Perfecting Chewy Whole Wheat Cranberry Orange Bagels: Your Ultimate Homemade Recipe Guide
For nearly two decades, the aroma of these slightly sweet, beautifully chewy Whole Wheat Cranberry Orange Bagels has filled my kitchen. What started as a simple experiment has evolved into a beloved tradition, and I’m thrilled to finally share a truly comprehensive and updated version of this recipe. Over the years, my understanding of bagel making has deepened considerably. I’ve learned invaluable lessons about the nuances of dough texture, the critical role different flour types play, and the delicate art of proofing. All these insights, along with fresh tips and refined techniques, have been meticulously woven into this guide to help you achieve bagel perfection right in your own home.

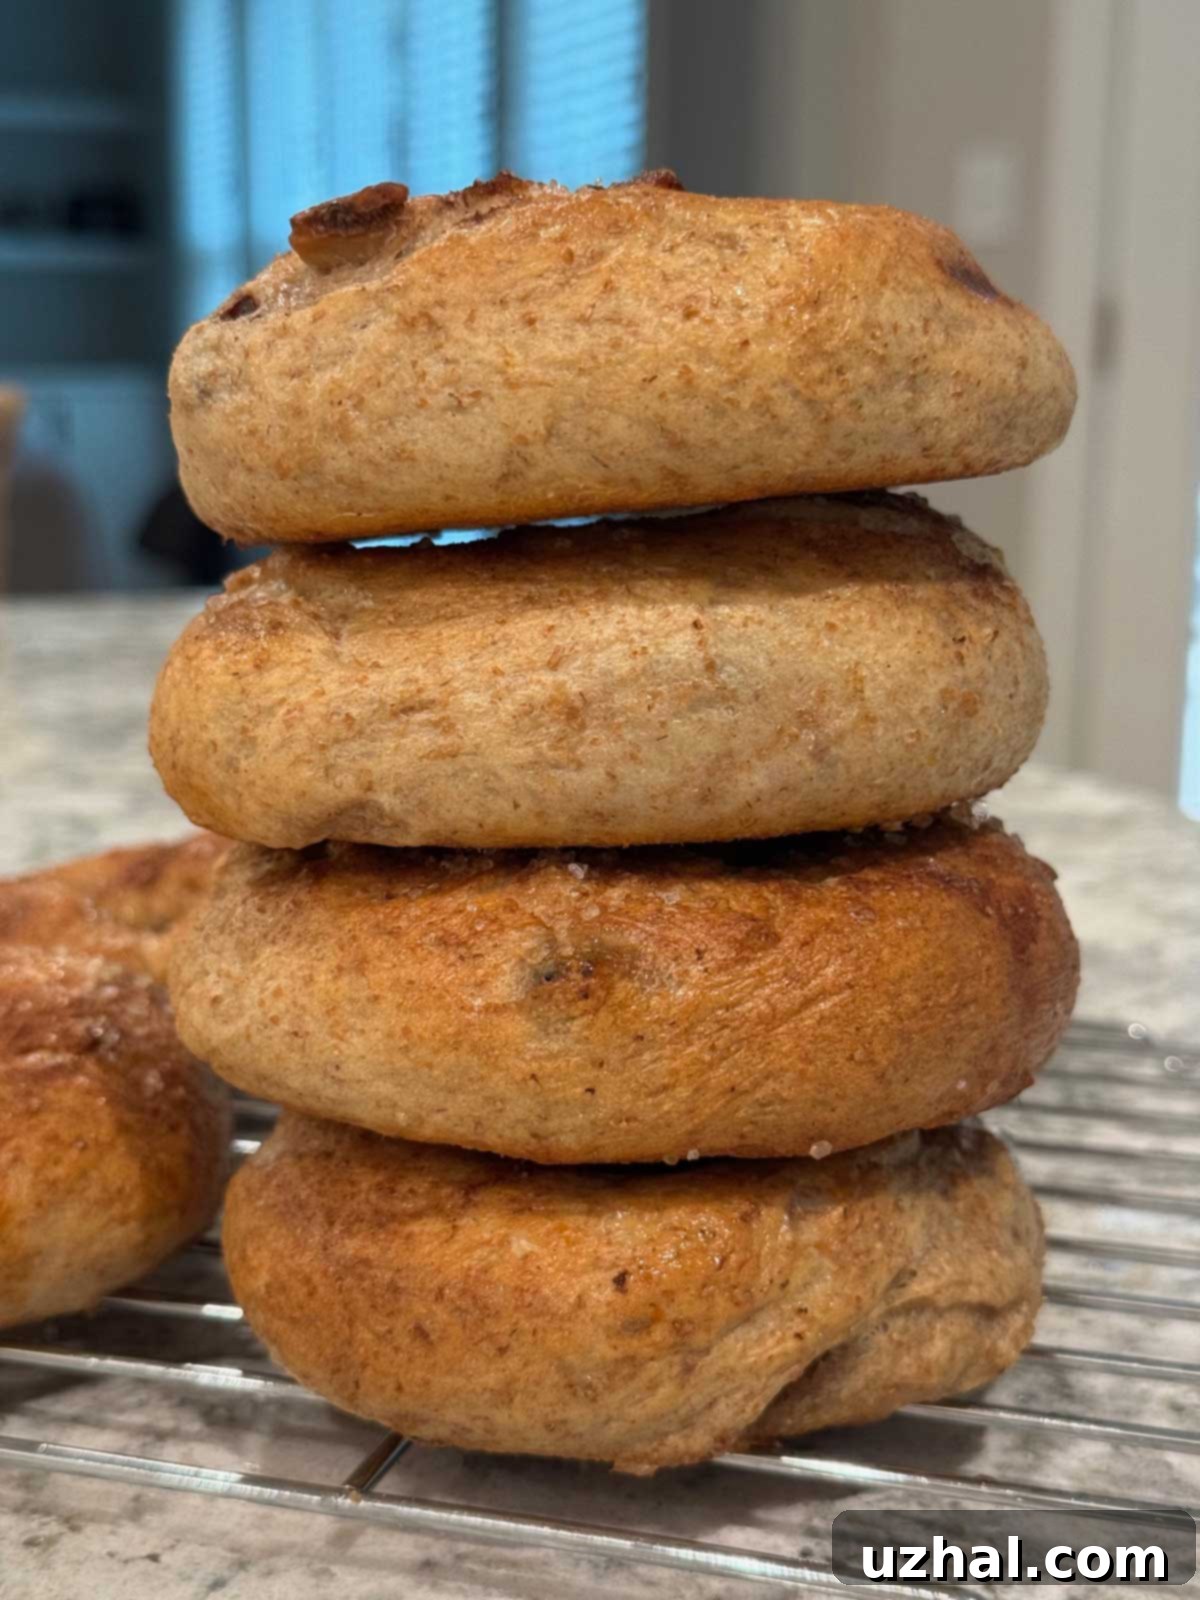
But before we dive into the process, let me paint a picture of these extraordinary bagels. Imagine a crust, robust and shiny, that offers a satisfyingly deep chew, reminiscent of your favorite artisan bagel shop. Break through that resilient exterior, and you’ll discover an interior that is remarkably soft and tender, boasting a subtle, wholesome whole wheat flavor. This natural earthiness is beautifully complemented by a delicate sweetness, derived not only from a touch of sugar in the dough but also from the plump, jewel-toned dried cranberries and golden raisins generously scattered throughout. For those who enjoy an extra layer of indulgence, a sprinkle of cinnamon sugar on the outside adds a delightful crunch and an additional hint of sweetness. The final flourish comes from a bright, citrusy note of orange zest infused directly into the dough. Originally, I used a more prominent amount, but through extensive testing, I’ve found that about ¼ teaspoon provides a perfect, subtle aroma and flavor that elevates the bagel without overpowering the other elements. Of course, you can adjust the zest to your personal preference – a little more for a bolder orange presence, or a little less for just a whisper of citrus.
Treat Flour Measurements as a Flexible Guide, Not Rigid Law
One of the most profound lessons I’ve learned in nearly two decades of baking, especially with yeast breads like bagels, is to approach flour measurements with a flexible mindset. Growing up, homemade yeast breads were not part of my family’s culinary tradition, so I meticulously followed recipes, often to my detriment. If a recipe called for a specific amount of flour, I used precisely that quantity, regardless of whether the dough felt excessively wet or stubbornly dry. This rigid adherence often led to inconsistent results and frustrating baking experiences.
Now, I know better: the dough dictates the flour, not the other way around. Flour is a natural product, and its absorption properties can vary significantly based on factors like humidity, age, and even how it’s stored. Therefore, precise gram measurements are always recommended when possible, but even then, visual and tactile cues are paramount. You must be prepared to adjust the flour as needed, particularly during the final stages of mixing and kneading. The goal is to achieve a dough that is smooth, cohesive, and easy to handle – it should not be excessively sticky, nor should it be so stiff that it resists kneading. A well-hydrated but not sticky dough will yield a light, airy crumb, while an overly stiff dough will result in dry, dense bagels. Take your time, feel the dough, and add flour tablespoon by tablespoon until it reaches the ideal consistency. The older photos here illustrate the desired appearance of the dough as you work with it.
Here it is again, beautifully risen and ready for the next stage.
The Critical Role of Flour Type in Bagel Texture
Understanding flour types is fundamental to achieving the perfect bagel texture. Different flours possess varying protein contents and milling processes, which directly impact their ability to absorb water and develop gluten. This, in turn, influences the chewiness, structure, and overall mouthfeel of your bagels. For instance:
- **Whole Wheat Flour:** Brands like King Arthur’s whole wheat flour are known for their higher protein content and denser structure, which means they tend to absorb more moisture compared to softer, more airy flours. This high absorbency contributes to the wholesome, hearty texture of these bagels.
- **All-Purpose Flour:** While versatile, all-purpose flour has a moderate protein content. It can produce good bagels, but often lacks the intense chewiness characteristic of New York-style bagels.
- **Bread Flour:** This is often the secret weapon for truly authentic, chewy bagels. Bread flour typically has a higher protein content than all-purpose flour, leading to stronger gluten development. High-gluten bread flour, such as Bob’s Red Mill Artisan Bread Flour, is particularly effective. It requires slightly more water than all-purpose flour to achieve the correct dough consistency, but the effort is well worth it, as it creates the robust gluten network essential for that classic, resilient bagel chew.
If you opt for a softer whole wheat flour like Pillsbury, you might find you need a rounded cup or slightly more than the specified 145 grams to reach the desired dough consistency. Conversely, if you’re using a very strong bread flour, you might need a touch more water. The interplay between whole wheat and bread flour in this recipe is key: the whole wheat adds a delightful depth of flavor and nutrition, while the bread flour ensures the quintessential chewy texture. Don’t hesitate to experiment with different brands to find your perfect balance, always letting the dough’s feel guide your adjustments.
Mastering Proofing Time: The Key to Bagel Structure
Proofing, or the rising of the dough, is a surprisingly delicate stage in bagel making. It’s an area where many home bakers, myself included, have made mistakes. Bagels are particularly susceptible to over-proofing, which can lead to a host of undesirable outcomes: flat, puffy bagels with a cake-like interior, or those that completely lose their characteristic chewiness. This happens because over-proofing allows the yeast to produce too much gas, exhausting the gluten structure and causing it to collapse, much like an overinflated balloon bursting.
This recipe utilizes a generous amount of active dry yeast, and I often kickstart the process with very warm water (around 110-115°F or 43-46°C). This combination means that the initial rise, or bulk fermentation, can be surprisingly quick, often taking only about 45 minutes to an hour. However, it’s crucial to remember that rising time is not an exact science and can be influenced by several environmental factors:
- **Ambient Temperature of Your Kitchen:** A warm kitchen will accelerate proofing, while a cooler environment will slow it down.
- **Age and Strength of Your Yeast:** Fresh, active yeast will work much faster than older, less potent yeast. Always check the expiration date!
- **Temperature of the Water:** As mentioned, warmer water jumpstarts yeast activity.
Therefore, rather than relying solely on the clock, learn to trust your senses. The dough should appear visibly puffy and slightly expanded, but not overly stretched or bubbly. A good test is the “finger poke” test: gently press a floured finger into the dough. If the indentation springs back very slowly or remains, it’s likely perfectly proofed. If it springs back immediately, it needs more time. If it collapses completely, it’s likely over-proofed. Aim for that sweet spot where the dough feels alive and responsive, but still firm enough to hold its structure.
Solving the Mystery of Flat Bottomed Bagels
Achieving perfectly rounded, professional-looking bagels can be a challenge, and one common issue that can plague home bakers is the dreaded flat bottom. This can be particularly frustrating when you’ve put in all the effort to shape them beautifully. Flat bottoms can occur for several reasons, and understanding these causes is the first step to preventing them.
Most frequently, flat bottoms are a symptom of over-proofing. As discussed, when dough over-proofs, its gluten structure weakens, making it less able to hold its shape, especially when subjected to the stress of boiling and baking. However, over-proofing isn’t the only culprit. The boiling process itself can sometimes contribute to flat bottoms if not managed correctly. If your water is boiling too rapidly and aggressively, or if you boil the bagels for an excessive amount of time, the agitation and prolonged exposure to heat can cause the dough to lose its integrity and flatten. Additionally, bagels can sometimes go flat during the baking stage if they don’t have adequate support or if the heat isn’t evenly distributed.
If you’re confident that you’re not over-proofing your bagels, and you’re carefully managing the boiling time and intensity, then another highly effective tip for achieving a beautifully rounded bottom and an overall superior texture is to bake your bagels on a hot baking stone. A preheated baking stone provides intense, even heat from below, essentially creating a “spring” that helps the bagel puff up quickly and set its shape before it has a chance to flatten. This direct heat also contributes to an incredibly crisp and chewy crust. If you don’t own a baking stone, don’t despair! You can achieve a similar effect by preheating a heavy-duty baking sheet in the oven before carefully transferring your boiled bagels onto the hot sheet. The key is that initial burst of heat from beneath.
The Art of Boiling: Achieving the Signature Chewy Crust
Boiling is perhaps the most distinctive step in bagel making, setting them apart from other breads. This crucial stage is what gives bagels their characteristic chewy texture and shiny, slightly crisp crust. When raw bagel dough hits the hot water, the starches on the surface of the dough gelatinize, forming a barrier that locks in moisture and prevents excessive rising during baking. This process is essential for creating that dense, chewy interior and the iconic crisp exterior that defines a great bagel.
The boiling solution itself plays an important role. While plain water will work, adding a sweetener like sugar, molasses, or barley malt syrup to the boiling water enhances both flavor and browning. Molasses and barley malt syrup, in particular, contribute a subtle, malty sweetness and help the bagels achieve a beautiful, deep golden-brown hue in the oven. You don’t need to be overly precise with the amount of sweetener; a tablespoon or two is usually sufficient. Just ensure your pot is wide enough to accommodate 2-3 bagels comfortably without overcrowding, allowing them to “swim” freely, and deep enough to prevent boil-overs. A gentle, rolling boil is ideal – too vigorous, and the bagels might deform or flatten.
Shaping Your Bagels: A Hands-On Approach
Shaping bagels is a satisfying part of the process, and there are two primary methods to achieve that classic ring shape. The method you choose might depend on whether you’ve incorporated inclusions like cranberries and raisins directly into the dough or prefer to add them during shaping.
- **The “Poke and Stretch” Method:** This is generally the easiest method, especially if your inclusions are already mixed into the dough. After dividing the dough into equal pieces and rolling them into tight balls, simply poke a hole through the center of each ball with your thumb. Then, gently stretch the dough outwards from the center, rotating it around your finger, until you create a ring with a hole about 1-1.5 inches in diameter. This method works well for evenly distributed ingredients.
- **The “Rope and Join” Method:** If you want to add fruits or nuts to individual bagels, or prefer a perfectly uniform shape, this method is ideal. Take a portion of dough, flatten it slightly, and place your desired inclusions in the center. Roll the dough tightly around the inclusions to form a cylinder, ensuring the seams are sealed. Then, gently roll the cylinder into a rope about 8-10 inches long. Flatten one end of the rope slightly, and wrap the other end around to meet it, overlapping the flattened end. Pinch and roll the seam firmly to create a secure, seamless ring. This technique often results in a slightly tighter crumb and a very even shape.
Whichever method you choose, remember to work gently but firmly. Overworking the dough during shaping can lead to tough bagels, but insufficient sealing can cause them to unravel during boiling. Place your shaped bagels on a parchment-lined tray, giving them enough space, and cover them for their final short rest before boiling.
Storage and Enjoyment: Keeping Your Homemade Bagels Fresh
Once you’ve baked a batch of these delectable Whole Wheat Cranberry Orange Bagels, you’ll want to ensure they stay fresh for as long as possible. Homemade bagels, like most homemade breads, are at their absolute best on the day they are baked. The crust is crisp, the interior is perfectly chewy, and the flavors are vibrant.
However, if you have leftovers, they can be stored at room temperature in an airtight container or a large zip-top bag for 1-2 days. For longer storage, freezing is an excellent option. Once the bagels have completely cooled, slice them in half (this makes toasting easier later) and place them in a freezer-safe bag. They will keep well in the freezer for up to 3 months. When you’re ready to enjoy, simply pop a frozen bagel half into the toaster oven or a regular toaster – no need to thaw first! The heat will revive the crust and warm the interior, bringing it back to almost freshly baked glory. These bagels are fantastic simply toasted with cream cheese, butter, or even a dollop of orange marmalade to complement the citrus notes.
- Strawberry Rhubarb Pie With Streusel
- Oven Ready Bran Muffins with Walnuts and Dates
- Easy Recipe for My Favorite Bagels
- Double Chocolate Bagels
- New York Bagels Recipe — Cinnamon Raisin Flavor
Recipe

Golden Raisin Cranberry Bagels
Anna
Pin Recipe
Ingredients
- 1 cup warm water about 110-115 degrees F
- 2 ¼ teaspoons active dry yeast
- 2 tablespoons granulated sugar
- 1 cup whole wheat flour (use gram amount if possible) (145 grams)
- 1 ½ cups bread flour, preferably artisan or strong (200 grams)
- 1 teaspoon salt
- 1 tablespoon olive oil plus a little extra for greasing bowl
- ¼ teaspoon vanilla extract
- ½ teaspoon orange zest
- ⅓ cup dried cranberries
- ⅓ cup golden raisins
- ⅓ cup chopped walnuts (optional)
- 1 large egg beaten with about a tablespoon of water for brushing
Boiling Solution
- ½ pot water
- 1-2 tablespoons sugar, molasses or barley malt syrup (See Note)
Instructions
-
In the bowl of a stand mixer (or large mixing bowl), combine warm water, yeast, and sugar. Let sit for 5-10 minutes until foamy.
-
Add whole wheat flour, bread flour, salt, olive oil, vanilla extract, and orange zest. Mix until combined. Knead with a dough hook (or by hand) for 8-10 minutes until smooth and elastic. If the dough is too sticky, add up to 2 tablespoons more bread flour.
-
Knead in dried cranberries and golden raisins until evenly distributed OR wait and add them while shaping bagels.
-
Place dough in a lightly oiled bowl, cover, and let rise in a warm spot for 60 minutes, or until doubled in size.
-
Divide dough into 6 equal pieces. Roll each into a tight ball, then poke a hole through the center and gently stretch into a ring. Alternatively, if you didn’t add the dried fruit yet and want to add the fruit to each individual piece, smash the pieces down, place fruit in the center and roll into a cylinder encompassing the fruit. Elongate and shape into a ring. Place shaped bagels on a parchment-lined tray. Cover and let rest 20-30 minutes.
-
Bring water to a gentle boil in a wide pot. Stir in sugar, molasses, or malt syrup. Preheat oven to 425°F (218°C). If using a baking stone, place it in the oven now.
-
Carefully lower 2-3 bagels at a time into the boiling water. Boil for 20 seconds on the first side, then turn and boil for about 10-20 seconds on the second side. Remove with a slotted spoon and place back on parchment-lined baking sheet.
-
Brush boiled bagels with egg wash or with something like cream if you’ve avoiding eggs. Sprinkle with sparkly sugar (optional) or cinnamon sugar (optional).
-
Bake for 18-22 minutes or until deep golden brown. For best bottoms, bake on a preheated stone or heavy-duty sheet pan.
-
Transfer to a wire rack and cool before slicing.
Notes
I hope this updated guide empowers you to bake the best Whole Wheat Cranberry Orange Bagels you’ve ever tasted. The journey of perfecting these bagels over two decades has been incredibly rewarding, and I’m confident that with these detailed tips and the refined recipe, you’ll find the process both enjoyable and successful. Happy baking!
