Mastering Homemade Pumpkin Seed Bread: An Artisan Recipe for Unforgettable Texture and Flavor
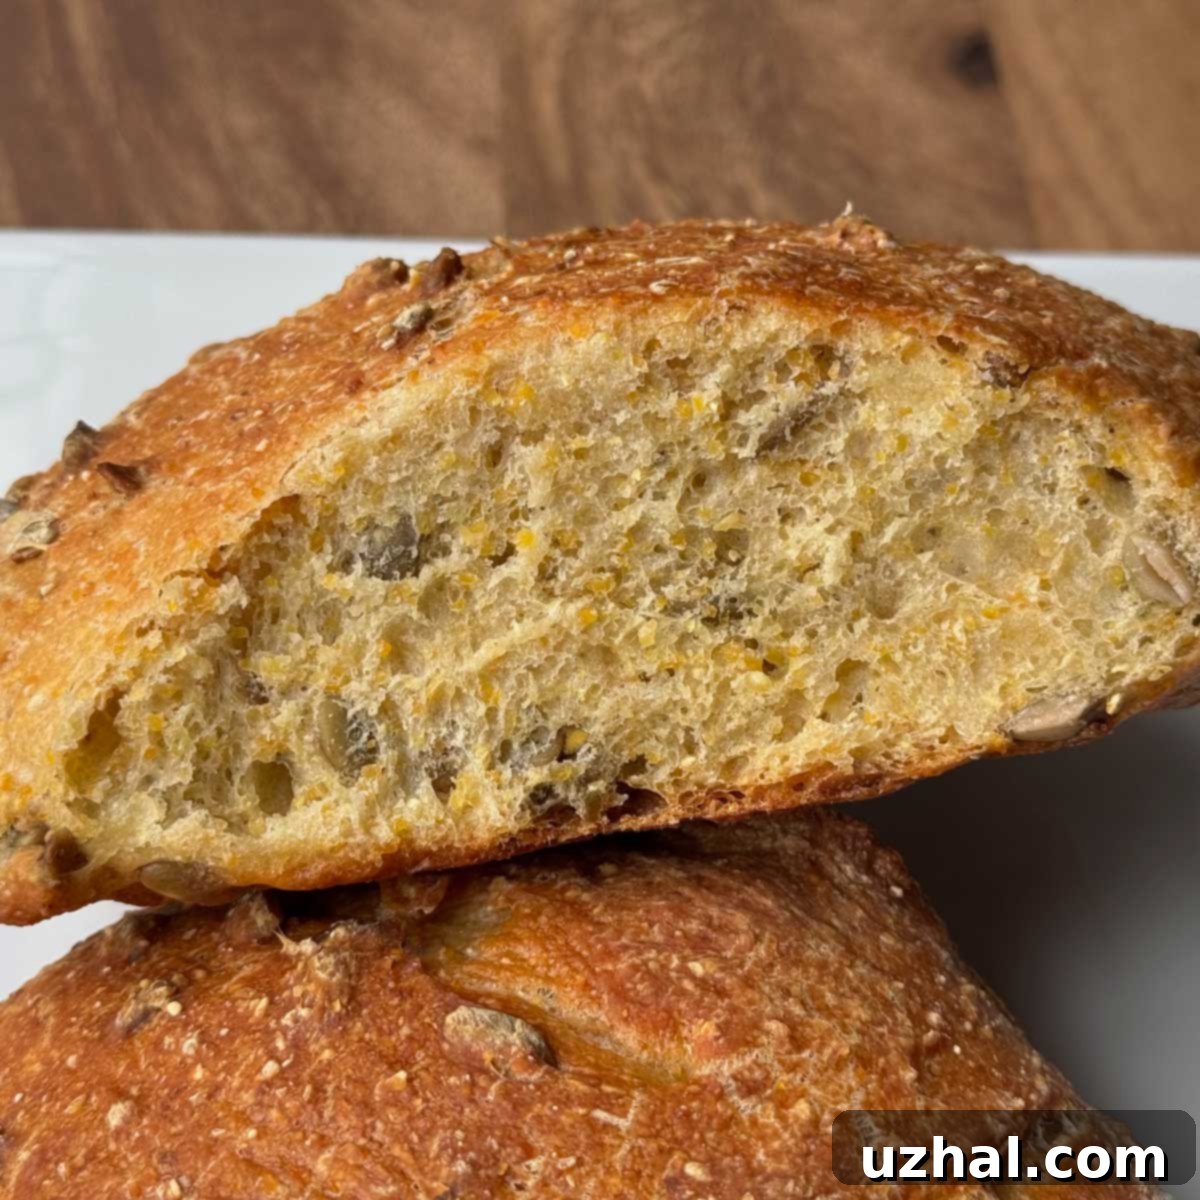
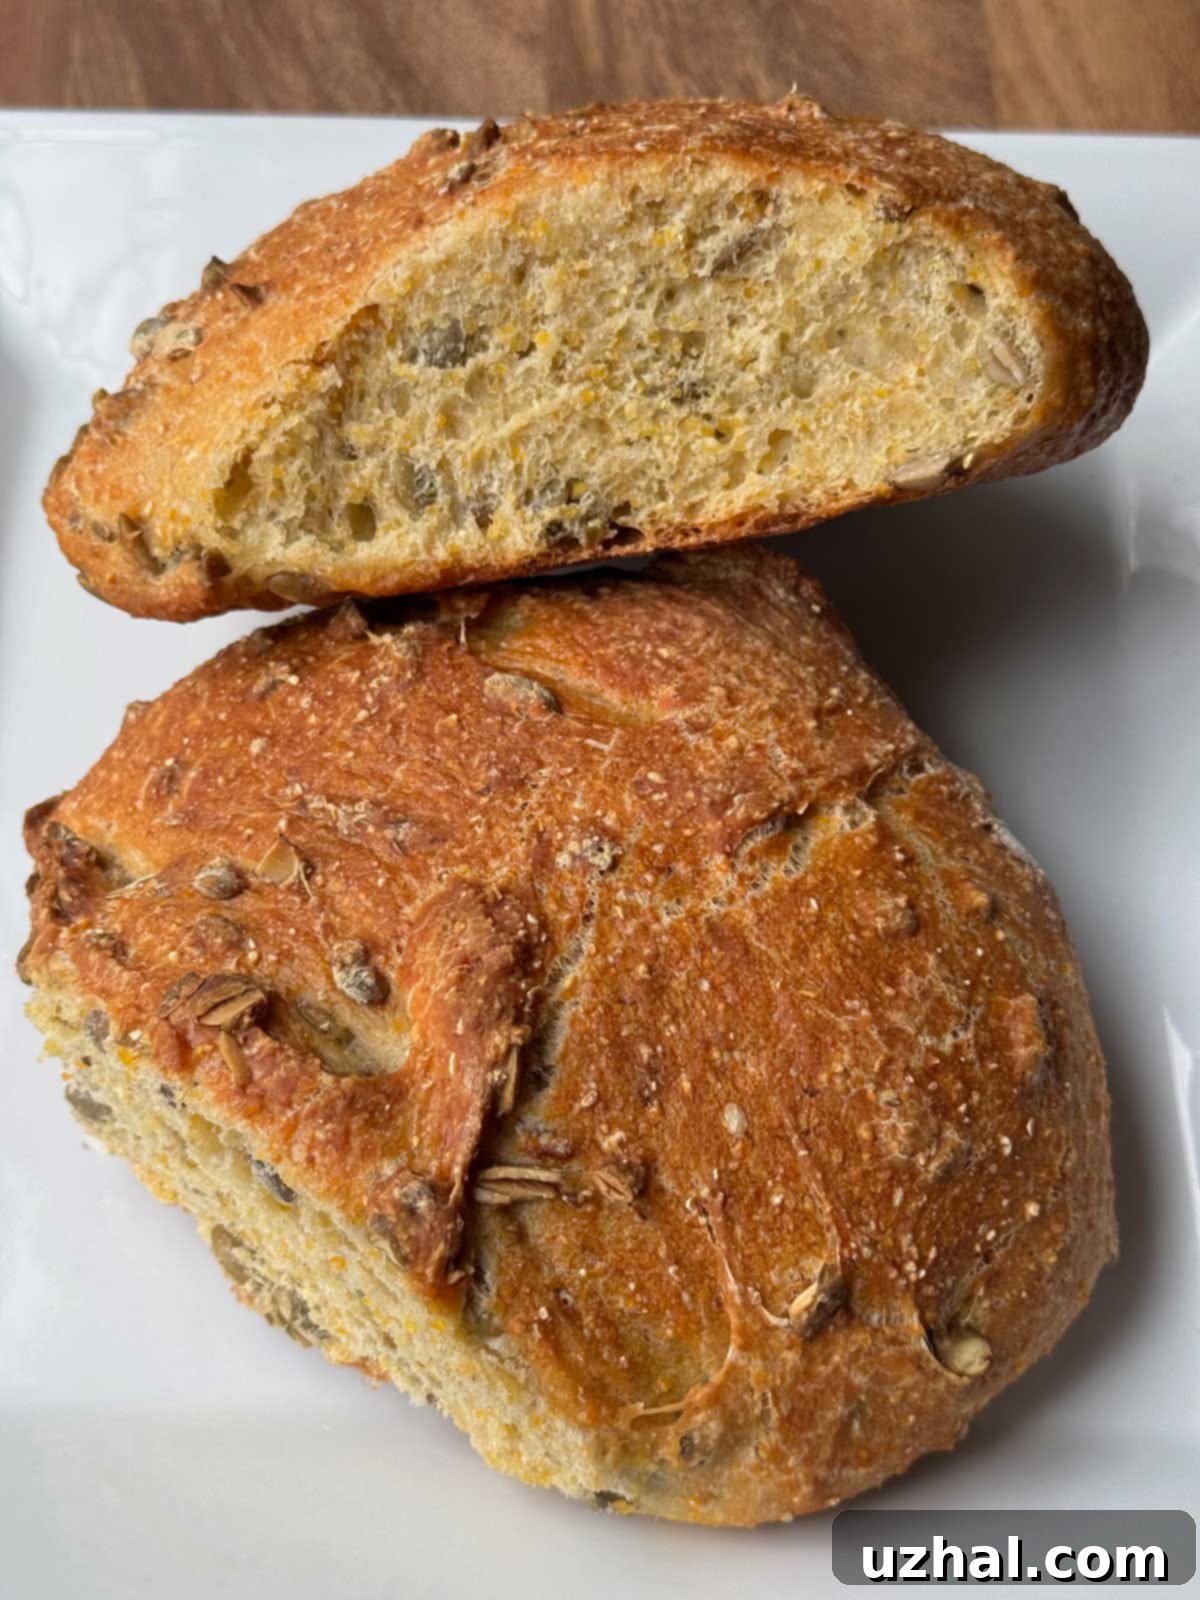
Embark on a culinary journey with this exceptional Pumpkin Seed Bread recipe, a true gem from David Norman, one of Austin’s most revered artisan bread bakers. While this recipe boasts a rich history spanning over two decades, its timeless appeal and unique characteristics make it feel perpetually fresh and exciting. Discovering this recipe was a revelation, as it delivers an extraordinary symphony of textures and flavors in every slice. Imagine a beautifully soft, open crumb contrasting with the delightful crunch of cornmeal and toasted pumpkin seeds, all encased in a wonderfully chewy, robust crust. This isn’t just bread; it’s a sensory experience, offering depth and complexity that sets it apart from ordinary loaves.
Jump to Recipe
The Magic of a Pre-Ferment: Preparing Your Dough the Night Before
The secret to this bread’s remarkable character begins the night before with a simple yet powerful technique: the pre-ferment. This foundational mixture of flour, a tiny amount of yeast, and water is left to sit overnight, transforming into a vibrant, bubbly starter. For many seasoned bakers, this initial step embodies the art of delayed gratification, a patience that is generously rewarded on baking day. The most cherished bread recipes, whether they call for a sponge, a poolish, or another form of pre-ferment, all understand that time is a crucial ingredient. While the wait can be challenging for an eager baker, the sight and aroma of a lively, active pre-ferment the next morning – full of bubbles and a subtly tangy scent – confirm that the waiting was well worth it. This extended fermentation allows for the development of complex flavors and a more nuanced crumb structure that cannot be achieved with a quick rise. To simplify the process, I recommend preparing the pre-ferment directly in your stand mixer bowl. This not only saves you from extra dishes but also ensures the starter is ready to go when you begin the main dough mixture.
Toasted Pumpkin Seeds: Flavor and Crunch in Every Bite
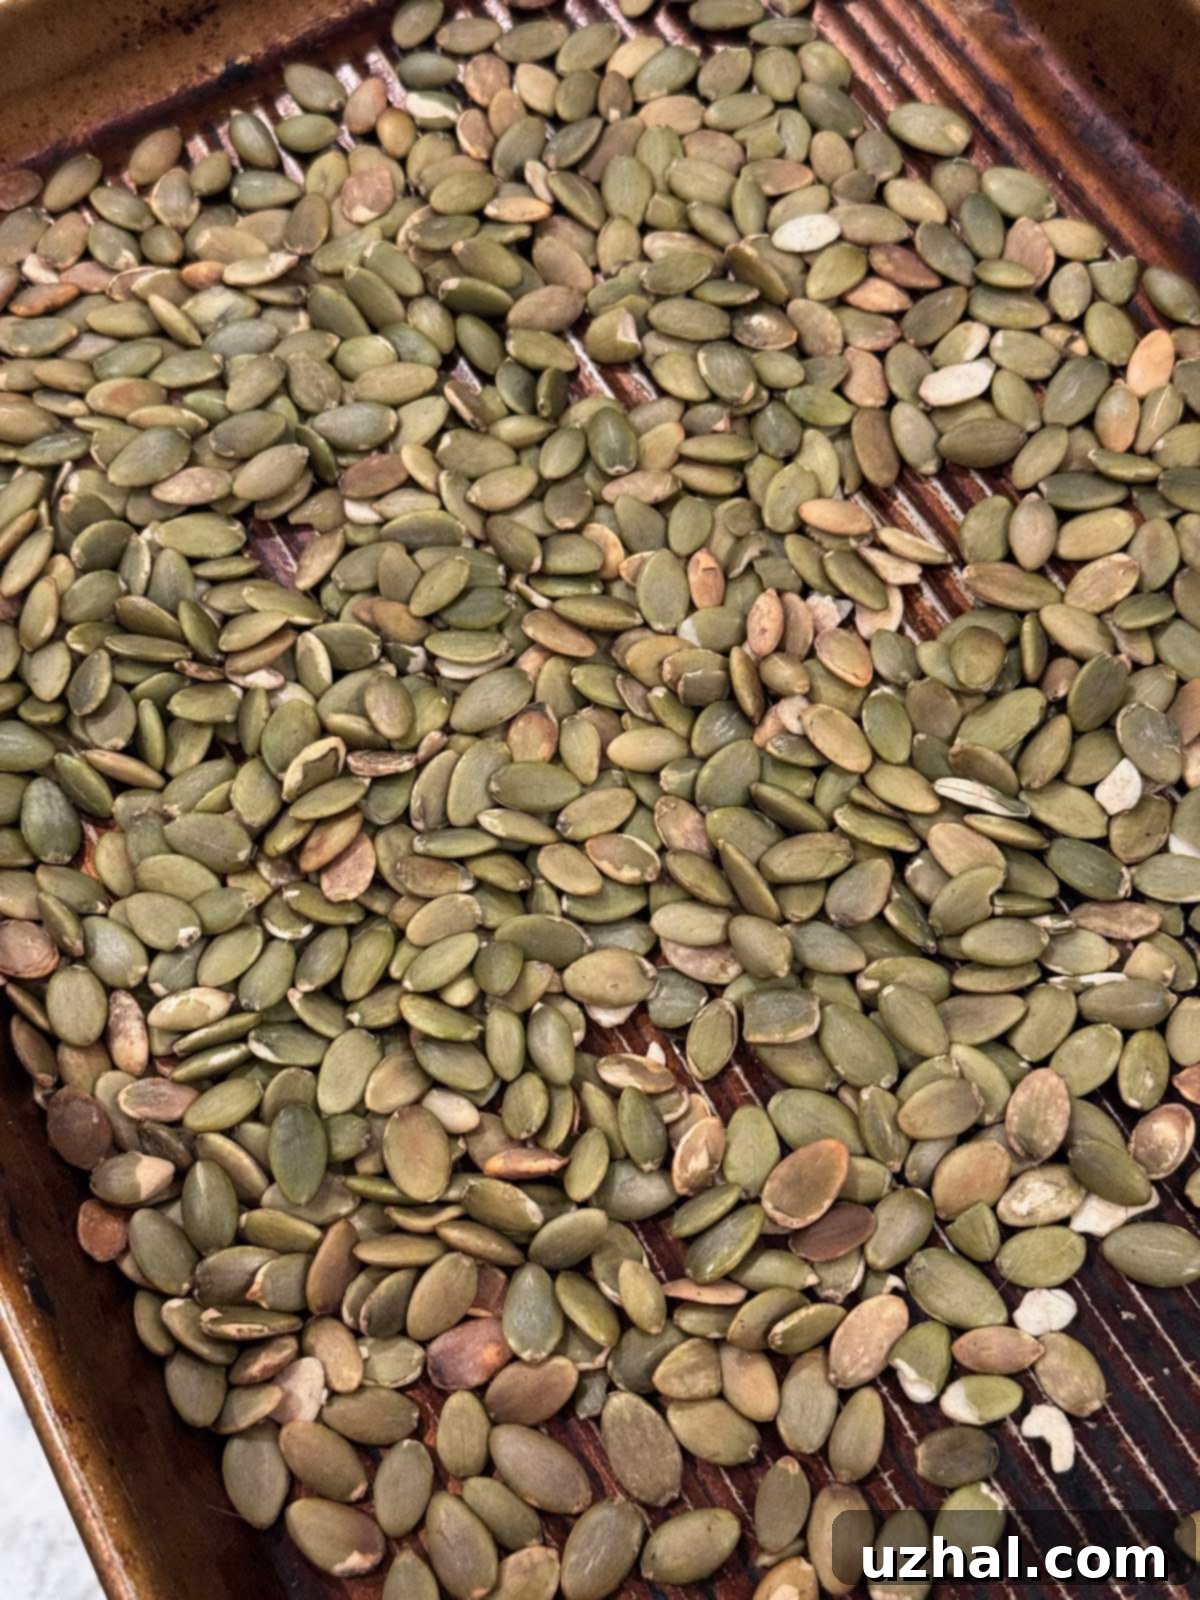
Pumpkin seeds are more than just a garnish in this recipe; they are a star ingredient, contributing significantly to both the bread’s texture and its nutty flavor profile. This recipe generously calls for a cup and a half, or nearly 6 ounces (170 grams), of these nutritious powerhouses. To truly unlock their full potential, toasting them beforehand is essential. Simply spread them on a rimmed baking sheet and toast at 350°F (175°C) for about 7-8 minutes. Keep a close eye on them, as they can go from perfectly golden to burnt quickly. You’ll know they’re ready when they become wonderfully aromatic and show a slight golden-brown hue, as pictured below. Once cooled, these perfectly toasted seeds are folded directly into the dough, ensuring that every slice and every bite of this delicious bread is packed with their healthy goodness and satisfying crunch. For the best value, consider buying pumpkin seeds from the bulk bins at your local grocery or health food store.
Achieving the Perfect Dough Consistency for Artisan Bread
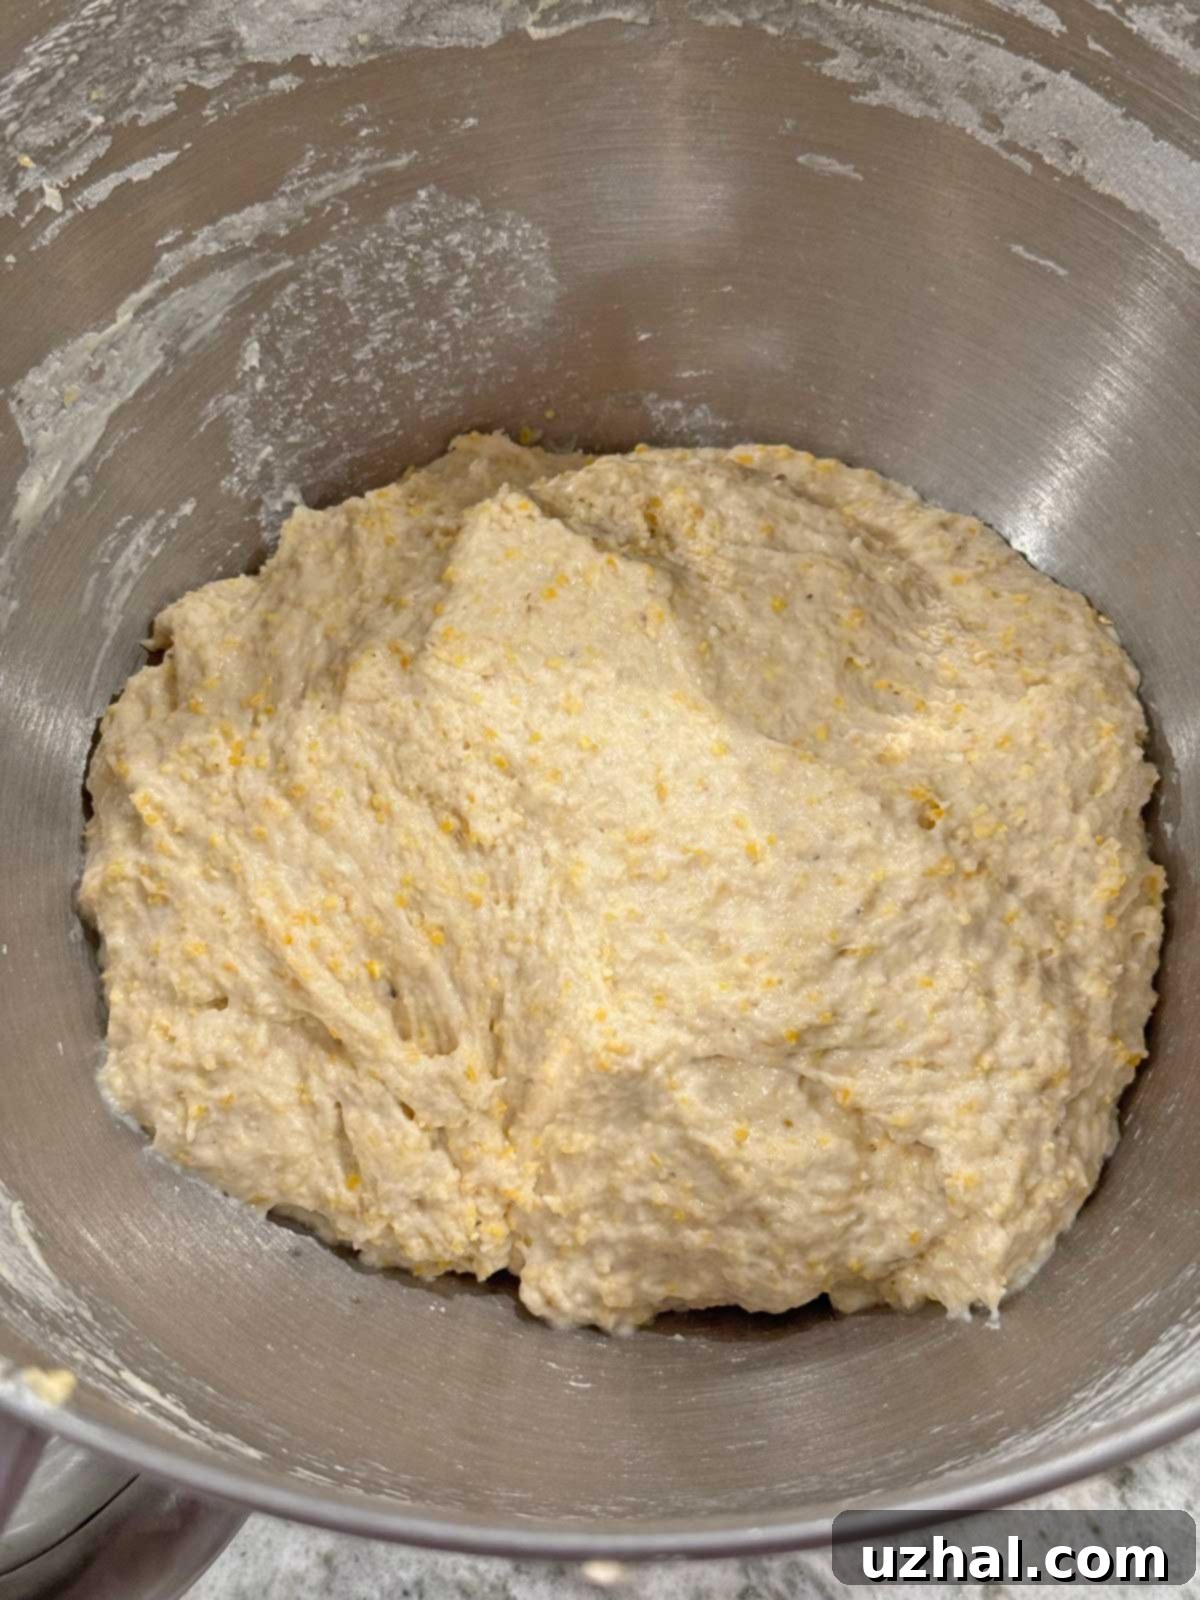
Understanding and achieving the correct dough consistency is paramount to successful bread baking. While the accompanying photo might not be a professional shot, it aims to give you a clear visual of the dough’s texture before the pumpkin seeds were incorporated. At this stage, the dough should feel soft and pliable, yet possess enough structure to hold its shape without being overly sticky. For this particular recipe, I used a total of 385 grams of bread flour. Bread flour, with its higher protein content, typically develops gluten more readily and can result in a chewier crumb, which is ideal for this artisan-style loaf. You might find that you can even incorporate a touch more flour depending on your environment’s humidity and the specific flour brand, but my loaves were perfectly achieved with 385 grams. If you opt for all-purpose flour, which has a lower protein content, you might need to adjust the flour quantity slightly, potentially adding a little more to reach that desired soft, yet shape-retaining consistency. The dough should be elastic enough that when you scrape it from the sides of the bowl, it snaps back cleanly, indicating well-developed gluten.
Baking Methods: Stand Mixer Convenience vs. Artisan Hand-Kneading and the Dutch Oven Advantage
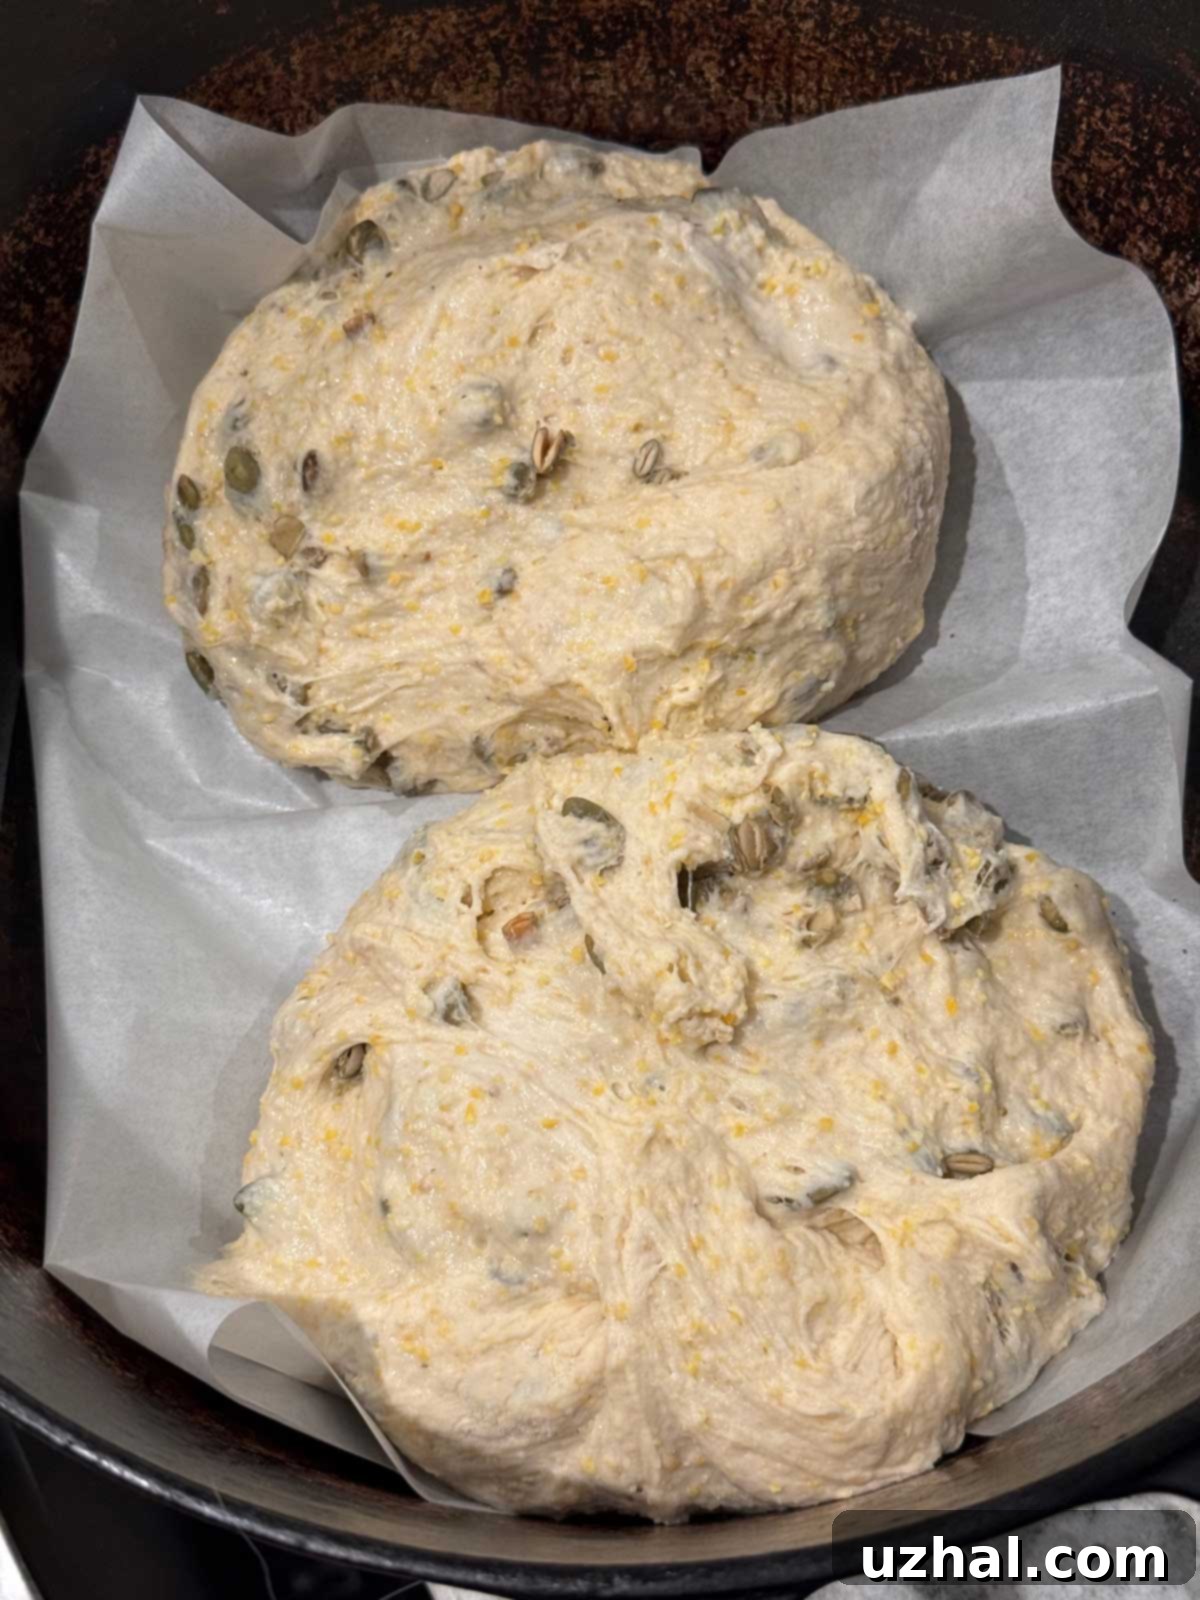
While this adaptation of David Norman’s recipe leverages the convenience of a stand mixer for kneading, it’s worth noting that “Dough Puncher” himself is a master of hand-kneading, achieving perfect doughs with sheer manual skill. If you enjoy the tactile experience and a good arm workout, hand-kneading for about 15 minutes will yield equally fantastic results. For those, like me, who appreciate a little mechanical assistance, a stand mixer with a dough hook makes the process effortless, kneading the dough to perfection in just 5 to 8 minutes. Similarly, while David often bakes his artisan loaves on a pizza stone, I’ve found great success and consistency with the Dutch oven method. My pizza stones, unfortunately, have a habit of succumbing to thermal shock, leading me to embrace the Dutch oven as my preferred baking vessel. The sealed environment of a Dutch oven traps steam, which is crucial for developing a thin, crisp, and beautifully golden crust, while keeping the interior of the bread moist. If you’re fortunate enough to own an oblong Dutch oven, you can easily bake two loaves simultaneously without them touching. In my case, using a round Dutch oven meant my two loaves fused together, creating a charming, rustic pull-apart bread – an outcome I fully anticipated and embraced! Next time, I plan to incorporate slashing (scoring) the tops of the loaves before baking, a technique that allows for controlled expansion and creates those beautiful, professional-looking cracks on the crust. Whether you choose a pizza stone or a Dutch oven, understanding your tools will enhance your baking experience and the quality of your homemade bread.
This recipe, crafted using Bob’s Red Mill medium-ground cornmeal, has quickly become a household favorite. My husband, in particular, raved about its incredible texture, a clear sign that this Pumpkin Seed Bread will be a regular feature in our kitchen. I’m already looking forward to making it again and will undoubtedly continue to add more notes and tips to perfect this delightful loaf. The combination of simple ingredients, the magic of a pre-ferment, and a thoughtful baking process culminates in a bread that is both deeply satisfying and incredibly rewarding to bake. Don’t be intimidated by the overnight step; it’s the key to unlocking the true potential of this artisan bread.
- Cornmeal Maple Biscuits
- Fine White Cornmeal Muffins
- Cornmeal Buttermilk Biscuits
- Blueberry Corn Muffins
- Soft Pumpkin Cream Cheese Cookies
Recipe
Pumpkin Seed Bread
Anna
Pin Recipe
Ingredients
Overnight Mixture (Pre-Ferment)
- ⅛ teaspoon active dry yeast
- 1 cup room temperature water
- 1 ¾ cup bread flour or all-purpose (210 grams)
Baking Day Mixture
- 1 ½ cups pumpkin seeds, toasted
- 1 teaspoon active dry yeast
- ½ cup lukewarm water, divided use
- 1 cup commeal, I used medium grind (150 grams)
- 1 ⅓ cups bread flour or all-purpose (175 grams)
- 1 ¾ teaspoons Morton Kosher Salt or 1 tablespoon Diamond
Instructions
Overnight Pre-Ferment
-
In a stand mixer bowl or another large bowl, dissolve ⅛ teaspoon of active dry yeast in 1 cup of room temperature water. Ensure the water is not too cold (which slows yeast activity) or too hot (which can kill the yeast). Stir in 1 ¾ cups (210 grams) of bread flour or all-purpose flour until just combined and no dry streaks remain. This initial mixture, known as a pre-ferment or sponge, will develop flavor and strength over time. Cover the bowl securely with plastic wrap to prevent a crust from forming and let it stand overnight in a warm spot on your kitchen counter. After 8-12 hours, you should see a bubbly, active mixture, indicating the yeast is thriving and developing those sought-after complex flavors.
Baking Day Preparations and Dough Development
-
Before you begin mixing the main dough, toast your pumpkin seeds to enhance their nutty flavor. Spread them in a single layer on a rimmed baking sheet. Bake them in a preheated oven at 350°F (175°C) for approximately 7 to 8 minutes, or until they become fragrant and begin to turn a light golden brown. Be cautious, as they can burn quickly. Remove from the oven and allow them to cool completely before adding them to the dough. This step is crucial for adding a deep, satisfying flavor to your finished bread.
-
In a small bowl, dissolve 1 teaspoon of active dry yeast in ¼ cup of lukewarm water (around 105-115°F or 40-46°C). Stir gently and let it sit for 5-10 minutes until foamy, which confirms the yeast is active and ready to work.
-
To prepare the cornmeal, bring the remaining ¼ cup of water to a boil, either in a microwave-safe cup or a small saucepan. Pour the hot water over the 1 cup (150 grams) of cornmeal and stir until it forms a slightly wet, porridge-like consistency. This process, called a scald, helps to soften the cornmeal, preventing a gritty texture in the final bread and allowing it to better integrate into the dough. Let this mixture cool to room temperature before adding it to the pre-ferment.
-
To the stand mixer bowl containing your bubbly overnight pre-ferment, add the cooled wet cornmeal mixture and the dissolved yeast mixture. Give it a brief stir to combine. Next, add 1 cup (130 grams) of the remaining bread or all-purpose flour, along with the Morton Kosher Salt (or Diamond Crystal). Reserve the remaining ⅓ cup (45-50 grams) of flour for gradual addition during the kneading process.
-
Attach the dough hook to your stand mixer and knead the dough on medium-low speed for about 5 to 8 minutes. During kneading, gradually add the reserved ⅓ cup of flour, a tablespoon at a time, as needed to achieve the desired consistency. Scrape down the sides of the bowl periodically to ensure all ingredients are incorporated. The dough should become soft, smooth, and elastic, pulling away from the sides of the bowl. It should be stiff enough to hold a round shape but still pliable and slightly tacky to the touch. Once the dough reaches this stage, add the toasted pumpkin seeds and gently knead them in with the dough hook for another minute or two, just until evenly distributed. Be careful not to overmix after adding the seeds.
-
For those who prefer a more traditional approach, you can knead the dough by hand. Turn the dough out onto a lightly floured work surface. Knead vigorously for about 15 minutes, using all of the flour and adding a little more if the dough is too sticky to handle. Hand-kneading is an excellent way to develop gluten and connect with your bread. After kneading, gently fold in the pumpkin seeds until evenly distributed.
-
After kneading and incorporating the pumpkin seeds, form the dough into a ball and return it to the mixer bowl (or the large bowl if hand-kneading). Cover the bowl tightly with plastic wrap or a damp tea towel and let the dough rise in a warm, draft-free spot for 1 hour. This is the first rise, where the yeast begins its work, creating gas and expanding the dough.
-
After the first rise, gently turn the dough out onto a lightly floured work surface. Briefly deflate the dough and perform a series of folds, stretching and pressing it gently to redistribute the yeast and further develop gluten. Fold it four times, essentially creating a soft, cohesive ball. Return the dough to the bowl, cover again, and let it rise for a second time until it has visibly doubled in bulk, which should take approximately another hour. This second rise allows for a finer crumb and deeper flavor development.
-
Once the dough has doubled, turn it out onto your work surface. Divide the dough evenly into two halves. Gently shape each half into a round or oblong loaf, depending on your preferred baking vessel. Place the shaped loaves on separate pieces of parchment paper. Cover them loosely with a piece of greased plastic wrap (to prevent sticking) and let them rise for a final hour to an hour and a half. This final proofing stage is crucial for the bread’s volume and texture.
-
If using the pizza stone method, place your pizza stone in the oven and preheat your oven to 500°F (260°C). Allow at least 30-45 minutes for the stone to fully heat up and stabilize at temperature. A hot stone is essential for a good crust.
-
For an even crispier crust, create a steamy environment in your oven. Carefully place a roasting pan or a cast-iron skillet on the bottom rack of your oven during the preheating phase. Just before you load the bread, carefully pour about 1 cup of hot water into the roasting pan to create steam. Be extremely careful to avoid steam burns.
-
Once the oven is fully preheated and the bread has completed its final rise, it’s time to prepare it for baking. Using a sharp knife or a bread lame, make three shallow slashes across the top of each loaf. This scoring allows the bread to expand in a controlled manner, preventing uncontrolled tearing and creating beautiful patterns on the crust. Then, carefully transfer the loaves (still on their parchment paper) directly onto the hot pizza stone. I simply slide the parchment and loaves onto the stone, but a pizza peel can also be used if you have one.
-
Bake the bread at 500°F (260°C) for the initial 10 minutes to achieve a strong oven spring and a good crust. After 10 minutes, reduce the oven temperature to 450°F (230°C) and continue baking for another 20 minutes, or until the crust is deeply golden brown and the internal temperature reaches 200-210°F (93-99°C). Once baked, remove the loaves from the oven and transfer them to a wire rack to cool completely. This cooling process is crucial for the crumb to set and for the flavors to fully develop; aim for at least 45 minutes before slicing and serving to enjoy the best texture and taste.
Dutch Oven Method (for a Superior Crust)
-
If you’re using a Dutch oven, preheat your oven to 450°F (230°C) with the empty Dutch oven inside for at least 30 minutes. This ensures the pot is scorching hot. For an oblong Dutch oven, you can often fit two small loaves side-by-side. If you have a round Dutch oven, like mine, two loaves placed within it will likely fuse together during baking, creating a rustic, pull-apart loaf, which is quite charming! Alternatively, you can bake one larger loaf, though it may require a slightly longer baking time. Carefully lift the parchment paper with the risen loaves and gently lower them into the preheated Dutch oven. Quickly place the lid back on to trap the steam.
-
Bake the bread, covered, at 450°F (230°C) for 25 minutes. This initial covered bake creates a steamy environment that promotes incredible oven spring and a wonderfully thin, crisp crust. After 25 minutes, carefully remove the lid from the Dutch oven and reduce the oven temperature to 400°F (200°C). Continue baking uncovered for another 20-25 minutes, or until the crust is a deep golden brown and the bread sounds hollow when tapped on the bottom. An internal temperature of 200-210°F (93-99°C) indicates it’s fully cooked. Transfer the finished loaves to a wire rack and allow them to cool for at least 45 minutes before slicing. This resting period is vital for the crumb to stabilize and for the flavors to fully develop, ensuring a perfect texture.
