Easy Black and Orange Cookies: Your Ultimate Guide to Spooktacular Halloween Treats
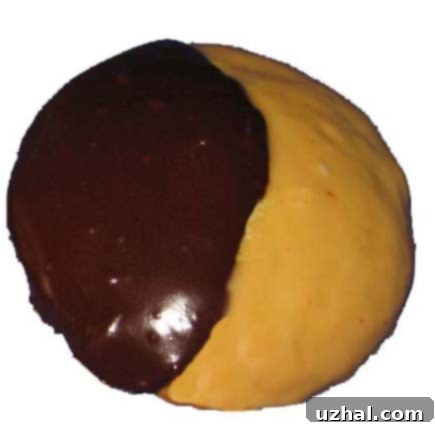
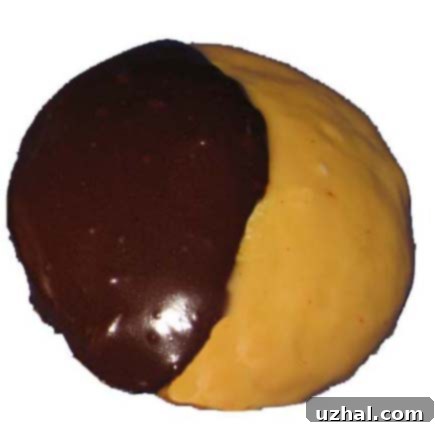
As the leaves begin to turn and a crisp chill fills the air, our thoughts inevitably drift towards the magic and mystery of Halloween. This season isn’t just about costumes and spooky decorations; it’s also a fantastic opportunity to indulge in festive treats that delight both the eyes and the palate. Among the myriad of Halloween confections, these Easy Black and Orange Cookies stand out as a truly iconic and delightful choice. They take the beloved classic Black and White cookie and infuse it with the vibrant spirit of autumn and all things eerie, swapping the traditional white icing for a brilliant, eye-catching orange.
For those who adore the nostalgic charm of a bakery-style Black and White cookie – with its soft, cake-like texture and distinct half-and-half frosting – this recipe offers a playful, seasonal twist. Imagine biting into a fluffy vanilla cookie, perfectly balanced between a rich, dark chocolate glaze and a zesty, bright orange frosting. It’s a sensory experience that perfectly captures the essence of Halloween without any complicated techniques. Whether you’re planning a ghoulish gathering, preparing treats for trick-or-treaters, or simply want to bring a dash of festive cheer to your kitchen, these Black and Orange Cookies are sure to be a howling success.

The Beloved Black and White Cookie: A Sweet History
To truly appreciate the Black and Orange cookie, it’s worth understanding its predecessor, the Black and White. Originating in early 20th-century New York, likely from German-American bakeries or delis, the Black and White cookie is less of a cookie and more of a “drop cake” or “cupcake top.” Its distinctive flat bottom and domed, soft top, generously coated with contrasting vanilla and chocolate icings, made it an instant classic. The visual appeal, symbolizing perfect balance, quickly cemented its place in American bakery culture. This iconic treat is known for its mild vanilla flavor in the cake base, providing a blank canvas for the bold flavors of its dual frosting. Our Black and Orange version cleverly builds on this foundation, retaining the beloved texture and dual-icing concept but transforming it with a seasonal color palette.
Why Black and Orange Cookies are Perfect for Halloween
The transition from a Black and White to a Black and Orange cookie is a natural evolution for the Halloween season. The colors black and orange are synonymous with this holiday, representing the dark, mysterious night and the warm, glowing pumpkins and autumn foliage. These cookies are not just a treat; they are a festive statement. They bring a vibrant pop of color to any Halloween dessert table, complementing pumpkins, spooky decorations, and other seasonal fare. Beyond their visual appeal, their slightly sweet cake base provides a comforting contrast to the rich, semi-sweet chocolate and bright, cheerful orange icing. They are simple enough to be a crowd-pleaser yet elegant enough to impress. Plus, the ease of preparing them means you can focus more on the fun of Halloween planning and less on complicated baking processes.
Essential Ingredients and Smart Tips for Your Cookie Base
Crafting the perfect Black and Orange cookie starts with a flawless cake-like base. The ingredients listed are carefully chosen to achieve that signature soft, slightly domed texture. Let’s delve into why each component is crucial and how to get the best results:
- Unsalted Butter (softened): Using softened butter is key for creaming. When butter is at room temperature, it can incorporate air more effectively with sugar, resulting in a lighter, fluffier cookie. Ensure it’s not melted, just pliable.
- Granulated Sugar: Provides sweetness and helps create a tender crumb by interfering with gluten development.
- Large Egg: Acts as a binder, adds richness, and contributes to the cookie’s structure and moisture. Make sure it’s at room temperature for better emulsification with the butter and sugar.
- Baking Soda: This leavening agent works with the buttermilk to create the signature puffiness and soft texture. It’s crucial to ensure there are no lumps for even distribution.
- Salt: A flavor enhancer that balances the sweetness and brings out the vanilla notes.
- Buttermilk or Lite Sour Cream (room temperature): This is perhaps the most critical ingredient for the cookie’s distinctive cakey texture and slight tang. The acidity in buttermilk reacts with baking soda to produce carbon dioxide, giving the cookies their lift. Using it at room temperature ensures it blends smoothly into the batter without curdling. If you don’t have buttermilk, you can make a substitute by adding a tablespoon of lemon juice or white vinegar to regular milk and letting it sit for 5-10 minutes.
- Vanilla Extract: Essential for that classic, comforting vanilla flavor in the cookie base. Use a good quality extract for the best taste.
- All-Purpose Flour: The structural backbone of the cookie. Be careful not to overmix the flour once it’s added, as this can develop the gluten too much, leading to tough cookies. Mix just until combined.
Mastering the Art of the Icing: Black and Brilliant Orange
The icing is what truly transforms these cookies, giving them their iconic look and flavor profile. It’s a two-part process to create both the rich black (chocolate) and vibrant orange glazes. Getting the consistency right is paramount for a smooth, spreadable finish.
For the Icing Base:
- Confectioners’ Sugar: The base for both icings, it dissolves easily to create a smooth, creamy texture. Sifting it can prevent lumps.
- Light Corn Syrup: Adds shine, elasticity, and helps prevent the icing from drying out too quickly, giving it a professional, slightly glossy finish.
- Fresh Lemon Juice (optional): While optional, a touch of lemon juice can add a subtle brightness and tang that complements the sweetness of the icing and the vanilla of the cookie. It can also help thin the icing slightly.
- Vanilla Extract: Enhances the flavor of both icings.
- Water: Used to adjust the consistency. Start with the recommended amount and add more slowly, just a teaspoon at a time, until you reach a pourable yet thick consistency that won’t run off the cookie.
Coloring the Icing:
- Unsweetened Dutch-Process Cocoa Powder: For the “black” half. Dutch-process cocoa is alkalized, meaning it’s less acidic and has a darker, richer color and mellower chocolate flavor compared to natural cocoa. This is crucial for achieving that deep, almost black hue.
- Red & Yellow Food Coloring: To create the perfect Halloween orange. Start with yellow and add tiny drops of red until you achieve your desired vibrant orange shade. Gel food coloring is often preferred over liquid for more concentrated color without adding too much moisture.
Step-by-Step Baking and Decorating Instructions
Follow these detailed steps to create your own batch of delicious Black and Orange Cookies:
- Black Bottom Cupcakes
- Chocolate Orange Walnut Cookies
- Pudding Mix Black and White Cookies
- Favorite Black and White Cookies
- Mini Halloween Oreo Cheesecakes
Recipe

Easy Black and Orange Cookies
Anna
Pin Recipe
Ingredients
- ⅓ cup unsalted butter softened (75 grams)
- ½ cup granulated sugar (100 grams)
- 1 large egg
- ½ teaspoon baking soda
- ½ teaspoon salt
- ⅓ cup buttermilk or lite sour cream, room temperature (40 grams)
- ½ teaspoon vanilla
- 1 ¼ cups all-purpose flour (160 grams)
Icing:
- 3 cups confectioners’ sugar (350 grams)
- 2 tablespoon light corn syrup (36 grams)
- 1 tablespoon fresh lemon juice optional
- ½ teaspoon vanilla
- 2-4 tablespoons water you might need more
- ½ cup unsweetened Dutch-process cocoa powder (40 grams)
- Red & yellow food coloring
Instructions
-
Prepare for Baking: Preheat your oven to 350°F (175°C). Line a large baking sheet with parchment paper or non-stick foil. This step is crucial for preventing sticking and ensuring easy removal of the delicate cookies.
-
Make the Cookie Dough: In a large mixing bowl, using an electric mixer or a sturdy wire whisk, beat the softened butter and granulated sugar together until the mixture is light, fluffy, and pale in color. This creaming process incorporates air, essential for a tender cookie. Next, beat in the large egg until it is just combined. In a separate small bowl, combine the baking soda and salt, then add this to the wet ingredients. Mix thoroughly, ensuring there are absolutely no lumps of baking soda, as undissolved baking soda can leave a bitter taste. Stir in the room temperature buttermilk (or lite sour cream) and vanilla extract. Finally, gradually add the all-purpose flour, mixing only until it is well combined and no streaks of dry flour remain. Be careful not to overmix the dough.
-
Bake the Cookies: Using a ¼ cup measuring cup or a large cookie scoop, spoon portions of the batter onto your prepared baking sheet. Ensure the mounds of dough are spaced about 3 inches apart to allow for spreading during baking. Bake in the middle rack of your preheated oven for 15 to 17 minutes. The cookies are done when their tops are puffed, slightly pale golden around the edges, and they spring back gently when lightly touched. Overbaking will result in dry cookies, so keep a close eye on them. Once baked, carefully transfer the cookies to a wire cooling rack and allow them to cool completely to room temperature before attempting to ice them. Warm cookies will cause the icing to melt and run.
-
Prepare the Icing Base: In a medium bowl, combine the confectioners’ sugar, light corn syrup, fresh lemon juice (if using), vanilla extract, and 2 tablespoons of water. Whisk these ingredients together until smooth. The consistency should be thick enough to coat a spoon but still spreadable. If it’s too thick, add more water, a half-teaspoon at a time, until the desired consistency is achieved.
-
Create the Black Icing: Transfer half of the prepared white icing base to a separate bowl. To this half, stir in the unsweetened Dutch-process cocoa powder. Mix thoroughly until the cocoa is fully incorporated and you have a deep, dark brown (almost black) icing. If the chocolate icing becomes too thick, slowly add a bit more water, a few drops at a time, until you reach a nice, smooth spreading consistency.
-
Create the Orange Icing: Dye the remaining half of the white icing orange. Start by adding a few drops of yellow food coloring and then gradually add a tiny drop of red food coloring until you achieve a vibrant, rich orange hue that evokes the spirit of Halloween. Mix well to ensure the color is uniform.
-
Ice the Cookies: This is where the fun begins! Once the cookies are completely cool, carefully ice them. Traditionally, Black and White cookies are iced on their flat bottom side, but for these festive Black and Orange Cookies, icing the rounded top side allows for a more prominent display of the vibrant colors. Use a small offset spatula or a butter knife to spread the black icing neatly over approximately half of each cookie. Then, clean your spatula and apply the orange icing to the remaining half. Try to create a clean line down the middle where the two colors meet.
-
Set and Serve: Allow the icing to fully set before handling or serving the cookies. This can take anywhere from 1 to 2 hours at room temperature, or slightly less if placed in a cool, dry spot. Once the icing is firm, your Easy Black and Orange Cookies are ready to be enjoyed!
-
This recipe yields approximately 8 delightfully spooky cookies.
Tips for Perfect Black and Orange Cookies Every Time
Achieving bakery-quality Black and Orange cookies is easier than you think with a few expert tips:
- Room Temperature Ingredients: This cannot be stressed enough. Softened butter and room temperature egg and buttermilk emulsify much better, creating a smoother batter and a more consistent cookie texture.
- Do Not Overmix: Once you add the flour, mix only until just combined. Overmixing develops gluten, which can lead to tough, chewy cookies instead of the desired cake-like softness.
- Portioning is Key: Use a consistent scoop or measuring cup to ensure all cookies are roughly the same size. This helps them bake evenly.
- Cool Completely: Resist the urge to ice warm cookies! The heat will melt the frosting, creating a messy, unappealing result. Patience is a virtue here.
- Icing Consistency: The perfect icing consistency is thick enough to stay on the cookie but thin enough to spread smoothly. Add water very slowly, a half-teaspoon at a time, to achieve this balance.
- Clean Lines: For a professional look, ice one half of the cookie, then clean your spatula before switching to the other color. This prevents color mixing and ensures a sharp division.
Serving and Storage Suggestions
These festive cookies are a fantastic addition to any Halloween party spread, a delightful treat for school lunches, or a cozy snack with your favorite warm beverage. Serve them alongside a glass of cold milk, a mug of hot apple cider, or a decadent hot chocolate to enhance the autumnal vibes.
To store your Black and Orange Cookies, place them in an airtight container at room temperature for up to 3-4 days. If stacking them, separate layers with parchment paper to prevent the icing from sticking. For longer storage, these cookies can be frozen. Place cooled, iced cookies on a baking sheet to freeze solid, then transfer them to a freezer-safe bag or container for up to 2-3 months. Thaw at room temperature before serving.
Creative Variations to Explore
While the classic Black and Orange combo is perfect, don’t hesitate to get creative with your Halloween cookies:
- Flavor Boost: Add a teaspoon of orange zest to your orange icing for a bright, citrusy kick. You could also infuse the chocolate icing with a hint of espresso powder or a drop of peppermint extract for different flavor profiles.
- Spice it Up: Consider adding a pinch of cinnamon, nutmeg, or pumpkin pie spice to the cookie dough for an even warmer, more autumnal flavor.
- Spooky Toppings: Before the icing sets, sprinkle a few Halloween-themed sprinkles, edible glitter, or finely chopped candy corn onto the orange side for extra flair.
- Different Shapes: While traditionally round, you could use a cookie cutter (e.g., pumpkin, ghost) for more themed shapes, adjusting baking time as needed.
- Cream Cheese Icing: For a richer, tangier icing, adapt a simple cream cheese frosting recipe for the orange half.
Embrace the Halloween Spirit!
These Easy Black and Orange Cookies are more than just a dessert; they are a celebration of the Halloween season, combining classic flavors with festive aesthetics. They embody the joy of homemade treats and the playful spirit of one of the year’s most anticipated holidays. So gather your ingredients, turn on your favorite spooky playlist, and get ready to bake a batch of these enchanting cookies. Share them with friends, family, or keep them all to yourself – we won’t tell! Happy baking, and happy Halloween!
