Indulge in Homemade Delight: The Ultimate Guide to Chewy Cottage Cheese Chocolate Bread
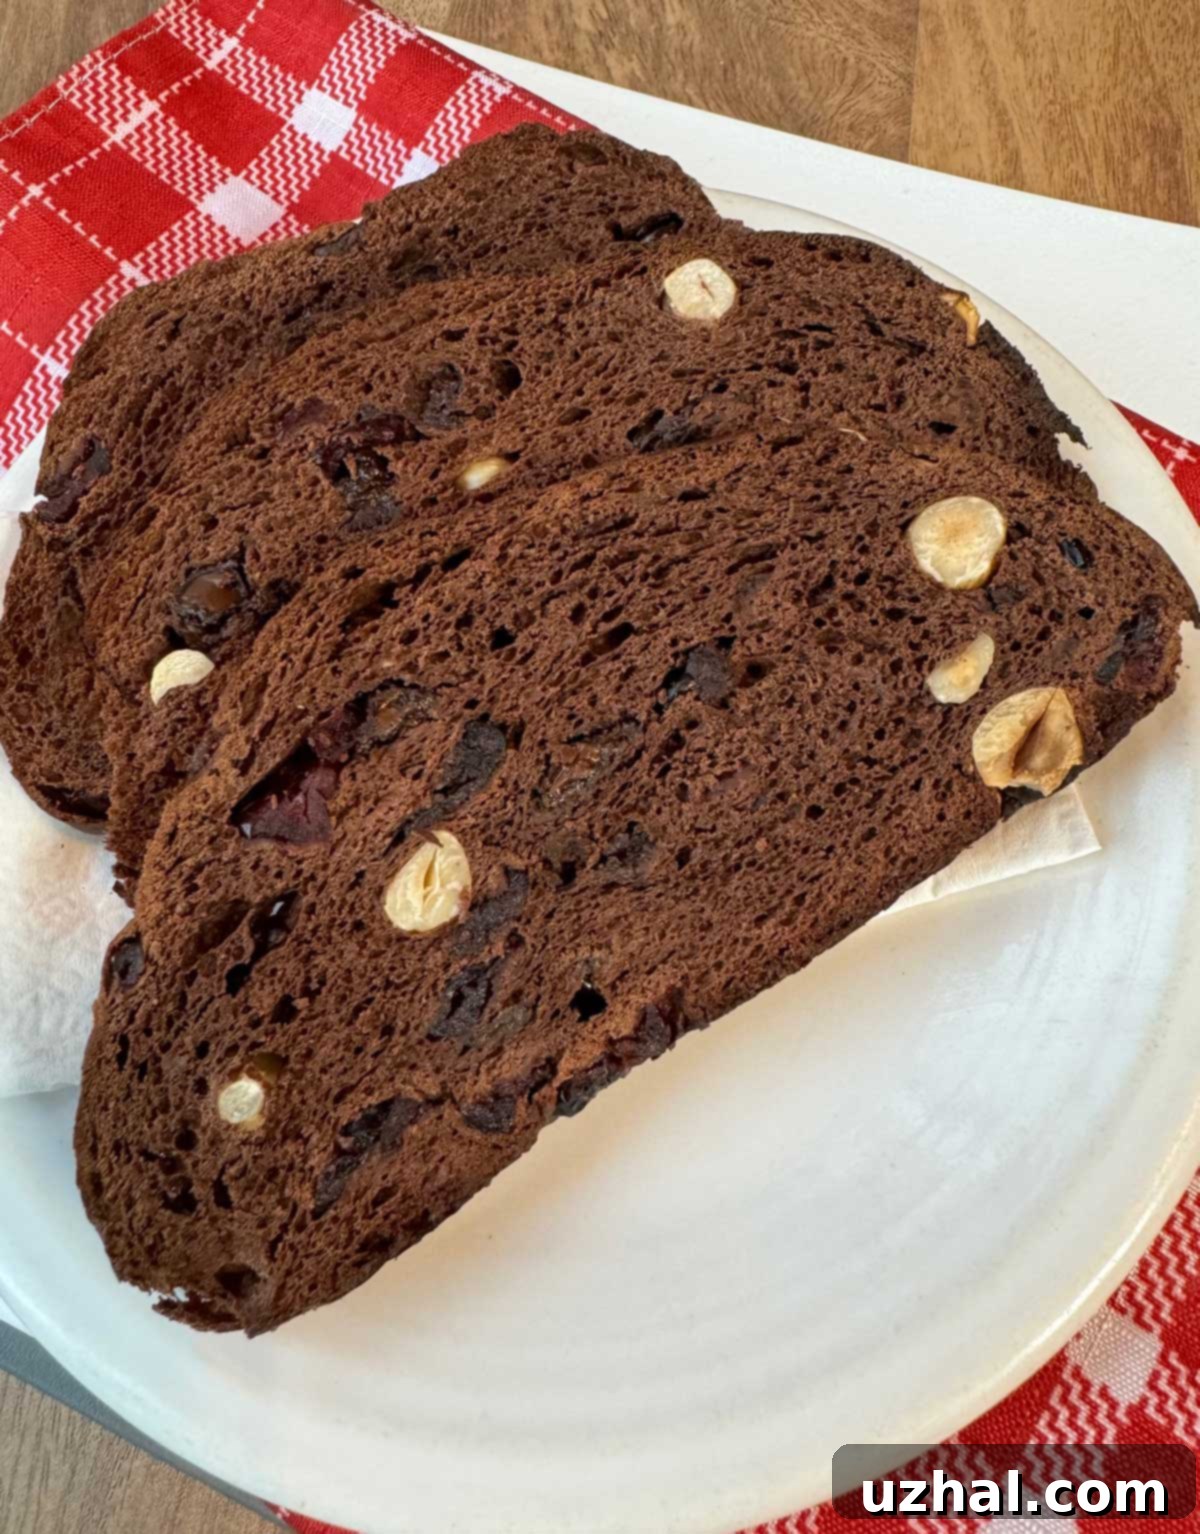
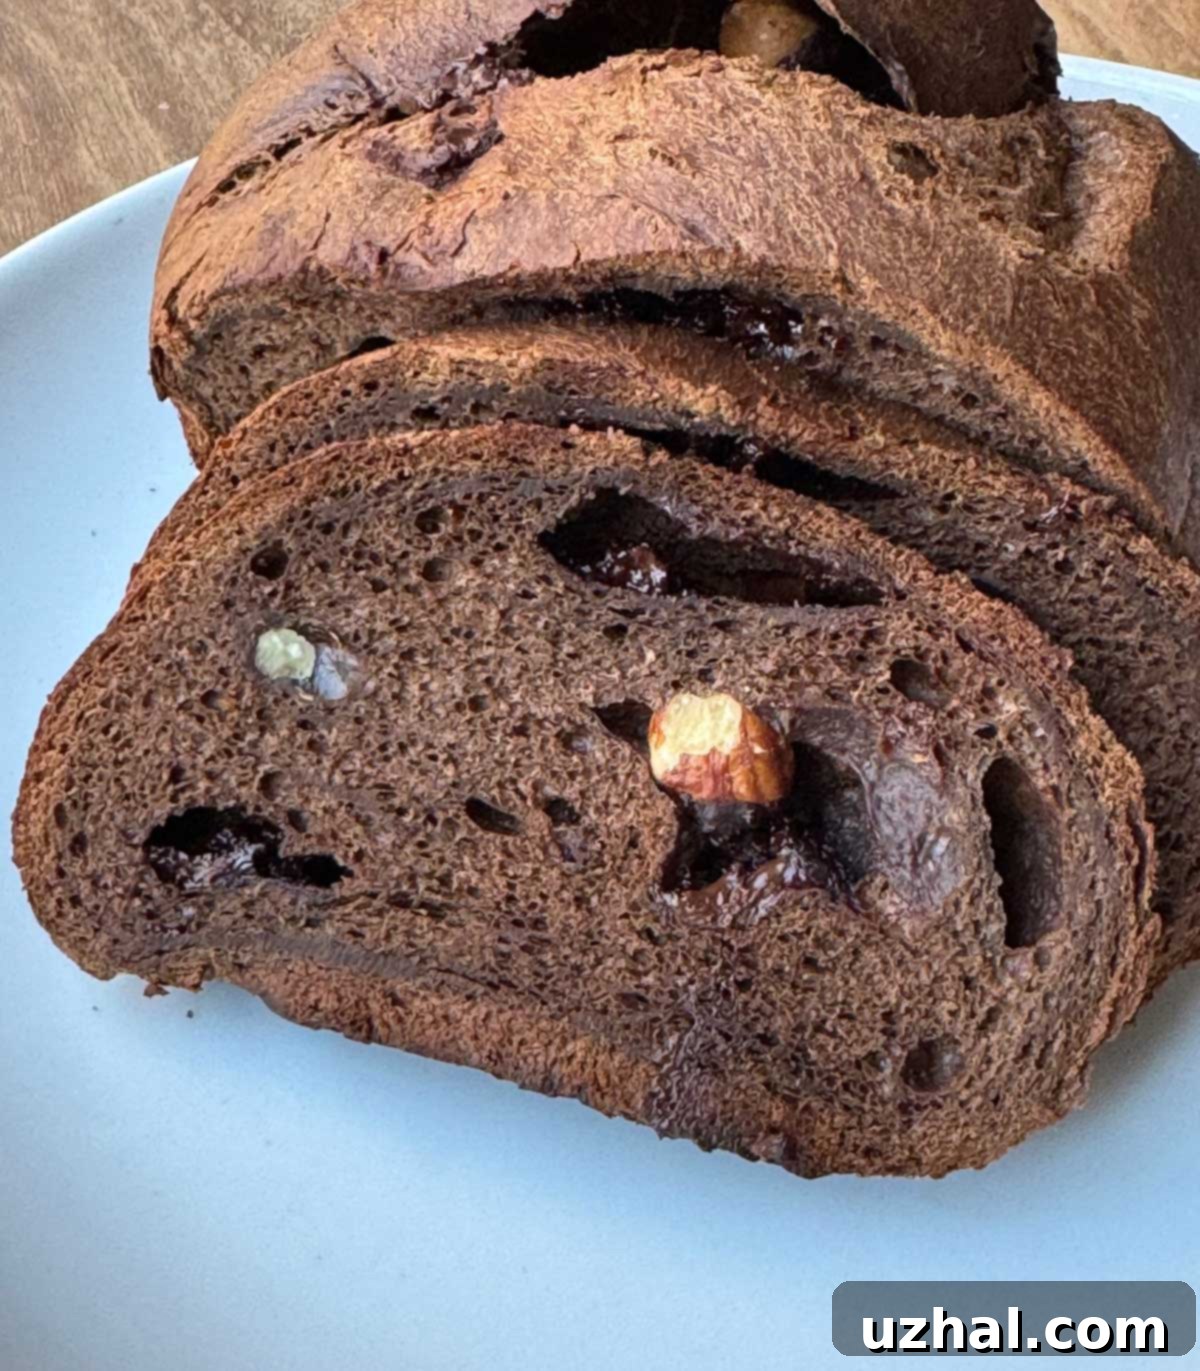
Welcome to the delightful world of homemade yeast breads, where an unexpected ingredient can elevate a classic treat to extraordinary new heights. Today, we’re diving into the creation of a truly unique and satisfying loaf: our Cottage Cheese Chocolate Bread. This isn’t just any chocolate bread; it’s a beautifully chewy, perfectly toastable yeast bread, boasting a rich chocolate flavor complemented by a subtle sweetness. While it might be a tad too sweet for a traditional savory breakfast or not quite indulgent enough for a full-on dessert, its versatility makes it perfect for a luxurious brunch, an afternoon snack, or even a delightful “breakfast dessert.” Whatever your preferred timing, you’ll find this bread irresistibly delicious and surprisingly easy to make. I’ve personally enjoyed countless slices of this bread and can’t wait for you to experience its wonderful texture and flavor.
Jump to Recipe

Crafting Exceptional Chocolate Yeast Bread with Cottage Cheese
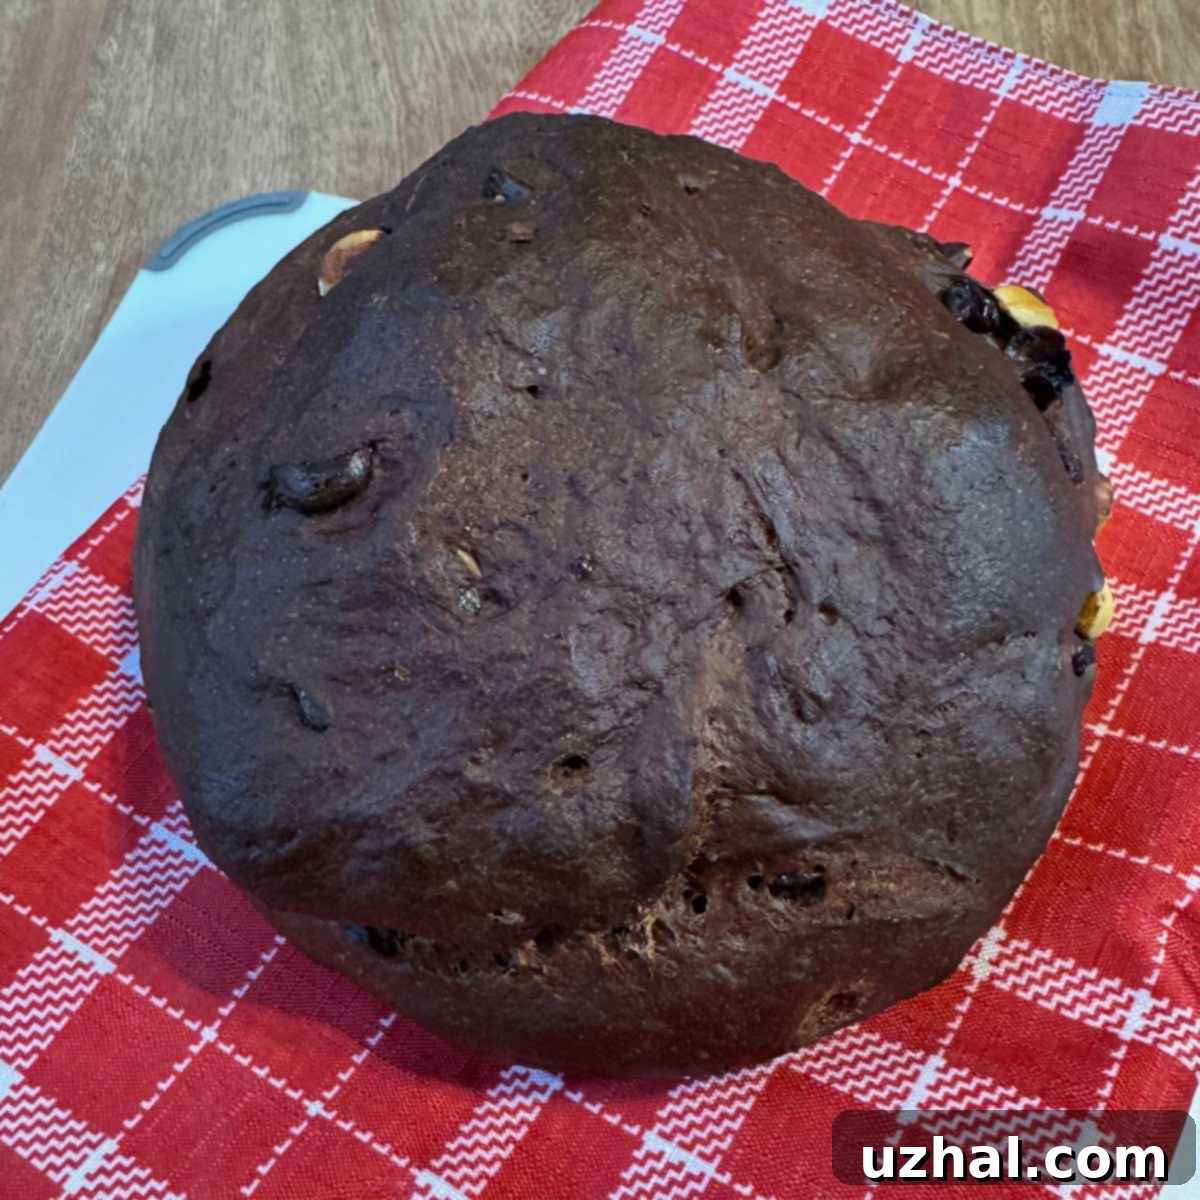
Chocolate yeast bread recipes are a rare find, making this particular loaf a special discovery. My journey with this recipe began years ago, inspired by the renowned David Lebovitz. Over time, I’ve adapted and experimented with his original concept, gradually refining it into the robust, flavorful round loaf you see today. The secret ingredient that sets this bread apart is cottage cheese. Far from simply adding a dairy element, the cottage cheese plays a crucial role, contributing significantly to the bread’s flavor profile, structural integrity, and nutritional value, notably protein. Its mild tang subtly enhances the chocolate, while its moisture content ensures a tender crumb that stays fresh longer.
Unlike traditional sandwich loaves, this bread is designed to be a standalone delight. Initially, I used a loaf pan, but I quickly realized it was unnecessary. This isn’t a bread meant for intricate sandwich fillings; it shines brightest as a rich, satisfying snack, a standout item on your brunch table, or an indulgent breakfast treat. If you’re someone who appreciates the comforting embrace of chocolate first thing in the morning, this bread is absolutely perfect for you. The cottage cheese melts seamlessly into the dough, leaving no discernible curds but rather imparting a softness and richness that makes every bite truly enjoyable.
Why Cottage Cheese is a Bread Baking Superstar
Incorporating cottage cheese into yeast bread might seem unconventional, but it brings a host of benefits that are simply revolutionary for bread-making. Firstly, its high moisture content translates to an incredibly tender and moist crumb, preventing the bread from drying out quickly. This means your loaf stays fresh and delicious for longer. Secondly, cottage cheese is packed with protein, adding a nutritional boost that makes this chocolate bread more substantial and satisfying than typical sweet breads. It helps create a stronger gluten structure, which contributes to the delightful chewiness of the final product.
Beyond texture and nutrition, cottage cheese also subtly enhances the flavor. It introduces a very mild, almost undetectable tang that beautifully balances the sweetness of the chocolate, preventing the bread from becoming overly cloying. It doesn’t impart a “cheesy” flavor; rather, it works in the background to deepen the overall richness and complexity. This makes our Cottage Cheese Chocolate Bread not just a treat for the taste buds, but also a clever way to add an extra layer of deliciousness and nourishment to your baking repertoire.
Unlock Your Creativity: Endless Flavor Variations
One of the most exciting aspects of this Cottage Cheese Chocolate Bread recipe is its incredible adaptability. While the fundamental yeast dough should generally remain unaltered, especially if you’re not an experienced bread maker, the world of mix-ins is wide open for your culinary improvisation. This allows you to tailor each loaf to your personal preferences or whatever delightful ingredients you have on hand.
Here are some ideas to inspire your variations:
- Chocolate Choices: Experiment with different types of chocolate chips or chunks. Instead of bittersweet, try semi-sweet, milk chocolate, or even white chocolate for a sweeter profile. You could also use a combination, like dark chocolate chunks with white chocolate chips, for visual appeal and varied sweetness.
- Nutty Additions: Beyond hazelnuts, consider toasted walnuts, pecans, almonds, or even pistachios. Each nut brings its own unique flavor and crunch, adding another layer of texture. For an extra aromatic touch, lightly toast the nuts before adding them to bring out their oils and enhance their flavor.
- Dried Fruit Delights: While dried cherries and cranberries offer a lovely tart counterpoint, feel free to explore other dried fruits. Golden raisins, chopped dried apricots, figs, or even candied orange peel would all make wonderful additions, introducing new bursts of flavor and chewiness.
- Aromatic Enhancements: A pinch of cinnamon, a touch of cardamom, or a subtle hint of orange zest could further elevate the complexity of the chocolate flavor. These spices can complement chocolate beautifully, adding a warm, inviting aroma.
The recipe provided below is the version I’ve perfected and enjoy most frequently. However, don’t hesitate to make it your own! I also have a recipe for a gluten-free chocolate bread (without cottage cheese) which I plan to share in the future, for those with specific dietary needs.
Low Carb Adaptation with King Arthur Keto Flour
For those looking to enjoy a lower-carb version of this delightful bread, I’m happy to report that this recipe adapts remarkably well to King Arthur Keto Wheat Flour. Crafting the low-carb variant requires a few thoughtful adjustments to ensure both texture and flavor remain excellent.
To begin, activate your yeast in the specified amount of warm water, and for an extra boost, add a dash of honey or inulin. While traditional sugar feeds the yeast, a small amount of honey or inulin can help kickstart the fermentation process in a low-carb dough. When it comes to the flour, use 260 grams of King Arthur Keto Flour, which is slightly less than the standard flour amount, to achieve the right dough consistency. For sweetness, opt for ⅓ cup of a monk fruit & allulose blend, or if you prefer pure allulose, use ½ cup. These sweeteners provide a clean taste without the carb impact.
When melting the butter, combine it with 85% dark chocolate to maintain a rich chocolate flavor with minimal added sugars. For the chocolate chips, you have a choice: regular chocolate chips will add some carbs, but for a truly low-carb option, Lily’s sugar-free chocolate chips are an excellent substitute. These modifications significantly reduce the carbohydrate count. Please note that while I’ve made these adjustments, obtaining a precise macro count can be challenging with certain software due to the presence of sugar alcohols and non-digestible carbs in keto-friendly ingredients.

A Note on SAF Instant Yeast: Your Baking Partner
For consistently excellent results with this Cottage Cheese Chocolate Bread, I highly recommend using SAF Gold Label instant yeast. I’ve exclusively tested this recipe with this particular yeast, and it performs beautifully every time. SAF Gold Label is specifically formulated to work optimally in doughs that contain sugar, making it an ideal choice for sweet breads like ours. It helps the dough rise reliably, even with the presence of sugar, which can sometimes inhibit yeast activity.
While most instant or fast-rising yeasts should technically work, SAF Gold Label consistently delivers superior performance. I typically purchase it in bulk and store it in the freezer to prolong its freshness and potency, ensuring that my yeast is always active and ready for baking. Even though it’s designed for sugary doughs, its robust activity and reliability make it my go-to choice for all my yeast breads, regardless of their sugar content. Using fresh, active yeast is a fundamental step towards a successful rise and a wonderfully textured loaf.
Tips for a Perfect Loaf Every Time
Achieving a bakery-quality loaf of Cottage Cheese Chocolate Bread at home is easily within reach with a few key tips:
- Yeast Activation: Always ensure your yeast is active. When combined with warm water, it should become visibly foamy within 5-10 minutes. If it doesn’t foam, your yeast might be old or the water temperature was incorrect (too hot or too cold), and it’s best to start with a new batch.
- Dough Consistency: The dough for this bread will be slightly speckly due to the cottage cheese curds and might feel a bit dry initially. Don’t be alarmed. Continuous kneading is key to developing the gluten and incorporating all the ingredients smoothly. Resist the urge to add too much extra flour. Add water *very* sparingly, only if the dough refuses to come together after several minutes of kneading. The goal is a slightly tacky, elastic dough.
- Kneading Time: Don’t cut short the kneading time. The recommended 5 minutes with a dough hook in a stand mixer is crucial for developing the gluten structure, which gives the bread its signature chewy texture. If kneading by hand, you’ll likely need to knead for 8-10 minutes.
- Rising Expectations: This dough will not double in size during either of its rises, especially the first one. This is normal due to the density of the chocolate and cottage cheese. Look for a noticeable puffing up, rather than a dramatic doubling. The second rise will be more significant.
- Preventing Exposed Chocolate: When incorporating chocolate chips and shaping the loaves, try to bury the chips within the dough. Exposed chocolate chips can burn or dry out during baking. If some are visible, you can use a small piece of plain dough to gently patch over them.
- Baking Doneness: The best way to determine if your bread is perfectly baked is to use an instant-read thermometer. Insert it into the center of the loaf; it should read around 200-205°F (93-96°C) for a fully cooked loaf. Shielding with foil during the last 20 minutes prevents the crust from over-browning.
- Cooling is Crucial: Allow the bread to cool for at least an hour, preferably longer, before slicing. This allows the internal structure to set and prevents a gummy texture. The aromas will also deepen as it cools.
Serving and Storage Suggestions
Once your Cottage Cheese Chocolate Bread has cooled sufficiently, it’s ready to be enjoyed in many delicious ways:
- Warm and Toasted: This bread is fantastic slightly warmed or toasted. The warmth enhances the chocolate flavor and makes it even chewier.
- With a Spread: While delicious on its own, it pairs wonderfully with a thin smear of butter, cream cheese, or even a fruit jam. For an extra chocolatey treat, hazelnut spread is a match made in heaven.
- Beverage Pairings: Serve it alongside a steaming cup of coffee, a rich espresso, or your favorite tea for a comforting and satisfying experience.
- Storage: Store the cooled bread wrapped tightly in plastic wrap or in an airtight container at room temperature for up to 3-4 days. For longer storage, this bread freezes exceptionally well.
- Freezing: Slice the cooled loaf, then wrap individual slices or the entire loaf tightly in plastic wrap, followed by aluminum foil. Freeze for up to 2-3 months. Thaw slices at room temperature or toast directly from frozen for a quick treat.
- Cottage Cheese Cookies
- Butter Crunch Lemon Cottage Cheese Bars
- Cottage Cheese Bread
- Cottage Cheese Dinner Rolls
- Cottage Cheese and Spinach Casserole
Recipe: Cottage Cheese Chocolate Bread

Cottage Cheese Chocolate Bread
Anna
Pin Recipe
Ingredients
- ¼ cup warm water (plus more as needed for dough consistency)
- 2 cups all-purpose or bread flour (280 grams, preferably bread flour for extra chew)
- ⅓ cup granulated sugar or coconut sugar (70 grams)
- 2 ¼ teaspoons quick rising yeast or 2 teaspoons SAF instant yeast (SAF Gold Label recommended)
- ¼ cup unsweetened cocoa powder (20-25 grams, Dutch-processed for richer color and flavor)
- ¾ teaspoon fine sea salt
- ½ teaspoon espresso powder (optional, but highly recommended to deepen chocolate flavor)
- 2-4 tablespoons unsalted butter, softened (28-56 grams, see note for preference)
- 3 ounces dark chocolate, coarsely chopped (85% cacao or similar)
- 1 cup full-fat cottage cheese (228 grams, for best texture and richness)
- 1 large egg, at room temperature
- 1 teaspoon vanilla extract
- ½ to ⅔ cup bittersweet chocolate chips or chunks
- ½ cup chopped hazelnuts or other preferred nuts (toasted for enhanced flavor)
- ½ cup dried cherries or cranberries (or other dried fruit like apricots or raisins)
- Extra chocolate disks or pieces for garnishing (optional, for topping after baking)
Instructions
-
Begin by activating your yeast. In a small bowl or custard cup, combine the warm water and the yeast. Give it a gentle stir, then let it stand undisturbed for 5-10 minutes. This allows the yeast to “bloom” and become foamy on the surface, indicating it is alive and active. If no foam appears, your yeast may be expired or the water was not at the correct temperature (ideally between 105-115°F / 40-46°C).
-
In the large bowl of a stand mixer (or a large mixing bowl if kneading by hand), thoroughly combine all the dry ingredients: the flour, sugar, cocoa powder, salt, and espresso powder (if you’re using it to boost the chocolate flavor). Mix these very well with a spoon or using the paddle attachment of your stand mixer to ensure an even distribution.
-
Next, prepare the wet chocolate mixture. In a medium-sized saucepan, melt the butter and the coarsely chopped dark chocolate together over very low heat, stirring occasionally. Once fully melted and smooth, remove the pan from the heat. Briefly set aside, then stir in the room-temperature cottage cheese and the egg until they are well blended into the chocolate mixture. Return the pan to the stove over low heat just until the mixture is warm to the touch – avoid making it hot, as this could kill the yeast.
-
Add the activated, foamy yeast mixture and the warm cottage cheese-chocolate mixture (along with the vanilla extract, if using) to the dry ingredients in your stand mixer bowl. Using the paddle attachment or a sturdy spoon, mix everything together. At this stage, the dough will appear somewhat speckled from the cheese curds and might seem a bit dry. Don’t worry; it will come together and soften beautifully as you knead.
-
Switch to the dough hook attachment on your stand mixer. Knead the mixture for at least 5 minutes, or until the dough begins to form a cohesive, slightly elastic ball. The dough should still be slightly tacky but not overly sticky. If the dough feels excessively dry and isn’t coming together, add water sparingly, a teaspoon at a time, until the desired consistency is reached. Continue kneading until the dough has developed sufficient elasticity and pulls away from the sides of the bowl. You may need to periodically scrape the dough from the sides of the bowl with a spatula.
-
Once kneaded, cover the bowl with plastic wrap or a clean kitchen towel. Let the dough rise in a warm, draft-free place for 30 minutes. If you are using active dry yeast (which typically requires a longer rise), allow it to rise for about an hour. It’s important to note that this dough, due to the density of the chocolate and cottage cheese, will not significantly double in size; expect a noticeable puffing up rather than a dramatic expansion.
-
After the first rise, gently turn the dough out onto a lightly floured surface. Work in the bittersweet chocolate chips, chopped nuts, and dried cherries or cranberries (if using). Gently fold and knead the dough briefly to evenly distribute these delicious additions. Now, shape the dough into one large round loaf or divide it to form two smaller rounds. I generally recommend making two smaller loaves, as they bake more evenly. As you form the rounds, try your best to keep the chocolate chips buried within the dough. If any chips are exposed on the surface, you can set aside a tiny bit of plain dough to patch over them, preventing them from drying out or burning during baking.
-
Place your shaped dough rounds onto a baking sheet lined with parchment paper. Lightly grease a piece of plastic wrap and loosely cover the dough rounds. Let them rise for a second time in a warm place for approximately 60-75 minutes. Again, the dough will not double, but it should puff up substantially, becoming noticeably larger and softer.
-
Towards the end of the second rise, preheat your oven to 350°F (175°C). Once preheated, bake the bread on the center rack. For two smaller loaves, bake for about 45 minutes. For one large loaf, bake for approximately 60 minutes. During the last 20 minutes of baking, if you notice the crust browning too quickly, loosely tent the loaf with aluminum foil to prevent over-browning. The bread is typically done when its internal temperature, measured with an instant-read meat thermometer inserted into the thickest part, reaches a little over 200°F (93°C); I aim for 205°F (96°C) for perfect doneness.
-
For an extra touch of indulgence, if desired, you can immediately lay a few chocolate disks or pieces on top of the hot loaves as soon as they come out of the oven. The residual heat will gently melt the chocolate, creating a beautiful, glossy, and extra chocolatey topping as the bread cools.
-
Allow the bread to cool completely on a wire rack for at least an hour, and preferably even longer, before slicing. This crucial cooling time allows the internal structure of the bread to set fully, resulting in the best possible texture and flavor. Once cooled, slice and serve your delicious Cottage Cheese Chocolate Bread, or wrap it tightly in plastic wrap and freeze for later enjoyment.
Notes
