Delicious Snicker Cookies: Transform Your Leftover Halloween Candy into a Sweet Treat!
The post-Halloween slump is a familiar feeling for many of us. The costumes are put away, the spooky decorations are packed, and often, we’re left with a mountain of candy that somehow feels less exciting than it did on October 31st. But what if there was a delightful way to breathe new life into those sugary treasures? Thanks to a wonderful recipe shared by my friend Taneka, I’ve found the perfect antidote to the post-Halloween funk: homemade Snicker Cookies! This ingenious idea doesn’t just clear out your candy stash; it turns it into a genuinely irresistible dessert that’s perfect for any occasion.
Taneka first stumbled upon these incredible Snicker Cookies at a sophisticated wine dinner, where they were being passed around on a dessert tray. Intrigued by the unique combination, she was fortunate enough to get the recipe directly from the chef. And I am incredibly grateful she did, because these cookies are not only fun to make but also incredibly rewarding. The cookie dough itself is a dream to work with – pliable, flavorful, and creates the perfect soft, chewy wrapper for miniature Snickers bars or virtually any other chocolate candy you might have lingering after Halloween. Don’t worry if your other candies are a bit too large; a quick slice in half will make them perfectly suitable for these delightful treats.
A Sweet Solution to the Post-Halloween Candy Surplus
Every year, after the trick-or-treating excitement fades, many of us find ourselves with an abundance of candy. While a handful of mini chocolate bars or lollipops might be appealing, the sheer volume can quickly become overwhelming. This is where creative culinary solutions truly shine. Instead of letting those candies sit forgotten in a bowl, why not transform them into something entirely new and utterly delicious? Snicker Cookies offer a fantastic way to repurpose your Halloween haul, turning ordinary candy into extraordinary baked goods that everyone will adore. It’s a win-win: less candy clutter and more homemade goodness!
The Magic Behind Taneka’s Recipe
What makes this particular recipe so special? It’s the thoughtful combination of classic cookie comfort with a surprising, melt-in-your-mouth center. The dough itself is a masterclass in simplicity and flavor. It’s designed to be easy for bakers of all skill levels, ensuring a smooth process from mixing to molding. The subtle hints of peanut butter and honey in the dough complement the rich chocolate and caramel of a Snickers bar beautifully, creating a harmonious blend of textures and tastes. Imagine biting into a warm, soft cookie and discovering a gooey, melted Snickers bar at its heart – it’s a truly magical experience that elevates a simple cookie into a gourmet delight. This recipe isn’t just about baking; it’s about crafting joy and surprising your taste buds.
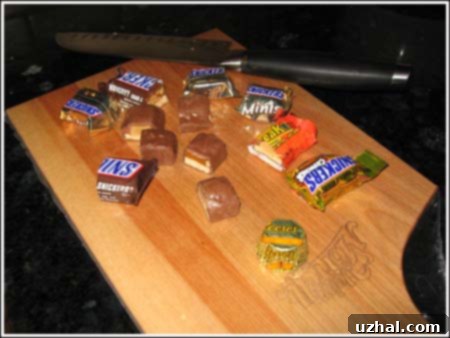
Unpacking the Perfect Snicker Cookie Ingredients
To truly appreciate the beauty of these Snicker Cookies, it’s worth understanding the role each ingredient plays. While the list might seem straightforward, each component contributes to the cookie’s unique texture, flavor, and overall appeal. Precision in baking often leads to the best results, so let’s break down what goes into creating these delightful morsels.
The Foundation: Flour, Sugar, Baking Soda, and Salt
- 1 ¾ cup all-purpose flour: Flour provides the main structure for our cookies. All-purpose flour is ideal here because it offers a good balance of protein, creating a tender yet firm cookie that can hold its shape around the candy filling.
- ½ cup sugar: Sugar is not just for sweetness; it contributes to the cookie’s texture, helping it to spread slightly and achieve that desirable crisp edge and chewy center. It also plays a role in browning, giving the cookies their appetizing golden hue.
- ½ tsp. baking soda: This is our leavening agent. When combined with an acidic ingredient (though not explicitly listed as a primary acid source, the butter and peanut butter contribute to the right pH balance for activation), baking soda helps the cookies rise slightly, ensuring they aren’t too dense and have a pleasant lightness.
- ¼ tsp. salt: Often overlooked, salt is crucial for balancing flavors. It enhances the sweetness of the sugar and the richness of the chocolate and peanut butter, preventing the cookies from tasting flat.
The Heart: Butter, Peanut Butter, Honey, and Milk
- ½ cup butter: Butter provides richness and flavor, contributing to the cookie’s tender crumb and delightful aroma. It’s essential for a moist cookie and helps carry the other flavors.
- ½ cup creamy peanut butter: This is a signature flavor component that pairs perfectly with Snickers. Creamy peanut butter adds a nutty depth, moisture, and a wonderfully soft texture to the dough, making it even more enjoyable to eat.
- ¼ cup honey: Honey adds a unique sweetness and a subtle floral note that complements the peanut butter beautifully. It also acts as a humectant, meaning it helps to keep the cookies moist and chewy for longer.
- 1 Tbsp. milk: Milk helps to bring the dough together, providing the necessary liquid to achieve the correct consistency. It ensures the dough is pliable and easy to mold around the candy.
The Star: Miniature Snickers (and Candy Alternatives)
- 24 miniature Snickers: These are the star of the show! The combination of nougat, caramel, peanuts, and milk chocolate provides a complex and utterly delicious center when melted inside the warm cookie. The mini size is perfect for individual portions.
- Candy Alternatives: While Snickers are the original, feel free to get creative! Other chocolate bars like Reese’s Peanut Butter Cups, Fast Break, Milky Way, or even caramels or fun-sized chocolate bars can be fantastic fillings. Remember the tip: if your candy is too large, simply cut it in half to fit perfectly within the dough. This flexibility makes the recipe even more appealing for using up diverse Halloween candy.
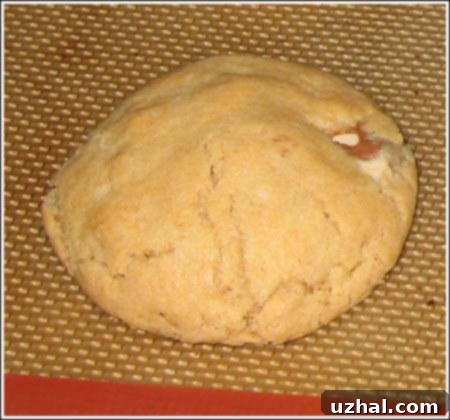
Step-by-Step Guide to Baking Irresistible Snicker Cookies
Baking these Snicker Cookies is a joyful experience, largely because the dough is so cooperative and the results are so satisfying. Here’s a detailed look at each step to ensure your cookies turn out perfectly every time.
Preparing the Dough
The first step involves combining your dry ingredients: flour, sugar, baking soda, and salt. Whisk them together thoroughly in a large bowl. This ensures that the leavening and salt are evenly distributed throughout the dough, which is crucial for uniform rising and consistent flavor. Next, you’ll “cut in” the butter and creamy peanut butter. This process involves incorporating the fats into the dry ingredients until the mixture resembles coarse crumbs. You can use a pastry blender, two knives, or even your fingertips for this. The goal is to create small, pea-sized pieces of butter and peanut butter coated with flour, which will melt during baking and create a tender, flaky texture. Finally, beat in the honey and milk until everything is well combined and forms a cohesive, slightly sticky dough. The dough should be soft but manageable, perfect for molding.
Enveloping Your Candy
Now for the fun part! Take roughly one tablespoon of the prepared dough. Flatten it slightly in the palm of your hand, place a miniature Snickers bar (or your chosen candy piece) in the center, and then carefully mold the dough around the candy. The key here is to completely seal the candy within the dough, ensuring there are no cracks or openings. This prevents the candy from melting out during baking and keeps that wonderful gooey surprise neatly contained. Take your time with each cookie to ensure a good seal; it’s a rewarding step that directly impacts the final appearance and texture of your baked treats.
Baking to Golden Perfection
Once your candies are snugly wrapped in their doughy blankets, place them on an ungreased cookie sheet. Give them a little space, about two inches apart, to allow for a slight spread during baking. Preheat your oven to 350 degrees Fahrenheit (175 degrees Celsius). Bake the cookies for 12 to 15 minutes. You’ll know they’re done when the edges are lightly golden brown and the centers appear set. Be careful not to overbake them, as this can lead to a dry cookie. Once out of the oven, let them cool on the baking sheet for a few minutes before transferring them to a wire rack to cool completely. This resting period allows them to firm up without breaking.
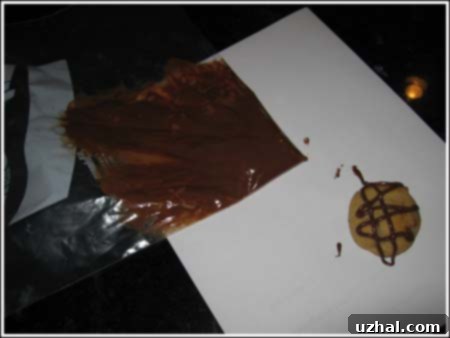
The Finishing Touch: Decorating Your Snicker Cookies
As you can see from the image above, these cookies emerge from the oven looking absolutely delicious on their own. But if you’re looking to add an extra layer of indulgence and visual appeal – perhaps using even more of that leftover Halloween candy – icing them is a fantastic idea! I opted for a simple yet effective method using miniature Hershey bars. I placed a few of them in a zipper bag, melted them gently in the microwave (squishing the bag every 30 seconds to ensure even melting), and then snipped a tiny corner off the bag to create a makeshift piping tool. Squeezing warm, melted chocolate out of a zipper bag is surprisingly therapeutic, and if that doesn’t cheer you up after a long day, I’m not sure what will!
The result is a beautifully drizzled cookie, adding another dimension of chocolatey goodness. This simple icing method also works wonderfully with other types of chocolate chips or candy melts you might have on hand. For a different twist, you could drizzle them with melted caramel, a sprinkle of sea salt to enhance the flavors, or even a light dusting of powdered sugar for a more delicate finish. The possibilities are endless, allowing you to customize your Snicker Cookies to your heart’s content. They look pretty, don’t they? And after a busy day, taking a moment to create something this delightful is truly a joy.
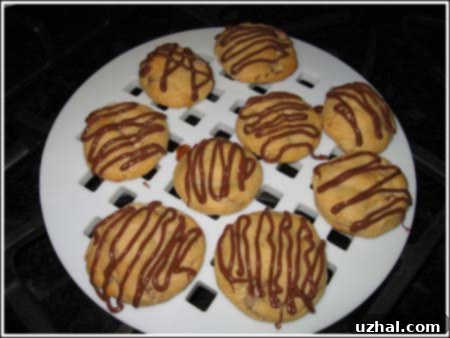
Can you tell I am having a slow day? After yesterday, I am loving this peaceful, creative process. It’s the perfect way to unwind and enjoy the simple pleasures of baking.
And for those curious about the inner workings of these delightful treats, here is a cross-section of a cookie filled with a Snickers bar. I chose a Snickers-filled one because that’s what the original recipe called for, and I imagine Taneka’s cookies looked something like this. At least, I hope so! You can clearly see the gooey, melted Snickers caramel, nougat, and peanuts nestled within the soft, tender cookie dough. It’s a truly mouth-watering sight that promises a burst of flavor with every bite.

Snicker Cookies Recipe
1 ¾ cup all purpose flour
½ cup sugar
½ tsp. baking soda
¼ tsp. salt
½ cup butter
½ cup creamy peanut butter
¼ cup honey
1 Tbsp. milk
24 miniature snickers
Combine flour, sugar, baking soda and salt. Cut in butter and peanut butter until mixture resembles coarse crumbs. Beat in honey and milk until well combined. Mold roughly 1 tablespoon of dough around candy. Place on ungreased cookie sheet, Bake 12 – 15 minutes at 350 degrees.
Makes 24
Enjoying Your Snicker Cookies: Tips and Variations
These Snicker Cookies are fantastic fresh out of the oven, when the candy center is still warm and delightfully gooey. They pair perfectly with a cold glass of milk, a warm cup of coffee, or even a scoop of vanilla ice cream for an extra indulgent dessert. They’re also an excellent addition to any party platter, potluck, or just as a special treat for your family. Their unique “surprise inside” element makes them a conversation starter and a guaranteed crowd-pleaser.
Beyond Snickers: Endless Candy Possibilities
While the recipe specifically calls for miniature Snickers, don’t limit your creativity! This dough is incredibly versatile and can embrace a wide array of chocolate candies. Imagine using mini Reese’s Peanut Butter Cups for an even more intense peanut butter experience, or Milky Way bars for a softer, nougat-filled center. Fun-sized Twix, Mars bars, or even plain caramels could also be fantastic. If you have larger candy bars left over, simply cut them into appropriate, roughly 1-inch pieces before wrapping them in the dough. This adaptability is what makes the Snicker Cookie recipe so brilliant for tackling that post-Halloween candy surplus. Experiment with different types and find your favorite combination!
So, don’t let those leftover Halloween candies languish in a bowl. Embrace the fun, simple joy of baking with this incredible Snicker Cookie recipe. It’s a delightful way to extend the holiday spirit, satisfy your sweet tooth, and create lasting memories (and delicious cookies!) with ease. Give it a try, and prepare to be charmed by these sweet, surprising treats!
