The Ultimate Hershey’s Deep Dish Brownies: Achieve Perfect Fudgy & Chewy Perfection Every Time
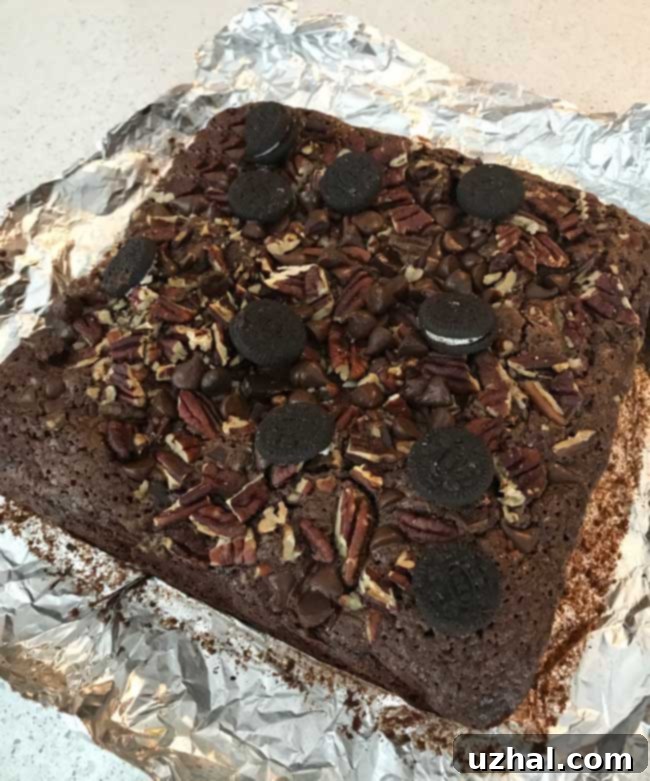
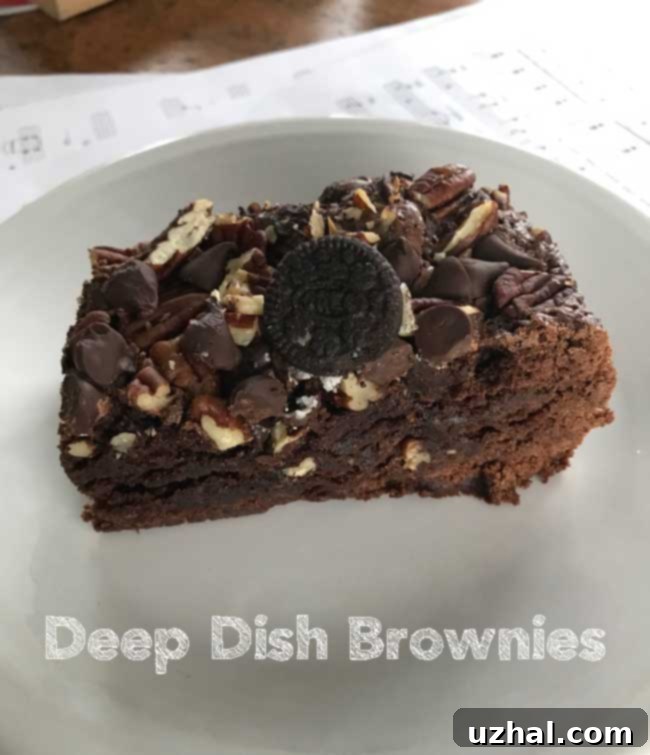
There’s a reason some recipes become timeless classics, passed down from generation to generation and earning a permanent spot in our recipe rotation. This particular Deep Dish Brownie recipe from Hershey’s is one such culinary treasure. Originally recommended by a dear friend who confidently declared it the only brownie recipe she ever needed, it quickly became a personal favorite. These brownies consistently deliver a delightful texture that perfectly balances between wonderfully cakey and lusciously fudgy, ensuring every bite is a decadent experience. You can expect those coveted chewy edges that give way to an incredibly soft, moist, and dense center – precisely what a truly great brownie should be. Forget dry, crumbly brownies; these Deep Dish Brownies promise a rich chocolate flavor and a satisfyingly substantial bite that will make them an instant hit in your kitchen.

Baking Essentials: Achieving Brownie Perfection
While the actual prep time for these delectable Deep Dish Brownies is refreshingly quick, typically around 10 minutes, their “deep dish” nature means a slightly longer bake time compared to thinner brownie recipes. This extended baking period is essential for developing that incredible depth of flavor and achieving the desired fudgy texture throughout the thicker batter. Paying attention to a few key details during the baking process will guarantee perfect results every time.
Choosing the Right Baking Pan: Metal vs. Glass
When it comes to baking brownies, the choice of pan can significantly impact the final texture. I consistently use a metal baking pan for this recipe, and it yields fantastic results. Metal pans conduct heat more efficiently and evenly, which helps create those desirable slightly crisp, chewy edges while ensuring the center cooks through beautifully. If you opt for a glass baking pan, which is also perfectly acceptable, you’ll want to make a slight adjustment to the oven temperature. Glass retains heat more effectively than metal and can cause the edges to bake and firm up faster than the center, potentially leading to dryer edges. To counteract this, reduce your oven temperature by 25 to 50 degrees Fahrenheit (e.g., from 350°F to 325°F or 176°C to 160°C). This lower temperature will allow the brownies to bake more gently and uniformly, preventing the edges from over-baking and becoming too dark or dry before the center is perfectly set. Always grease the bottom of your pan thoroughly, and for easier removal, consider lining it with parchment paper or aluminum foil, leaving an overhang on the sides to use as “handles” once cooled.
The Importance of Proper Doneness
One of the most common pitfalls in brownie baking is over-baking. For fudgy Deep Dish Brownies, it’s crucial to pull them from the oven at precisely the right moment. They should appear set around the edges, but the very center might still look slightly soft or even a tiny bit underbaked. A good test is to insert a toothpick or a thin skewer a couple of inches from the edge of the pan. It should come out with moist crumbs attached, but not wet batter. If the toothpick comes out completely clean, your brownies are likely overbaked and will lean more towards a cakey texture. Remember, the brownies will continue to set as they cool in the hot pan, so a little bit of softness in the middle is your secret to ultimate fudginess.
Cooling is Non-Negotiable
Patience is a virtue, especially when waiting for brownies to cool. It’s absolutely essential to let these Deep Dish Brownies cool completely in the pan on a wire rack. This cooling period allows the brownies to finish setting, consolidates their fudgy texture, and prevents them from falling apart when cut. Attempting to slice warm brownies often results in a messy, crumbly outcome. For the absolute best fudgy experience and clean slices, you can even chill the cooled brownies in the refrigerator for an hour or two before cutting. This step truly enhances their density and makes for picture-perfect squares.

The Science of Cocoa Powder for Deep Dish Brownies
The type of cocoa powder you choose is a fundamental ingredient that profoundly impacts the flavor, color, and even the texture of your brownies. For this classic Hershey’s Deep Dish Brownie recipe, I highly recommend sticking with Hershey’s natural cocoa powder. Given that Hershey’s is the original source of this beloved recipe, it’s safe to assume their natural cocoa was used during its development and testing, ensuring the leavening agents in the recipe are perfectly balanced for it.
Natural vs. Dutch Processed Cocoa Powder
Understanding the difference between natural and Dutch-processed cocoa is crucial for successful baking. Natural cocoa powder, like Hershey’s, is acidic. This acidity is key when a recipe calls for baking soda, as the two react to create carbon dioxide gas, providing lift and a tender crumb. Natural cocoa typically has a lighter color and a more intense, sometimes fruity, chocolate flavor profile.
Dutch-processed cocoa, on the other hand, has been treated with an alkali to neutralize its acidity. It’s darker in color, often described as having a smoother, less bitter, and milder chocolate flavor. Because it’s neutral, Dutch-processed cocoa doesn’t react with baking soda and is typically used in recipes that rely solely on baking powder for leavening, or in recipes that don’t require chemical leavening at all. Using Dutch-processed cocoa in a recipe designed for natural cocoa can throw off the chemical balance, potentially resulting in dense, flat brownies.
While any brand of natural cocoa powder will likely work well, maintaining the natural style is the most important factor to ensure your Deep Dish Brownies achieve their intended texture and rise. The quality of your cocoa powder also directly translates to the depth and richness of your chocolate flavor, so choosing a good quality natural cocoa will elevate your brownies from good to absolutely extraordinary.
- Hershey’s Deep Dark Chocolate Cookies
- Gourmet Deep Dark Chocolate Brownies
- Deep Dish Keto Brownies with Allulose
- German Chocolate Cream Pie
- Pumpkin Dump Cake Pie
Recipe

Hershey’s Classic Deep Dish Brownies
Cookie Madness
Pin Recipe
Ingredients
- 1 ½ sticks (6 oz / 170 grams) melted unsalted butter. Using unsalted butter allows you to control the salt level.
- 1-½ cups (10.5 oz / 294 grams) granulated sugar
- 1-½ teaspoons vanilla extract (7 ml), for enhancing the chocolate flavor
- 3 large eggs , at room temperature for better emulsification
- ¾ cup all-purpose flour (3.4 oz / 95 grams). Avoid over-measuring flour, which can lead to dry brownies.
- ½ cup HERSHEY’S natural cocoa powder (40 grams). Ensure it’s natural, not Dutch-processed, for proper leavening interaction.
- ½ teaspoon baking powder (2 ml), for a slight lift and tender crumb
- ½ teaspoon salt (or a scant 1 teaspoon if using unsalted butter and desire a salty-sweet balance, like Morton Kosher salt). Salt balances the sweetness and enhances chocolate flavor.
Instructions
-
Preheat your oven to 350°F (176°C). Prepare an 8×8 inch (20×20 cm) square metal baking pan by lining it with aluminum foil or parchment paper, ensuring an overhang on all sides. Lightly grease only the bottom of the foil/parchment. This method encourages the brownie batter to slightly cling to the sides of the pan during baking, resulting in deliciously chewy edges and a more uniform texture, rather than pulling away prematurely.
-
In a large mixing bowl, combine the melted butter, granulated sugar, and vanilla extract. Whisk or stir vigorously with a spoon until the mixture is well blended and smooth. Next, add the three large eggs, one at a time, beating each thoroughly with the spoon until fully incorporated before adding the next. This ensures proper emulsification and a smooth batter base.
-
In a separate medium bowl, whisk together the all-purpose flour, natural Hershey’s cocoa powder, baking powder, and salt until uniformly combined. Gradually add this dry ingredient mixture to the wet egg mixture, stirring gently with your spoon until just combined. It is crucial not to overbeat the batter at this stage, as overmixing can develop the gluten in the flour too much, leading to tougher, less tender brownies. Spread the prepared batter evenly into your greased and lined 8×8 inch pan.
-
Bake the brownies for 40 to 45 minutes. They are ready when the edges appear set and firm, and a toothpick inserted about two inches from the edge comes out with moist crumbs attached (not wet batter). The center may still look slightly soft; this is ideal for fudgy brownies. Once baked, remove the pan from the oven and place it on a wire rack to cool completely. Allowing them to cool fully in the pan is essential for achieving the perfect fudgy texture and clean cuts. Once cooled, use the foil/parchment overhang to lift the brownies out of the pan and cut them into approximately 16 square bars.
Notes
**High Altitude Baking Adjustments: My friend, who lived in Mexico, experienced her brownies consistently sinking in the middle due to high altitude. Upon returning to Texas, the recipe worked perfectly again. If you reside at a high altitude (generally 3,000 feet/900 meters above sea level or more), you may need to make a few common adjustments to your baking. These often include slightly reducing the sugar, increasing liquids, increasing flour, and sometimes reducing leavening agents or increasing the oven temperature. Lower atmospheric pressure at high altitudes causes leavening gases to expand more rapidly, which can lead to structural collapse. Experimentation is key to finding the perfect balance for your specific elevation.
Tried this recipe?Let us know how it was!
