Chocolate Haupia Pie: A Tropical Dream Dessert with Coconut & Chocolate Layers
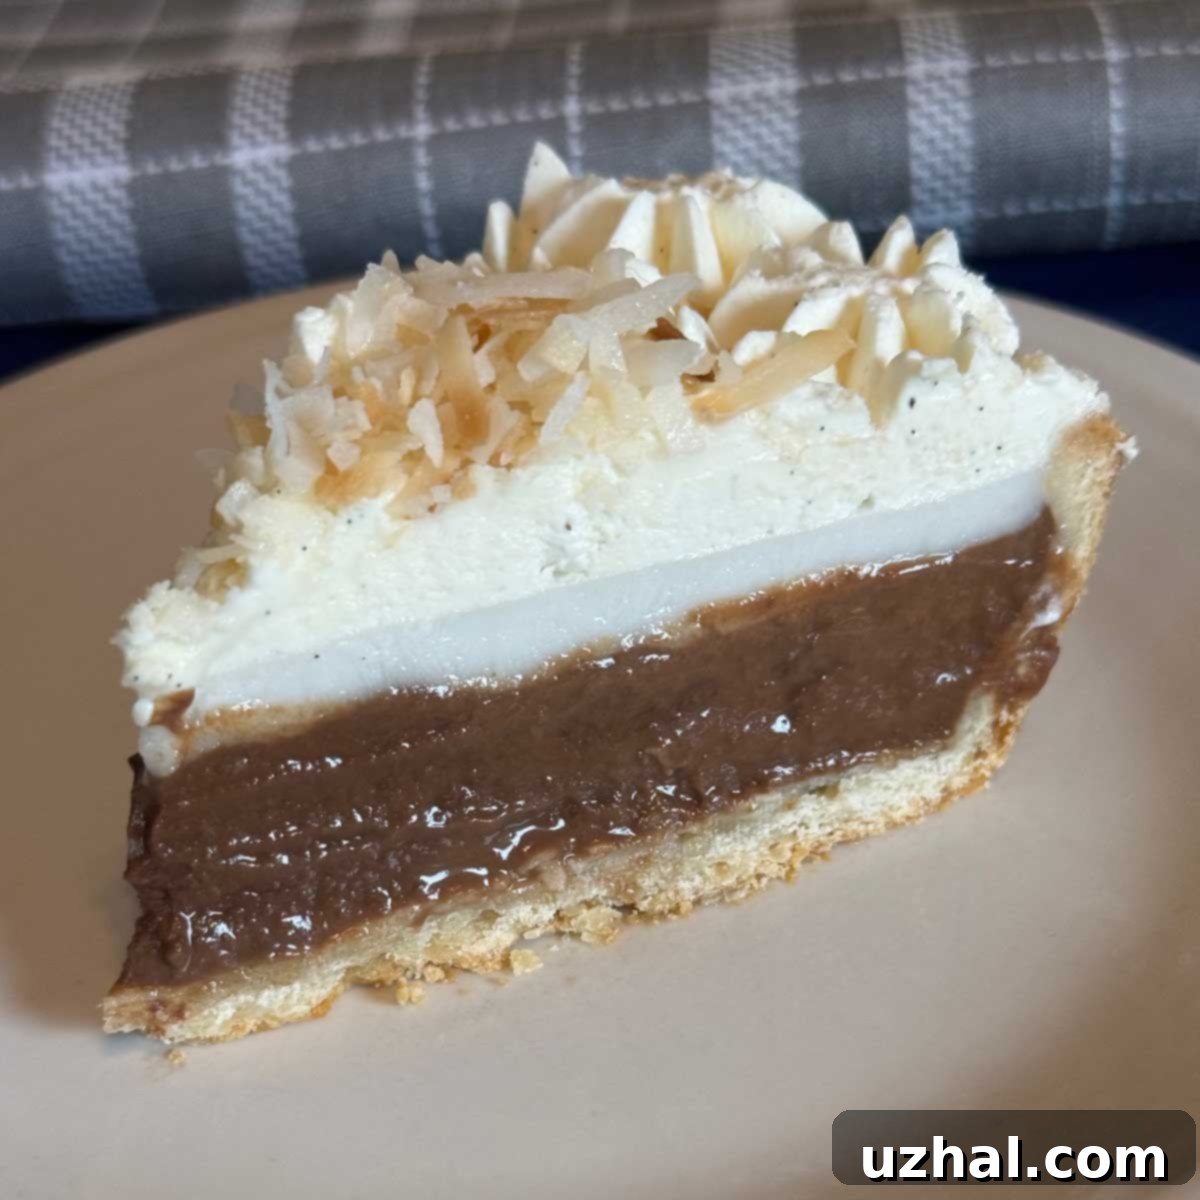
As a devoted baker who constantly seeks new and exciting recipes, especially for a loved one with a passion for all things coconut, discovering the Hawaiian Chocolate Haupia Pie was an absolute revelation. This exquisite dessert derives its name and inspiration from haupia, a traditional Hawaiian coconut pudding, usually enjoyed firm and cut into squares. In this particular adaptation, haupia transforms into a luxurious pie filling. What makes this pie truly special is its ingenious layering: one half of the haupia mixture is infused with rich chocolate, while the other remains a pure, creamy coconut delight. These distinct layers are then nestled into a perfectly baked crust and crowned with a generous swirl of fluffy whipped cream. The result is nothing short of extraordinary!
I distinctly remember making this pie almost on a whim, primarily to utilize some frozen pastry dough I had on hand. Little did I know, it would quickly become a cherished favorite. The moment I tasted this wonderful chocolate coconut pie, I was already planning my next batch. It’s an effortless creation that delivers immense satisfaction, marrying the tropical allure of coconut with the comforting decadence of chocolate in every single bite. If you’re searching for an easy yet impressive dessert that transports your taste buds to the sunny shores of Hawaii, look no further than this delightful Chocolate Haupia Pie.
Jump to Recipe
What is Haupia? Exploring the History and Meaning of This Hawaiian Delicacy
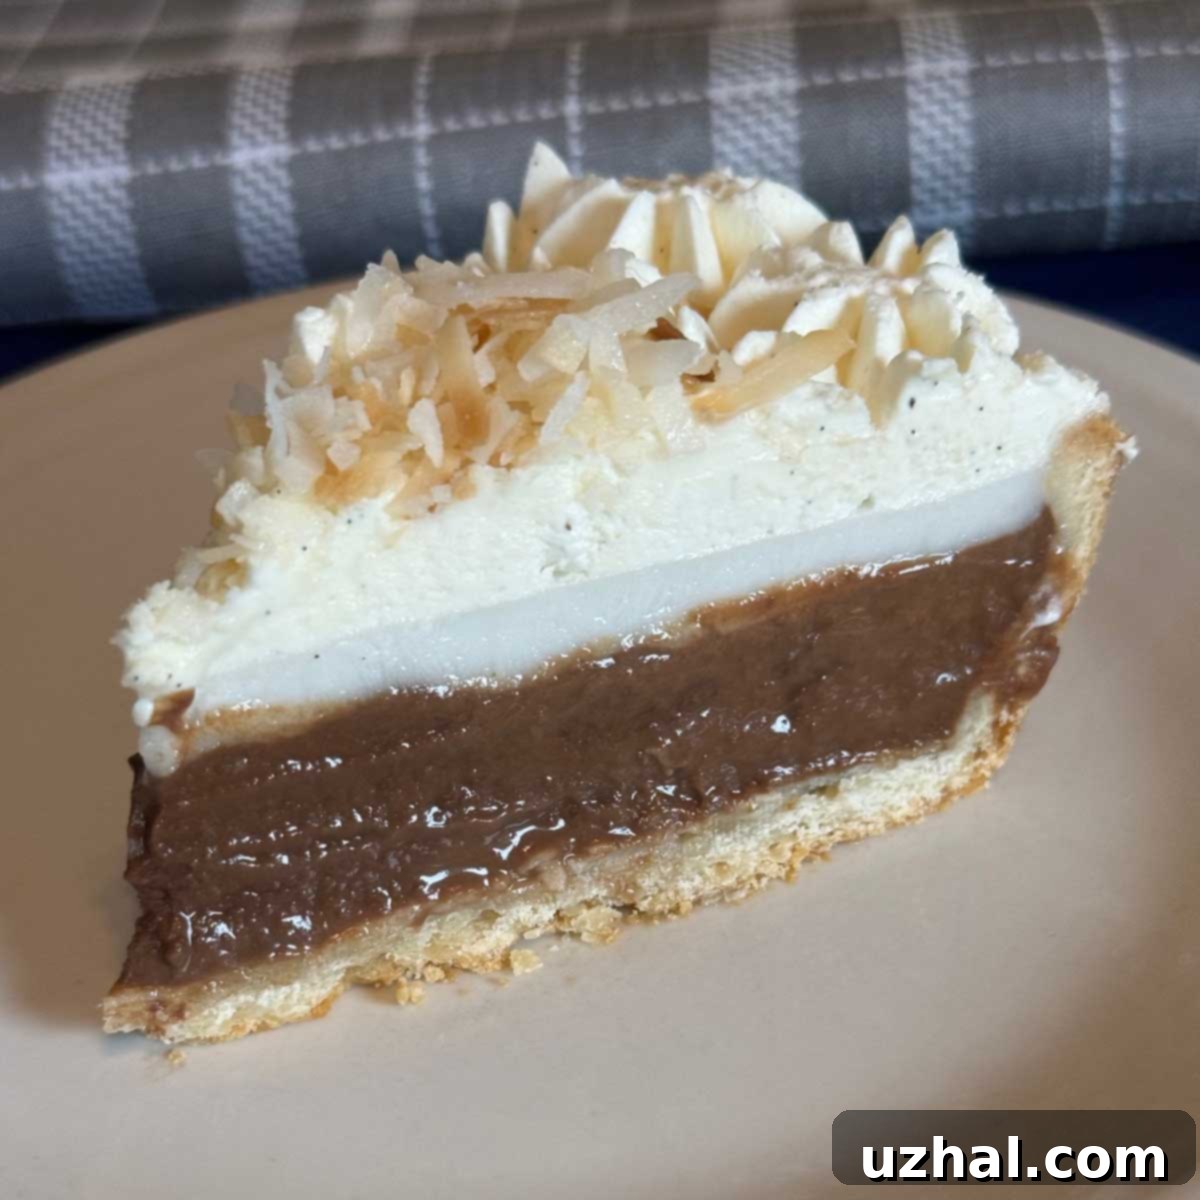
The word “Haupia” itself is quite intriguing, and its etymology provides a fascinating glimpse into Hawaiian culinary traditions. “Hau” translates to “cool” or “fresh,” while “pia” refers to Polynesian arrowroot (Tacca leontopetaloides), a starchy tuber native to the Pacific islands. Thus, haupia literally means a “cool arrowroot type dessert.” Traditionally, haupia was made using this native pia starch, which gave it a unique gelatinous yet creamy texture. It’s pronounced “how-pee-uh,” a phonetic spelling that helps avoid common mispronunciations. I confess, for a while, I mistakenly thought of it as “hop-pia,” conjuring images of a tiny bunny! This dessert is renowned for its appearance and consistency – it resembles a cold, firm gelatin or custard, but achieves its set texture not from animal gelatin, but from plant-based starch.
While historically rooted in arrowroot, modern haupia recipes, including those for Chocolate Haupia Pie, most commonly substitute cornstarch due to its widespread availability and ease of use. This adaptation makes the dessert more accessible for home cooks everywhere without significantly compromising its beloved texture. Haupia is often served simply, cut into squares, especially during luau celebrations and family gatherings. Its mild, sweet coconut flavor makes it a versatile base, perfect for incorporating other ingredients like chocolate, as seen in this delightful pie.
Why You’ll Love This Chocolate Haupia Pie: An Easy & Impressive Dessert
This Chocolate Haupia Pie isn’t just a dessert; it’s an experience. Its appeal lies in several key aspects that make it a standout choice for any occasion:
- Effortless Elegance: Despite its impressive appearance and rich flavor, the pie is surprisingly simple to prepare. It doesn’t require complex techniques or a lengthy list of specialized equipment, making it approachable for bakers of all skill levels.
- Unique Flavor Combination: The harmonious blend of creamy coconut haupia and decadent chocolate haupia creates a taste sensation that is both exotic and familiar. It’s a delightful departure from typical chocolate or coconut pies, offering a balanced sweetness that’s hard to resist.
- Perfect for Coconut Lovers: If you or someone you know adores coconut, this pie is an absolute must-try. The coconut flavor is prominent yet not overwhelming, perfectly complemented by the chocolate.
- Make-Ahead Friendly: The pie requires several hours of chilling to set properly, which makes it an excellent dessert to prepare in advance. This frees up your time on the day of serving, allowing you to focus on other aspects of your meal or gathering.
- Crowd-Pleaser: Its unique Hawaiian origin and delicious taste make it a memorable dessert that’s sure to impress guests and spark conversation. It’s a wonderful way to introduce a touch of aloha to your dessert table.
Making Chocolate Haupia Pie: A Simple Step-by-Step Guide for Success
Creating this delicious Chocolate Haupia Pie is a straightforward process, making it an ideal recipe for both novice and experienced bakers. The magic primarily happens on the stovetop and then in the refrigerator. Let’s walk through the steps, ensuring you achieve that perfect layered consistency.
-
First, ensure you have a cooled 9-inch deep dish pie crust ready. Whether it’s a homemade pastry crust or a store-bought graham cracker crust, having it pre-baked and cooled is crucial before you start preparing the filling.
-
Begin by preparing your cornstarch slurry. In a 2-cup liquid measuring cup or a small bowl, combine 1 cup of cold water with about ⅓ cup plus a tablespoon of cornstarch (approximately 56 grams). Whisk these two ingredients thoroughly until no lumps remain. This slurry is key to thickening your haupia filling, so a smooth consistency now will prevent a lumpy filling later. Set it aside for a moment.
-
Next, in a medium-sized saucepan set over medium heat, whisk together the 1 cup of whole milk, the entire can of unsweetened coconut milk, and the granulated sugar. Stir continuously until the sugar dissolves and the mixture comes to a gentle simmer. Once simmering, give your cornstarch slurry another quick whisk to re-incorporate any settled starch, then gradually whisk it into the simmering milk mixture. Continue whisking constantly for about 5 to 7 minutes. You’ll notice the mixture thickening considerably as it cooks. It should reach a pudding-like consistency.
-
Now comes the layering. Carefully divide the thickened haupia mixture. Set a clean bowl on a kitchen scale and tare it to zero. Pour approximately 18 ounces (about half, perhaps slightly less to ensure a more substantial chocolate layer) of the mixture into this bowl. If you don’t have a scale, you can simply eyeball the division, aiming for roughly half. This portion will be your pure coconut layer.
-
To the remaining mixture in the saucepan, add the chopped dark chocolate. Place the saucepan back over very low heat and whisk gently until the chocolate is completely melted and smoothly incorporated into the haupia. This will form your rich chocolate layer.
-
Flavoring is next. Stir 1 teaspoon of coconut extract and ½ teaspoon vanilla into the bowl containing the white coconut haupia mixture. For the chocolate mixture, stir in the remaining ½ teaspoon of vanilla extract. Allow both mixtures to cool for about 5 minutes. The chocolate filling will thicken noticeably quickly, while the white coconut filling may still seem quite loose and runny. Do not be alarmed by this; it will firm up beautifully as it chills.
-
Evenly spread the slightly cooled chocolate mixture into the prepared pie crust. Since the coconut mixture will still be quite fluid, you might want to let it cool for another 5-10 minutes to help it set slightly before layering. Then, carefully spoon the coconut mixture over the chocolate layer. Take your time to distribute it gently. Remember, it won’t be completely stiff at this point, but it will firm up during refrigeration.
-
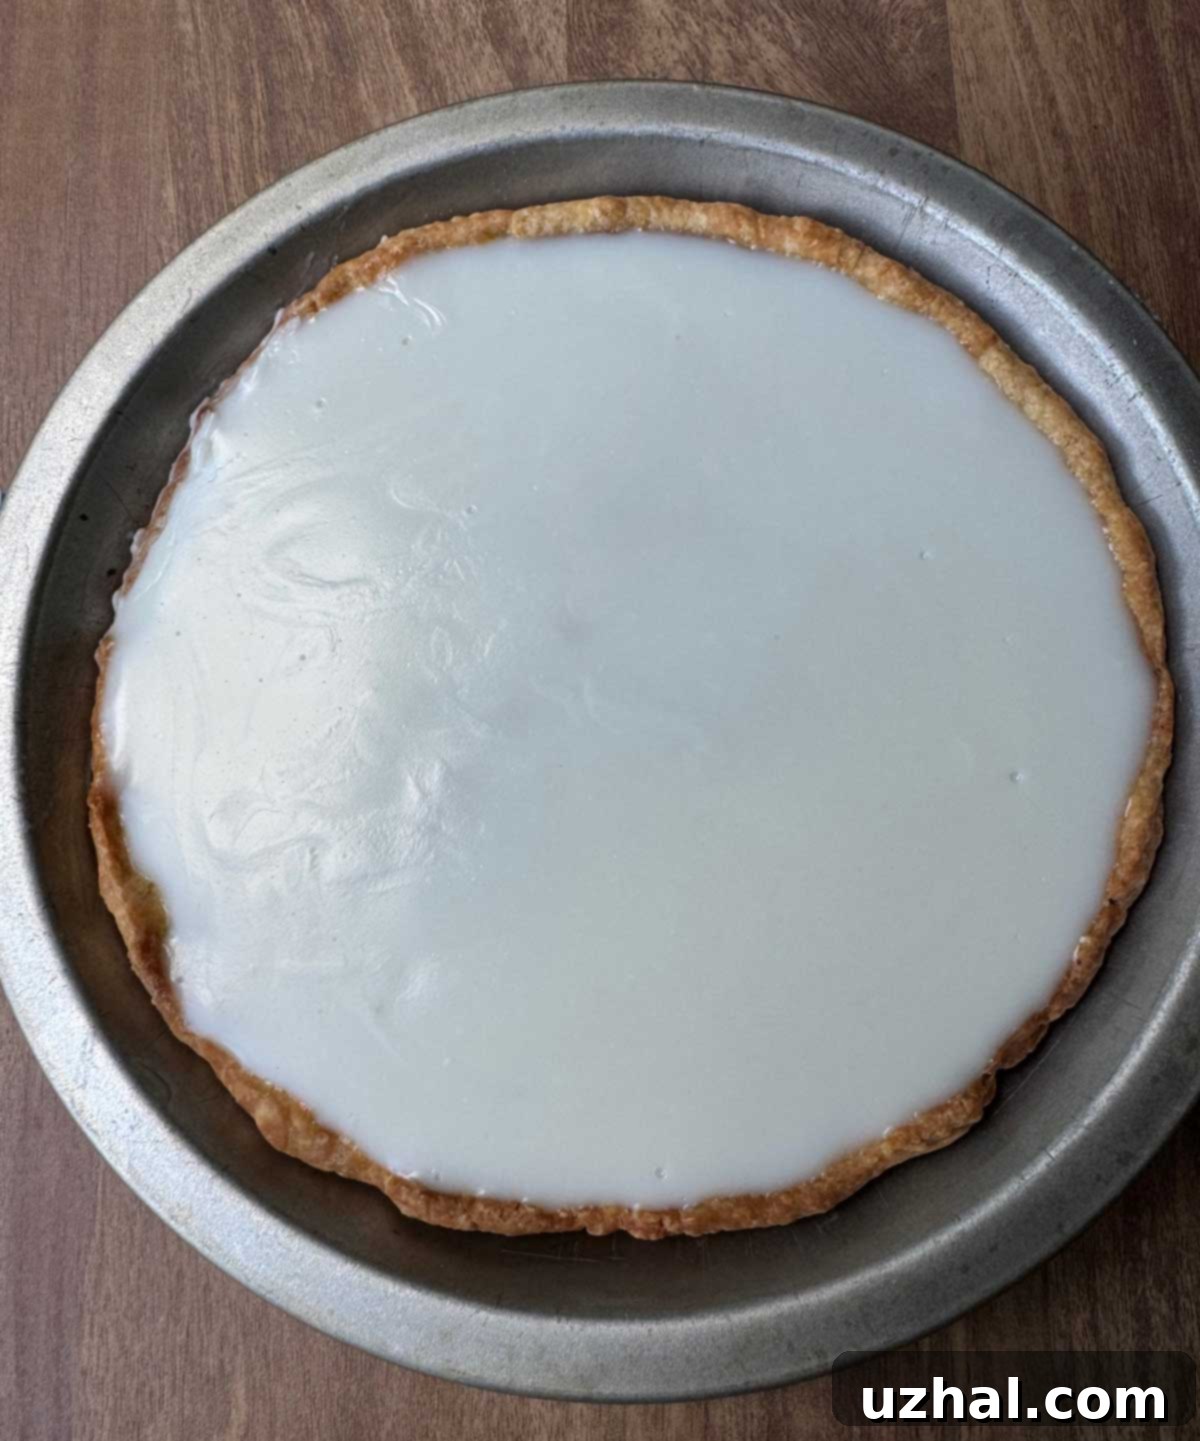
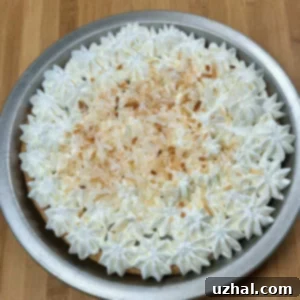
Finally, cover the pie gently with plastic wrap, ensuring the wrap doesn’t touch the filling directly (this prevents condensation). Chill the pie in the refrigerator for a minimum of 6 hours, or ideally, overnight. This chilling period is essential for the haupia to set properly and develop its characteristic firm, sliceable texture. I was genuinely impressed with how beautifully mine firmed up after about six hours, as shown in the image below.
Choosing and Preparing the Perfect Crust for Your Haupia Pie
The crust is the foundational element that brings structural integrity and an additional layer of flavor to your Chocolate Haupia Pie. While the recipe is versatile enough to accommodate various crust types, selecting the right one can significantly enhance your dessert experience. Initially, I used a pre-made frozen pastry dough I had on hand, primarily to clear out some freezer space. I blind-baked it to achieve a wonderfully flaky, buttery, and subtly salty base. A tip for blind-baking: be mindful of shrinkage! My crust did shrink quite a bit, making it slightly too small to contain all the delicious filling, but it was still a fantastic pie.
For your next batch, or if you prefer a different flavor profile, consider these excellent options:
- Classic Pastry Dough: A homemade or high-quality store-bought pastry dough offers a traditional, buttery foundation. Blind-baking is essential to prevent a soggy bottom crust, especially with a moist filling like haupia. To blind-bake, line your pie crust with parchment paper, fill it with pie weights or dried beans, and bake until the edges are golden. Remove the weights and paper, then continue baking until the bottom is lightly golden. This creates a sturdy barrier for the filling.
- Graham Cracker Crust: This is a highly recommended option for Haupia Pie. Its sweet, slightly spiced flavor profile complements the coconut and chocolate beautifully. You can easily make your own by crushing graham crackers and mixing them with melted butter and a touch of sugar, then pressing the mixture into your pie plate and chilling or briefly baking. Pre-made graham cracker crusts, like those from Keebler, are also a convenient choice, though they tend to be smaller, making them perfect for a half-batch of filling or individual mini pies.
- Vanilla Wafer or Shortbread Crust: For a different take, a crushed vanilla wafer or shortbread cookie crust would also provide a delightful texture and flavor contrast. Similar to the graham cracker crust, these can be pressed into the pan and chilled or lightly baked.
Experimenting with different crusts is part of the fun of baking. If you find yourself with half a can of coconut milk leftover from another recipe, consider making a smaller pie with a ready-made Keebler crust – they’re just the right size for a reduced portion of this heavenly filling.
Mastering the Flavor: Sweetness, Chocolate, and Extracts in Your Haupia Pie
Even though I wouldn’t describe myself as a die-hard coconut enthusiast, this Chocolate Haupia Pie truly won me over. One common concern with similar chocolate coconut pies, as noted in reviews on sites like Allrecipes, is that they can sometimes be overly sweet. However, I found the sweetness level in this particular recipe to be just right—rich and satisfying without being cloying. The interplay of flavors is what truly elevates this dessert.
To achieve the perfect balance, here are a few considerations:
- Chocolate Selection: The type of chocolate you choose for the chocolate layer significantly impacts the overall flavor. I strongly recommend using a dark chocolate with a cacao percentage between 60-70%. This provides a deep, slightly bitter counterpoint to the sweetness of the haupia and whipped cream, creating a more sophisticated and less sugary profile. While chocolate chips are convenient, high-quality dark chocolate bars, such as those from Trader Joe’s, will yield a richer and smoother texture. If you prefer a less intense chocolate flavor, you can reduce the quantity from 6 oz to about 3-4 oz, but I found 6 oz to be ideal for a pronounced chocolate presence.
- Layer Proportions: For a delightful visual and taste experience, consider pouring slightly *over* half of the haupia mixture into the chocolate portion. This will result in a slightly thicker and more prominent chocolate layer compared to the pure coconut-vanilla layer. The contrast in textures and flavors is part of what makes each bite so enjoyable.
- Extracts for Depth: Don’t underestimate the power of good quality extracts. McCormick coconut extract enhances the tropical essence, while Nielsen-Massey vanilla bean paste (which explains the beautiful little flecks in my pie!) provides a complex, aromatic vanilla note that elevates both layers. If you don’t have coconut extract, simply use additional vanilla extract in the coconut layer for a pure vanilla-coconut flavor.
- Whipped Cream Finish: The sweetened whipped cream topping is not merely a garnish; it’s an integral part of the pie’s flavor and texture harmony. Its light, airy sweetness and creamy texture provide a perfect contrast to the denser haupia layers, bringing all the elements together in a symphony of taste. The combination of dark chocolate, creamy coconut, and fresh vanilla-infused whipped cream is truly a match made in dessert heaven.
Storing and Freezing Your Chocolate Haupia Pie for Future Enjoyment
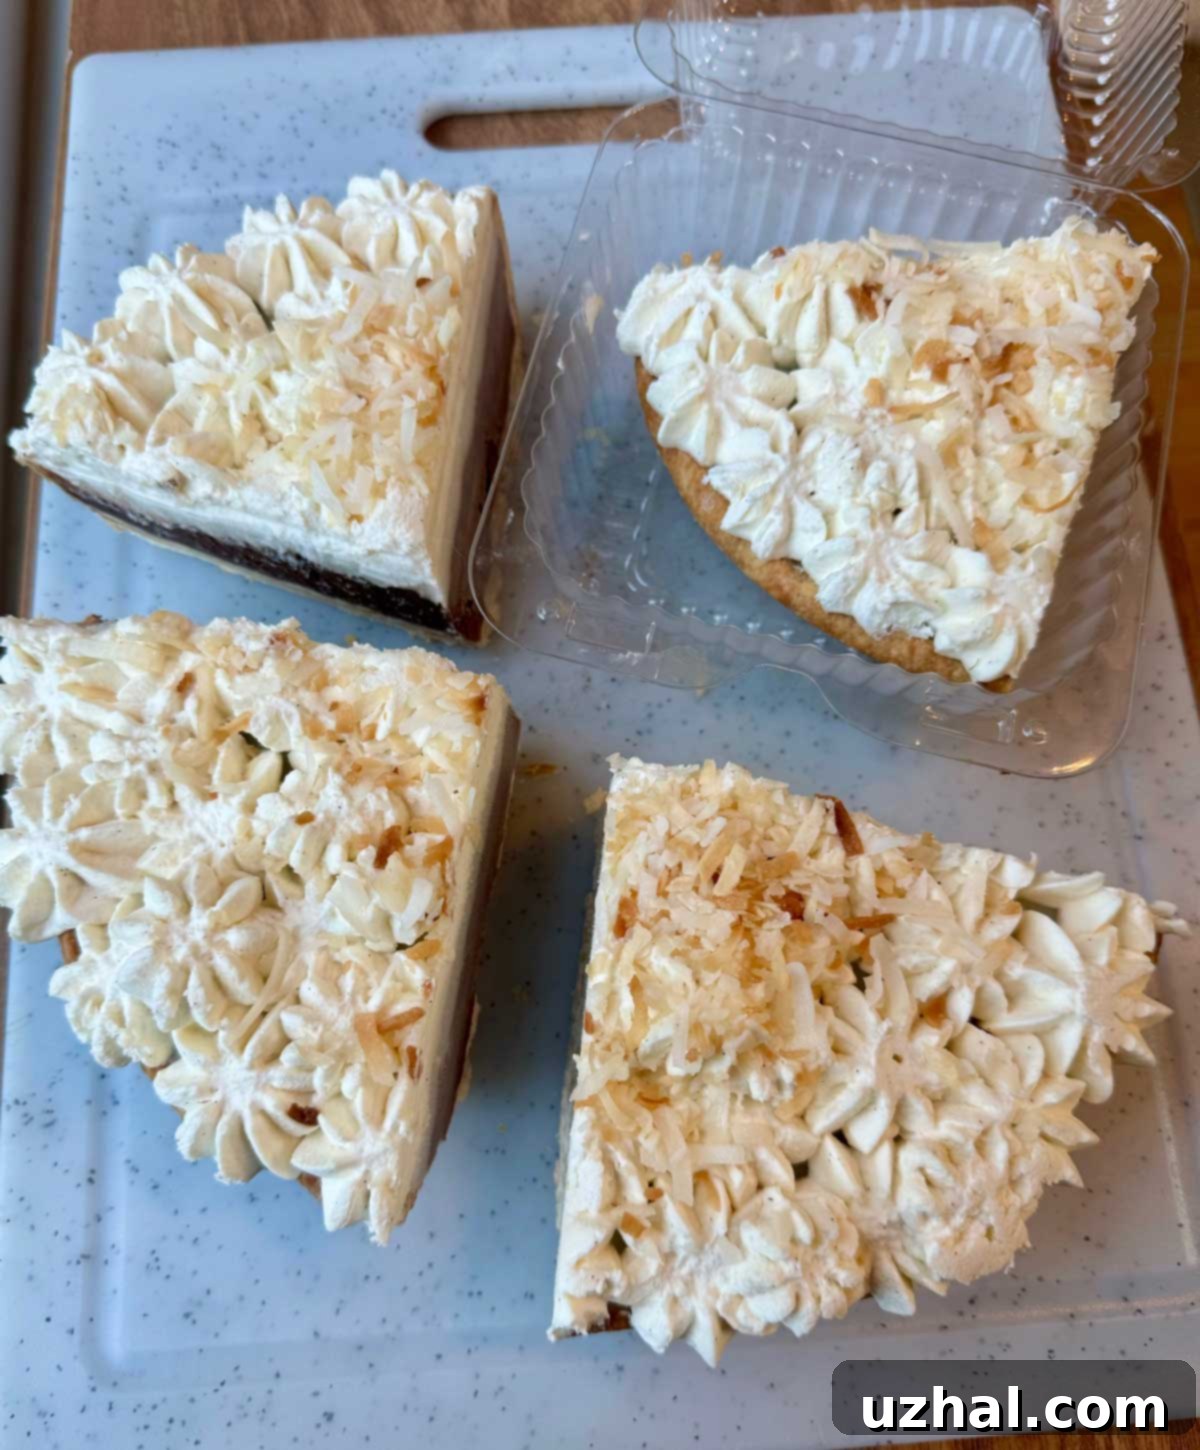
One of the practical advantages of Chocolate Haupia Pie is its adaptability for storage, including freezing. After our initial indulgence, I chose to freeze the remainder of the pie, cutting it into generously sized sections before wrapping them individually. This method proved highly effective, and I thawed two pieces to assess the texture, which held up remarkably well.
Here are some detailed tips for storing and freezing your haupia pie:
- Initial Chilling is Key: For the best results, always ensure your pie is thoroughly chilled and set for at least 6 hours, or preferably overnight, before attempting to slice or freeze it. This firmness is crucial for maintaining its structure.
- Short-Term Refrigeration: A freshly made pie, without whipped cream, can be stored in the refrigerator, covered loosely with plastic wrap or aluminum foil, for up to 3-4 days. Add the whipped cream just before serving for the freshest taste and best texture.
- Freezing Whole or Sliced: To freeze, you have two options:
- Whole Pie: If freezing the entire pie, ensure it’s completely chilled and set. Place it in the freezer uncovered for 1-2 hours until firm. Then, wrap it tightly in several layers of plastic wrap, followed by a layer of aluminum foil. This prevents freezer burn.
- Individual Slices (Recommended): For easier portioning and thawing, cut the chilled pie into individual slices or large sections. Place these slices on a baking sheet lined with parchment paper and freeze for 1-2 hours until solid. Once firm, wrap each slice tightly in plastic wrap, then place them in an airtight freezer-safe container or a heavy-duty freezer bag.
- Thawing Frozen Pie: When you’re ready to enjoy a slice, transfer it from the freezer to the refrigerator and allow it to thaw slowly for several hours, or overnight. You might notice some minor seepage near the crust as it thaws, which is usually not a significant issue and doesn’t affect the overall taste or texture much.
- Adding Whipped Cream (Post-Thaw): For optimal freshness and appearance, it’s best to add freshly whipped cream just before serving, even if the pie has been frozen and thawed.
- Best Practice for Serving: Ideally, plan to make and chill the pie on day one. On day two, prepare and add the whipped cream, then serve shortly after. However, based on my experience, the pie freezes remarkably well, offering a convenient option for enjoying this delightful Hawaiian dessert over a longer period.
An Easy & Exotic Dessert: Chocolate Haupia Pie for Every Occasion
Whether you’re looking for an uncomplicated yet impressive pie or simply craving a taste of the tropics, this Chocolate Haupia Pie is an excellent choice. Its ease of preparation, coupled with its unique and delicious flavor profile, makes it a true winner. The recipe relies mostly on readily available pantry staples, ensuring that you won’t have to hunt for obscure ingredients. One of its appealing characteristics is that no eggs are required for the filling, simplifying the process and making it accessible to those with egg sensitivities.
Furthermore, the topping offers flexibility. While freshly whipped cream, sweetened and flavored with vanilla, provides the ultimate light and airy contrast to the rich filling, you can certainly opt for convenience. If you’re a fan of Cool Whip or another pre-made whipped topping, feel free to use it to save time without sacrificing much of the pie’s overall appeal. This adaptability ensures that anyone can enjoy this fun Hawaiian dessert, regardless of their baking experience or time constraints.
Essential Ingredients for Your Chocolate Haupia Pie: Tips & Substitutions
Understanding each ingredient’s role and potential substitutions can empower you to create the best possible Chocolate Haupia Pie. Here’s a closer look:
- Crust: As discussed, a 9-inch deep-dish crust is ideal. I personally used a homemade buttery pastry dough, which I blind-baked to ensure flakiness and prevent sogginess. A store-bought graham cracker crust is another fantastic, easy option, offering a complementary sweetness and crunch. For a vegan version, ensure your chosen crust is dairy-free.
- Cornstarch: This is the crucial thickening agent for haupia. Precision is important here. I used 56 grams, which is approximately ⅓ cup plus one tablespoon, or just under ½ cup. Using a kitchen scale for accuracy is highly recommended, as exact measurements will ensure your haupia sets perfectly—not too runny, not too firm.
- Coconut Milk: Opt for full-fat, unsweetened canned coconut milk for the richest flavor and creamiest texture. Brands like Native Forest are known for their clean, authentic coconut taste. Avoid “light” coconut milk or coconut beverage from the dairy aisle, as these will not provide the necessary fat content for proper thickening and flavor.
- Water vs. Milk in Slurry/Filling: Some haupia recipes offer the option of using 1 cup of milk in place of the cold water for the cornstarch slurry and as part of the coconut filling. I chose to use cold water for the slurry and whole milk in the main filling mixture. If you’re making a vegan version of this pie, unsweetened almond milk or another plant-based milk would work wonderfully for both the slurry and the filling, providing a rich, dairy-free alternative.
- Sugar: A full cup of granulated sugar is specified in the recipe. While some might find this generous, I found it created a perfectly balanced sweetness when combined with the dark chocolate and creamy coconut. If you prefer a less sweet dessert, you could experiment by reducing it by 1/4 cup, but be aware it might slightly alter the texture of the filling. The pinch of salt is essential to balance all that sweetness, enhancing the other flavors.
- Salt: Don’t skip the pinch of salt! It’s a small but mighty ingredient that helps to balance the sweetness of the sugar and enhance the overall depth of flavor in the haupia layers.
- Dark Chocolate: For the chocolate layer, 6 oz (170 grams) of chopped dark chocolate is ideal. While many recipes suggest chocolate chips, high-quality dark chocolate bars (e.g., 60-70% cacao) will melt more smoothly and provide a more intense, less sweet chocolate flavor. I often use Trader Joe’s dark chocolate bars. If you desire a less sweet chocolate layer, you can certainly opt for a 70% cacao chocolate. For a milder chocolate intensity, you can reduce the amount of chocolate by half, though I found 6 oz provided a robust and satisfying chocolate presence.
- Coconut and Vanilla Flavorings: These extracts are vital for enhancing the distinct flavors of each layer. I used McCormick coconut extract for an authentic tropical boost and Nielsen-Massey vanilla bean paste for its superior flavor and visual appeal (those lovely little flecks!). If coconut extract isn’t available, simply use an additional teaspoon of good quality vanilla extract in the coconut layer. Pure vanilla extract is always preferred over imitation.
- Whipped Cream: For the ultimate topping, freshly whipped heavy whipping cream, sweetened with sugar and flavored with vanilla, is recommended. It creates a light, airy, and luscious contrast to the dense filling. For those preparing a vegan pie, many excellent dairy-free whipped toppings are available that can save you a step and still deliver a delicious finish.
- Cake in a Pie Crust
- Favorite Desserts of 2010 (Still Good!)
- Basic Pastry Cream #1
- Coconut Cream Pie with Half & Half
- Coconut Upside Down Cake
Recipe
Chocolate Haupia Pie
Anna
Pin Recipe
Ingredients
- 1 9-inch baked pastry crust or graham crust
Cornstarch Slurry
- 1 cup cold water (230 grams)
- ⅓ cup plus a tablespoons of cornstarch, weigh 56 grams or measure with a light hand** (56 grams)
Haupia Filling
- 1 cup milk (230 grams)
- 13.5 oz can unsweetened coconut milk
- 1 cup granulated sugar (200 grams)
- 1 pinch salt
- 6 oz dark chocolate, chopped (170 grams)
- 1 teaspoon vanilla extract
- 1 teaspoon coconut extract or more vanilla
Sweetened Whipped Cream
- 1 ½ cups heavy whipping cream
- ¼ cup sugar
- 1 ½ teaspoons vanilla extract
- Toasted coconut for garnish (optional)
Instructions
-
Have ready a cooled 9-inch deep dish crust.
-
In a 2-cup liquid measuring cup, combine cold water and cornstarch and whisk to make a slurry.
-
In a medium-sized saucepan over medium heat, whisk together the 1 cup of whole milk, can of coconut milk, and sugar and bring to a simmer. When it is simmering, whisk the cornstarch slurry again, then whisk it into the simmering mixture. Whisk until thickened. This should take about 5 to 7 minutes.
-
Set a clean bowl on the scale, set the tare to zero and pour about 18 oz of the mixture (around half, but a little under) into the clean bowl. You can also just eyeball it if you’d rather.
-
Add the chocolate to the saucepan with the remaining coconut mixture. Set over low heat and whisk just until the chocolate is fully melted.
-
Stir 1 teaspoon of coconut extract and ½ teaspoon vanilla into the bowl with the white coconut mixture, then stir ½ teaspoon of vanilla into the chocolate mixture. Let both mixtures cool for about 5 minutes.
-
Spread the chocolate mixture evenly in the pie crust. The coconut mixture will still be a little cool and runny at this point, so you may want to let it cool for another 10 minutes. Carefully spoon it over the chocolate mixture. It will not be stiff or very thick at this point.
-
Cover and chill for 6 hours.
Whipped Cream Topping
-
After 6 hours, prepare sweetened whipped cream. Whip the cream until stiff peaks start to form, then sweeten with sugar and flavor with vanilla. Spread or pipe the whipped cream topping over the coconut mixture.
