Mastering the New York Times Chocolate Chip Cookie: Tips, Tricks & The Ultimate Recipe
The New York Times Chocolate Chip Cookie recipe, often affectionately known as “The Jacques Torres Cookie” or simply “NYT Chocolate Chip Cookies,” has earned its legendary status for a reason. For many, myself included, it represents the pinnacle of homemade chocolate chip perfection. This isn’t just *a* chocolate chip cookie recipe; it’s *the* chocolate chip cookie recipe that countless bakers aspire to master.

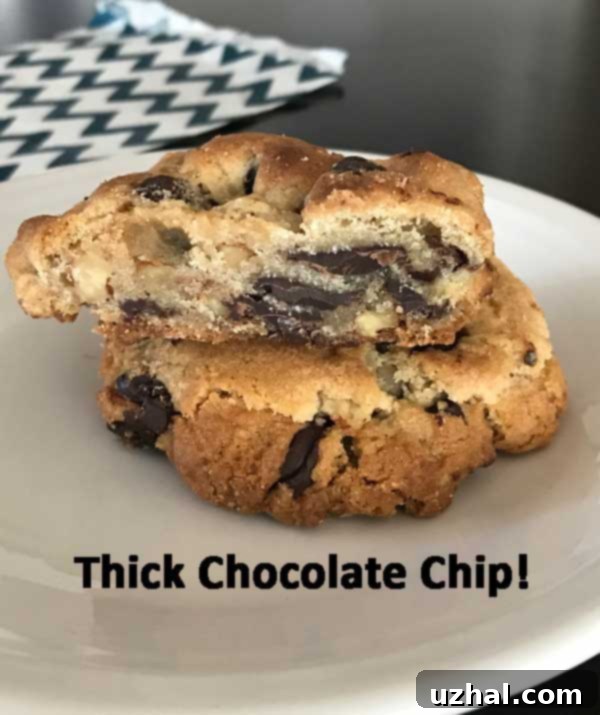
In my humble opinion, these cookies consistently deliver an unparalleled experience. Each bite is a symphony of textures: a gloriously thick, bumpy exterior that gives way to a soft, irresistibly chewy center, all framed by perfectly crispy, crumbly edges. And, of course, they are loaded with an abundance of rich, melt-in-your-mouth chocolate. What sets them apart is their distinct character – they are not overly soft, nor do they possess a raw, doughy quality. Instead, they offer a delightful contrast that elevates them above standard cookie fare. The signature ribbons of melted chocolate running through the cookies are undeniably a major part of their charm and flavor profile. Having baked countless batches over the years, I’ve gathered a wealth of insights and perfected my approach. For those eager to start, I’ve also shared a convenient small-batch NYT chocolate chip cookies recipe, complete with precise gram measurements.
The Magic of the Flour Blend: Cake Flour Plus Bread Flour Explained
One of the distinctive elements of the New York Times Chocolate Chip Cookie recipe is its specific flour combination: cake flour and bread flour. This might seem unusual to home bakers accustomed to using a single type of flour. The rationale behind this blend is to achieve a protein level remarkably similar to that of standard all-purpose flour, but with a nuanced difference in gluten development. All-purpose flour typically hovers around 10-12% protein. Cake flour, with its lower protein content (around 7-8%), contributes to tenderness and a delicate crumb, while bread flour, boasting a higher protein content (around 12-14%), provides strength and chewiness. When combined, they strike a perfect balance, yielding a cookie that is both tender and wonderfully chewy.
While some bakers opt to simplify the process by using solely all-purpose flour, and I sometimes do this myself, my extensive experience with these cookies leads me to a clear conclusion: the bread and cake flour mix version consistently produces superior results. It might seem like an extra step, but the difference in texture is tangible. The dual-flour approach seems to create a more pronounced contrast between the soft, yielding interior and the slightly crispier edge, a hallmark of these famous cookies. My updated theory is that the common bleaching process of most cake flour plays a role. Bleached flour tends to absorb liquids differently and can contribute to a softer, more delicate texture, which might be the secret behind that perfect crumb. Don’t skip this step if you want the authentic NYT cookie experience!

The Ultimate Chocolate Choice: Demystifying Fèves and Chips
The original Jacques Torres recipe specifically calls for bittersweet chocolate disks or “fèves.” For those unfamiliar, fèves are essentially high-quality chocolate disks designed to melt more evenly and create those beautiful, glossy ribbons of chocolate throughout the cookie dough. Their shape allows them to melt into luscious pools, rather than holding their form like traditional chocolate chips. This is a critical factor in achieving the signature look and mouthfeel of the NYT cookie.
While fèves undeniably deliver an exceptional experience, they can sometimes be harder to source or more expensive. In practice, I often turn to Ghirardelli bittersweet chips as a fantastic alternative. While Ghirardelli chips might not melt into quite the same dramatic ribbons as professional fèves, their size, quality, and robust bittersweet flavor complement the rich dough beautifully. The key here is to choose a high-quality bittersweet chocolate (around 60-70% cacao) that you genuinely enjoy eating on its own. Avoid overly sweet or waxy chocolate. The chocolate is a star ingredient in this recipe, so investing in good quality will significantly impact the final taste. Trust me, these cookies truly aren’t the same without the right kind of chocolate – whether it’s genuine fèves or a premium bittersweet chip like Ghirardelli.
The Secret to Depth of Flavor: Shape Dough and Chill Individual Balls
If there’s one non-negotiable step in achieving the legendary status of these cookies, it’s the dough chilling process. I’m continually amazed by the transformative power of chilling the dough for at least 48 hours. This isn’t just about making the dough easier to handle; it’s a crucial step that allows the flavors to meld, the flour to fully hydrate, and the sugars to fully dissolve, leading to a richer, more complex taste and a superior texture. The cookies spread less, bake more evenly, and develop an incredible depth of flavor that is simply not present in unchilled dough.
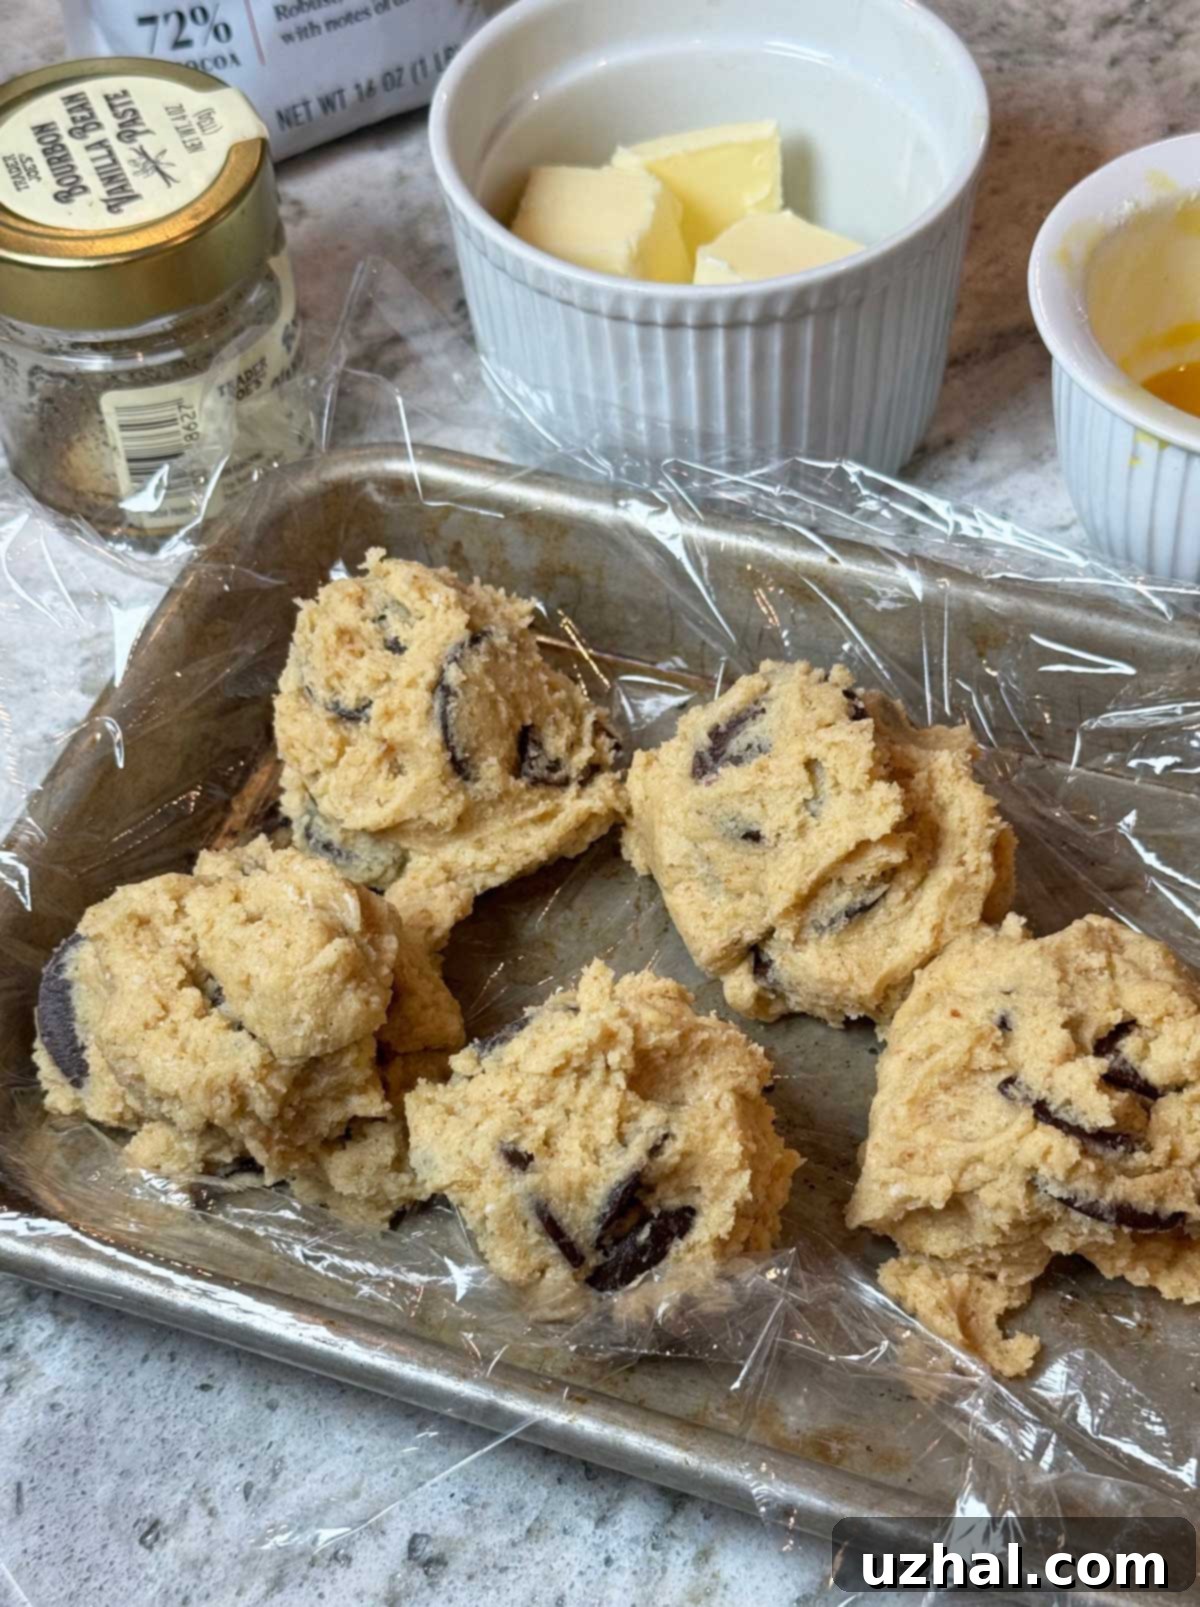
For even more exceptional results, consider aging the dough in the refrigerator for a few days, then transferring it to the freezer for an extended period – a day, a week, or even a month! Baking from frozen dough often yields cookies with an even chewier center and crispier edges. My preferred method is to shape the dough into individual balls immediately after mixing, place them on a plate, cover them, and chill. The next day, I might bake one or two to satisfy an immediate craving. Over the following days, I’ll bake a few more, always noticing an improvement in taste and texture with each passing day. The very best cookies I ever made for a special event were prepared this way: dough balls chilled for a day, then frozen for several weeks before baking. This prolonged chilling and freezing truly unlocked their full potential, proving that patience is a virtue in baking these masterpieces.

Baking Brilliance: Convection Oven Tips for NYT Chocolate Chip Cookies
If you’re lucky enough to have a convection oven, you’ll find it can be a game-changer for these cookies. Convection ovens circulate hot air evenly, which can lead to more consistent baking, a slightly faster cook time, and often, a thicker cookie. I frequently bake my small-batch cookies in a Breville toaster oven with convection, my wall convection oven, and now a Miele using its “Surround” mode, all delivering excellent results.
When baking the New York Times Chocolate Chip Cookies in a convection oven, you’ll generally want to adjust the temperature and/or baking time. A good starting point is to bake at 350°F (175°C) for approximately 15 minutes. However, baking times can vary significantly depending on your specific oven and, critically, the temperature of your dough. If your dough balls are coming straight from the refrigerator or freezer, they will require a longer baking time – sometimes up to 20-25 minutes or even more, especially if frozen solid. Always keep a close eye on the cookies; they should be golden brown around the edges and still slightly soft in the center when removed from the oven, as they will continue to set as they cool. Don’t be afraid to experiment with your oven to find the perfect balance.
Convenience in Every Bite: Small Batch NYT Chocolate Chip Cookies
Sometimes, you don’t need a full batch of 18 giant cookies, but the craving for that perfect NYT chocolate chip cookie is undeniable. That’s where this small-batch recipe comes in handy! It’s carefully scaled down to produce just a few glorious cookies, making it perfect for an impromptu treat or for those times when you only have half an egg left. I’ve meticulously updated this small-batch version over time, providing both precise gram measurements (which I highly recommend for accuracy) and volume measurements for convenience.
One of the unique aspects of scaling down this recipe is the use of “half an egg.” To achieve this, simply whisk a large egg thoroughly in a small bowl, then measure out approximately 24 grams (about 2 tablespoons) of the beaten egg. This ensures you maintain the correct moisture balance for the smaller quantity of dough. If you don’t have both cake and bread flours on hand for the small batch, you can substitute with 120 grams of all-purpose flour, which is roughly equivalent to ¾ cup plus 2 ½ tablespoons. While the blended flours are ideal, the all-purpose option will still yield a delicious cookie. This small batch ensures you can enjoy these exquisite cookies without the commitment of a large recipe.
Small Batch NYT Chocolate Chip Cookie Ingredients (Grams & Volume):
- 60 grams bread flour (½ cup minus 1 tablespoon)
- 60 grams cake flour (½ cup)
- ¼ teaspoon plus a pinch of baking soda
- ⅜ teaspoon baking powder
- ⅜ teaspoon salt
- 70 grams unsalted butter (5 tablespoons), softened
- 62 grams brown sugar (¼ cup packed plus 1 tablespoon)
- 56 grams granulated sugar (¼ cup plus ½ tablespoon)
- 24 grams beaten egg (approx. ½ of a large egg)
- ½ teaspoon vanilla extract
- ¾ to 1 cup bittersweet chocolate chips or fèves
How to Make the Small Batch NYT Cookies: Step-by-Step
Crafting these smaller batches is just as rewarding and impactful as the full recipe. Follow these steps for perfect results:
- First, accurately weigh your flour(s) – remember, weight measurements are always best for baking precision. In a medium bowl, whisk together the flour(s), baking powder, baking soda, and salt. Set this dry mixture aside.
- In a separate, larger bowl, using an electric mixer (a stand mixer with a paddle attachment is ideal, but a good handheld mixer works well too), beat the softened butter with both the brown and granulated sugars until the mixture is light, fluffy, and creamy. This creaming process incorporates air, which contributes to the cookies’ texture.
- Carefully add the measured 2 tablespoons (24 grams) of beaten egg and the vanilla extract to the butter-sugar mixture. Beat just until everything is thoroughly blended. Overmixing at this stage can lead to tough cookies.
- With the mixer on its lowest speed (or by hand with a sturdy spatula), gradually add the dry flour mixture to the wet ingredients. Mix only until the flour is just incorporated and no streaks remain.
- Finally, stir in your chosen bittersweet chocolate chips or chunks. Once the chocolate is evenly distributed, shape the dough into large, uniform balls.
- This next step is crucial: chill the dough balls for as long as you can possibly stand it! A minimum of 24 hours in the refrigerator is recommended for optimal flavor and texture development. Longer chilling (48-72 hours) or even freezing for a week or more will only improve them.
- When you’re ready to bake, preheat your oven to 350°F (175°C). Place the cold dough balls on a baking sheet lined with parchment paper or a silicone baking mat.
- Bake for approximately 18 minutes, or until the edges are golden brown and the centers still appear slightly soft and gooey. Remember that baking times will vary depending on your oven’s calibration and whether you’re using a convection setting (which might bake them faster).
- Allow the cookies to cool on the baking sheet for 5-10 minutes before transferring them to a wire rack to finish cooling completely. This allows them to set properly without breaking.

For those interested in the origin, here’s a link to the original New York Times Chocolate Chip Cookie recipe. My adapted version, particularly with the emphasis on gram measurements for accuracy, aims to bring you the best possible result. For truly consistent and professional-level baking, always measure ingredients by weight.
One minor note about these magnificent cookies: they are at their absolute peak freshness on the day they are baked. Their magic begins to fade after that. However, don’t despair! They freeze exceptionally well. If you plan to bake ahead or have leftovers, simply freeze the baked cookies. You can then thaw them at room temperature or gently warm them in the oven for a quick revival.
As a final recommendation for any avid home baker, I highly suggest considering a NYT Cooking subscription. What initially seemed like just another recipe platform has become an invaluable resource. Not only are the recipes consistently excellent, but the vibrant comment section often provides ingenious tips, substitutions, and troubleshooting advice from a global community of passionate cooks. It’s a goldmine of culinary wisdom that has significantly enriched my baking journey.
Related Deliciousness
- Jacques Torres Secret Chocolate Chip Cookie Recipe
- Convection Oven Granola
- Amazing Hard Boiled Egg Chocolate Chip Cookies
- New York’s Best Cupcakes
- New York Cheesecake — My Favorite Recipe
Recipe

(The Latest) New York Times Chocolate Chip Cookies
Anna
Pin Recipe
Ingredients
- 2 cups minus 2 tablespoons cake flour (240 grams or 8 ½ oz by weight)
- 1 ⅔ cups bread flour (240 grams or 8 ½ oz by weight)
- 1 ¼ teaspoons baking soda
- 1 ½ teaspoons baking powder
- 1 ½ teaspoons coarse salt
- 2 ½ sticks unsalted butter (280 grams)
- 1 ¼ cups light brown sugar (250 grams)
- 1 cup plus 2 tablespoons sugar (225 grams)
- 2 large eggs
- 2 teaspoons natural vanilla extract
- 3 cups of the best chocolate chips you can find
- Sea salt — good but I omit it half the time and the cookie are still great.
Instructions
-
Thoroughly mix the flours, baking soda, baking powder and salt in a bowl. Set aside.
-
Using a mixer fitted with paddle attachment (a handheld mixer is fine), beat the butter and sugar until light and creamy, scraping side of the bowl often.
-
Add eggs, one at a time, mixing well after each addition. Stir in the vanilla. By hand (or using lowest speed of mixer if using stand mixer and paddle), stir in the flour mixture. When flour is incorporated, stir in the chocolate. At this point, I like to shape the cookies and chill the shaped balls.
-
Line a baking sheet with parchment paper and scoop out about 18 equal size balls. Chill until the dough is firm and the balls don’t stick together, then put in a bag and chill overnight or for a few days. If baking way ahead of time, put the dough balls in a freezer bag, pressing out any extra air, and bake later.
-
When ready to bake, preheat oven to 350 degrees and bring dough to room temperature.
-
Line a baking sheet with parchment paper or a nonstick baking mat and arrange about 6 dough balls per sheet. Press the tops down slightly and sprinkle tops with sea salt if desired.
-
Bake for 18 to 20 minutes. Let cool on the baking sheet for 5 to 10 minutes and then transfer to a cooling rack to finish cooling.
-
I usually transfer them to the refrigerator to quick cool and prefer the chocolate set rather than warm and melt-y
Notes
