The Ultimate Black Magic Cake: Your Guide to a Deeply Rich and Moist Chocolate Masterpiece
Every home baker should have a repertoire of essential recipes, and a truly spectacular chocolate cake undoubtedly tops that list. Among the myriad of chocolate cake recipes available, two stand out for their enduring popularity and undeniable deliciousness: the classic Black Magic Cake and Hershey’s Perfectly Chocolate Cake. While both deliver an intensely satisfying chocolate experience, Black Magic Cake, with its unique inclusion of buttermilk and hot coffee, offers an exceptionally moist crumb and profound depth of flavor that makes it a true culinary gem. It’s often praised as a “dump-in-the-bowl” kind of cake, surprisingly simple to prepare, yet yielding results that taste anything but effortless. This recipe ensures a luscious, rich chocolate cake every single time.

The Widespread Allure and Enduring Popularity of Black Magic Cake
It seems that the legendary Black Magic Cake has a way of consistently appearing on everyone’s radar, earning accolades and becoming a staple in countless kitchens worldwide. Just this week, its fame was underscored by two distinct occurrences that highlight its incredible versatility and universal appeal. My sister-in-law, a discerning baker with impeccable taste, enthusiastically shared a link to Sally’s Baking Addiction, where this very recipe is lauded as “the best cake in the world” – an impressive claim often enhanced by the clever addition of black cocoa for an even more dramatic hue and profound chocolate flavor. This endorsement from a popular baking blog speaks volumes about its quality and consistent results.
Not long after, a fascinating story emerged from Pennsylvania, capturing the attention of food enthusiasts. The closely related Hershey’s Perfectly Chocolate recipe was skillfully adapted by a talented lady to create “The Best Chocolate Cake in Pennsylvania” at the state’s renowned Farm Show. Adorned with a lavish peanut butter frosting, this particular creation captured hearts and palates, proving the foundational recipe’s adaptability and crowd-pleasing potential beyond measure. These anecdotes are just a glimpse into why Black Magic Cake continues to captivate bakers and eaters alike: its deep, rich chocolate flavor, incredibly moist texture, and straightforward preparation make it a consistent winner for both novice and experienced bakers.
What truly sets Black Magic Cake apart and contributes to its widespread adoration is its unique combination of liquid ingredients: buttermilk and hot coffee. The acidity from the buttermilk reacts with the baking soda, contributing significantly to the cake’s remarkably tender crumb and subtle tanginess. This interaction creates a light and airy texture that is surprisingly decadent. Meanwhile, the hot coffee doesn’t necessarily impart a strong coffee flavor, but rather acts as a secret weapon, intensifying the chocolate, making it taste even more profound, dark, and irresistible. This magical interplay of ingredients creates a cake that is not only intensely chocolatey but also remarkably light, fluffy, and incredibly moist – qualities that are often hard to achieve simultaneously in a single recipe. Its ease of preparation, often described as a “one-bowl” or “dump cake” method, further adds to its appeal, making it a go-to choice for last-minute desserts, casual family gatherings, or even sophisticated special occasions when you want to impress without the stress of complicated techniques.
Elevating the Experience: The Black Cocoa Variation for an Ultra-Dark Chocolate Cake
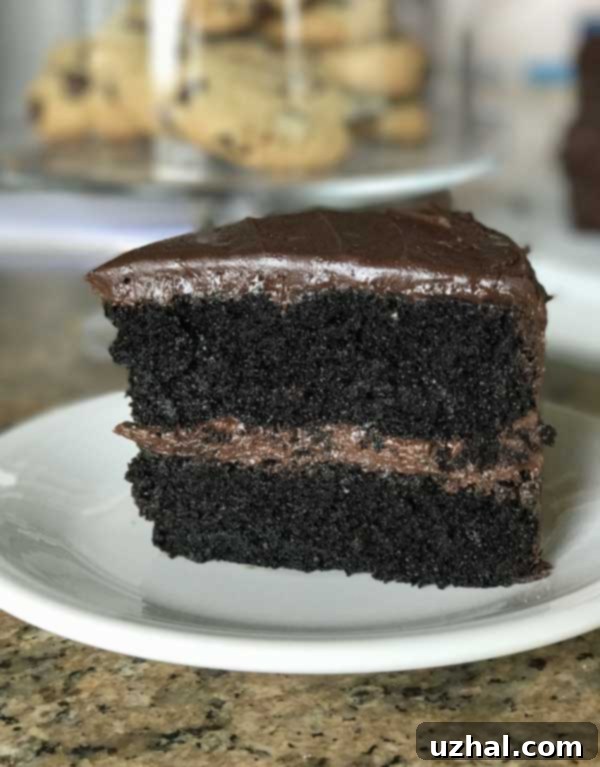
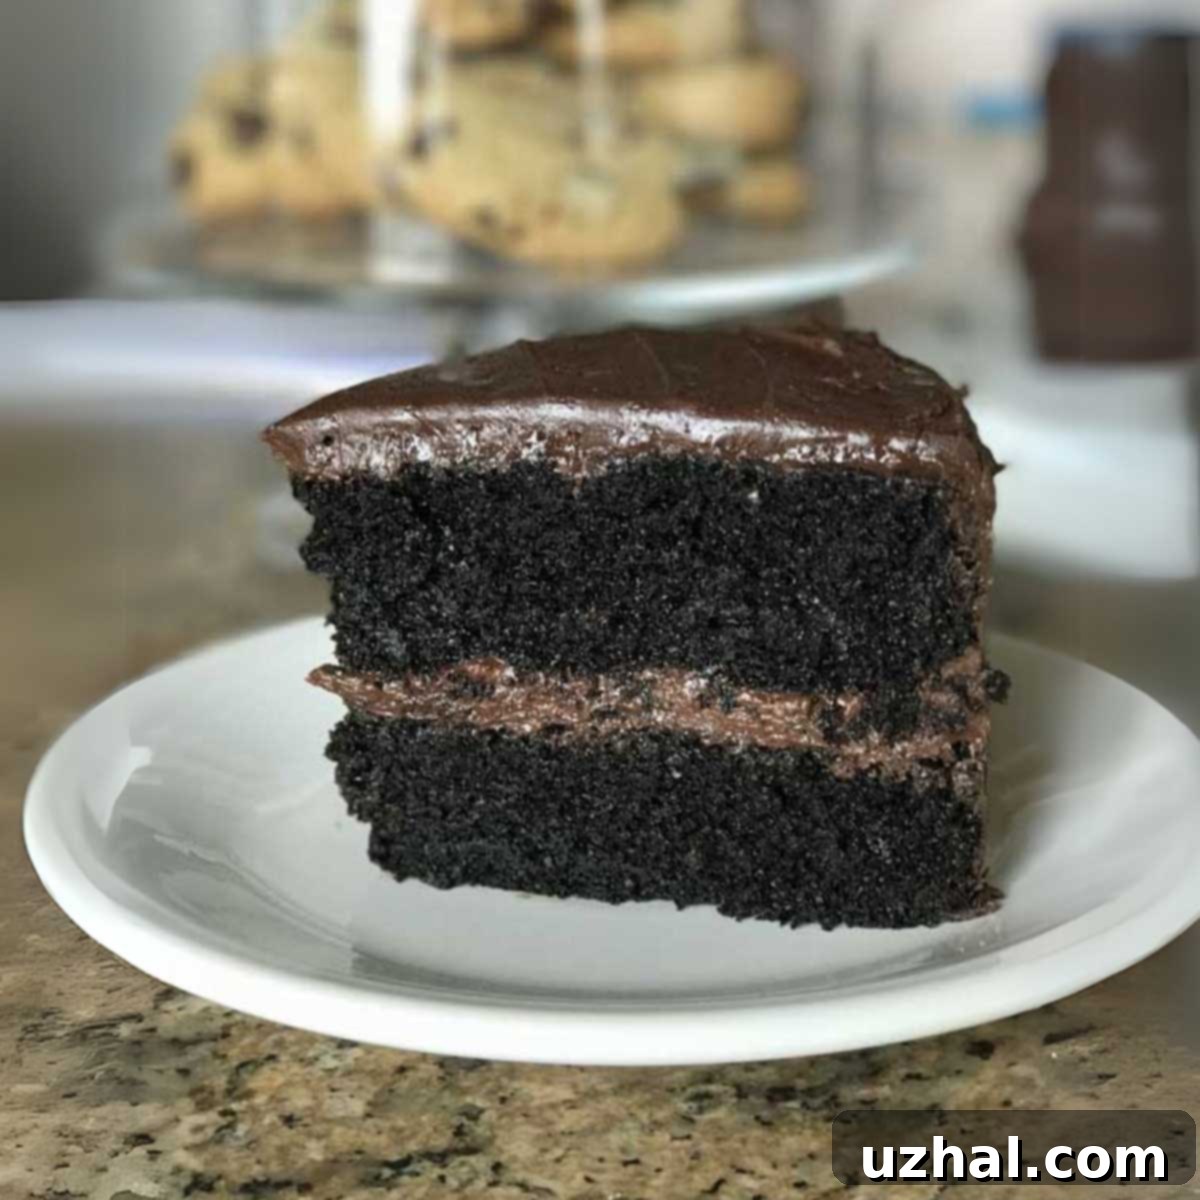
For those who crave an even darker, more dramatic chocolate cake experience, incorporating black cocoa powder is an absolute game-changer. This week, I decided to experiment by adjusting the original recipe slightly, and the results were truly spectacular. I replaced two tablespoons of the standard unsweetened cocoa with two tablespoons of intensely dark black cocoa powder. While this step is entirely optional – as the cake is absolutely delicious and deeply chocolatey without it – if you happen to have black cocoa in your pantry or are looking to achieve that iconic dark chocolate look, it’s a worthwhile addition that transforms the cake visually and subtly in flavor.
Black cocoa is a highly Dutch-processed cocoa, meaning it has undergone a specific treatment with an alkali to reduce its natural acidity. This process not only gives it a strikingly dark, almost black color but also results in a milder, less bitter chocolate flavor compared to natural cocoa. It’s the secret ingredient behind the iconic dark color and distinct taste of many commercial chocolate sandwich cookies, for instance. Using black cocoa not only deepens the visual appeal of the cake, making it look incredibly rich and sophisticated, but it also introduces a subtly different flavor profile. It enhances the overall chocolate experience, giving the cake a richer, more profound “chocolate-ness” without adding excessive bitterness. It creates a stunning contrast, especially when paired with a creamy, lighter-colored frosting, making each slice a feast for both the eyes and the palate.
When considering substitutions, it’s important to remember that black cocoa is Dutch-processed. Its alkaline nature means it reacts differently with leavening agents like baking soda and baking powder compared to natural cocoa. In this specific Black Magic Cake recipe, where both baking soda (which needs acid to react) and baking powder (which is double-acting and contains its own acid) are used, a small substitution like two tablespoons won’t significantly alter the cake’s rise or texture. However, for recipes that rely solely on baking soda and an acidic ingredient, or for larger quantities of substitution, you might need to adjust your leavening. For this recipe, the original unsweetened cocoa (whether natural or Dutch-processed) works perfectly, but for the true chocolate aficionado looking for an extra layer of complexity, visual drama, and a unique flavor nuance, the black cocoa variation is highly recommended. It takes a wonderful classic cake and elevates it to an extraordinary, memorable dessert.
The Perfect Pairing: Why Natural Cocoa Powder Excels in This Chocolate Frosting
When it comes to crafting the ideal chocolate frosting to complement this magnificent Black Magic Cake, my preference almost always leans towards natural cocoa powder. While there are many excellent recipes for chocolate frosting that successfully utilize Dutch-process cocoa, for this particular cake, natural cocoa delivers a distinct flavor that I find unparalleled. Brands like Ghirardelli, Hershey’s, or Navitas (a personal favorite for its rich quality and consistent performance) consistently produce fantastic results. The choice of cocoa powder might seem like a minor detail to some, but it makes a significant difference in the final taste, texture, and overall character of your frosting.
So, why natural cocoa powder over Dutch-process for this specific frosting, especially when Dutch-process cocoa is often praised for its smooth, less bitter flavor? The answer lies partly in a nostalgic connection to classic baking and partly in the subtle chemical properties that influence flavor perception. Natural cocoa powder is acidic and reacts beautifully with baking soda in cake recipes, contributing to their rise and flavor development, as we see in the cake portion of this recipe. In frosting, however, its inherent acidity contributes to a brighter, more pronounced chocolate flavor that often tastes more “classic” or “old-fashioned.” For me, it strongly evokes the familiar, comforting flavors of the chocolate frosting I grew up with – likely the very recipe found on the back of the iconic Hershey’s cocoa can, which traditionally calls for natural cocoa. This gives the frosting a familiar, comforting, yet intensely chocolatey profile that pairs perfectly with the rich, slightly tangy Black Magic Cake.
This thoughtful choice means our Black Magic Cake, particularly when made with the optional black cocoa variation in the cake itself and natural cocoa in the frosting, cleverly incorporates two distinct types of cocoa powder. This allows us to leverage the unique characteristics of each: the deep, dark hue and subtle, mellow notes of black cocoa in the cake, providing a velvety texture and an intense visual appeal; and the bright, classic, slightly fruity chocolate flavor of natural cocoa in the frosting. The result is a multi-layered chocolate experience that is both sophisticated and deeply satisfying. This delightful contrast in color and flavor creates a harmonious balance, impressing any chocolate lover with its complexity and depth, all while maintaining the comforting familiarity of a truly classic chocolate cake.
- Magic Blondies: A Chewy & Sweet Delight
- Magic Cookie Bar Sticks: Portable Perfection
- Magic Cookie Brownies: Two Desserts in One
- Favorite Black and White Cookies: A Classic Treat
- Black Magic Mousse Topped Cupcakes: Indulgent & Elegant
The Black Magic Cake Recipe: A Step-by-Step Guide

Black Magic Cake
Anna
Pin Recipe
Ingredients
- 1 ¾ cups all-purpose flour (be sure to stir the flour well before measuring, then spoon into measuring cup and level off, approximately 220 grams, for accurate results)
- 2 cups granulated sugar (approximately 390 grams; this provides the perfect balance of sweetness and contributes to moistness)
- ¾ cup unsweetened baking cocoa or Dutch processed (for a deeper, darker cake, consider substituting a portion with black cocoa, as discussed earlier)
- 2 teaspoons baking soda (essential for reacting with the acidic buttermilk to create rise and tender crumb)
- 1 teaspoon baking powder (to ensure a consistent, light, and airy texture throughout the cake)
- 1 teaspoon salt (enhances all the other flavors, particularly deepening the chocolate notes)
- 2 large eggs (at room temperature for better emulsion and a smoother batter)
- ½ cup vegetable oil (about 90 to 100 grams; contributes significantly to the cake’s exceptional moistness and tenderness)
- 1 cup buttermilk (approximately 114 grams; if you don’t have buttermilk, see notes for a simple homemade substitute)
- 1 cup hot brewed coffee (approximately 228 grams; this is the secret ingredient that intensifies chocolate flavor without making the cake taste like coffee)
- 2 teaspoons vanilla extract (pure vanilla extract will yield the best aromatic depth and flavor profile)
Favorite Chocolate Frosting
- 12 tablespoons of unsalted butter, softened (170 grams; ensure it’s truly softened, not melted, for a smooth, creamy frosting texture)
- 4 ½ cups confectioners’ sugar, sifted before using or whisked very well (sifting prevents lumps; you can adjust the total amount based on desired sweetness and consistency, starting with less)
- 1 cup plus 2 tablespoons natural style cocoa powder (90 grams; natural cocoa gives a brighter, more classic chocolate flavor to the frosting, complementing the cake beautifully)
- 1 pinch salt (a small amount of salt balances the sweetness and enhances the chocolate flavor)
- 1 teaspoon vanilla extract (adds a lovely aromatic depth to the rich chocolate)
- 2 tablespoons of buttermilk or sour cream (adds a subtle tang and creamy texture to the frosting, mirroring the cake’s flavor profile)
- 6 to 8 tablespoons of half and half or a mixture of cream and whole milk (adjust this liquid gradually to achieve your desired frosting consistency – from thick for piping to spreadable for a rustic finish)
Instructions
-
Prepare Your Pans: Begin by preheating your oven to a consistent 350°F (175°C). This is crucial to ensure the oven is at the correct temperature when your batter is ready, promoting even baking and a beautiful rise. Take two 9-inch round cake pans and prepare them thoroughly for optimal non-stick results. First, generously grease the insides with softened butter or a reliable non-stick baking spray. Next, cut circles of wax paper or parchment paper to perfectly fit the bottoms of the pans and carefully place them in. Grease the paper circles again and then dust the entire inside surface of the pans with a light coating of all-purpose flour. This meticulous preparation prevents sticking and guarantees your beautiful cake layers will release easily and intact after baking.
-
Combine Dry Ingredients: In a generously sized mixing bowl, combine all your pre-measured dry ingredients: the all-purpose flour, granulated sugar, unsweetened cocoa powder (or your special blend, including black cocoa if you’re using it), baking soda, baking powder, and salt. It’s important to whisk these ingredients together vigorously for about 30-60 seconds to ensure they are thoroughly combined and evenly distributed. This step is vital as it prevents pockets of unmixed leavening agents or salt in the finished cake, which can lead to uneven texture or flavor. Thorough whisking also helps to aerate the flour, contributing to a lighter cake.
-
Integrate Wet Ingredients for the Batter: Create a shallow well in the very center of your dry ingredient mixture. Into this well, carefully add the wet ingredients: the two large eggs (ideally at room temperature for better emulsion with other liquids), vegetable oil, buttermilk, and vanilla extract. Using a sturdy rubber spatula or a heavy-duty scraper, begin to gently stir the mixture from the center, gradually incorporating the dry ingredients from the bottom and sides of the bowl. Continue stirring until the mixture is mostly combined and no large dry pockets remain. Next, pour in the hot brewed coffee. Continue to stir until the batter is thick, smooth, and well blended. For an extra smooth consistency, you can use an electric mixer on medium speed for about 30 seconds, taking care not to overmix, which can develop the gluten in the flour too much and result in a tough cake. Note that the batter will be quite thin; this is perfectly normal and contributes to the cake’s moistness.
-
Bake to Perfection: Carefully divide the thin chocolate cake batter evenly between your two prepared 9-inch cake pans. You can use a kitchen scale for precision if desired, or simply eyeball it. Place the pans on the center rack of your preheated oven. Bake for approximately 35 minutes. It’s important to remember that baking times can vary slightly depending on your specific oven and pan material, so begin checking for doneness around the 30-minute mark. The cakes are ready when a wooden skewer or toothpick inserted into the center comes out clean, and the tops gently spring back when lightly touched. Once baked, remove the cakes from the oven and let them cool in their pans on a wire rack for about 15 minutes. This crucial resting period allows them to firm up slightly before handling. After 15 minutes, carefully invert the cakes onto the wire rack, peel off the parchment paper (which should come off easily), and let them cool completely to room temperature before attempting to frost. Attempting to frost warm cakes will inevitably result in melted frosting and a messy situation.
-
Prepare the Favorite Chocolate Frosting: In a large mixing bowl, combine the softened unsalted butter with about half of the confectioners’ sugar and all of the natural cocoa powder. Begin stirring with an electric mixer on low speed to avoid a cloud of sugar, gradually increasing to medium speed, until these initial ingredients are well mixed and form a thick, somewhat pasty consistency. Now, add the vanilla extract and approximately half of the buttermilk (or sour cream). Continue beating until well combined. Then, gradually add the remaining confectioners’ sugar, alternating with the remaining half and half or cream/milk mixture. Beat on medium-high speed until the frosting is delightfully smooth, light, and wonderfully creamy. You have flexibility here: you can stop adding sugar at around 3 ½ cups if you prefer a less sweet frosting, or use the full 4 ½ cups for a sweeter, firmer frosting. Add the half and half (or cream/milk mixture) one tablespoon at a time until your desired frosting consistency is reached – whether you prefer it thick for piping intricate designs or more spreadable for a rustic, smooth finish.
-
Assemble and Frost Your Cake: Once the cake layers are completely cool to the touch, you may choose to level them using a long, serrated knife if they have domed significantly during baking. However, this particular Black Magic Cake recipe often bakes up fairly evenly, so this step might be unnecessary. Place one cake layer on your chosen serving plate or cake stand. Spread a generous and even layer of your prepared chocolate frosting over the top of this first cake layer. Carefully place the second cake layer on top, aligning it as best you can for a stable structure. Use the remaining frosting to generously cover the top and sides of the entire cake, creating a beautiful and decadent finish. For extra flair, you can add sprinkles, chocolate shavings, or fresh berries. Slice, serve, and savor every moist, rich bite of this classic Black Magic Cake!
Notes
Buttermilk Substitute: If you find yourself without buttermilk for the cake, don’t fret! You can easily make a simple substitute. Add 1 tablespoon of fresh lemon juice or white vinegar to a liquid measuring cup, then fill it to the 1-cup mark with regular milk (dairy or non-dairy works). Let it sit for 5-10 minutes until it appears slightly curdled. This will provide the necessary acidity required for the baking soda to react properly in the recipe.
Room Temperature Ingredients: For optimal baking results, it’s highly recommended that your eggs and buttermilk for the cake are at room temperature. Room temperature ingredients incorporate more easily and smoothly into the batter, leading to a better emulsified mixture and ultimately a more uniform, tender cake texture. Planning ahead for this small detail makes a big difference.
Do Not Overmix the Batter: After adding the wet ingredients to the dry, mix the batter just until combined. Overmixing is a common mistake that can develop the gluten in the flour too much, resulting in a dense, tough, or chewy cake instead of the desired light and tender crumb. A few small lumps in the batter are perfectly acceptable and often indicate you haven’t overmixed. The hot coffee will help dissolve any remaining cocoa powder.
