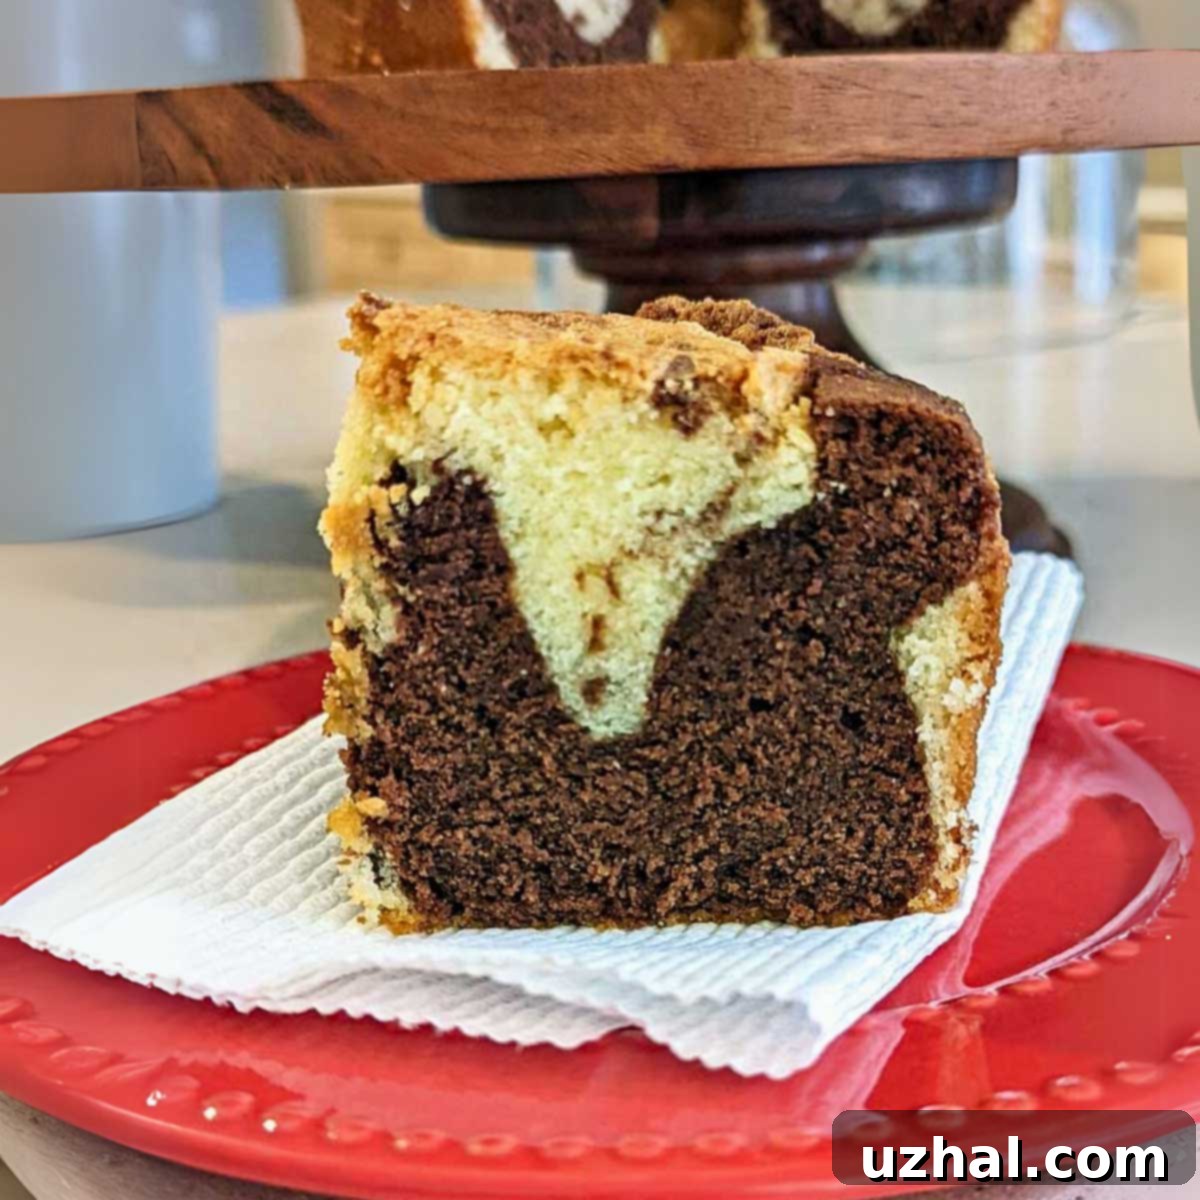
Elvis-Inspired Marble Pound Cake: A Timeless Recipe for a Perfect Treat
While Elvis Presley might not have personally sampled *this specific* marble pound cake recipe, legend has it that he absolutely adored the classic pound cake that inspired it. If the King of Rock ‘n’ Roll had ever encountered a beautifully marbled version as rich and tender as this one, we’d like to imagine it would have quickly become his new favorite. This small marble pound cake takes the beloved qualities of a traditional Southern pound cake – its dense yet moist crumb, buttery flavor, and satisfying texture – and elevates it with a captivating swirl of vanilla and chocolate. It’s a truly royal treat, fit for a King… or anyone who appreciates a truly exquisite homemade dessert. This recipe promises a slice of nostalgia with a delightful twist, perfect for any occasion.
The Legacy of Elvis Presley’s Favorite Pound Cake
The original pound cake recipe, reportedly cherished by Elvis Presley himself, is renowned for its simplicity and exquisite taste. It’s a testament to the fact that sometimes, the most basic ingredients, when combined with care, yield the most spectacular results. This marble pound cake recipe pays homage to that classic, infusing it with a visual appeal and a dual flavor profile that makes every bite an adventure. Our adaptation ensures the same incredible texture and depth of flavor while adding a sophisticated chocolate element that intertwines beautifully with the classic vanilla base. It’s a celebration of tradition with a delightful twist, perfect for those who appreciate both nostalgia and innovation in their baking. Imagine sinking your teeth into a slice, feeling the tender crumb melt in your mouth, and experiencing the perfect harmony of vanilla and rich chocolate—it’s pure bliss.
Perfectly Proportioned: The Small Marble Pound Cake Advantage
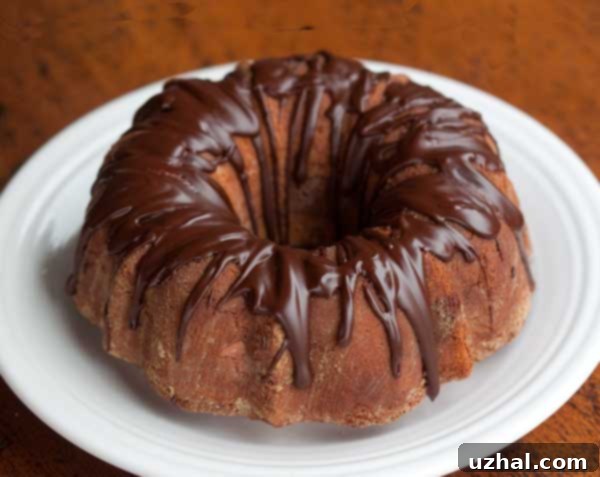
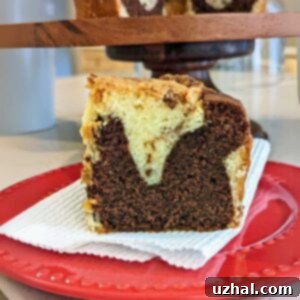
After numerous baking experiments with various marble pound cake recipes, this particular version, inspired by Elvis’s classic, consistently emerged as my top choice. Its smaller size is incredibly versatile, making it ideal for intimate gatherings, a thoughtful gift, or simply a treat for a smaller household without the commitment of a large cake. I’ve successfully baked this recipe multiple times, both in a traditional loaf pan and in a charming 6-cup Bundt pan. The photographs you see here proudly display the results from a 6-cup Bundt pan, highlighting its elegant shape and enticing swirl. The compactness of this marble pound cake ensures it’s manageable, easy to store, and always feels special when served.
Opting for a smaller marble pound cake offers several benefits. It bakes more uniformly, reduces overall baking time, and ensures that every slice feels special without leaving you with excessive leftovers. It’s also less intimidating for beginner bakers who might be hesitant to tackle a large dessert. This small-batch approach allows for more frequent baking and experimentation, ensuring fresh, homemade goodness whenever the craving strikes. This recipe truly proves that good things come in smaller, perfectly portioned packages, delivering all the rich flavor and moist texture you’d expect from a full-sized pound cake, making it an excellent choice for any home baker.
Choosing the Right Baking Pan: Bundt vs. Loaf
The choice between a Bundt pan and a loaf pan for your marble pound cake largely comes down to aesthetics and personal preference. Both will deliver a delicious cake, but they offer different presentations and some nuances in baking. Understanding these differences can help you achieve the best results for your homemade pound cake.
Baking in a Bundt Pan: For Elegant Presentation
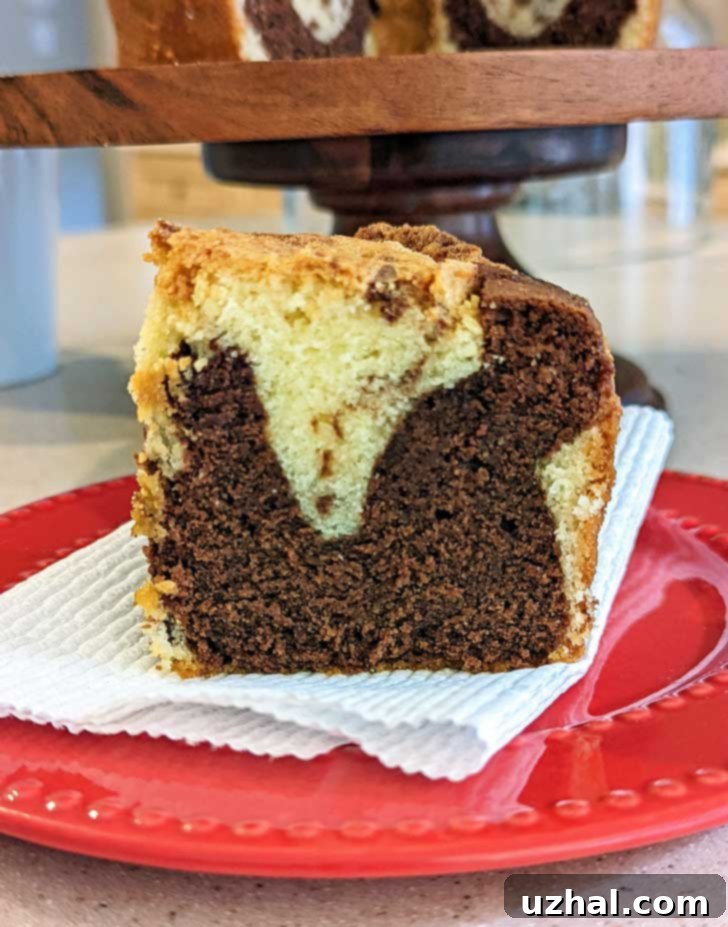
If you choose to use a Bundt pan, proper preparation is absolutely critical. Bundt pans, with their intricate designs and often non-stick coatings, can still be notoriously sticky, and this dense pound cake batter loves to cling. Therefore, it’s essential to grease and flour your Bundt pan *thoroughly*. Don’t just spray; take the time to spread the grease (butter or shortening works best) into every nook and cranny, then dust generously with flour, tapping out the excess. This creates a protective barrier, preventing the cake from sticking. For even greater peace of mind and consistently easy release, I highly recommend investing in a good quality silicone Bundt pan, such as the ones I’ve linked below. Silicone pans are a game-changer for delicate cakes like this, ensuring a flawless release every time, preserving the beautiful details of your pan. The photos of the gorgeous marbled cake shown are from a 6-cup Bundt, which typically means an 8-inch pan. This size is ideal for halving standard Bundt cake recipes or for making a perfectly scaled small marble pound cake.
Baking in a Loaf Pan: For Classic Simplicity
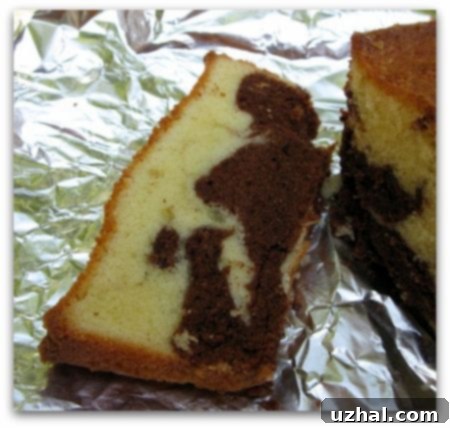
For a more classic, comforting, and rustic presentation, a loaf pan works beautifully for this marble pound cake. It’s often easier to prepare and ensures neat, even slices that are perfect for serving or gifting. The original inspiration for this recipe often utilized a loaf pan, producing a dense, rectangular cake perfect for slicing and serving alongside coffee or tea. A loaf cake also tends to maintain its moisture exceptionally well, making it a fantastic option for make-ahead baking. Below is one of the older photos of this very recipe baked in a loaf pan, demonstrating its equally appealing charm and straightforward elegance.
Recently, I purchased these fantastic silicone loaf pans that are 8-inch pans designed to hold 6 cups. They are absolutely perfect for halving larger Bundt or pound cake recipes, making them incredibly versatile for baking a smaller marble pound cake or even other delightful treats. Their naturally non-stick properties simplify the baking process immensely, giving you more confidence in achieving a perfect cake every time, without the fuss of heavy greasing and flouring.
Mastering the Marble: The Secret to a Stunning Swirl
Achieving that iconic, mesmerizing marble pattern in your pound cake is simpler than you might think, but it requires a gentle touch and a bit of artistry. The key is to spoon alternating dollops of vanilla and chocolate batter into your prepared pan. Start with a layer of vanilla, then add several small dollops of chocolate batter on top, followed by more vanilla, and so on, until all the batter is used. Once all the batter is in the pan, take a butter knife or skewer and gently swirl through the layers just once or twice. Move in an S-shape or circular motion, but avoid over-mixing, as this will muddy the colors and destroy the distinct marble effect. A few graceful passes are all you need to create beautiful, contrasting ribbons of flavor and color throughout your homemade pound cake, making each slice a delightful surprise.
The visual appeal of a marble cake is undeniable, making it a showstopper dessert for any occasion, from casual family dinners to more formal celebrations. The contrast between the rich, dark chocolate and the creamy, lighter vanilla batter creates an artistic effect that makes each slice unique and enticing. This artistic element, combined with the luxurious taste, makes this small marble pound cake a truly special treat that will impress your guests and satisfy your sweet cravings. It’s a classic that never goes out of style, offering both beauty and exceptional flavor in every bite.
Essential Ingredients for a Superior Pound Cake
A true pound cake, whether marble or plain, relies on specific ingredients and techniques to achieve its characteristic dense, moist, and tender crumb. Here’s a closer look at the components of this Elvis-inspired marble pound cake and why each plays a vital role in creating its perfect texture and rich flavor:
- Sifted Cake Flour (165 grams): This is non-negotiable for a truly tender pound cake. Sifting the flour *before* measuring (1 ½ cups), and then sifting it again (as the recipe instructs for a total of three sifters), helps to aerate the flour, break up any lumps, and ensure a light, delicate texture despite the cake’s density. Cake flour also has a lower protein content than all-purpose flour, which further contributes to tenderness and prevents a tough crumb. Using a kitchen scale to measure by weight (165 grams) is the most accurate way to ensure consistency, guaranteeing a perfect cake every time.
- Salt (½ teaspoon): A small but mighty ingredient, salt enhances all the other flavors in the cake, balancing the sweetness and bringing out the depth of the butter and chocolate.
- Unsalted Butter, Softened (1 stick or ½ cup / 114 grams): The backbone of any good pound cake. Using unsalted butter allows you to control the salt content in the recipe. Ensure it’s properly softened to room temperature (but not melted) for optimal creaming with the sugar. Butter contributes to richness, flavor, and helps create a fine, moist crumb structure. Its quality will significantly impact the final taste of your homemade pound cake.
- Granulated Sugar (1 ½ cups / 300 grams): Not just for sweetness, sugar also contributes significantly to the cake’s moisture, tenderness, and beautiful golden crust. Creaming it vigorously with butter creates countless tiny air pockets that give the cake its classic volume and texture.
- Large Eggs (3 large plus 2 tablespoons beaten egg, at room temperature): Eggs add richness, structure, and essential moisture to the cake. Bringing them to room temperature before adding them to the batter is crucial. Room temperature eggs emulsify better with the butter and sugar, resulting in a smoother, more uniform batter and a finer crumb. Don’t skip the extra 2 tablespoons of beaten egg – it provides just the right amount of additional moisture without thinning the batter too much, ensuring a perfectly balanced consistency.
- Vanilla (1 teaspoon): A classic flavor enhancer that complements both the buttery vanilla base and the rich chocolate swirl. Use a good quality pure vanilla extract for the best, most aromatic flavor, as it makes a noticeable difference.
- Heavy Cream, at room temperature (½ cup): This is where the pound cake gets its incredible richness and moistness. Like the eggs, ensuring the heavy cream is at room temperature is vital to prevent curdling the batter and ensure smooth incorporation. It contributes significantly to the cake’s signature dense yet tender crumb, making it truly decadent and luxurious.
- Semisweet Chocolate, melted and cooled slightly (2 ½ oz): For the beautiful dark swirl and a delightful chocolate flavor. Melting it gently (either in a microwave or a double boiler) and allowing it to cool slightly before incorporating it into a portion of the batter is important. This prevents the hot chocolate from “cooking” or seizing the batter and ensures a smooth, even blend for your marbling.
Step-by-Step Baking for Pound Cake Perfection
Baking this marble pound cake isn’t just about mixing ingredients; it’s about following precise steps to achieve that perfect crumb and unforgettable flavor. Precision and patience are your best friends in the kitchen when making this delightful homemade treat. Here’s a detailed guide to ensure your baking success, from preparing your pan to cooling your masterpiece:
-
Prepare Your Pan and Oven: Position your oven rack in the middle. Importantly, do not preheat your oven yet! This cold oven start is a classic Southern pound cake technique that helps the cake rise slowly and evenly, preventing large cracks and ensuring a consistently moist interior. For your chosen pan, whether it’s a 9×5 inch metal loaf pan (an 8 ½ by 4 ½ inch would also work perfectly) or a 6-cup Bundt, thorough preparation is paramount. Spray it generously with a flour-added cooking spray, or meticulously grease it with softened butter or shortening and dust with flour, ensuring every crevice is coated to prevent sticking.
-
Triple-Sifted Flour for Tenderness: Into a large bowl, sift together the already-measured cake flour (1 ½ cups) and salt. Then, sift that mixture into another clean bowl. Repeat this process one more time, sifting it back into the first bowl. This triple-sifting might seem meticulous, but it’s essential for aerating the flour thoroughly, removing any lingering lumps, and distributing the salt evenly throughout the dry ingredients. This aeration contributes significantly to the cake’s exceptionally light and tender crumb, a definitive hallmark of a truly great pound cake.
-
Cream Butter and Sugar to Perfection: In the bowl of an electric mixer fitted with the paddle attachment, beat the softened unsalted butter and granulated sugar together on medium-high speed for a full five minutes. This extended creaming time is crucial. It incorporates a significant amount of air into the mixture, creating a light and fluffy base, which ultimately leads to a higher, lighter textured cake despite its characteristic density. This step also ensures the sugar crystals dissolve slightly, contributing to a wonderfully smooth batter.
-
Incorporate Eggs and Vanilla: Reduce the mixer speed to medium-low. Add the room temperature eggs one at a time, beating well after each addition to ensure full incorporation before adding the next. This gradual addition prevents the batter from curdling. Once all eggs are incorporated, beat in the vanilla extract until just combined. Its aromatic warmth will infuse the entire cake with a delightful fragrance. Now, reduce the mixer speed to its lowest setting. Add half of the sifted flour mixture, mixing until just combined, then add all of the room temperature heavy cream, mixing until smooth, and finally, add the remaining flour, mixing only until no streaks of flour remain. Be careful not to overmix once the flour is added, as overmixing develops gluten, which can lead to a tough cake. Scrape down the sides of the bowl with a rubber spatula, then beat for about two more minutes on low speed, or until the batter appears wonderfully creamy and smooth. Finally, spoon out about 1 ¼ cups of this prepared vanilla batter (eyeball this measurement) and mix it gently with your slightly cooled melted semisweet chocolate until uniform in color.
-
Layer, Marble, and Bake: Spoon alternating dollops of the vanilla and chocolate batters into your prepared pan. Start with vanilla, then add dollops of chocolate, followed by more vanilla, and so on, filling the pan evenly. Once all the batter is in, gently rap the pan against your work surface once or twice. This helps to eliminate any trapped air bubbles, ensuring a more uniform, even crumb. Now, take a thin knife or skewer and gently swirl through the batters a couple of times to create your desired marble pattern. Remember, less is often more for a distinct and beautiful marble effect. Place the pan into the (cold) oven. Now, turn the oven temperature to 350°F (175°C). This cold oven technique allows the cake to gradually come up to temperature, promoting an even rise and preventing premature crust formation. Bake until the cake is golden brown on top and a wooden pick or skewer inserted into the center comes out with a few moist crumbs clinging to it. This typically takes approximately 60 minutes, but start checking for doneness around the 50-minute mark, as oven temperatures can vary.
-
Cooling for Perfection: Let the cake cool in the pan on a wire rack for 30 minutes. This crucial step allows the cake to firm up slightly and contract from the pan edges before unmolding, significantly reducing the risk of it breaking. If using a Bundt pan, carefully run a thin knife around its inner and outer edges after the 30 minutes to help release it from any stubborn spots. Then, invert a wire rack over the pan and flip the cake onto the rack to cool completely. For a loaf pan, simply invert onto a rack after 30 minutes to cool completely. Ensuring the cake is fully cooled before slicing is especially important for Bundt cakes to maintain their intricate shape and for all pound cakes to prevent crumbling and ensure the best texture.
- Simply Sliced: The rich flavor and moist, tender texture of this pound cake truly shine when enjoyed plain, perhaps with a cup of freshly brewed coffee or a soothing tea. It’s a perfect accompaniment for an afternoon break or a comforting breakfast.
- With Fresh Fruit: A light dusting of powdered sugar and a vibrant side of fresh berries (strawberries, raspberries, blueberries) adds a refreshing contrast and a burst of natural sweetness.
- A Dollop of Cream: For a touch of indulgence, a spoonful of freshly whipped cream or a scoop of premium vanilla bean ice cream can transform this into a more decadent dessert.
- Simple Glaze: For an extra touch of sweetness and an elegant finish, consider a simple vanilla or chocolate glaze drizzled over the top once the cake is fully cooled. A lemon glaze would also add a delightful tang.
- Room Temperature: Store any leftover cake tightly wrapped in plastic wrap or placed in an airtight container at room temperature for up to 3-4 days. The plastic wrap is crucial to prevent the cake from drying out and to seal in its rich flavors.
- Freezing for Longer: For longer storage, individual slices or the whole cake (after it has cooled completely) can be wrapped tightly first in plastic wrap, then securely in aluminum foil, and frozen for up to 2-3 months. When ready to enjoy, thaw the cake at room temperature. Freezing actually enhances the texture of many pound cakes, making them even more moist and tender upon thawing!
- Elvis Presley’s Original Favorite Pound Cake: Go back to the source with the recipe that started it all – the classic pound cake that Elvis reportedly loved! Understand the foundational flavors that inspired this marble version.
- Cinnamon Roll Biscotti: If you appreciate unique twists on classic baked goods, these biscotti offer a delightful cinnamon swirl, combining the crunch of biscotti with the comforting flavors of a cinnamon roll.
- Marble Rye Bread: Expand your marbling skills beyond cakes and try your hand at this savory, visually appealing bread, perfect for sandwiches or a charcuterie board.
- Marbled White Chocolate Cheesecake: For cheesecake lovers, this recipe combines the creamy richness of cheesecake with a beautiful marbled effect, offering a sophisticated dessert option.
- Marbled Layer Cake: Take your marbling to the next level with a stunning layer cake presentation, perfect for birthdays or grand celebrations where you want to truly impress.
- 1 ½ cups sifted cake flour (sift first, then scoop). Go by weight. (165 grams)
- ½ teaspoon salt
- 1 stick unsalted butter, softened (½ cup) (114 grams)
- 1 ½ cups granulated sugar (300 grams)
- 3 large eggs plus 2 tablespoons beaten egg at room temperature 30 minutes
- 1 teaspoon vanilla extract
- ½ cup heavy cream, bring to room temperature
- 2 ½ oz semisweet chocolate melted and cooled slightly
-
Put oven rack in middle position, but do not preheat oven. Spray a 9×5 inch metal loaf pan (I think an 8 ½ by 4 ½ would work too) with flour-added cooking spray. Alternatively, use a 6 cup Bundt.
-
Sift together the already-sifted flour (1 ½ cups) and salt into a bowl. Repeat sifting into another bowl (flour will have been sifted 3 times total).
-
Beat together butter and sugar with an electric mixer for a full 5 minutes.
-
Add eggs 1 at a time, beating well after each addition; beat in vanilla. Reduce speed to low and add half of flour, then all of cream, then remaining flour, mixing well after each addition. Scrape down side of bowl, then beat for about 2 minutes or until batter is creamy and smooth. Spoon out about 1 ¼ cups of batter (eyeball it) and mix with cooled melted chocolate.
-
Spoon batter into pan, starting with vanilla, layering with chocolate and topping with vanilla, then rap pan against work surface once or twice to eliminate air bubbles. Place pan in (cold) oven and turn oven temperature to 350°F (175°C). Bake until golden and a wooden pick or skewer inserted in middle of cake comes out with a few crumbs adhering, 60 minutes.
-
Let cake cool in pan on a rack for 30 minutes. If using a Bundt pan, carefully run a thin knife around its inner and outer edges to help release, then invert the rack over the pan and flip the cake onto the rack to cool completely. For a loaf pan, simply invert onto a rack after 30 minutes to cool completely.
Serving and Storing Your Elvis-Inspired Pound Cake
Once your exquisite marble pound cake has cooled completely, it’s ready to be devoured! This cake is incredibly versatile and delicious on its own, but here are some serving suggestions to elevate your dessert experience:
Storage Tips for Lasting Freshness:
Pound cakes are known for their excellent keeping qualities, often tasting even better the day after they are baked. To maintain the freshness and moisture of your homemade marble pound cake:
Related Baking Adventures
If you enjoyed baking this Elvis-inspired marble pound cake, you might be interested in exploring other delightful recipes that share similar qualities or themes. Expanding your baking repertoire is always rewarding, and these suggestions offer more pound cake variations, unique cookie ideas, and other marbled delights:
Recipe
(Maybe Would Have Been?) Elvis Presley’s Favorite Marble Pound Cake
Anna
Pin Recipe
Ingredients
Instructions
We hope you enjoy baking and savoring this magnificent Elvis-inspired Marble Pound Cake as much as we do. It’s a recipe that transcends generations, offering a comforting and elegant dessert that’s perfect for any occasion. Share your baking adventures and join the conversation! Happy baking!
