Dutch Crunch Bread Recipe: Master the Unique Tiger (or Giraffe) Loaf with a Signature Crunchy Topping
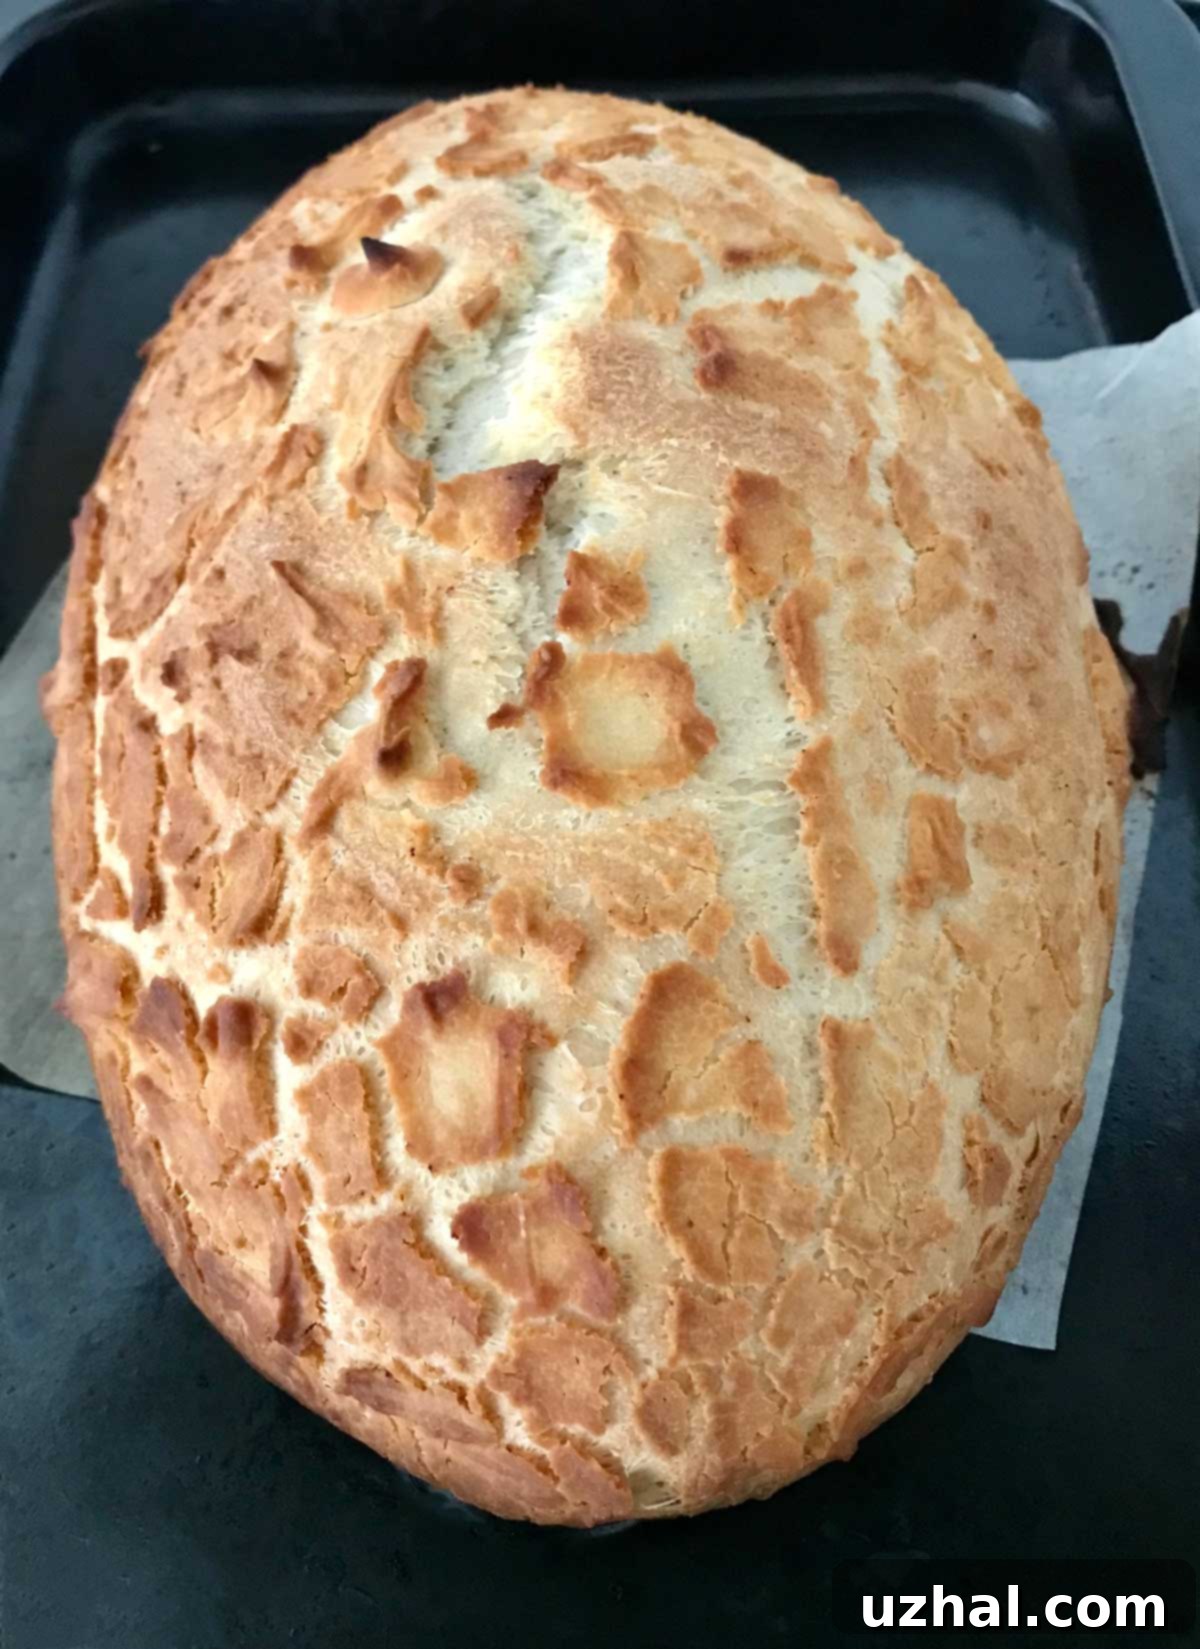
There’s a special kind of magic that happens in the kitchen when yeast, flour, and a bit of culinary creativity come together. This week, our culinary journey has led us straight to the delightful world of “yeast breads with things baked on top,” particularly focusing on two distinct varieties: the vibrant Conchas (which we’ll explore another time) and the truly unique Dutch Crunch Bread. This exceptional bread, known by several captivating names like Tiger Bread or Giraffe Bread, earns its moniker from the distinctive, crackled pattern that forms on its crunchy baked topping, reminiscent of a wild animal’s coat. Far from being a sweet treat or a tangy sourdough, Dutch Crunch Bread is a savory, robust loaf, perfect as an accompaniment to lunch or dinner, or shaped into versatile rolls for delicious sandwiches. Its signature crunchy top isn’t just a feast for the eyes; it adds an irresistible texture and a subtle, savory flavor that elevates any meal.
While its exact origins are debated, Dutch Crunch Bread is most famously a California phenomenon, deeply ingrained in the culinary landscape of San Francisco. Locals often associate it with deli sandwiches, where its unique texture provides the perfect counterpoint to savory fillings. Unlike sourdough, which relies on a wild yeast starter, Dutch Crunch Bread typically uses commercial yeast, making it a more straightforward bake for many home cooks. And as we mentioned, it stands apart from sweet breads like brioche or challah, offering a distinctly savory profile that makes it incredibly versatile.

How to Make Dutch Crunch Bread at Home
The process of creating Dutch Crunch Bread is surprisingly accessible, especially if you’re already familiar with basic yeast bread techniques. The beauty of most Dutch Crunch recipes lies in their simplicity; they typically don’t require complex pre-ferments or sponges, streamlining the baking process significantly. Generally, you’ll prepare a standard yeast dough, allowing it to rise, then shape it into your desired form – whether that’s a grand, rustic loaf or individual, perfectly portioned buns. The real magic, however, happens during the second rise, when you apply a special rice flour mixture over the surface, which is key to developing that iconic crunchy topping.
Many recipes for Dutch Crunch Bread offer slight variations, some calling for milk to enrich the dough and others sticking to water for a lighter crumb. Regardless of these minor differences, the core method remains consistent: combine your ingredients, typically in a stand mixer for ease, let the dough undergo its first fermentation, and then prepare for the crucial topping application. This method ensures a consistently delicious and visually stunning result every time you bake this extraordinary bread.
Crafting the Iconic Crunchy Topping
The distinctive, crackled texture that gives Dutch Crunch Bread its charming “Tiger” or “Giraffe” appearance is all thanks to a simple yet ingenious topping. This topping is a paste made from a precise blend of ingredients: extra fine rice flour, a touch of sugar for caramelization and flavor, a pinch of salt to balance, a small amount of yeast to aid in the cracking, water to form the paste, and a neutral oil or one that imparts a specific flavor. The magic truly unfolds during the baking process.
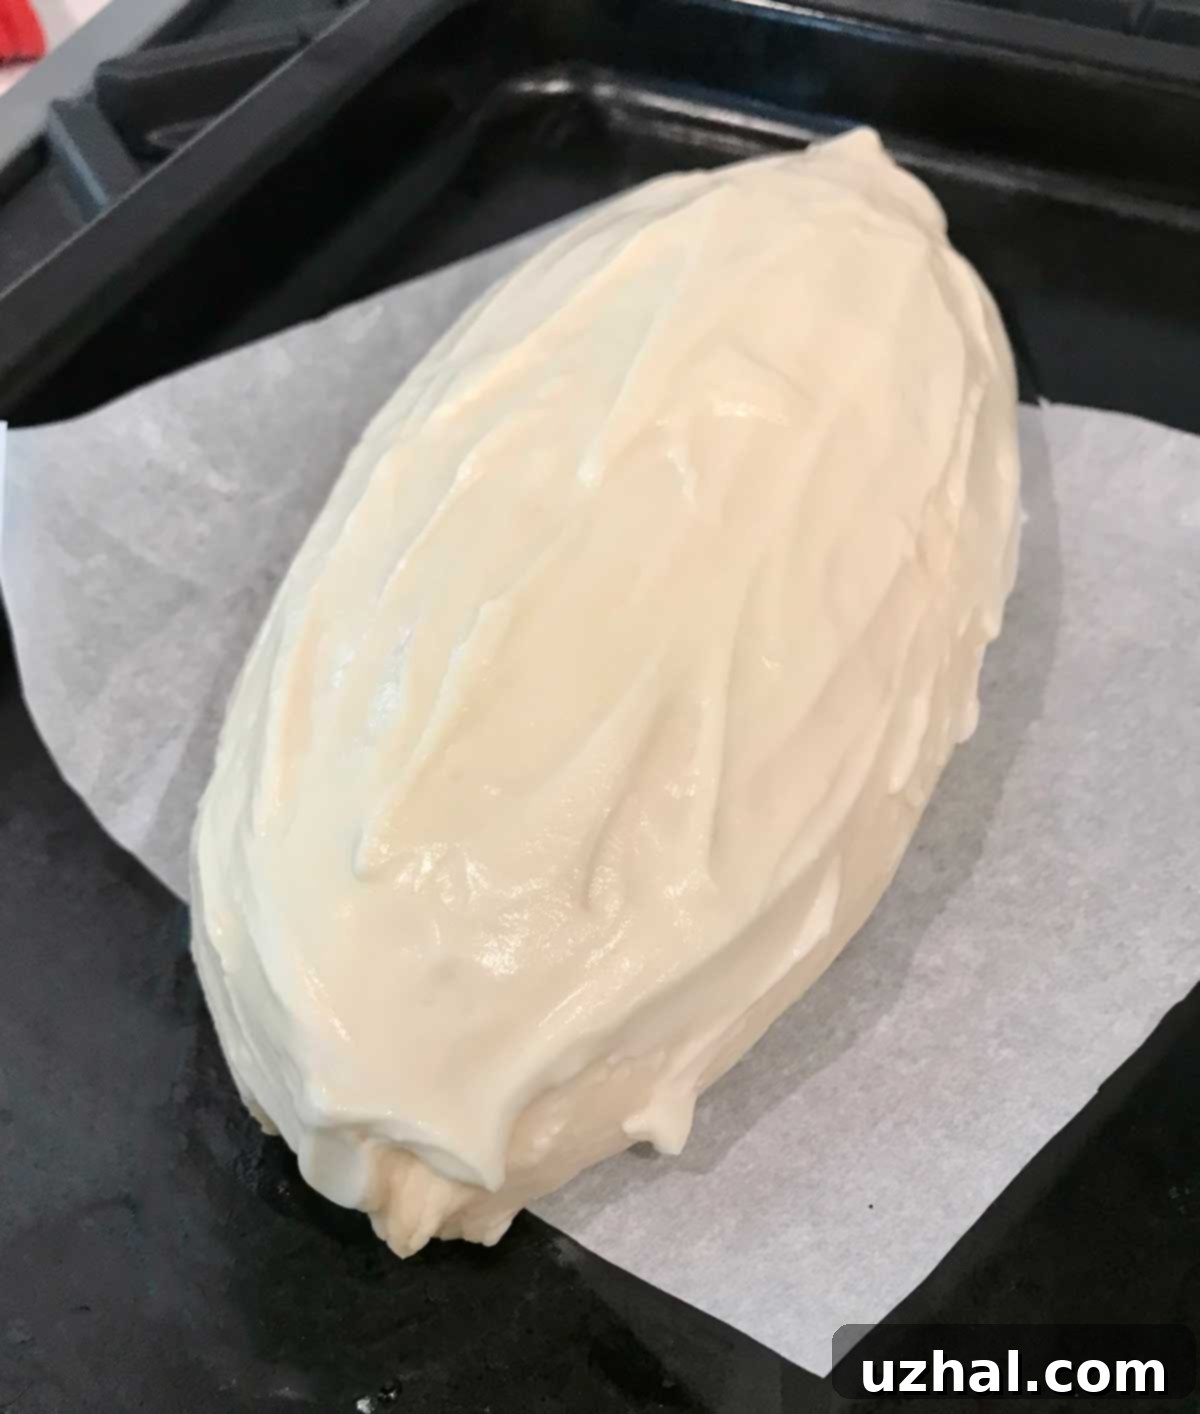
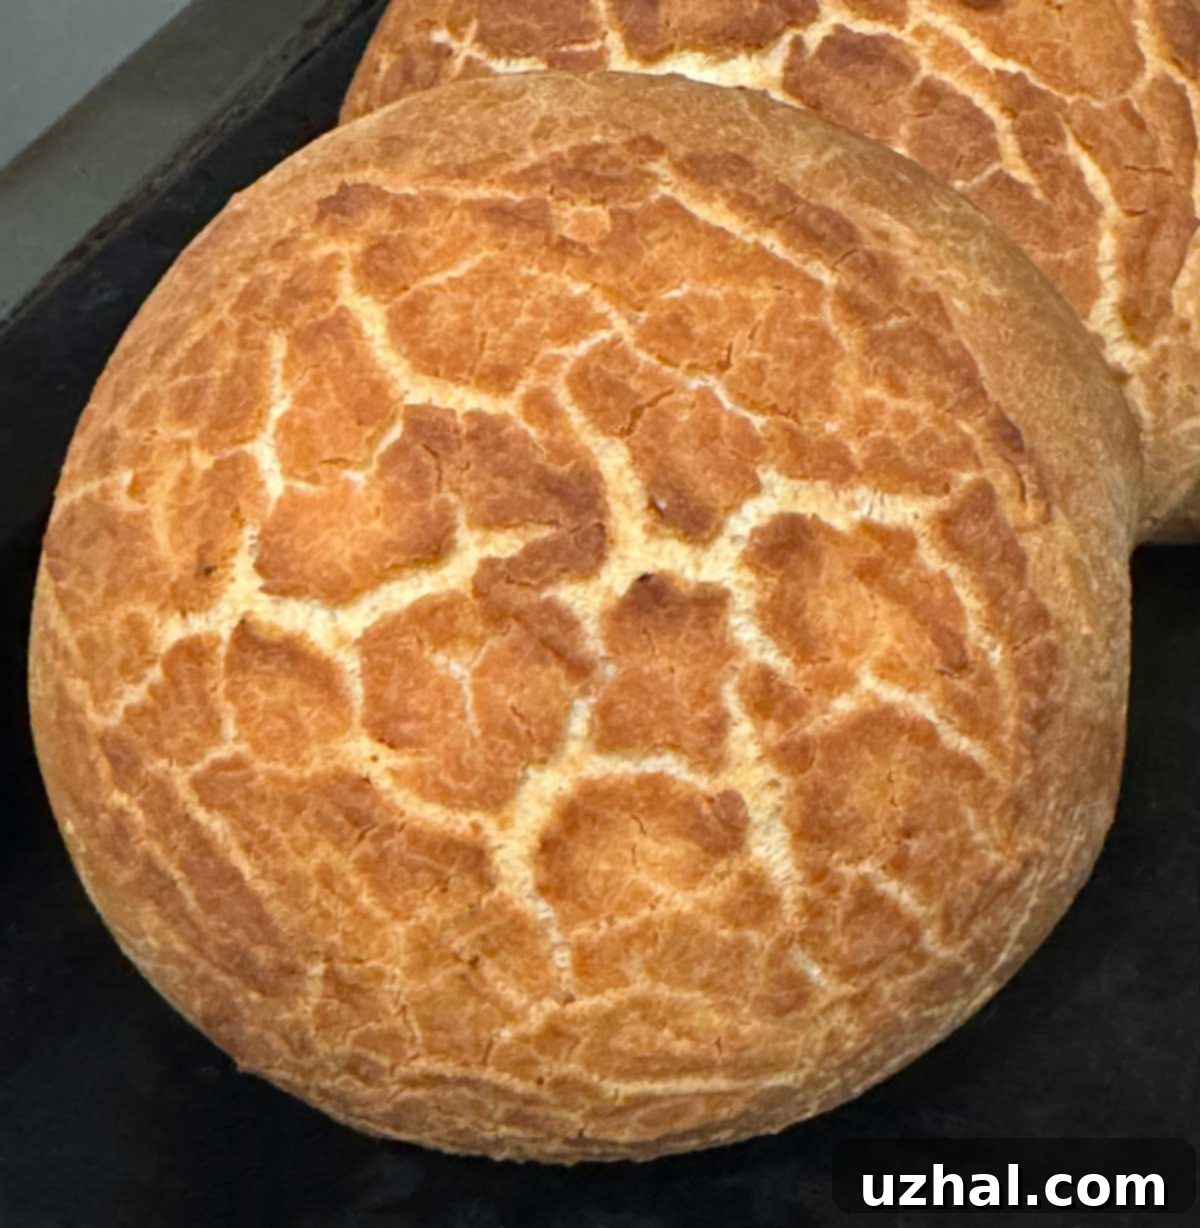
Once your bread dough has undergone its first rise and been shaped, you carefully spoon or spread this rice flour mixture over the top. It’s crucial to apply it during the second rise, allowing the yeast in the topping to activate and the paste to set slightly. As the bread bakes and expands in the hot oven, the rice flour paste, being low in gluten, cannot stretch as much as the underlying yeast dough. This difference in elasticity causes the topping to crack and shatter, forming the characteristic mosaic pattern that has inspired its charming jungle-themed names. The result is a beautifully variegated crust that provides an exquisite textural contrast to the soft, airy interior of the bread, making every bite a delight.

Understanding Rice Flour: Why It’s Essential for Dutch Crunch
When it comes to achieving that perfect, crackly crust for Dutch Crunch Bread, rice flour is absolutely non-negotiable. Its unique properties are what make the distinctive pattern possible. Unlike wheat flour, rice flour is naturally gluten-free. This absence of gluten means that when the rice flour paste is applied to the surface of the bread and bakes, it creates a brittle, unyielding layer. As the yeast dough beneath expands rapidly in the heat of the oven, this rigid topping cracks and separates, forming the signature “tiger” or “giraffe” print. Without rice flour, the topping would simply stretch with the dough, resulting in a smooth, rather than crackled, crust.
While I regularly keep super fine rice flour on hand these days, there was a time when I had to resort to making my own. If you find yourself in a similar situation without access to commercial rice flour, you can try grinding your own. For approximately 30 to 35 grams (about ¼ cup) of extra fine white rice flour, you can place about the same amount of uncooked rice (white or brown works) in a clean spice or coffee grinder. Pulse and grind until it reaches a very fine, powdery consistency, similar to powdered sugar. While homemade rice flour might not always be as consistently fine as commercially produced varieties, it should still work acceptably for Dutch Crunch Bread, giving you a good crackle.
It’s crucial to understand that regular all-purpose wheat flour is NOT a suitable substitute for rice flour in the topping. All-purpose flour contains gluten, which would develop elasticity and prevent the topping from cracking. The result would be a smooth-crusted bread, completely lacking the visual appeal and signature crunch of true Dutch Crunch Bread. So, for an authentic experience, make sure you have extra fine rice flour ready to go!
Key Ingredients for Your Homemade Dutch Crunch Bread
Let’s dive deeper into the specific ingredients that contribute to the success of this wonderful bread. Understanding the role of each component can help you achieve the best results and even customize the recipe to your preferences.
- King Arthur Bread Flour or All Purpose or Bob’s Artisan: The choice of flour significantly impacts the texture of your Dutch Crunch Bread. I often use artisan-type flours, like Bob’s Artisan, because I keep them on hand for things like pretzel making. These flours typically have a higher protein content, which translates to more gluten. The extra gluten is beneficial here, as it helps prevent the loaves from spreading excessively and contributes to a slightly thicker, chewier crust. Bread flour is another excellent choice for similar reasons. If you opt for all-purpose flour, you’ll likely achieve a softer crumb and a less robust crust, which can be delightful, especially when making rolls. For sandwich rolls where a softer texture is often desired, all-purpose flour works exceptionally well.
- Active Dry Yeast or Instant: Both active dry and instant yeast will work for this recipe, though there’s a slight difference in their usage and rise times. Active dry yeast typically needs to be “proofed” first in warm water to ensure it’s alive and active, which usually takes about 10 minutes and can result in a slightly longer overall rise time for the dough. Instant yeast, on the other hand, can often be mixed directly with the dry ingredients. If using instant yeast, I’ve found that using water that’s a bit warmer—around 130°F (54°C)—helps to activate it more quickly when it’s surrounded by flour and other ingredients, leading to a faster and more efficient rise. This is warmer than you’d typically proof active dry yeast in water alone, but it’s effective in this context.
- Sugar: The bread itself contains just enough granulated sugar to enhance the overall flavor profile and provide a bit of food for the yeast, aiding in its activity and the bread’s rise. The goal is not a sweet bread, but rather a subtle depth of flavor that complements savory meals. The small amount of sugar in the topping also contributes to a pleasant caramelization and crispness.
- Ginger (Optional): This is a unique, optional addition that I personally enjoy. A tiny pinch of ginger is believed by some bakers to help boost yeast activity and therefore the dough’s rise. Beyond its functional role, it imparts a very subtle hint of flavor that is difficult to pinpoint, adding a layer of complexity without making the bread taste distinctly of ginger. Feel free to omit it if you prefer.
- Salt: Salt is essential for flavor in any bread recipe, and it also plays a crucial role in regulating yeast activity, preventing the dough from rising too quickly. I typically use Morton kosher salt. If you’re using Diamond Crystal kosher salt, remember that it’s less dense, so you’ll need to increase the amount by about half to achieve the same level of salinity. For the crunchy topping, adding salt is optional; I include it as it enhances the flavor of the crust and doesn’t appear to impede the yeast’s action within the paste.
- Butter: Whether you use salted or unsalted butter in your dough, it will contribute to a richer flavor and a tender crumb. The fat in the butter also helps to extend the bread’s shelf life slightly and provides a more pleasant mouthfeel. Ensure the butter is very soft for easy incorporation into the dough.
- Extra Fine White Rice Flour: As discussed extensively, this is the star ingredient for the topping. The “extra fine” designation is important, as a coarser grind might not create the same delicate crackle. I find excellent quality from brands like Vitacost or Anthony’s. Brown rice flour can also be used, offering a slightly nuttier flavor and a similar textural result for the topping.
- Sesame Oil: For the topping, sesame oil adds a distinct, aromatic flavor that I particularly enjoy with savory breads. However, if you’re not a fan of sesame’s robust profile, you have plenty of alternatives. A neutral vegetable oil (like canola or grapeseed) will work perfectly well without imparting a strong flavor. For an extra savory kick, especially if you plan to use the rolls for garlic-heavy sandwiches, a good quality garlic oil can add a wonderful “blast of garlic flavor.” Olive oil is another excellent choice, offering its characteristic fruitiness.
By carefully selecting and combining these ingredients, you’re well on your way to creating a homemade Dutch Crunch Bread that rivals those found in the best San Francisco bakeries. Each component plays a vital role in achieving that perfect balance of a soft, airy interior and an incredibly crunchy, visually stunning exterior.
- Marbled Olive Oil Cake
- Whipped Cream Crunch Cake
- Crunch Crust Brownies
- Pecan Crunch Cookies
- Butterscotch Crunch Cookies
Recipe: Authentic Dutch Crunch Bread (Tiger Bread)

Dutch Crunch Bread
Anna
Pin Recipe
Ingredients
For the Bread Dough
- ⅔ cup warm water (110-120 degrees F / 43-49 C, approximately 175 grams, plus more as needed)
- 1 ⅛ teaspoons active dry yeast
- 1 tablespoon plus 1 teaspoon granulated sugar
- 2 cups bread flour or 2 cups plus 2 tablespoons all-purpose flour (approximately 280 grams)
- 1 teaspoon salt
- ⅛ teaspoon ground ginger (optional, for flavor and rise boost)
- 2 tablespoons unsalted butter, very soft
For the Crunchy Topping
- ¼ cup extra fine white rice flour (approximately 30 grams)
- ½ tablespoon sugar
- ⅛ teaspoon salt (optional)
- ¼ teaspoon active dry yeast plus an extra tiny pinch
- 2-3 tablespoons water, slightly warm
- 1 teaspoon sesame oil, garlic oil, or any neutral vegetable oil (e.g., olive oil, canola oil)
Instructions
-
In the bowl of a stand mixer (or a large mixing bowl if kneading by hand), combine the warm water and 1 teaspoon of the granulated sugar. Sprinkle the active dry yeast over the water and stir gently. Let this mixture stand for about 10 minutes, or until the surface becomes visibly foamy and you see small bubbles, indicating the yeast is active.
-
To the yeast mixture, add the remaining 1 tablespoon of sugar, the flour (bread flour or all-purpose as per your preference), salt, ginger (if using), and the very soft unsalted butter. Begin to mix these ingredients by hand using a heavy-duty spatula or a sturdy spoon until just blended. At this stage, the mixture will likely appear quite dry and shaggy.
-
Attach the mixing bowl to your stand mixer and fit it with the dough hook. Knead the dough on medium-low speed for approximately 5 minutes. Continue kneading until the dough transforms into a smooth, elastic mass that pulls cleanly away from the sides of the bowl. If the dough seems too stiff, add a tiny splash more water (about ½ teaspoon at a time). Conversely, if it feels too sticky or overly loose, sprinkle in a small amount of extra flour. If you are measuring by weight, aiming for a total of 280 grams of flour generally provides the ideal consistency.
-
Transfer the kneaded dough to a clean bowl that has been lightly coated with a neutral oil or greased with butter. Turn the dough once to ensure it’s fully coated. Cover the bowl loosely with plastic wrap or a clean kitchen towel and allow the dough to rise in a warm, draft-free place until it has doubled in size. This typically takes about 1 hour, but timing can vary depending on your ambient temperature.
-
Once the dough has completed its first rise and doubled, gently punch it down to release the air. Transfer the dough to a lightly floured surface. Now, shape your bread: for a single large loaf, form it into a large oval. For two smaller loaves, divide the dough and shape each into an oval. If you prefer rolls, divide the dough into 5 or 6 equal portions and shape each into a round bun. To achieve a good rise and prevent flattening, shape carefully by pressing dough sections into rectangles or ovals, then rolling them downward into tight cylinders or rounds, tucking the top corners as you roll and pressing out any air. Pinch the seams tightly closed.
-
Place your shaped loaf or rolls onto a baking sheet lined with parchment paper. Cover them very loosely with plastic wrap that has been lightly greased on the side facing the dough. This creates a humid environment for the second rise, allowing the dough to expand without drying out.
-
While the dough begins its second rise, it’s time to prepare the crucial rice flour paste for the topping.
-
In a small bowl, thoroughly mix together the extra fine rice flour, sugar, salt (if using), and active dry yeast. Gradually add 1 tablespoon of slightly warm water and the teaspoon of your chosen oil (sesame, garlic, or neutral vegetable oil). Stir well until the mixture is completely smooth. Continue adding more warm water, a teaspoon at a time, until you achieve a consistency that is a thick, spreadable paste. It should be thick enough to be pushed off a spoon onto the dough and gently spread without running off. Once the topping is ready, carefully and evenly spread it over the top of your rising bread (loaves or rolls). Leave the topped dough uncovered for the remainder of its second rise. During this final rise, preheat your oven to 400 degrees F (200 degrees C).
-
Bake the Dutch Crunch Bread in the preheated oven. For a single large loaf, bake for approximately 35 to 40 minutes. If you’ve shaped two smaller loaves, they will typically bake faster, between 30 and 35 minutes. For 5 or 6 individual rolls, expect a baking time of about 25 minutes, or until the crust is beautifully golden brown and crispy to your liking. The internal temperature should reach 200-210°F (93-99°C). Allow the bread to cool on a wire rack before slicing and enjoying its unique texture and flavor.
