The Secret to Irresistibly Fluffy & Soft Homemade Cinnamon Rolls: Featuring Powdered Buttermilk
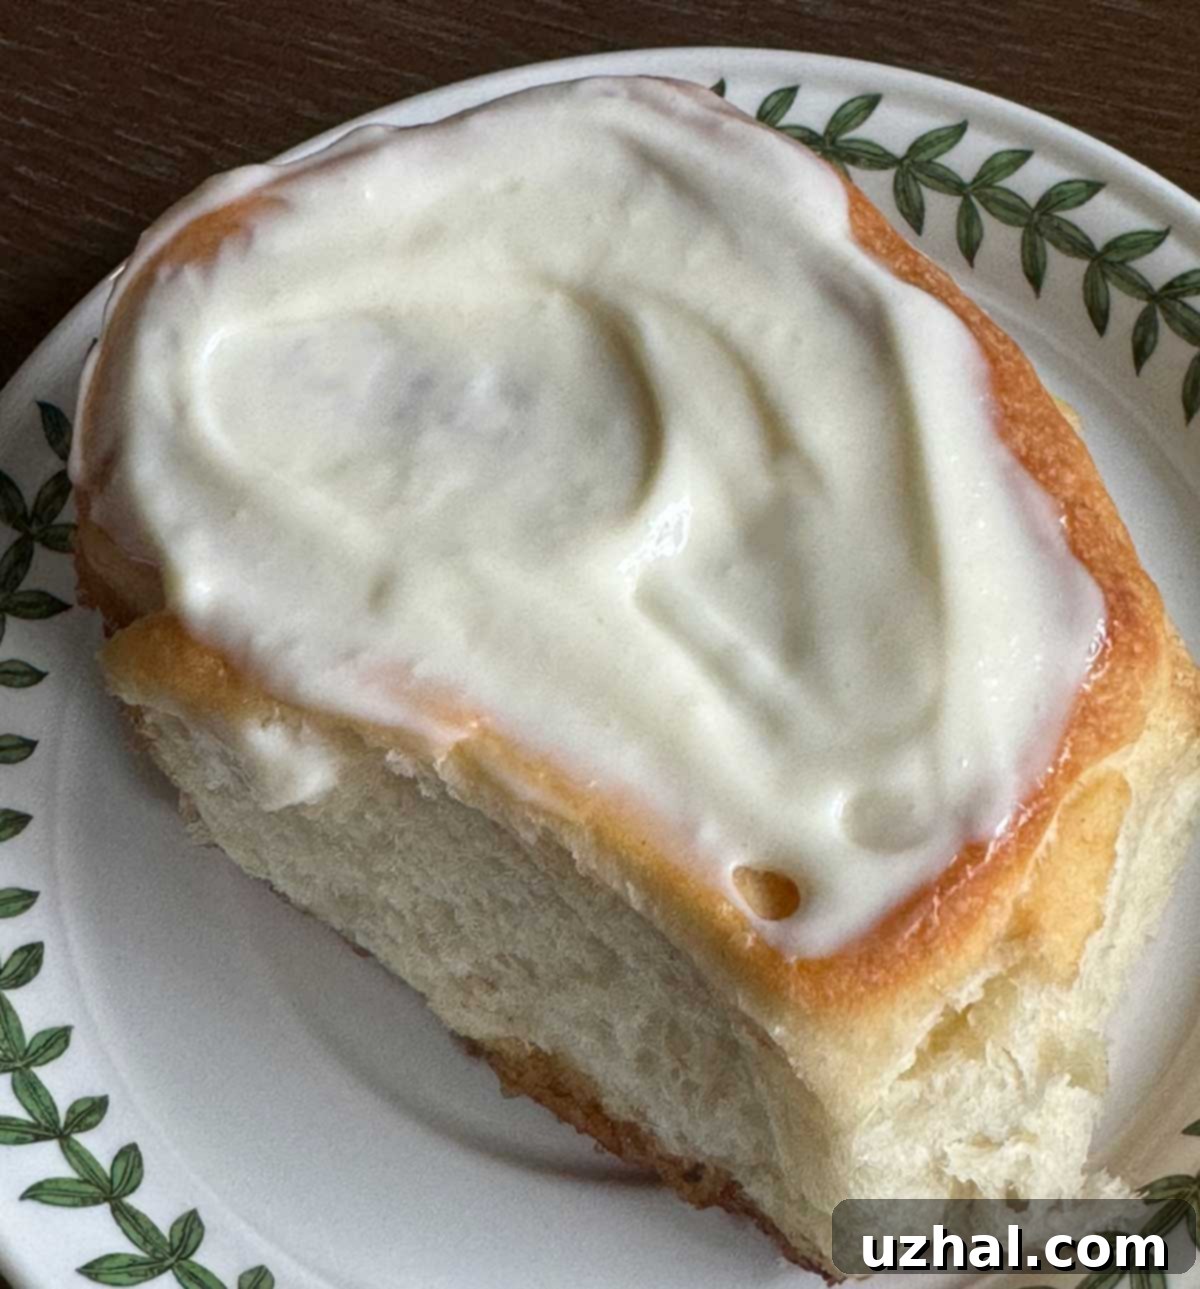
There are some days when baking is simply a necessity. For us, a snow day unexpectedly cleared our schedule, providing the perfect excuse to indulge in a batch of warm, comforting cinnamon rolls. The only hiccup? A quick check of the pantry revealed I was completely out of fresh milk, an essential ingredient for most doughs. Thankfully, I always keep a trusty can of Saco Powdered Buttermilk on hand. This pantry staple truly saved the day, allowing me to whip up some of the most incredibly soft and fluffy cinnamon rolls we’ve ever tasted. The unique combination of powdered buttermilk and all-purpose flour created an exceptionally tender crumb that had everyone reaching for seconds.
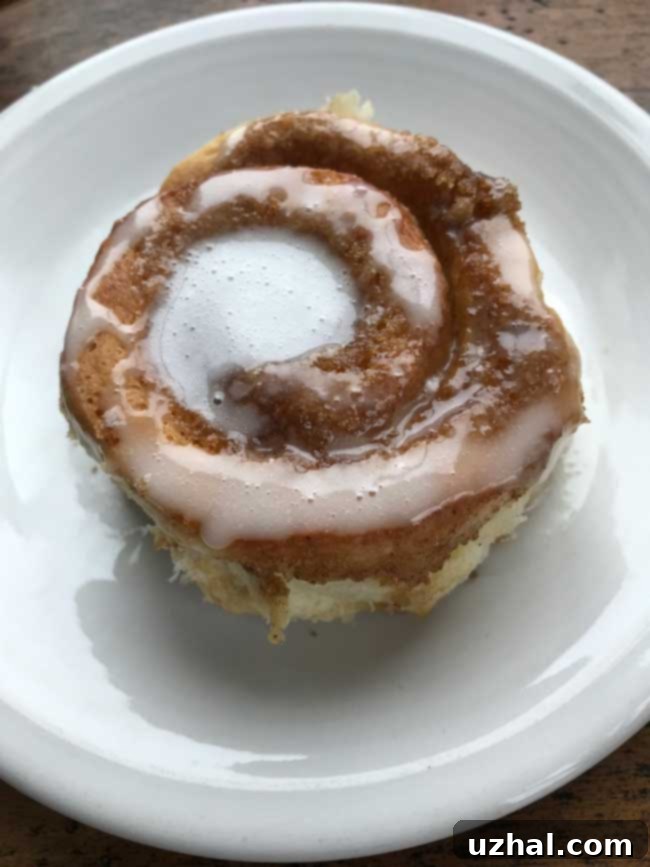
Perfecting Your Buttermilk Cinnamon Rolls Recipe
This particular recipe for buttermilk cinnamon rolls has become a steadfast favorite among our community since its initial publication. Over time, my own yeast bread baking skills have seen significant improvement, allowing me to refine and enhance this beloved recipe with even more detailed notes and helpful tips to ensure your baking success. Our goal is to guide you in creating cinnamon rolls that are not just good, but truly exceptional – a delightful balance of soft, pillowy dough and a rich, aromatic cinnamon-sugar filling.
One of the key updates to the recipe involves the hydration of the dough. While precision is important, doughs can sometimes vary in their moisture absorption. I’ve added a specific note regarding the extra 2 tablespoons of water: incorporate them only if your dough truly needs the additional liquid to achieve the desired consistency. Over-hydrating can lead to a sticky, difficult-to-handle dough, while under-hydrating can result in a dry, crumbly one. The goal is a dough that is soft, pliable, and slightly tacky to the touch. Additionally, pay close attention to the butter for the cinnamon sugar filling. It should be very softened – almost to the point of melting, but not completely liquid. This ensures it creams beautifully with the brown sugar and cinnamon, creating a smooth, spreadable mixture that adheres perfectly to the dough without leaking out during baking. A thoughtful dash of salt in the filling is also a brilliant idea, especially if you’re using unsalted butter, as it expertly balances the sweetness and enhances the overall flavor profile of the rolls.
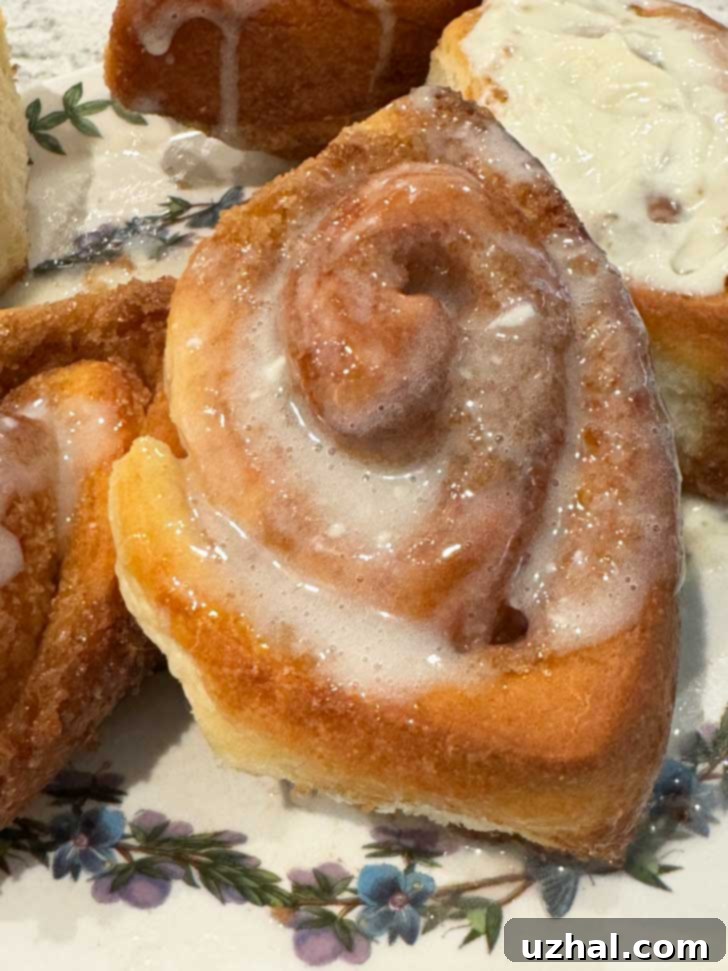
Elevating Your Rolls with a Decadent Cream Cheese Glaze
While the classic clear glaze made with confectioners’ sugar, whole milk, and vanilla is perfectly acceptable and provides a lovely sheen and sweetness, we’ve introduced an optional, easy-to-stir-together cream cheese glaze that truly takes these cinnamon rolls to the next level. This richer, more substantial topping offers a delightful tang that beautifully complements the sweet cinnamon filling. Unlike the translucent basic glaze, the cream cheese glaze is wonderfully opaque, providing a visually appealing contrast that makes your homemade cinnamon rolls look as incredible as they taste. It adds another layer of texture and flavor, transforming a simple treat into a truly decadent dessert-like experience. The softened cream cheese, blended with powdered sugar, vanilla, and a touch of milk, creates a velvety smooth finish that melts in your mouth with every bite.
Freezing and Warming: Enjoying Cinnamon Rolls Anytime
One of the fantastic advantages of this recipe is how well these homemade cinnamon rolls freeze, making them an excellent make-ahead option for busy mornings or unexpected cravings. To freeze them, first ensure they have completely cooled to room temperature after baking and glazing (if desired). Once cool, wrap each cinnamon roll individually in plastic wrap, then place them in an airtight freezer-safe bag or container. This double-layer protection helps prevent freezer burn and preserves their freshness. When you’re ready to enjoy them, simply take them out of the freezer. For a quick warm-up, a brief stint in the microwave works wonders to restore their soft texture. Alternatively, for a slightly crisper exterior and more even warmth, you can thaw them in the refrigerator overnight and then warm them gently in a preheated oven at a low temperature (around 275-300°F or 135-150°C) for about 10-15 minutes, or until heated through. A toaster oven is also a great option for a single roll, offering convenience and efficiency.
Detailed Buttermilk Cinnamon Roll Ingredient Notes
- All-Purpose Flour: This is our flour of choice for these cinnamon rolls because its lower protein content helps achieve that signature soft, tender, and fluffy texture. While bread flour can also be used, be aware that its higher protein content will result in a slightly chewier roll, which some bakers prefer. If opting for bread flour, start with 2 cups and adjust as needed, as it tends to absorb more liquid.
- Powdered Buttermilk: This is truly the star ingredient that makes this recipe so convenient and effective. I wholeheartedly recommend always keeping a can or sack of powdered buttermilk in your refrigerator or pantry. It has a much longer shelf life than liquid buttermilk and is an absolute lifesaver when you run out of fresh milk or buttermilk. Powdered buttermilk imparts a wonderful tang and tenderness to baked goods. If you don’t have it, you can substitute with 6 ounces (about ¾ cup) of warm liquid buttermilk.
- Baking Soda: In this recipe, baking soda works in conjunction with the acidity of the buttermilk (whether powdered or liquid) to create a gentle rise, contributing significantly to the rolls’ overall softness and helping them brown beautifully during baking. It’s crucial for that tender crumb.
- Water: Begin with the specified ¾ cup (6 ounces) of hot tap water. The crucial tip here is to add the additional 2 tablespoons of water *only if needed*. Dough consistency can vary based on factors like ambient humidity, flour type, and how accurately you’ve measured. The dough should come together, be soft, and slightly tacky, but not overly sticky. Trust your judgment here, and avoid adding unnecessary liquid.
- Yeast: I prefer using SAF instant yeast for its reliability and ease of use. Instant yeast doesn’t require proofing beforehand; it can be mixed directly with the dry ingredients, saving you a step and speeding up the dough preparation process.
- Oil: Any neutral vegetable oil will work well in this recipe. My personal preference is Wesson oil. The oil contributes to the dough’s softness and helps keep the rolls moist, preventing them from drying out too quickly. It also helps with the pliability of the dough.
- Salt: I use Morton kosher salt, which measures similarly to table salt but offers a cleaner, less harsh flavor. Salt is vital in baking as it enhances the flavors of all the other ingredients and helps regulate yeast activity, ensuring a controlled rise.
- Sugar (for the Dough): Just one tablespoon of sugar in the dough mixture is all that’s needed. This small amount primarily serves as food for the yeast, encouraging it to activate and produce carbon dioxide, which gives the rolls their light, fluffy texture. It also adds a subtle sweetness to the dough itself.
- Brown Sugar (for the Filling): You can use either light or dark brown sugar, or even a mix of the two. Brown sugar is preferred over white granulated sugar for the filling because its molasses content adds moisture, a deeper caramel-like flavor, and helps create a wonderfully gooey, rich filling that stays soft.
- Butter (for the Filling): Use butter that is preferably salted, or if using unsalted butter, add a small pinch of salt to the filling mixture. As mentioned earlier, it’s essential for the butter to be very softened, almost to a spreadable, paste-like consistency, rather than completely melted. This ensures it mixes evenly with the brown sugar and cinnamon and stays within the rolls during baking.
- Powdered Sugar (for the Glaze): Also known as confectioners’ sugar, this fine sugar is the base for our glazes. Sift it if it appears lumpy to ensure a perfectly smooth, lump-free glaze.
- Milk (for the Glaze): For the best results, use whole milk in your glaze. Its higher fat content contributes to a richer, creamier texture and more decadent flavor, as it’s often the primary source of fat in the basic glaze.
- Iced Pumpkin Chocolate Chunk Cookies
- Apple Pie with Buttermilk Crust
- Cinnamon Roll Biscotti
- Glazed Cinnamon Rolls
- Apple Pie Cinnamon Rolls
Recipe
Powdered Buttermilk Cinnamon Rolls
Anna
Pin Recipe
Ingredients
- 2 ¼ cups all-purpose flour (280 grams, essential for a soft crumb)
- ½ teaspoon salt (balances flavor, regulates yeast)
- ¼ teaspoon baking soda (reacts with buttermilk for tenderness and rise)
- 1 packet instant yeast (2 ¼ teaspoons) (no proofing needed)
- ¼ cup buttermilk powder (the secret to extra soft and tangy rolls)
- 1 tablespoon sugar (feeds the yeast, adds subtle sweetness to dough)
- ¾ cup hot tap water plus another 2 tablespoons (7 oz) (add the extra 2 T. water only if needed for dough consistency)
- ¼ cup vegetable oil (for tenderness and moisture)
Cinnamon Sugar Filling
- 4 tablespoons butter, softened to almost melted (important for a smooth, cohesive filling; add a pinch of salt if using unsalted butter)
- ½ cup plus 2 tablespoons brown sugar (light or dark, provides moisture and deep flavor)
- ¾ teaspoon ground cinnamon (for that classic cinnamon aroma and taste)
Basic Cinnamon Roll Icing/Glaze
- 1 cup confectioners’ sugar (sift if lumpy for a smooth glaze)
- 1-2 teaspoons butter (optional) (adds richness to the basic glaze)
- 3 tablespoons milk plus more as needed (almond milk okay) (adjust for desired drizzling consistency)
- ¼ teaspoon vanilla extract (enhances overall sweetness and aroma)
Cream Cheese Topping (Optional, but highly recommended!)
- 4 oz cream cheese, softened (this is very important for a smooth glaze, ensure it’s at room temperature or slightly warmed)
- ¼ cup confectioners’ sugar (or more, to taste)
- ¼ teaspoon vanilla (for depth of flavor)
- 2-3 tablespoons milk, preferably whole (for ideal drizzling consistency and richness)
Instructions
-
In the large bowl of a sturdy stand mixer, begin by combining all your dry ingredients: the all-purpose flour, salt, baking soda, instant yeast, buttermilk powder, and sugar. Use the paddle attachment to briefly mix these ingredients together until they are well integrated. This ensures even distribution of the yeast and leavening agents.
-
Next, add ¾ cup of very hot tap water (ideally around 120-130°F or 49-54°C, which is warm to the touch but not scalding). Stir this into the dry mixture until it’s just combined. Then, pour in the vegetable oil and continue to stir. At this stage, the dough might still appear a little dry or shaggy. This is your cue to assess: add the extra 2 tablespoons of hot water only if the dough truly needs it to come together. Over the many times I’ve made these, I’ve noticed the dough’s “thirst” can vary, so feel free to trust your baker’s intuition here. The ideal dough should be moist but not overly sticky.
-
Once the liquid is incorporated, switch to the dough hook attachment on your stand mixer. Knead the dough on medium-low speed for approximately 8 minutes, or until it transforms into a smooth, elastic, and uniform ball. You’ll know it’s ready when it pulls away cleanly from the sides of the bowl and springs back slightly when gently poked. It might not need the full 8 minutes, so stop when it reaches that smooth, elastic state.
-
Lightly grease the same mixing bowl (or a clean one) with a little oil, place the dough back in, turning it once to coat. Cover the bowl tightly with plastic wrap or a clean kitchen towel and let it rest in a warm, draft-free place for about 30 minutes. This short rest allows the gluten to relax, making the dough easier to roll out, and gives the yeast a head start.
-
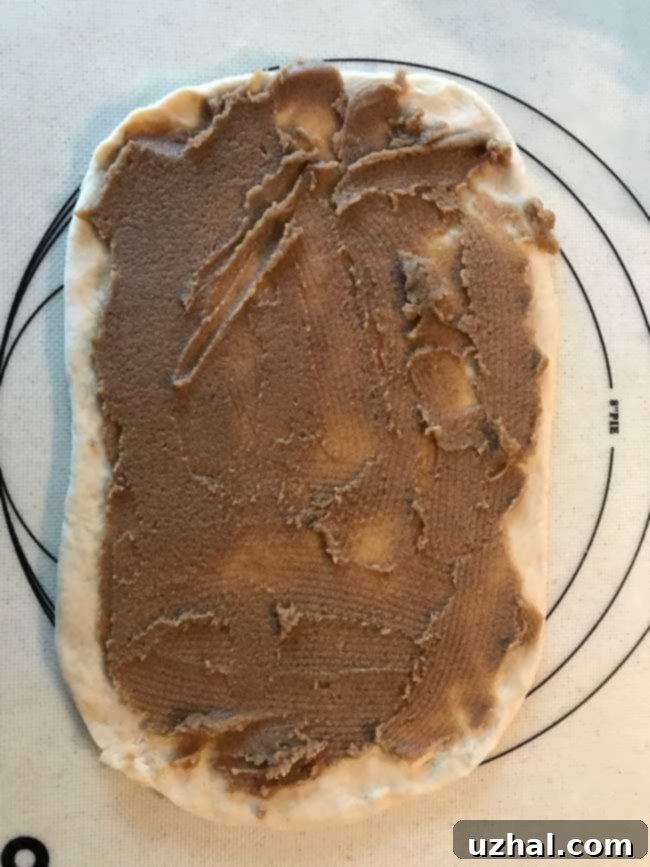
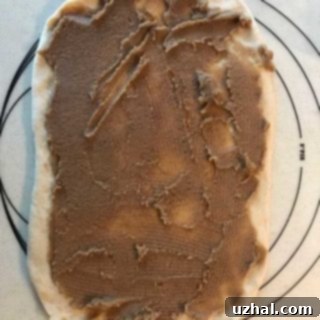
While your dough is resting, prepare the irresistible cinnamon-sugar filling. In a small bowl, combine the very softened butter, brown sugar, and ground cinnamon. Stir these ingredients together thoroughly until you have a smooth, spreadable paste. The consistency should be like a thick brown sugar frosting.
-
Once the dough has rested, gently transfer it to a pastry mat or a lightly floured surface. Roll the dough into a rectangular shape, aiming for dimensions of approximately 9×14 inches. If you’re using a good quality pastry mat, you might find that you don’t need much, if any, extra flour because the dough made with buttermilk is often incredibly pliable and easy to handle without sticking. Only use additional flour if absolutely necessary to prevent sticking.
-
Evenly spread the prepared brown sugar mixture over the entire surface of the rolled-out dough, leaving a small, clean border on one of the long edges (about ½ inch) which will help seal the roll. Starting from one of the short sides, carefully and tightly roll the dough into a cylinder. A tight roll ensures beautiful spirals in your finished cinnamon rolls.
-
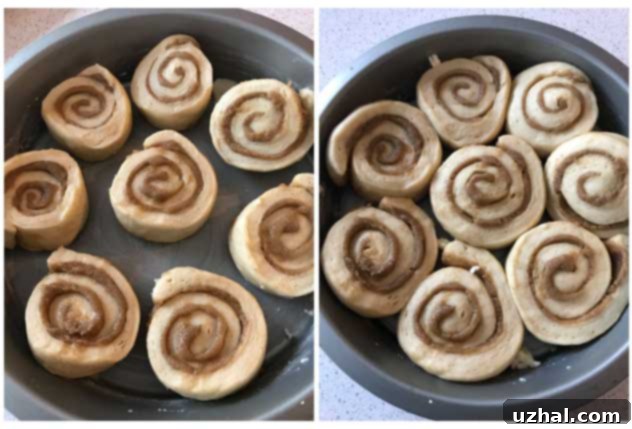
Using a sharp knife or even unflavored dental floss (for perfectly clean cuts), slice the rolled cylinder into 8 equal pieces. For the best presentation and even baking, aim for uniform thickness. Arrange these sliced pieces, cut side up, in a generously buttered 9-inch round cake pan. Leave a little space between each roll, as they will expand during their final rise and baking.
-
Loosely cover the cake pan with a greased piece of aluminum foil or plastic wrap. Place the covered pan in a warm, draft-free location for its final rise, which should take approximately 30 minutes. During this time, the rolls will puff up noticeably, becoming light and airy. A warm spot could be on top of your preheating oven or in a slightly warmed (but turned off) oven.
-
About 15 minutes into the final rise, preheat your oven to 375 degrees F (190 degrees C). This ensures the oven is at the correct temperature when your rolls are ready to bake.
-
Bake the cinnamon rolls in the preheated oven for 25 to 30 minutes. Keep an eye on them; they are done when they have risen beautifully and the tops are a gorgeous golden brown. An internal temperature of about 200-205°F (93-96°C) will indicate they are fully baked.
-
Once baked, remove the cinnamon rolls from the oven and let them cool slightly in the pan while you quickly prepare the icing. To make the basic glaze, place 1 cup of confectioners’ sugar in a 2-cup Pyrex measuring cup or a small mixing bowl. If you’re using butter in the glaze, stir it into the sugar now. Add 2 tablespoons of milk and the vanilla extract, then stir vigorously until smooth. Continue adding milk, one tablespoon at a time, and stirring until you achieve your desired smooth, drizzling consistency. Pour or generously drizzle this glorious icing over your warm cinnamon rolls. The warmth of the rolls will help the glaze melt slightly, creating a delicious sheen.
Optional: Cream Cheese Topping
-
For that irresistible cream cheese topping, ensure your cream cheese is very soft. You can achieve this by letting it sit at room temperature for an hour, or by gently warming about 4 oz of cream cheese in the microwave for 15-30 seconds until it’s no longer cold and is quite mushy and pliable. In a bowl, using a spoon, whisk, or a hand mixer, beat in about ¼ cup to ⅓ cup of powdered sugar (adjust to your sweetness preference) along with ¼ teaspoon of vanilla extract. Gradually add whole milk, one tablespoon at a time, beating until the consistency is perfectly smooth and thin enough to beautifully drizzle over your warm cinnamon rolls. This cream cheese topping adds a delightful tang and richness that truly complements the sweet cinnamon.
Notes
