Starbucks Copycat Oreo Stack Brownies: Your Guide to Homemade Indulgence
There’s something undeniably captivating about the display case at Starbucks. Beyond the coffee aroma, the array of pastries often calls out to me, and one particular treat captured my imagination: the Oreo Stack Brownie. This isn’t just any brownie; it’s a multi-layered masterpiece that promises a symphony of textures and flavors. My quest began after a delightful day out, and while I managed to resist buying a pastry that day, the image of that brownie was seared into my memory. The desire to recreate this iconic Starbucks bar cookie at home became an irresistible challenge.

The Inspiration: A Day Out and a Sweet Revelation
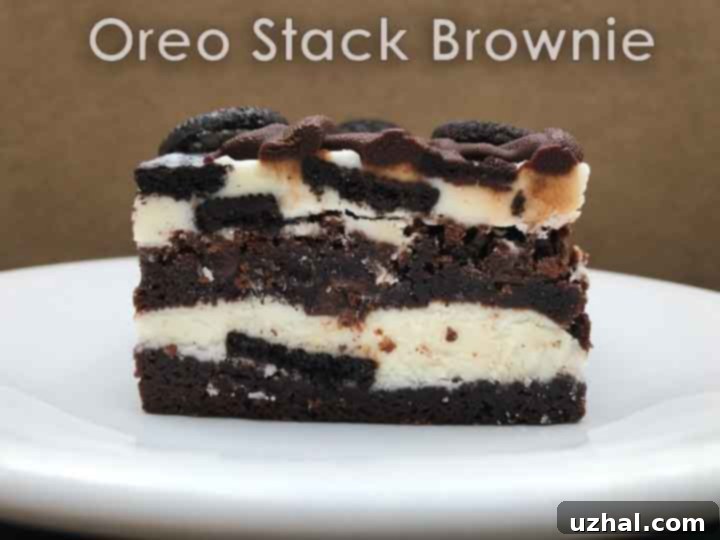
My adventure into the world of homemade Oreo Stack Brownies truly began on a wonderfully laid-back day with Fuzz. We’d spent hours enjoying each other’s company, browsing camp essentials, and getting lost among the endless shelves of Barnes and Noble. As the day wound down, a stop at Starbucks for a refreshing smoothie felt like the perfect conclusion. That’s when I saw it – nestled among the other delectable offerings, the Oreo Stack Brownie. Its layers were distinct: a dark, fudgy brownie base, a thick, creamy white filling studded with Oreo pieces, and a glossy chocolate drizzle on top. It looked utterly divine. I found myself chatting with a remarkably enthusiastic barista who was more than happy to share insights into its flavor profile and texture. Their vivid descriptions fueled my determination to reverse-engineer this treat in my own kitchen. While my initial homemade attempt was promising, the ultimate test will be a direct comparison with the original. Until then, I’m confident this copycat recipe captures the essence of that beloved Starbucks dessert.
Decoding the Original: A Sneak Peek at Starbucks’ Best
During my initial encounter, I discreetly managed to snap a few photos of the actual Starbucks Oreo Stack Brownies. While not professional quality, these images provided crucial visual cues for my homemade rendition, helping me understand the layering and the generous distribution of Oreo pieces. Observing the thickness of the brownie base, the creamy filling, and the elegant drizzle was key to my replication process. These details, combined with the barista’s descriptions, served as my blueprint for crafting a truly authentic copycat.
Crafting Your Own Oreo Stack Brownies: The Recipe Breakdown
Embarking on the creation of these Oreo Stack Brownies at home was a process of careful selection and joyful experimentation. For my first attempt, I opted for an 8-inch pan, a cautious start that proved to be just right for testing the waters. The beauty of this recipe lies in its three harmonious components: a perfectly fudgy brownie base, a decadent, creamy Oreo-infused filling, and a simple yet elegant chocolate ganache drizzle. Each element plays a crucial role in mimicking the Starbucks original, ensuring every bite is a delightful experience.
The Foundation: A Perfectly Balanced Brownie
The brownie itself needed to be just right – not overly rich, nor too dry, especially since it would be layered with a substantial frosting. I chose a reliable brownie recipe that typically serves as an excellent canvas for frostings. Its texture is dense and moist, providing a sturdy yet tender foundation that can hold up to the generous filling without crumbling or becoming soggy. This particular brownie recipe strikes the ideal balance, delivering that classic chocolate indulgence without overwhelming the palate before the Oreo goodness even begins. If you prefer a larger batch, this recipe can easily be doubled and baked in a 9×13 inch pan, or you can certainly substitute your own favorite fudgy brownie recipe, ensuring it’s one that holds its structure well when chilled and sliced.
The Heart of the Treat: Decadent Oreo Cream Filling
The star of the show, beyond the brownie, is undoubtedly the creamy vanilla filling, generously studded with chunks of Double Stuff Oreos. This isn’t just any frosting; it’s designed to replicate the distinctive creme of an Oreo, elevated and spreadable. The “Double Stuff” choice is deliberate, ensuring that iconic vanilla flavor and extra creaminess permeates every layer. As I assembled these bars, it initially felt a bit messy – a testament to the generous amount of filling! But trust the process: once frozen and carefully trimmed, the layers become beautifully defined, and the integrated Oreo bits create a delightful textural contrast. This creamy layer is what truly transforms a simple brownie into an “Oreo Stack.”
The Grand Finale: Silky Chocolate Ganache Drizzle
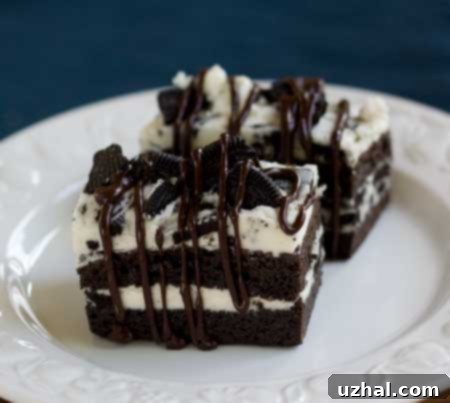
To complete the Starbucks copycat experience, a simple yet elegant chocolate ganache drizzle is essential. This quick microwave ganache adds another layer of chocolate flavor and a sophisticated finish. It’s incredibly easy to prepare: just combine chocolate chips and cream, microwave briefly, and stir until smooth. The ganache sets beautifully on the chilled bars, providing a slight snap and a rich, intense chocolate taste that perfectly complements the fudgy brownie and the sweet, creamy Oreo filling. Don’t forget to crush a few extra Oreo pieces to sprinkle on top for that authentic bakery-style garnish!
Tips for Success and Creative Variations
While the recipe itself is straightforward, a few key tips can elevate your homemade Oreo Stack Brownies from good to exceptional. Precision in chilling is paramount; a well-chilled brownie base and a frozen stacked bar are much easier to work with, ensuring clean cuts and neat layers. Don’t rush the cooling and freezing steps – patience will be rewarded with a professional-looking dessert. When trimming the edges, use a sharp chef’s knife for crisp lines, and wipe the blade clean between cuts if necessary for the cleanest finish. Embrace the initial messiness of assembly; it’s all part of the process for these generously filled treats.
Customizing Your Oreo Stack Brownies
This recipe provides a fantastic base, but don’t hesitate to get creative! Here are a few ideas to make these brownies uniquely yours:
- Oreo Varieties: Experiment with different Oreo flavors! Mint Oreos could make a refreshing twist, Peanut Butter Oreos for an extra nutty flavor, or even Golden Oreos for a vanilla-on-vanilla experience.
- Brownie Base Alternatives: While my chosen brownie recipe is reliable, feel free to use your absolute favorite fudgy brownie recipe. Just ensure it bakes up dense enough to support the filling.
- Filling Flavors: Add a touch of almond extract to the filling for a different nuance, or even a tiny amount of instant espresso powder to deepen the chocolate flavor.
- Ganache Customization: Instead of a plain chocolate ganache, consider a white chocolate ganache for a contrasting color, or even a caramel drizzle for an added layer of sweetness.
- Extra Toppings: Beyond crushed Oreos, consider sprinkling with mini chocolate chips, sprinkles, or a dusting of cocoa powder for an extra flourish.
Storage and Make-Ahead Instructions
Proper storage is key to maintaining the delicious texture and freshness of these layered brownie bars. Due to their creamy filling, Oreo Stack Brownies are best stored in the freezer for long-term preservation. Wrapped tightly in plastic wrap and then placed in an airtight freezer bag or container, they can last for several weeks, allowing you to enjoy a perfect treat whenever a craving strikes. For short-term storage, the refrigerator is ideal, where they will stay fresh for up to 5-7 days. To enjoy them at their best, simply remove them from the refrigerator or freezer and let them sit at room temperature for about 20-30 minutes before serving. This allows the brownie to soften slightly and the filling to become perfectly creamy, enhancing the overall experience.
If you’re planning to serve these at an event where they might sit out for an extended period, you can adjust the filling recipe for more stability. Consider using a combination of shortening and butter in place of just butter in the creamy filling. Shortening provides a higher melting point, helping the frosting maintain its structure and firmness longer at room temperature without melting. This small adjustment can be a lifesaver for potlucks or parties.
Frequently Asked Questions About Oreo Stack Brownies
Can I use store-bought brownie mix for this recipe?
Absolutely! If you’re short on time or prefer the convenience, a good quality boxed brownie mix can definitely be used. Just follow the package instructions to bake an 8-inch square brownie, and ensure it cools completely before proceeding with the layering steps. The key is to have a sturdy, fudgy brownie base.
What kind of chocolate chips should I use for the ganache?
For the ganache, using good quality extra dark or semisweet chocolate chips will yield the best flavor. However, regular chocolate chips will also work perfectly fine. The “extra dark” recommendation simply offers a richer, more intense chocolate flavor that balances the sweetness of the filling. You can even use milk chocolate chips if you prefer a sweeter ganache.
How do I get really clean cuts for my brownie bars?
The secret to clean cuts is a very sharp knife and chilling. Make sure your stacked brownie is thoroughly frozen or at least very firm from refrigeration. Use a large chef’s knife and press down firmly rather than sawing. For the cleanest possible cuts, wipe your knife clean with a hot, damp cloth between each slice. This prevents the chocolate and frosting from dragging and smearing.
Can I make these ahead for a party?
Yes, these Oreo Stack Brownies are an excellent make-ahead dessert! You can prepare the entire recipe, freeze the trimmed stacks, and then re-wrap them tightly in plastic wrap followed by aluminum foil or an airtight container. They will keep well in the freezer for up to 2-3 weeks. When you’re ready to serve, simply thaw them in the refrigerator overnight or at room temperature for about 30 minutes before slicing and serving. This makes them perfect for entertaining, as most of the work can be done in advance.
- Starbucks Banana Bread Copycat
- Starbucks VIA Double Chocolate Cookies
- Butterscotch Scones aka Starbucks Pumpkin
- Oreo Stack Brownie — Better!
- Raspberry Icebox Cake
Related Copycat Recipes You’ll Love
Full Recipe: Homemade Oreo Stack Brownies

Oreo Stack Brownies
Anna
Pin Recipe
Ingredients
- 8 tablespoons unsalted butter, cut into chunks (114 grams)
- 1 cup granulated sugar (200 grams)
- ⅓ cup unsweetened Dutch processed cocoa powder
- ¼ teaspoon salt
- ¾ teaspoon vanilla extract
- 2 large eggs, cold
- ½ cup all-purpose flour (stir and fluff before measuring) (2.3 oz or 65 grams)
- ¼ teaspoon baking powder
Filling/Topping
- 12 tablespoons unsalted butter, softened
- 3 cups sifted confectioners’ sugar****
- 1 teaspoon vanilla
- ¼ teaspoon salt, scant
- 6 tablespoons whipping cream
- 10 tasty Double Stuff Oreos use more or less as desired
Ganache
- ½ cup extra dark or semisweet chocolate chips
- ¼ cup whipping cream
Instructions
-
Preheat oven to 350 degrees F (175°C). Line an 8-inch square metal pan with nonstick foil, leaving an overhang on the sides for easy removal.
-
Melt the butter in a large (3-quart) nonstick saucepan over medium heat. Stir in the granulated sugar and cocoa powder until well combined. Reduce heat to low and stir gently for about 30 seconds to warm the sugar mixture. Turn off the heat and let the mixture sit for 5 minutes to cool slightly. Stir in the salt and vanilla extract.
-
Add the cold eggs, one at a time, whisking or stirring just until each is mixed into the chocolate mixture. Be careful not to overbeat the eggs, as this can make the brownies cakey. Finally, stir in the baking powder and all-purpose flour until just combined, ensuring no dry streaks remain. Pour the batter evenly into the prepared 8-inch pan and bake for 25 minutes, or until a wooden skewer inserted into the center comes out with moist crumbs attached (not wet batter). Let the brownies cool completely in the pan on a wire rack. Once cool, transfer them to the refrigerator to chill thoroughly, which will make them easier to handle.
Filling/Frosting
-
While the brownies chill, prepare the creamy filling. In a large bowl, beat the softened unsalted butter with an electric mixer until light and creamy. Gradually add the sifted confectioners’ sugar, scraping down the sides of the bowl as needed, and continue beating until smooth and fluffy. Beat in the vanilla extract and a scant ¼ teaspoon of salt. Slowly add the whipping cream, beating and scraping until you have a smooth, rich vanilla frosting. On a clean cutting board, coarsely chop about 7 of the Double Stuff Oreos (stuffing and all) and gently fold them into the prepared frosting. This adds texture and a burst of Oreo flavor to every bite.
-
Once the brownie slab is thoroughly chilled, lift it from the pan using the foil overhang and carefully peel away the nonstick foil. With a large, sharp knife, slice the brownie in half lengthwise to create two 4×8 inch rectangles. This makes them much easier to manage for layering. Working with one rectangle at a time, carefully slice each rectangle horizontally through the center to create two thinner layers, similar to how you would slice a cake. You will now have four brownie layers in total. Spread about half a cup of the creamy Oreo frosting onto the bottom layer of one rectangle. Place the top layer of the same rectangle over the frosting, pressing down gently but firmly to remove any air bubbles and ensure the layers adhere. Repeat with the second rectangle. Spread the tops of each assembled rectangle with more of the Oreo frosting, creating a smooth surface. Gently wrap each frosted rectangle in plastic wrap and place them in the freezer until solid, which usually takes at least 2-3 hours. If you plan to keep them frozen for longer than an hour, re-wrap them tightly once solid and place them in an airtight freezer-safe container or bag to prevent freezer burn.
-
Once the brownie stacks are completely frozen solid, remove them from the freezer. Using a sharp chef’s knife, carefully trim the edges of each rectangle to create two perfectly neat and uniform stacked brownie bars. This step gives them a professional, bakery-quality finish.
Ganache Topping
-
To prepare the ganache, combine the extra dark or semisweet chocolate chips and whipping cream in a microwave-safe bowl or a large Pyrex measuring cup. Microwave at 50% power for 30-second intervals, stirring thoroughly after each interval, until the chocolate is fully melted and the mixture is smooth and glossy. Be careful not to overheat. Once smooth, transfer the ganache to a heavy-duty zipper bag (or a piping bag). Snip a tiny hole in one corner of the bag. Squeeze decorative lines of ganache evenly over the cold, trimmed brownie bars. Break up the remaining Double Stuff Oreos into smaller pieces and gently press them into the wet ganache on top of the bars for an attractive garnish. Return the bars to the refrigerator for at least 15-30 minutes to allow the ganache to set completely. Store the finished Oreo Stack Brownies in an airtight container in the refrigerator.
-
For optimal enjoyment, remove the bars from the refrigerator about 15-30 minutes before serving. This allows the brownie and filling to soften slightly, enhancing their delicious texture. While the bars can sit out for short periods, they will maintain their best texture and firmness when kept chilled.
Notes
