Ultimate Apple Pie Cinnamon Rolls: The Genius Way to Transform Leftovers
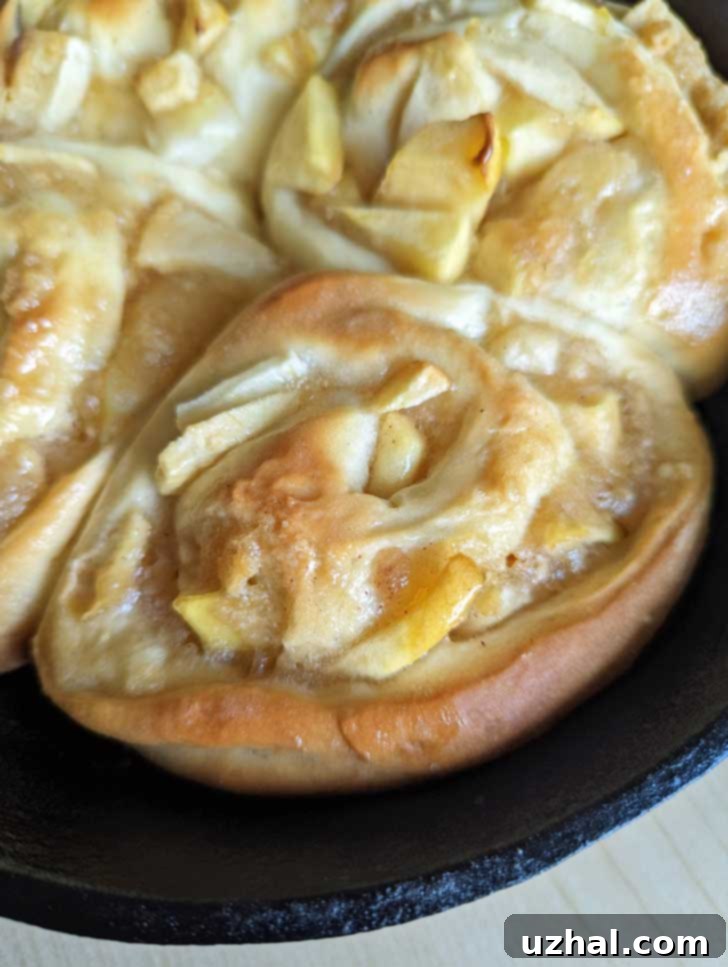
Imagine the warm, comforting embrace of a classic cinnamon roll, but with an unexpected twist – a luscious, fruity filling of real apple pie. That’s precisely what these Apple Pie Cinnamon Rolls deliver. When the idea first sparked, there was an initial rush of excitement, followed by the realization that “apple pie cinnamon rolls” is a phrase already floating around the internet. However, this recipe is genuinely different. It’s not just cinnamon rolls *flavored* like apple pie; it’s literally an actual apple pie, chopped and rolled into your favorite sweet dough. This ingenious method ensures every bite is packed with authentic apple pie flavor, complete with tender fruit, hints of spice, and delightful little pockets of flaky crust and crumb.
Jump to Recipe

The magic begins with cold, leftover apple pie. Instead of your usual butter and cinnamon sugar mixture, you finely chop the pie – fruit, crust, and all – and generously spread it across your cinnamon roll dough. As the rolls bake, the apple pie filling caramelizes and melds with the soft dough, creating an incredible fusion of flavors and textures. You’ll find pockets of tender apples, fragrant spices, and even bits of the original pie crust and crumb, offering delightful little surprises in every mouthful. This isn’t just a recipe; it’s a creative solution for holiday leftovers and a truly unique dessert or breakfast treat that will impress anyone who tries it.
The Ingenious Process: Rolling Real Apple Pie into Dough
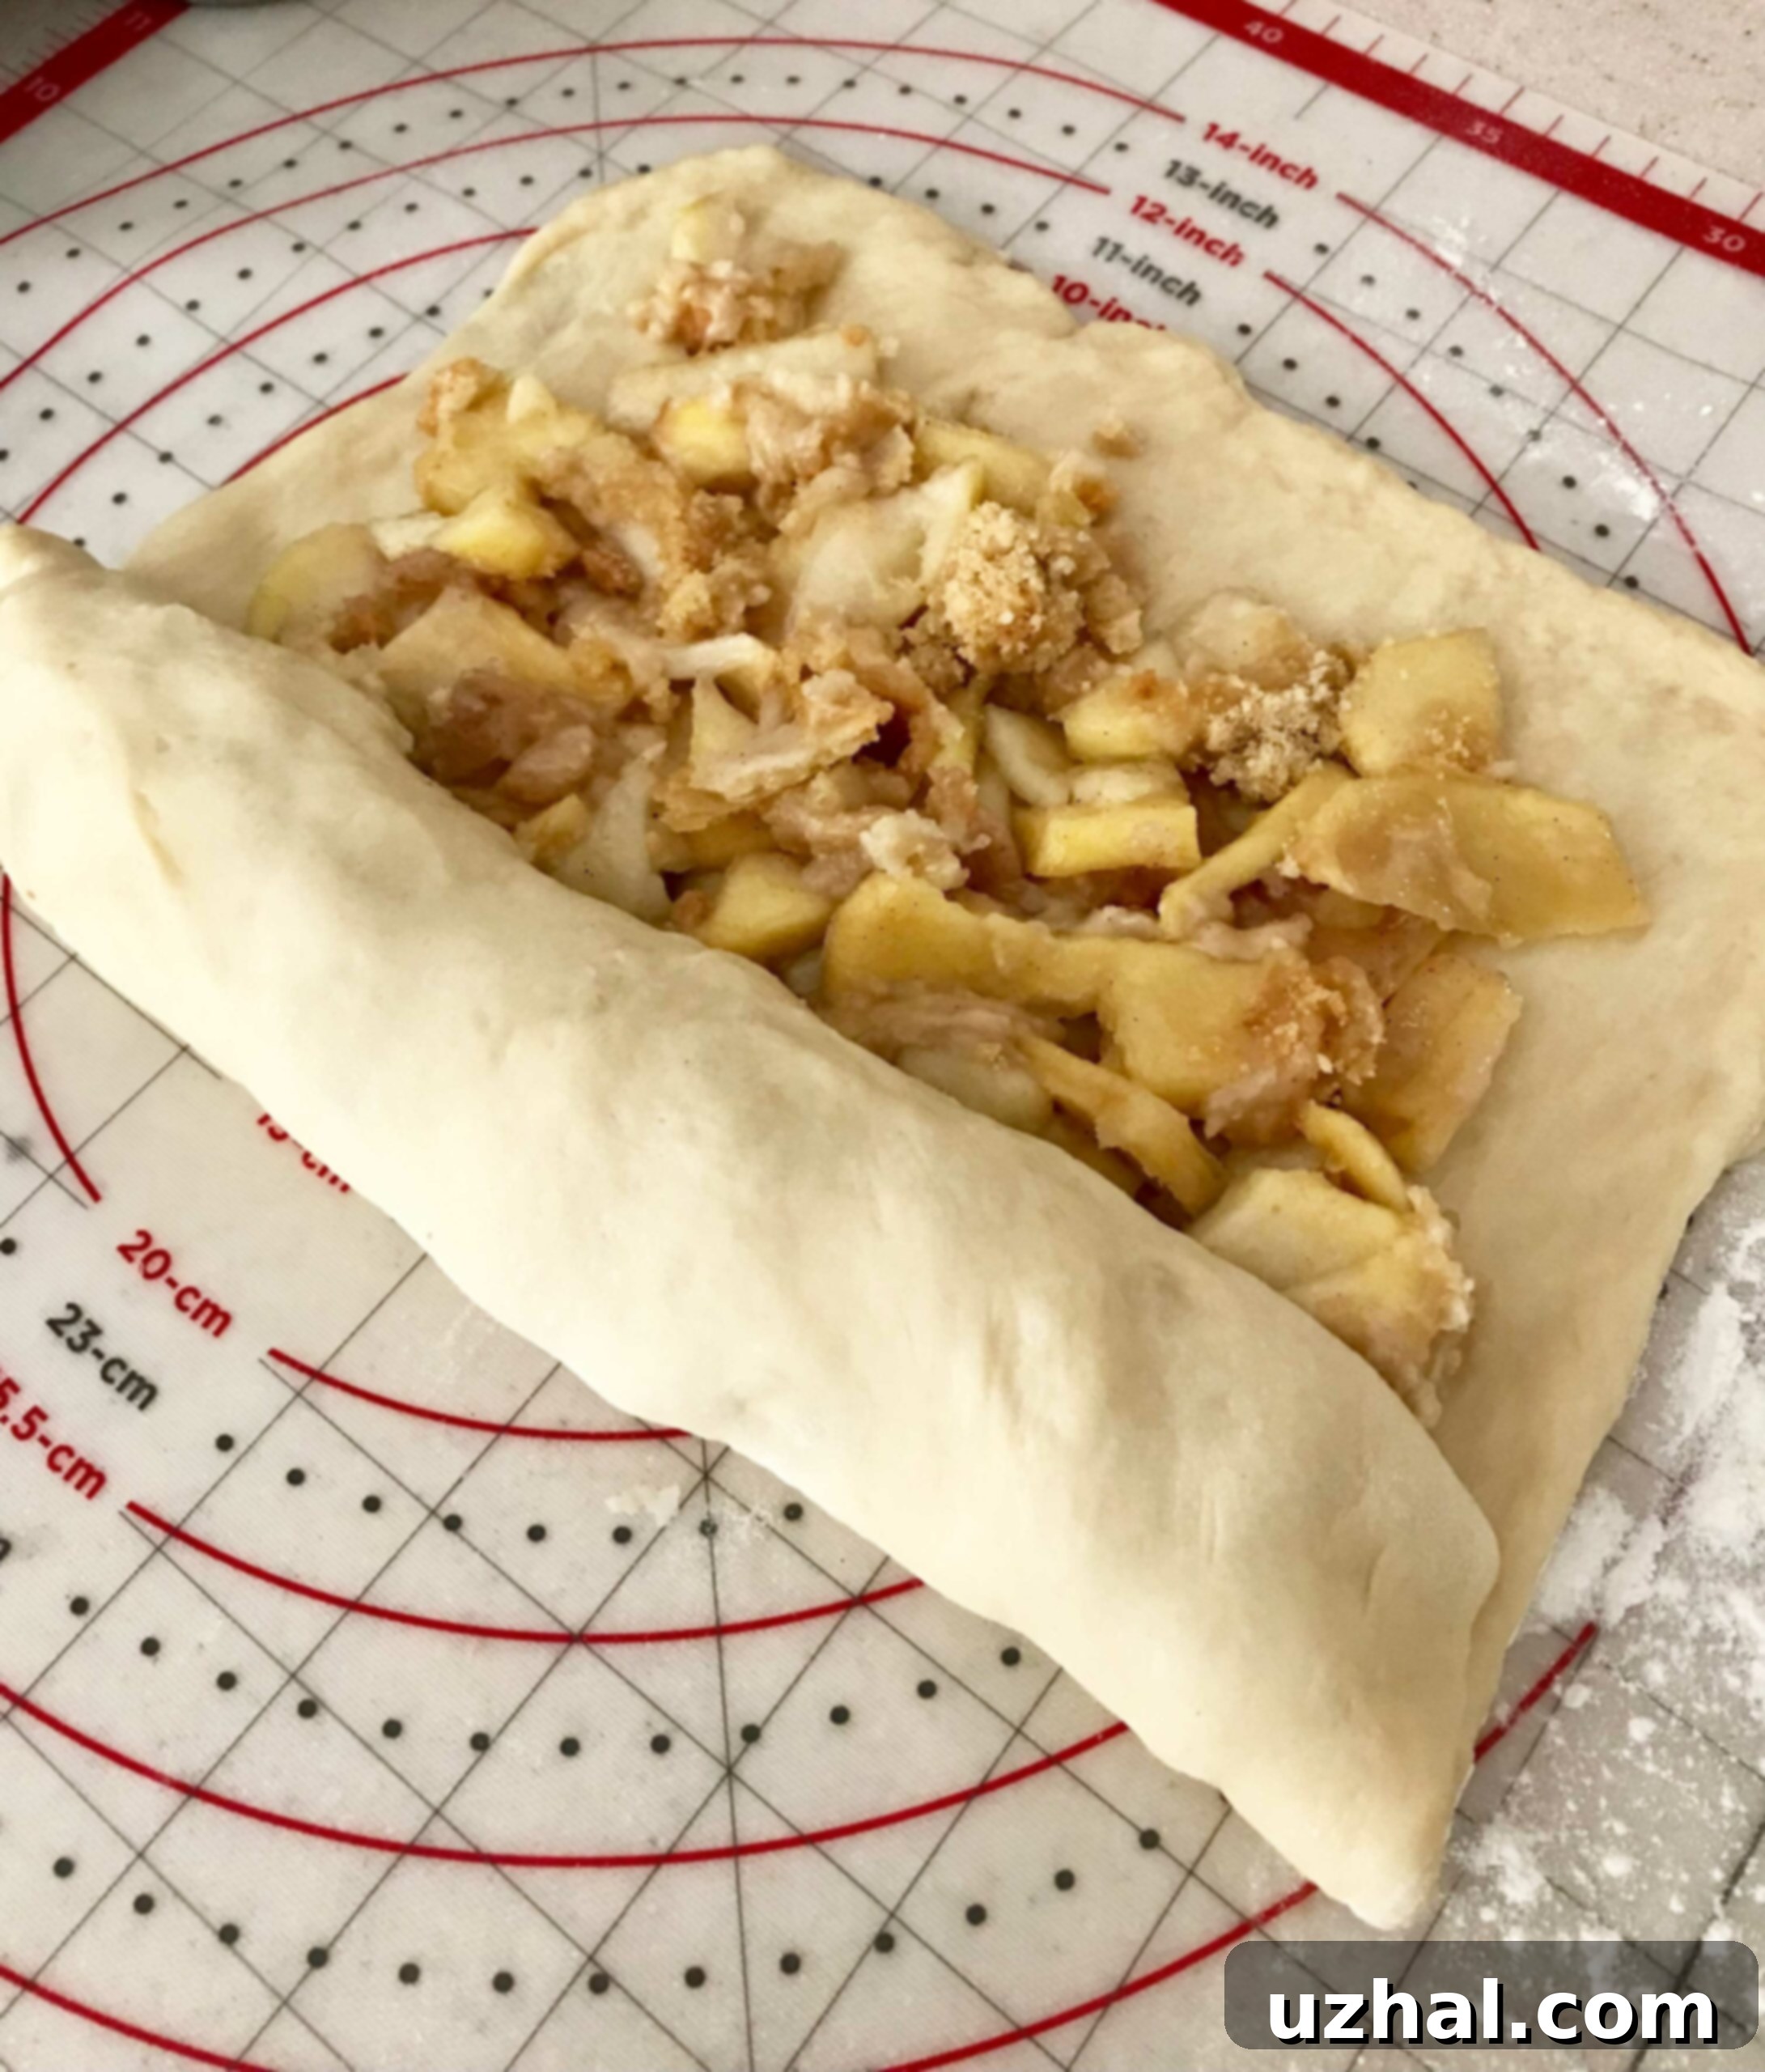
Let’s dive into the fascinating process of crafting these extraordinary Apple Pie Cinnamon Rolls. The beauty of this recipe lies in its simplicity and the delightful outcome. The transformation of a slice of yesterday’s apple pie into tomorrow’s irresistible cinnamon roll is truly something to behold. The image below provides a visual guide to how the apple pie filling is incorporated into the dough. For this particular batch, I focused on using mostly the apple filling with just enough bits of the crust and crumb to add textural interest without overwhelming the rolls. The cold pie filling, when chopped, adhered perfectly to the dough, allowing for a seamless rolling process into a single, cohesive cylinder. Cutting this cylinder into individual rolls was surprisingly easy, yielding seven perfectly portioned treats. Even if a piece of dough separated slightly during cutting, a gentle pinch was all it took to bring it back together, ensuring beautifully formed rolls ready for baking.

The chosen cinnamon roll dough proved to be incredibly forgiving and effective for this application. Its light and airy texture provided the perfect contrast to the dense, fruity pie filling. The resulting Apple Pie Cinnamon Rolls were soft, pillowy, and generously studded with the mixed-in pie, offering a uniquely satisfying texture that wasn’t overly gooey. However, for those who crave an extra layer of richness and a more intensely gooey experience, there’s a simple trick: before spreading the apple pie, lightly brush the dough with a mixture of melted butter, brown sugar, and a dash of cinnamon. This extra step will elevate the gooey factor and add another dimension of classic cinnamon roll flavor. For my initial test, I opted for pure apple pie, letting its natural flavors shine through, and the results were absolutely delicious. Rest assured, a second round of these delightful rolls is definitely on the horizon!
Pre-Bake Perfection: Ready for the Oven
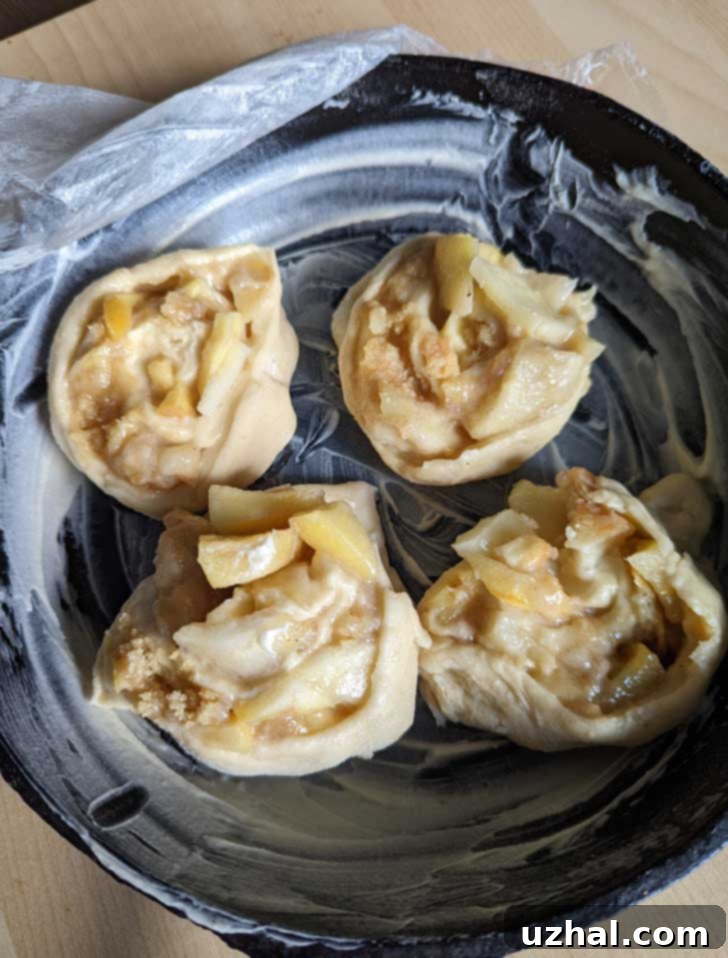
Once the rolls are cut and nestled into their baking vessels, the anticipation builds. For this particular batch, I decided to bake four of the rolls in a charming cast iron skillet, which not only aids in even baking but also gives them a rustic, homey appeal. The remaining three found their home in another pan, ready to rise alongside their skillet counterparts. It’s important to give them adequate space for their final rise, as they’ll puff up beautifully, becoming even more tender and ready to absorb the warmth of the oven. The image below captures these unbaked beauties, already showing promise with their visible layers of dough and apple pie filling. This stage is crucial, as the rising process contributes significantly to the rolls’ ultimate light and fluffy texture, preparing them for a transformative bake.

These homemade Apple Pie Cinnamon Rolls were not only fun to make but also incredibly rewarding to share. The best part? We now have six more stashed away in the freezer, ready to be pulled out and baked on a whim for an instant treat. This makes them perfect for meal prepping or having on hand for unexpected guests. If you decide to embark on this culinary adventure, whether following this recipe exactly or experimenting with a different flavor pie – perhaps a cherry pie, peach pie, or even something more unconventional like a pecan pie – please share your experience! I’m always eager to hear about new variations and successes. I’ll certainly be posting updates as I explore other fruit pie fillings in the future. Imagine a sticky, sweet pecan pie cinnamon roll – the possibilities are truly endless!
Tips for Success & Variations
To ensure your Apple Pie Cinnamon Rolls turn out perfectly every time, here are a few extra tips and considerations:
- Choose Your Pie Wisely: While any leftover apple pie will work, one with a good amount of filling and some textural contrast from the crust works best. A pie with a crumb topping can add an extra delightful crunch!
- Chop Consistently: Aim for small, manageable pieces of pie. Too large, and they might make rolling difficult; too small, and you lose some of the distinct pie texture.
- Don’t Overfill: While it’s tempting to load up on pie, ensure you can still easily roll and seal your dough.
- The Dough is Key: A strong, elastic cinnamon roll dough is ideal. The recipe provided is excellent, but feel free to use your favorite go-to sweet dough recipe if you have one.
- Achieving Gooeyness: As mentioned, for an extra gooey texture, a light brush of melted butter, brown sugar, and cinnamon on the dough *before* adding the pie can make a significant difference.
- Freezing Instructions: To freeze, place the unbaked rolls in your greased pan, cover tightly with plastic wrap, then aluminum foil. Freeze for up to 1 month. When ready to bake, thaw overnight in the refrigerator, then let rise in a warm spot for about 1-2 hours before baking as directed. You can also bake them first, let them cool, then freeze. Reheat thawed baked rolls in a microwave or a warm oven.
- Other Pie Adventures: Don’t limit yourself to apple! This concept works wonderfully with other fruit pies like cherry, blueberry, or even mixed berry. Imagine the vibrant colors and flavors! Pecan pie is a more decadent option that could create a truly unique, rich roll.
These Apple Pie Cinnamon Rolls truly bridge the gap between two beloved desserts, offering a comforting and innovative treat. They’re perfect for a special breakfast, a decadent brunch, or a delightful dessert. Give them a try and savor the magic!
- Streusel Bread
- Apple Pie Muffins
- Chocolate Apple Butter Muffins
- Double Chocolate Apple Butter Bread
- Coffee Cake
Recipe: Apple Pie Cinnamon Rolls

Apple Pie Cinnamon Rolls
Anna
Pin Recipe
Ingredients
- Lots of butter for greasing pan
- ½ cup whole milk (120 grams)
- 1 ⅛ teaspoons active dry yeast
- 4 tablespoons granulated sugar (50 grams)
- 1 large egg, room temperature
- 2 tablespoons plus 2 teaspoons salted butter or margarine, softened (40 grams)
- 2 ¼ cups all-purpose or bread flour, divided use (280 and 35 grams total)
- ½ teaspoon kosher salt (Morton) or table salt
- Leftover apple pie, mostly apples and some bits of crust
Vanilla Icing
- 2 tablespoons salted butter, softened (or use unsalted and add a pinch)
- 1 cup powdered sugar (120 grams)
- 2 tablespoons milk or as much as you need (28 grams) or as needed
Instructions
-
Generously grease a 9×13 inch baking pan or two 8×10 inch cast iron skillets with butter. Set aside.
-
Gently heat the milk to approximately 105 degrees F (40 degrees C). Stir in one teaspoon of the granulated sugar along with the active dry yeast. Give it a gentle stir and allow it to proof for about 10 minutes until foamy, indicating the yeast is active.
-
In the bowl of a stand mixer, combine the softened butter, large egg, and the remaining granulated sugar. Beat until the mixture is light and creamy. Incorporate the kosher or table salt, then add the carefully measured 280 grams (2 cups) of all-purpose or bread flour. Keep the remaining ¼ cup of flour nearby for later adjustment.
-
Stir the ingredients by hand until just combined. Then, pour in the proofed yeast/milk mixture. Mix thoroughly by hand before attaching the bowl to the stand mixer and fitting it with the dough hook.
-
Begin kneading with the dough hook. After about a minute of kneading, observe if the dough is still sticking to the sides of the bowl. It likely will be. Gradually add the reserved ¼ cup of flour, one tablespoon at a time, while continuing to knead (and scraping down the sides occasionally) for approximately 6 minutes. Continue until the dough is smooth, elastic, and clings only to the hook and the bottom of the bowl, not the sides. Typically, I only need to add about 2 tablespoons from the extra ¼ cup of flour.
-
Scrape the dough into the center of the bowl to form a neat ball. Cover the bowl with plastic wrap or a clean kitchen towel and let it rise in a warm place for 1 hour, or until it has doubled in bulk. If you need your mixing bowl for other tasks, you can transfer the dough to a lightly greased bowl before covering. (A helpful tip: I often let my dough rise directly in the mixing bowl without extra oil, then transfer it to a lightly floured pastry mat).
-
Once doubled in size, gently punch down the dough to release the air. Turn it out onto a lightly floured pastry mat or clean countertop. Using your hands or a rolling pin, press and roll the dough into a rectangle approximately 16 inches by 10 inches, positioning the 10-inch sides at the top and bottom.
-
Optional step for richer rolls: If you desire an even richer, gooier cinnamon roll, lightly brush the entire surface of the dough rectangle with some extra melted salted butter, followed by a sprinkle of cinnamon sugar or brown sugar. I personally skipped this step and found the rolls to be perfectly rich with just the apple pie filling.
-
Evenly spread the chopped leftover apple pie pieces (ensuring a good mix of apples and bits of crust) over the entire dough rectangle. Gently press the pie pieces into the dough to help them adhere. Starting from the top 10-inch side, carefully roll the dough downward to form a tight cylinder. As you roll, pinch the dough together to keep the pie filling securely inside.
-
With one hand gently holding the cylinder, use the other hand and a sharp knife or unflavored dental floss to carefully slice rounds about 1 ½ inches thick. Arrange the sliced rolls in your greased pans, leaving about ½ to 1 inch of space between each roll to allow for expansion during rising and baking. Cover the pans with a piece of greased plastic wrap and let the rolls rise for another 45 minutes to 1 hour, or until visibly puffy.
-
While the rolls are performing their second rise, preheat your oven to 400 degrees F (200 degrees C).
-
Bake the rolls at 400 degrees F (200 degrees C) for the initial 15 minutes. This high heat helps them rise quickly and achieve a beautiful golden crust.
-
After 15 minutes, reduce the oven temperature to 350 degrees F (175 degrees C) and continue baking for another 10 to 15 minutes. The rolls are perfectly baked when they are golden brown on top and a thermometer inserted into the doughy part of a roll registers 205 degrees F (96 degrees C).
-
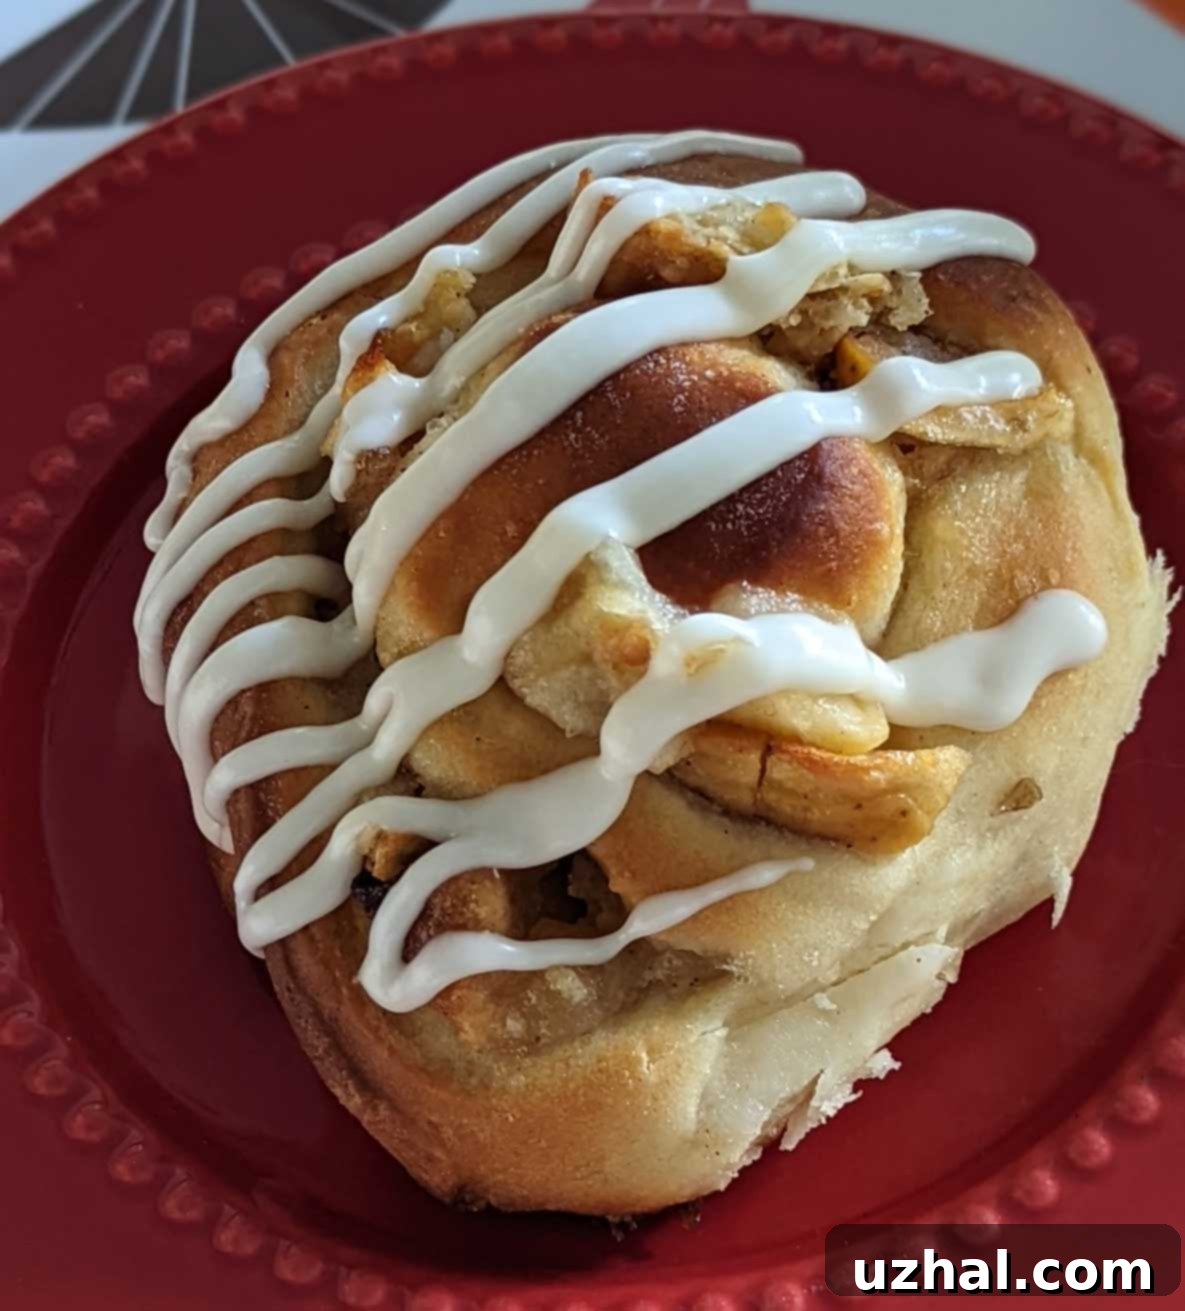
While the rolls are cooling slightly, prepare the vanilla icing. In a medium bowl, beat together the softened salted butter and powdered sugar until smooth. Gradually add the milk, one tablespoon at a time, stirring until the icing reaches a smooth, pourable consistency. Add a splash of vanilla extract for extra flavor. You can spoon the icing generously over the warm rolls, or for a neater application, transfer it to a freezer bag, snip off a bottom corner, and pipe it over the rolls. Serve warm and enjoy your incredible Apple Pie Cinnamon Rolls!
