Easy Homemade Challah Bread: A Simple Recipe for Delicious Loaves & Bread Pudding
There’s nothing quite like the aroma of freshly baked bread filling your home, and this easy challah recipe delivers on that promise every time. Crafted with simplicity and versatility in mind, this recipe is perfect for seasoned bakers and enthusiastic beginners alike. While it’s my go-to for making a sublime White Chocolate Challah Bread Pudding – a personal favorite – its rich yet balanced flavor profile makes it suitable for virtually any bread pudding creation or simply enjoyed on its own.
Why This Challah Recipe Stands Out
Unlike many traditional challah recipes that call for an abundance of eggs and oil, this version is intentionally designed to be slightly lighter without sacrificing flavor or texture. It uses fewer eggs and less oil, resulting in a challah that’s a bit less rich but still incredibly moist, tender, and undeniably delicious. This thoughtful adjustment makes the bread not only easier on the palate for everyday enjoyment but also perfectly poised to absorb the custardy goodness of a bread pudding without becoming overly heavy. Despite its lighter ingredient list, it still yields a generously sized loaf, perfect for sharing or savoring throughout the week.
The Evolution of a Family Favorite
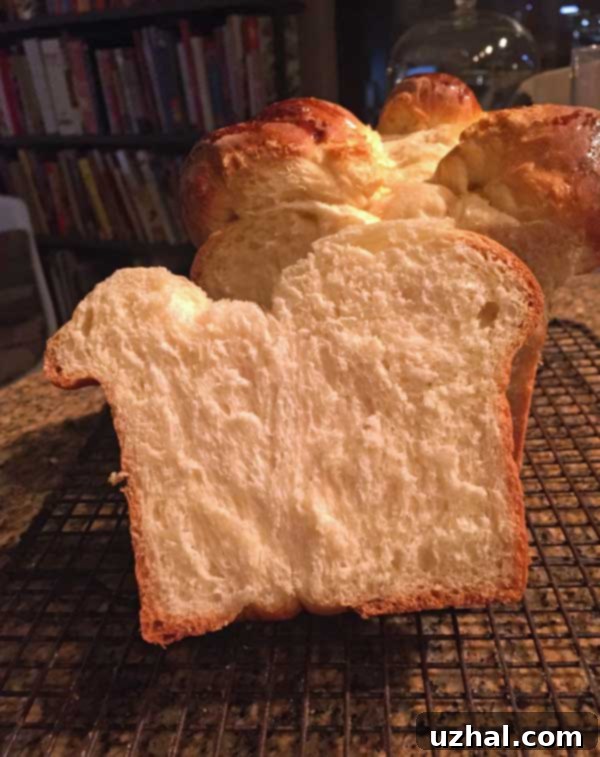
This recipe has become a staple in my kitchen, a testament to its consistent results and delicious taste. My family absolutely adores it, leading me to bake it frequently and experiment with various shaping techniques. One popular variation involves baking challah in a standard loaf pan, offering a more conventional slice for sandwiches or toast. You have a couple of fantastic options for achieving this:
- **The Braided Loaf Pan Method:** Divide the dough into three equal parts, braid them as usual, then gently stuff the braided loaf into a 9×5 inch loaf pan. This method still gives you the beautiful braided appearance, albeit slightly compressed.
- **The “Bubble Bread” Style:** For a fun and pull-apart loaf, cut the dough into three parts, then cut each of those parts into eight smaller bits. Shape each small piece into a round and simply stack these rounds in the loaf pan. As the dough rises and bakes, the rounds meld together, creating a delightful “bubble bread” effect, similar to popular savory versions but with the sweet, rich taste of challah. This method is particularly enjoyable for kids and makes for easy portioning.
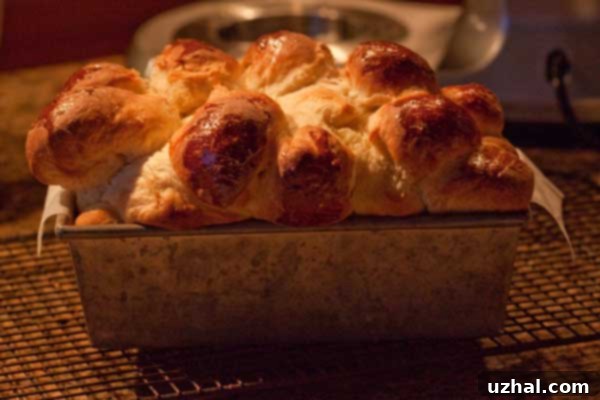
A crucial tip if you opt for baking challah in a loaf pan: ensure it’s a large one! Challah dough rises significantly, and a cramped pan can lead to overflowing or an uneven bake. A spacious pan allows the bread to expand fully, yielding a beautifully shaped and perfectly cooked loaf.
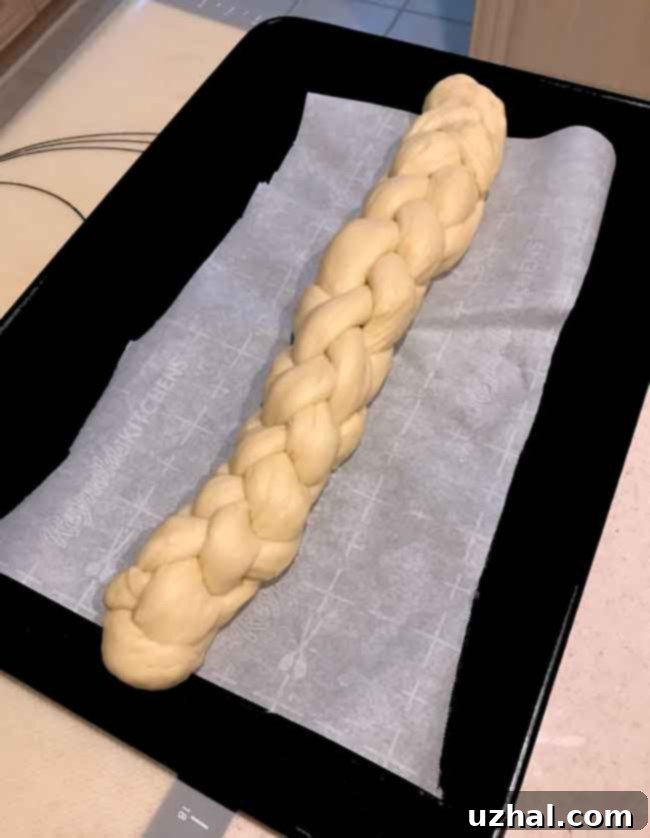
Pre-Rise Perfection: A Glimpse of the Dough
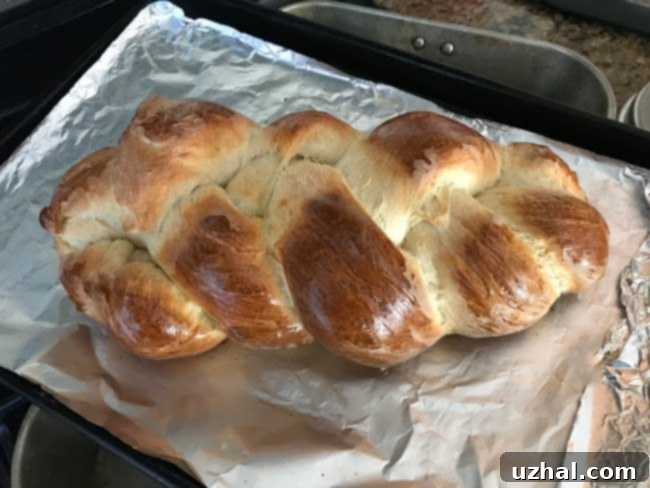
Here’s a sneak peek at a beautiful challah loaf just before its final rise, meticulously prepared by my trusted baking assistant, Fuzz. Witnessing the smooth, elastic dough at this stage is always a promising sign of the deliciousness to come.
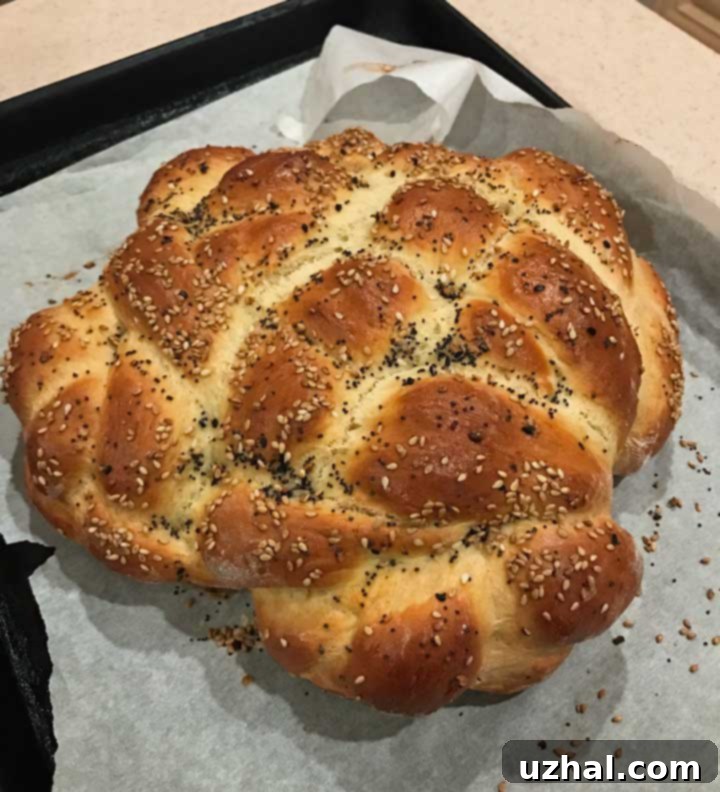
Round Challah: A Symbol of Continuity
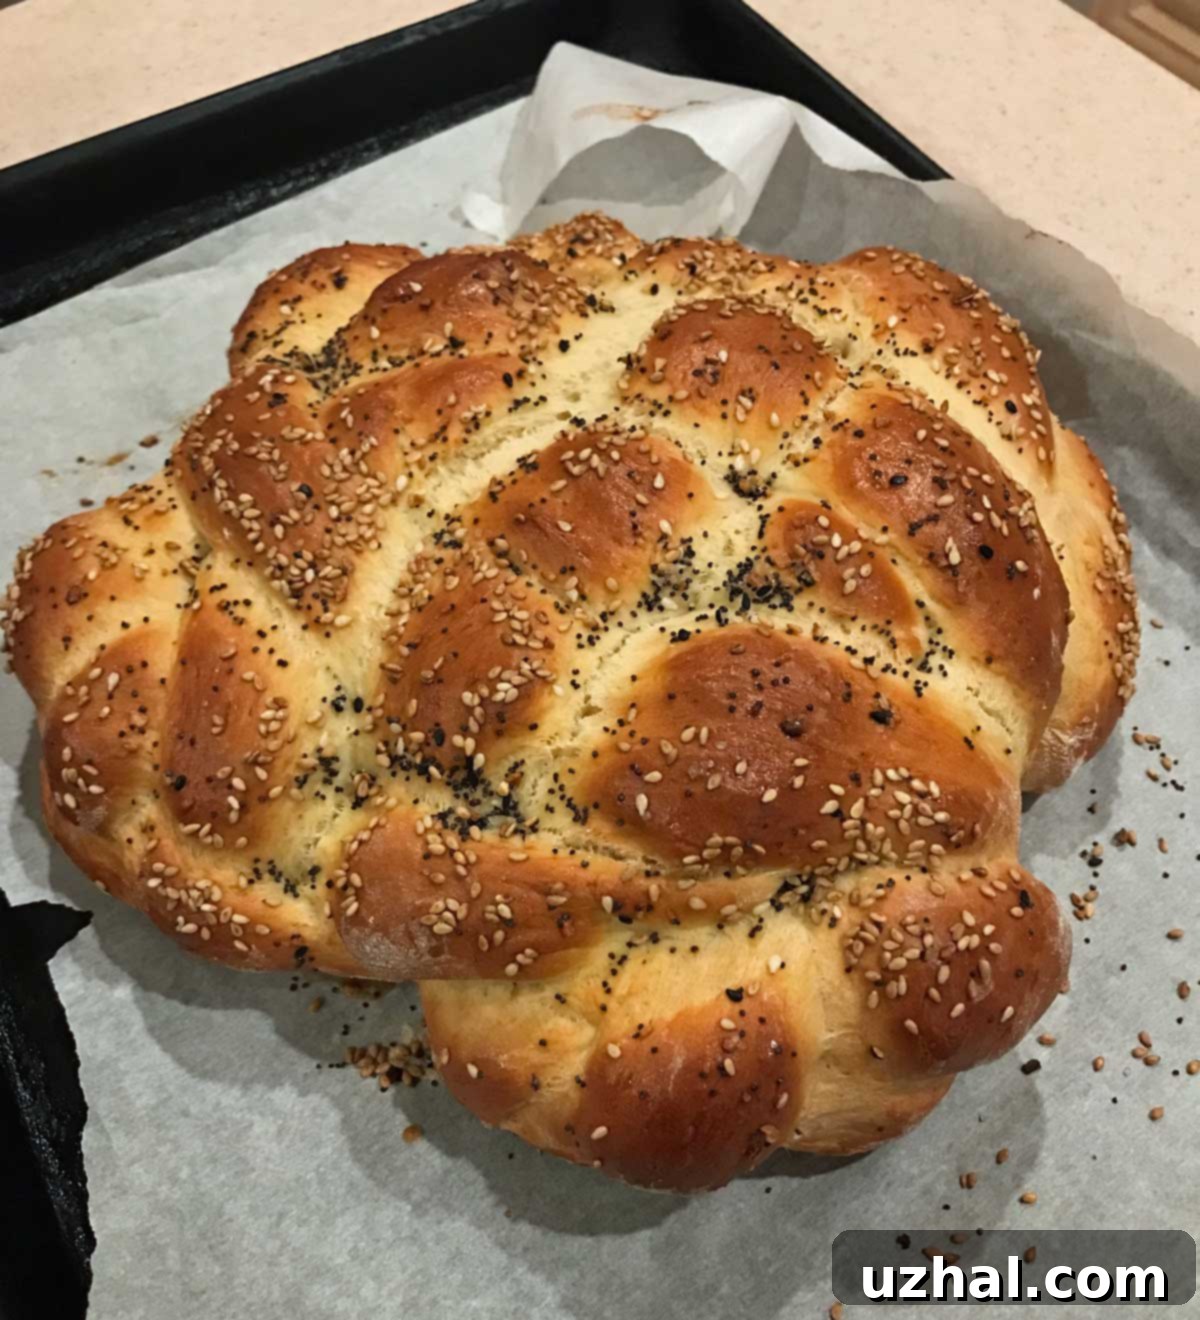
Beyond the classic braided loaf or loaf pan variations, this recipe is also fantastic for crafting round challah, which holds special significance during Jewish holidays like Rosh Hashanah (the Jewish New Year). The round shape symbolizes continuity and a sweet new year. My daughter has truly embraced this recipe as her signature challah. Although she once ventured to try Amy’s recipe (which is indeed excellent), she quickly returned to this tried-and-true formula. This recipe consistently produces the soft, airy, and slightly sweet challah we all love. Below, you can see one of her recent masterpieces, beautifully shaped as a round.
Tips for Challah Baking Success
Achieving a perfect challah involves a few key steps. Here are some essential tips to help you master this delicious bread:
- **Yeast Activation:** Ensure your water is “very warm” (around 105-115°F or 40-46°C) to properly activate the quick-rising yeast. Water that is too hot can kill the yeast, while water that is too cold won’t activate it effectively. If you’re unsure, a kitchen thermometer is a great tool. Platinum yeast is often recommended for its reliability and strong rise.
- **Kneading is Key:** Don’t skimp on the kneading time. Eight minutes might seem long, but it’s crucial for developing the gluten in the flour, which gives challah its characteristic chewy yet tender texture. Look for the dough to be smooth, elastic, and pull away from the sides of the bowl while sticking slightly to the bottom. If kneading by hand, this can take a bit longer, but the principle remains the same.
- **First Rise (Bulk Fermentation):** A well-oiled bowl prevents the dough from sticking and allows it to rise freely. Find a warm, draft-free spot for your dough to double in bulk, which typically takes about an hour but can vary based on your environment’s temperature and humidity. A good indicator is the “poke test” – gently poke two fingers into the dough; if the indentations remain, it’s ready.
- **Shaping Techniques:** Braiding challah is an art form that improves with practice. Start with three equally sized strands, about 16 inches long, and focus on keeping the braid even. If you’re new to it, watching a quick video tutorial can be incredibly helpful. For loaf pan variations, remember to use a large enough pan to accommodate the rise.
- **Second Rise (Proofing):** This final rise is critical for achieving a light and airy texture. Covering the loaf during this period prevents it from drying out. An inverted roasting pan or greased plastic wrap creates a humid environment conducive to a good rise.
- **Egg Wash for Golden Perfection:** The egg wash (lightly beaten egg mixed with a little water) isn’t just for shine; it also contributes to the beautiful golden-brown crust and a slightly richer flavor. Apply it gently to avoid deflating your perfectly proofed loaf.
- **Doneness Test:** A fully baked challah will have a deep golden-brown crust and sound hollow when tapped on the bottom. An internal temperature of 190-200°F (88-93°C) also indicates doneness.
Recipe
Easy Challah Bread
Anna
Pin Recipe
Ingredients
- 3 ¾ cups all-purpose flour (1 pound) (470 grams)
- 2 ¼ teaspoons quick rising yeast (1 packet) Platinum works well
- ¼ cup sugar (50 grams)
- 1 ½ teaspoons salt
- 1 ½ tablespoons vegetable oil
- 2 large eggs
- ¾ cup very warm water (more if needed)
- 1 lightly beaten egg mixed with a little water for brushing
Instructions
-
In the bowl of a stand mixer, combine the flour, quick rising yeast, sugar, and salt. Stir these dry ingredients together thoroughly to ensure even distribution. Add the vegetable oil, two large eggs, and very warm water. Stir initially until just combined, then attach the dough hook and begin kneading on a medium-low speed. The dough should start to pull away from the sides of the bowl but still stick slightly to the bottom. If the dough appears too sticky, add a tablespoon or two of additional flour. If it seems too dry and isn’t coming together, add water one tablespoon at a time until the desired consistency is achieved.
-
Continue kneading the dough for approximately 8 minutes. The goal is a smooth, elastic, and supple dough that is no longer shaggy. This thorough kneading process is vital for developing the gluten, which gives challah its characteristic light and airy texture.
-
Lightly oil a large bowl. Transfer the kneaded dough to this bowl, turning it once to coat all sides with oil. Cover the bowl loosely with plastic wrap or a clean kitchen towel. Allow the dough to rise in a warm, draft-free place until it has doubled in bulk. This typically takes about an hour, but keep an eye on it as rising times can vary based on ambient temperature.
-
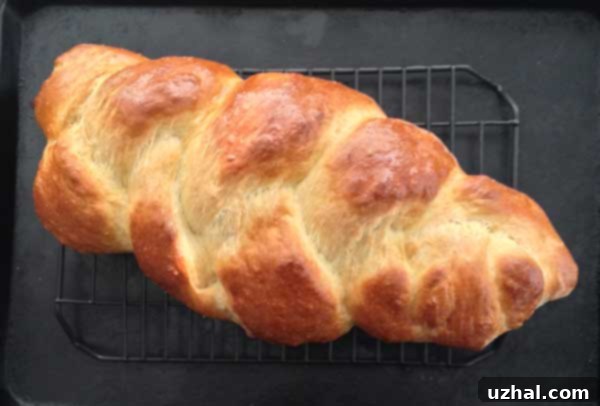
Once doubled, gently punch down the dough to release the air. Transfer the dough to a lightly floured surface (such as a pastry mat) and divide it into three equal pieces. Each piece should weigh approximately 10 ounces (about 280-285 grams). Working one piece at a time, roll each into a long strand, about 16 inches in length. Arrange the three strands side-by-side and braid them securely to form one beautiful braided loaf. This step requires a bit of practice to get a neat braid, but even an imperfect one will bake up deliciously! After braiding, carefully lift the loaf and place it onto a foil-lined baking pan.
-
Allow the braided loaf to undergo its second rise (proofing) for approximately 35 to 40 minutes. During this time, the loaf will puff up and become visibly larger. For best results, cover it to prevent a skin from forming and to create a humid environment. An inverted roasting pan works wonderfully, or you can loosely tent it with greased plastic wrap.
-
While the challah is completing its second rise, preheat your oven to 350 degrees F (175 degrees C). This ensures the oven is at the correct temperature when the bread is ready to bake.
-
Just before baking, gently brush the surface of the loaf with the prepared egg wash (one lightly beaten egg mixed with a little water). This egg wash will give your challah its signature glossy, golden-brown crust.
-
Bake the challah for about 35 minutes, or until the top is a deep golden brown and the loaf sounds hollow when gently tapped on the bottom. If the top browns too quickly, you can loosely tent it with aluminum foil for the remaining baking time. Once baked, remove from the oven and transfer to a wire rack to cool completely before slicing and serving. Enjoy your delicious homemade challah!
More Ways to Enjoy Your Homemade Challah
While often associated with Jewish holidays and special meals, challah is a wonderfully versatile bread that deserves a spot in your everyday repertoire. Its slightly sweet flavor and rich texture make it perfect for so much more than just bread pudding:
- **Sandwiches:** Elevate your ordinary sandwich with slices of challah. It pairs beautifully with both savory fillings like turkey and avocado, or sweet spreads like jam and Nutella.
- **French Toast:** Challah is arguably the best bread for French toast. Its dense yet absorbent crumb soaks up the eggy custard perfectly, resulting in a golden, crispy, and incredibly fluffy breakfast treat.
- **Croutons:** Don’t let stale challah go to waste! Cut it into cubes, toss with olive oil and herbs, then bake until crispy for gourmet croutons that will transform any salad or soup.
- **Savory Accompaniment:** Serve a warm slice of challah alongside a hearty stew, a comforting soup, or a rich roast for a delightful textural and flavor contrast.
- **Pull-Apart Rolls:** Instead of a full loaf, divide the dough into smaller portions before the second rise and bake them as individual rolls. Perfect for dinner parties!
Whether you’re making it for a special occasion, prepping for the ultimate bread pudding, or simply enjoying the comforting process of baking homemade bread, this easy challah recipe is a winner. Its balance of traditional flavor with a lighter touch makes it accessible and enjoyable for everyone. Give it a try, experiment with shaping, and discover your new favorite bread!
Remember, baking is as much about the process as it is about the delicious end product. Enjoy the journey of creating this beautiful and tasty challah.
