Mastering Flat & Chewy Self-Rising Flour Chocolate Chip Cookies: The Ultimate Easy Recipe
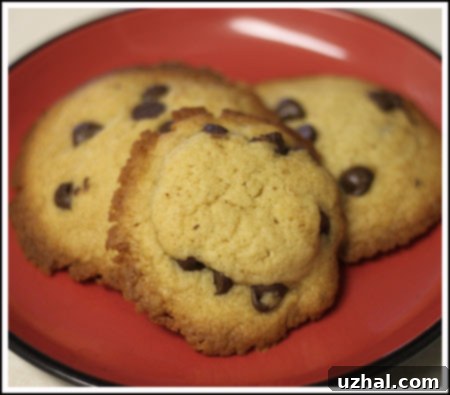
Embarking on the journey of baking chocolate chip cookies with self-rising flour can be a delightful adventure, full of delicious surprises. However, it can also lead to unexpected results if you’re not quite sure what to expect. My first attempt, for instance, yielded cookies that were distinctly cakey, with deeply browned edges and a very dense texture. While undeniably tasty, they weren’t the classic chewy chocolate chip cookies I envisioned.
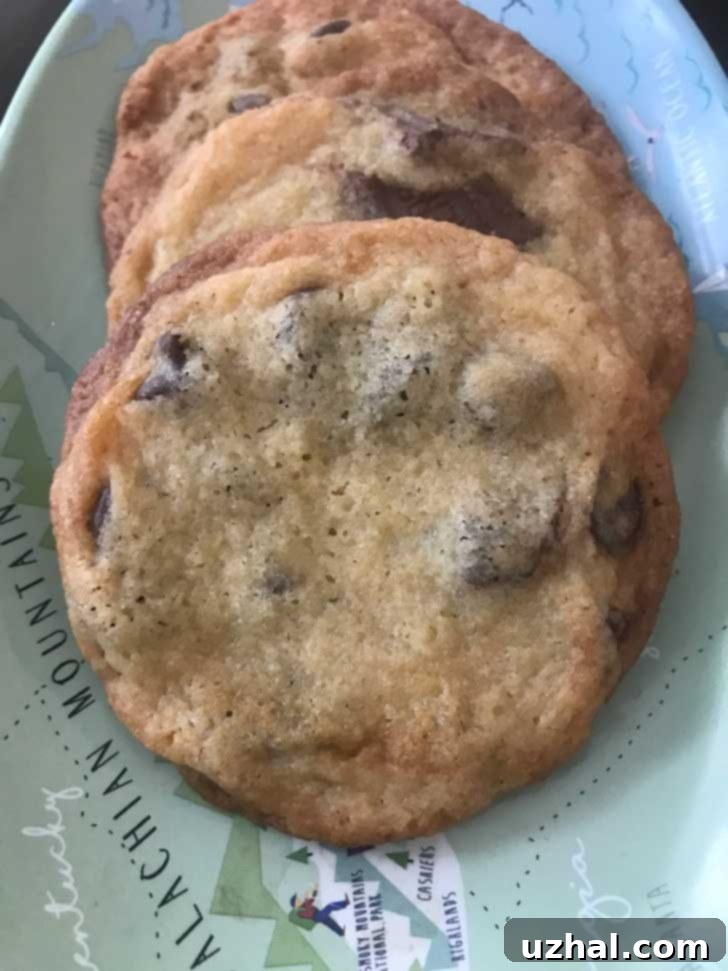
That initial batch, despite its cake-like density, was still a hit with my family. We enjoyed them, but I tucked the recipe away, eager to explore the vast world of other chocolate chip cookie variations. Years later, my curiosity about self-rising flour in cookies was reignited. I decided to revisit the concept, determined to crack the code and create a recipe that truly sang. This time, I was after something completely different: flat, incredibly chewy cookies bursting with rich flavor. After much experimentation, I finally perfected a version that is the polar opposite of those first cakey creations.
The Quest for Perfection: Discovering the Flat & Chewy Secret
The updated recipe delivers cookies that are spectacularly flat, wonderfully chewy, and possess an intense brown sugar flavor, primarily because they are made with 100% brown sugar. What’s even better? They are incredibly easy to make, streamlining the baking process and delivering delicious results without fuss. This breakthrough recipe redefined my understanding of what self-rising flour could achieve in chocolate chip cookies, proving that it’s capable of producing more than just cakey textures.
Flat and Chewy Self-Rising Flour Chocolate Chip Cookies: A Game-Changer
If you’re ready to experience a whole new level of self-rising flour chocolate chip cookies, then this recipe is for you. One of its standout features is that it uses significantly less butter than traditional chocolate chip cookie recipes – roughly half the amount. This reduction in butter, combined with the power of self-rising flour and a generous amount of brown sugar, contributes to their unique flat and chewy texture. I typically use unsalted butter to have full control over the salt content. If you follow suit, a tiny pinch of salt (about ⅛ scant teaspoon) is recommended to enhance the flavors. However, if you opt for salted butter, feel free to omit any additional salt.
It’s also crucial to understand your self-rising flour. Some brands, especially those labeled “self-raising” in certain regions, might not contain salt. If your flour lacks salt, you’ll want to add approximately ⅜ teaspoon (or a very scant ½ teaspoon) to the recipe. This small adjustment makes a big difference in balancing the flavors and ensuring your cookies are perfectly seasoned. Always check the ingredient list on your flour packaging to be sure.

No Need to Refrigerate Dough: Baking Made Easy
Perhaps one of the most appealing aspects of this specific recipe is that there is absolutely no need to refrigerate the cookie dough. In fact, I’ve found that refrigerating the dough for these particular self-rising flour cookies can actually make them come out even flatter, which isn’t always the desired outcome for those seeking a slight puff. This characteristic might be attributed to the unique interplay between the leavening agents in the self-rising flour and the acidity of the brown sugar. For whatever reason, these cookies don’t benefit from the typical chilling period that often helps other cookie doughs maintain their shape and thickness.
This eliminates a significant waiting period, making this recipe ideal for spontaneous baking sessions or when you’re short on time. You can mix the dough and bake almost immediately, getting fresh, warm cookies into your hands much faster. While I personally sometimes still refrigerate the dough balls out of habit, resulting in even thinner, chewier cookies, it’s certainly not a mandatory step for achieving excellent results. Feel free to skip it entirely and enjoy the immediate gratification of freshly baked goods.
The Recipe: Flat & Chewy Self-Rising Flour Chocolate Chip Cookies
Ingredients:
- 4 tablespoons (56 grams) unsalted butter, cool room temperature: Ensures even mixing and proper texture.
- ⅛ scant teaspoon salt: Essential for flavor balance. Omit if using salted butter or self-rising flour that already contains salt.
- ¾ cup plus 1 tablespoon (165 grams) packed light brown sugar: The secret to their incredible chewiness and deep flavor.
- 1 large egg: Acts as a binder and adds moisture.
- ½ teaspoon vanilla extract: For that classic, comforting aroma and taste.
- 1 cup (135 grams) self-rising flour (I use White Lily): Pre-leavened for convenience, but be mindful of its salt content.
- Around 1 cup chocolate chips (or use chocolate chunks): Your choice of semi-sweet, dark, or milk chocolate.
Instructions:
1. Preheat Oven: Preheat your oven to 350 degrees F (175 degrees C). Prepare a baking sheet by lining it with parchment paper or a silicone mat, or simply leave it ungreased as specified.
2. Cream Butter and Sugar: In a medium mixing bowl, combine the cool room temperature butter, salt (if using), and packed light brown sugar. Beat with an electric mixer on medium speed until well blended and lightened in color, scraping down the sides of the bowl as needed to ensure everything is incorporated. This typically takes 2-3 minutes.
3. Add Wet Ingredients: Beat in the large egg and vanilla extract until fully combined. The mixture should be smooth and slightly fluffy.
4. Incorporate Dry Ingredients: Gradually stir in the self-rising flour until it is just incorporated. Be careful not to overmix the dough, as overworking the gluten can lead to tougher cookies. Stop mixing as soon as no dry streaks of flour remain.
5. Fold in Chocolate: Gently fold in the chocolate chips or chunks until they are evenly distributed throughout the dough.
6. Scoop and Bake: Using a rounded tablespoon measure or a medium-sized cookie scoop (about 1 inch in diameter), scoop up the dough to form balls. Place the dough balls a few inches apart on your ungreased cookie sheet. They will spread significantly, so ensure adequate spacing.
7. Bake: Bake for 12-14 minutes, or until the edges are deeply golden brown and the centers appear set, though they may still look soft. The cookies will be very brown, which is a sign of their delicious caramelization.
8. Cool: Allow the cookies to cool directly on the baking sheet for about 10 minutes. This helps them firm up and prevents them from breaking when transferred. After 10 minutes, carefully transfer them to a wire rack to cool completely. These cookies are also excellent when frozen for later enjoyment.
Yields: Approximately 20 delicious cookies.
Elevate Your Cookies: Creative Variations and Serving Ideas
While this recipe is fantastic as is, there’s always room for a little culinary creativity. Experimenting with variations can introduce new depths of flavor and texture, making each batch a unique experience:
- Molasses Magic: For an intensely deep, almost caramel-like flavor, try adding a tiny bit – about a teaspoon or 7 grams – of blackstrap molasses to the dough along with the wet ingredients. This addition causes the cookies to spread even further, often resulting in cookies that are almost paper-thin and extremely chewy. They might not be the prettiest, but their flavor is truly exceptional and irresistible.
- Maldon Sea Salt Finish: A sprinkle of flaky Maldon sea salt on top of the dough balls just before baking is a simple yet impactful addition. The coarse crystals provide a wonderful textural contrast and a burst of savory saltiness that beautifully cuts through the sweetness of the brown sugar and chocolate.
- Nutty Additions: Consider folding in about ½ cup of chopped pecans, walnuts, or macadamia nuts for an added layer of crunch and nutty flavor.
- Different Chocolates: Don’t limit yourself to just one type of chocolate chip. Try a mix of dark, milk, and white chocolate chips for a more complex chocolate profile. Chocolate chunks will also give a richer, melty pocket experience.
- Spices: A pinch of cinnamon or a tiny grating of fresh nutmeg can add a warming note to these already comforting cookies.
These cookies are wonderful on their own, but they also pair beautifully with a cold glass of milk, a hot cup of coffee, or even served warm with a scoop of vanilla ice cream for an indulgent dessert. They also freeze exceptionally well, making them perfect for meal prep or unexpected guests.
Troubleshooting Tips for Your Self-Rising Flour Cookies
Even with a straightforward recipe, sometimes things don’t go exactly as planned. Here are a couple of common issues and how to address them:
- Cookies too cakey or not flat enough? Ensure your butter is at a cool room temperature, not melted or too soft. Overmixing the flour can also develop too much gluten, leading to a denser texture. Make sure your oven temperature is accurate – a too-low oven can prevent proper spread.
- Cookies too flat or spreading excessively? While these are designed to be flat, if they’re spreading into a single sheet, your butter might be too warm or your oven temperature might be slightly too high. Also, double-check your flour measurement; too little flour can lead to over-spreading.
Ultimately, these flat and chewy self-rising flour chocolate chip cookies offer a uniquely delicious experience that is both simple to create and incredibly satisfying. Their rich brown sugar flavor, delightful chewiness, and the sheer ease of baking them without any dough refrigeration make them a staple in any baker’s repertoire. Give this recipe a try, and prepare to be amazed by the delicious possibilities of self-rising flour!
- How to Make Self-Rising Flour and Cake Flour at Home
- More Delicious Recipes with Self-Rising Flour
- Easy Chocolate Muffins with Self-Rising Flour
- Self-Rising Flour White Chocolate Macadamia Cookies
- Small Coconut Layer Cake with Self-Rising Flour
