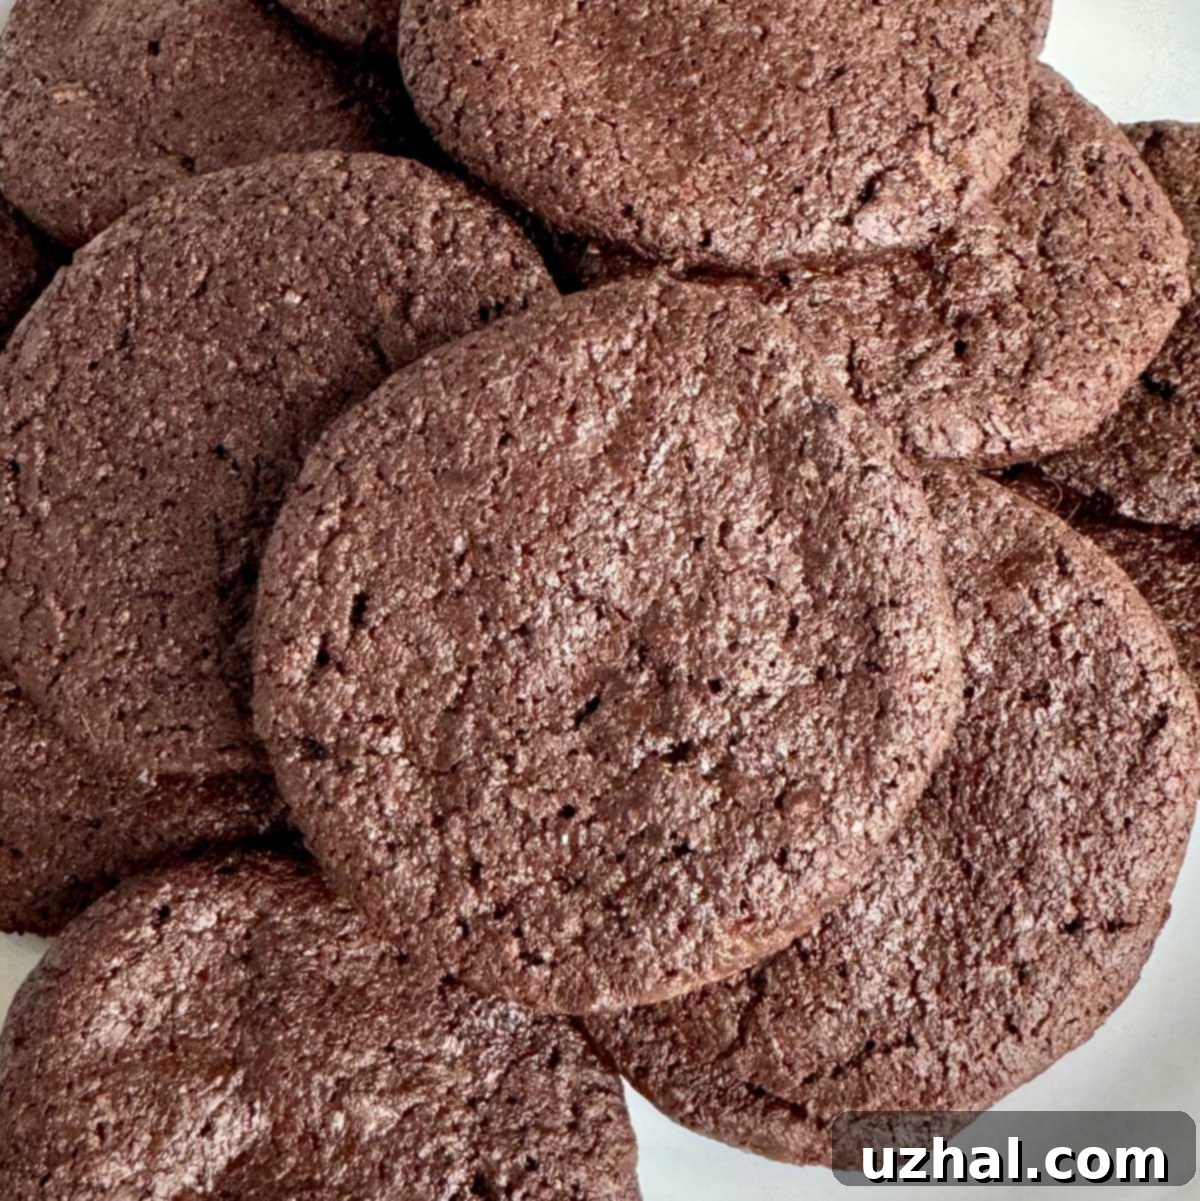
The Best Homemade Nabisco Famous Chocolate Wafers Recipe: Recreating the Discontinued Classic for Icebox Cakes
It’s with a heavy heart that we bid farewell to a beloved pantry staple: Nabisco’s Famous Chocolate Wafers. The news of their discontinuation sent ripples through the baking community, leaving many of us to mourn the loss of one of our favorite shortcut ingredients, particularly for the iconic Original Famous Chocolate Wafer Refrigerator Roll. It’s truly surprising that such a popular icebox dessert component would be removed from shelves, but alas, they’ve gone the way of other nostalgic treats like the Brown Edge Wafers. While the convenience of store-bought wafers will be missed, the good news is that you don’t have to give up on your favorite chocolate wafer-based desserts. This comprehensive guide will walk you through creating delicious homemade Nabisco chocolate wafer substitutes, ensuring your icebox cakes and pie crusts can live on!

Crafting the Perfect Homemade Chocolate Wafers: A Superior Alternative
For years, Nabisco wafers were the gold standard for quick and easy pie crusts, icebox cakes, and various other no-bake desserts. Their distinct chocolate flavor and ideal texture made them indispensable. However, they were often quite expensive, making them a treat rather than a pantry staple for many. The silver lining to their discontinuation is the opportunity to embrace homemade versions, which can often surpass the original in flavor and freshness, and certainly in cost-effectiveness.
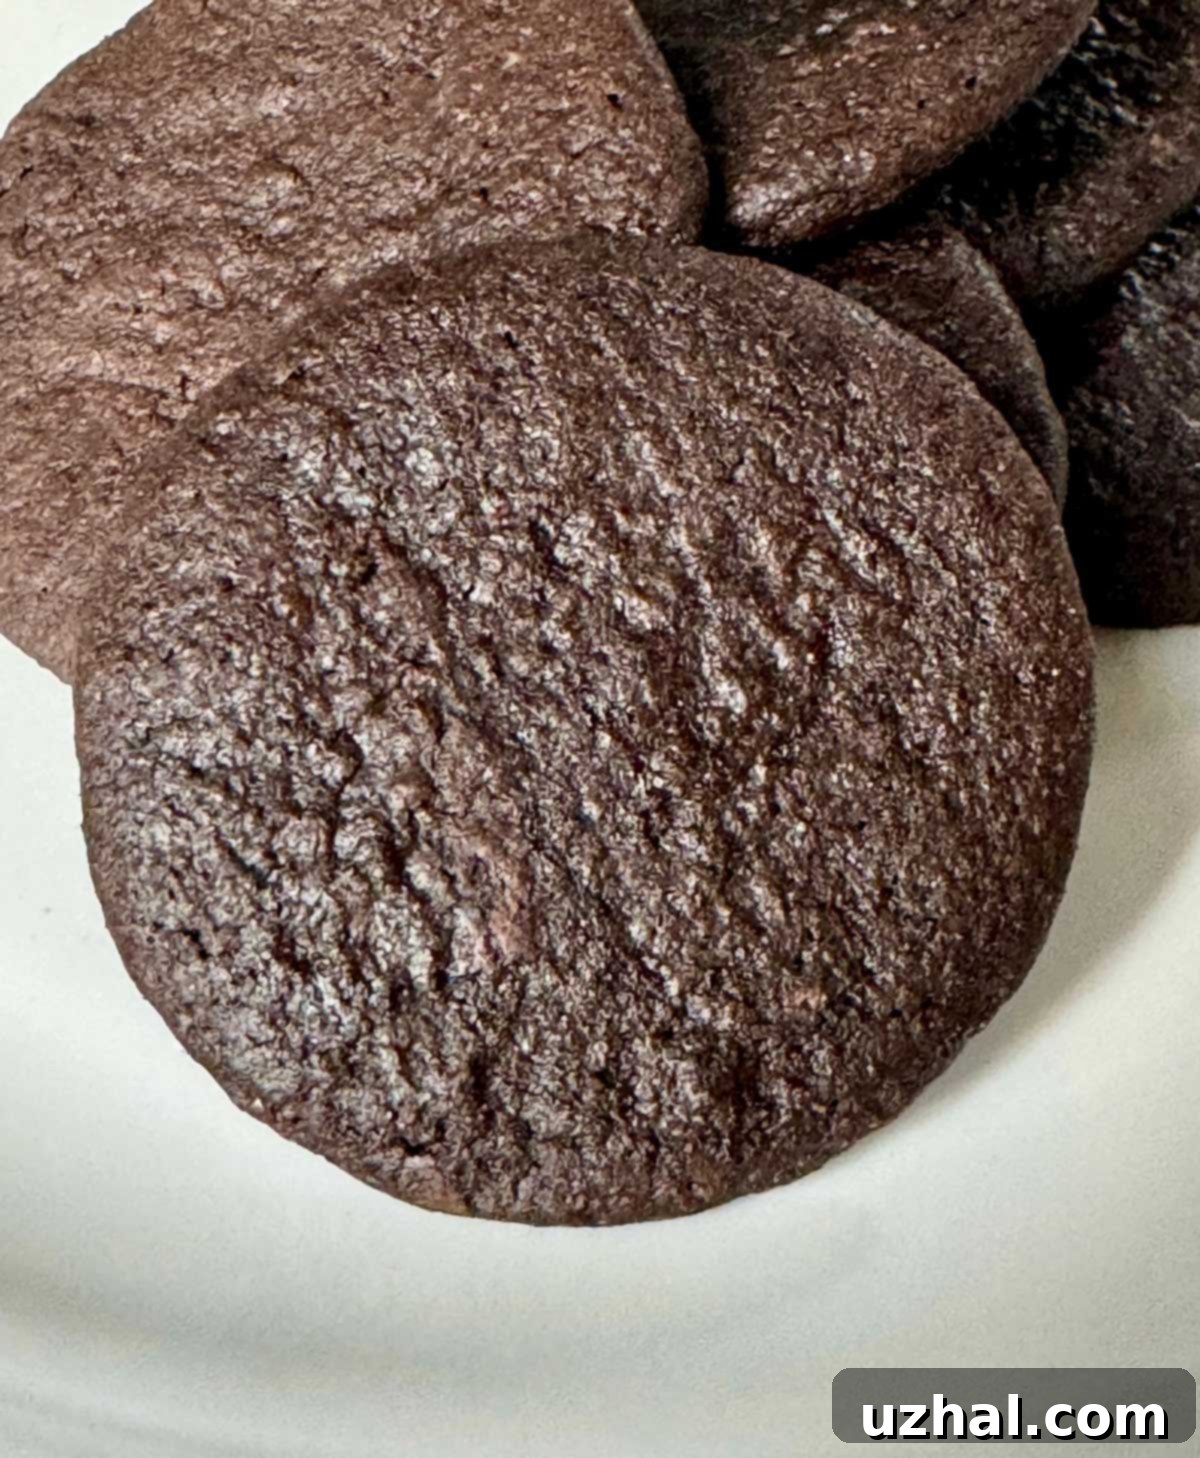
I’ve experimented with several recipes over the years, including one that was originally found in The King Arthur Flour Cookie Companion. While that recipe served me well for a time, I’ve since refined my approach and landed on a new King Arthur-inspired recipe that I believe is truly the best. You’ll find it detailed in the recipe card below. What makes this recipe superior, in my opinion, is twofold: the cookies boast an incredible depth of flavor on their own, and, crucially for icebox cakes, they soften beautifully when layered with whipped cream. The key to success with this recipe lies in achieving the right thickness – aiming for a thin wafer that will absorb moisture and transform into a cake-like consistency. Mine sometimes come out a little thicker, but even then, they are absolutely delicious and still work wonderfully for any application.
Making your own chocolate wafers from scratch isn’t just about replacing a discontinued product; it’s about elevating your desserts. You have complete control over the ingredients, ensuring quality and freshness. Plus, there’s an immense satisfaction that comes from creating something so delicious from basic pantry items. This recipe is designed to be approachable for home bakers of all skill levels, providing clear instructions to guide you through each step. Whether you’re a seasoned baker or new to the kitchen, you’ll be able to whip up a batch of these “almost famous” chocolate wafers with confidence.
The Critical Role of Dutch Cocoa Powder Weight and Dough Consistency
One common challenge many bakers face, and a point that a reader once highlighted about an older version of this recipe, is a very dry dough. This can stem from various factors, but a primary culprit is often inconsistencies in cocoa powder measurement. Not all cocoa powders are created equal, especially when it comes to density. Different brands can have significant weight variations per volume, which directly impacts the moisture balance of your dough.
For instance, natural cocoa powder, like Hershey’s, typically weighs around 5 grams per tablespoon. In contrast, most Dutch-processed cocoa powders are denser, weighing closer to 6 grams per tablespoon. To complicate matters further, some brands that claim 6 grams per tablespoon might actually weigh 7 grams. In a recipe calling for a substantial amount, such as ¾ cup of cocoa powder, these small discrepancies can lead to major issues. A difference of even a few grams can transform a perfectly balanced dough into an unworkably dry or overly sticky one.
This is why using a kitchen scale is highly recommended for baking, especially for ingredients like flour and cocoa powder. If a recipe provides weight measurements, always prioritize them over volume measurements. If you don’t have a scale, or if the recipe only provides volume measurements for cocoa powder, there are still ways to mitigate dryness:
- Sift or Sieve Your Cocoa Powder: Cocoa powder tends to clump and settle, making it denser when scooped directly from the container. Sifting or passing it through a fine-mesh sieve aerates it, making it lighter and closer to an accurate volume measurement.
- Measure Lightly: When measuring by volume (cups or tablespoons), do not scoop directly from the container. Instead, spoon the cocoa powder into your measuring cup or spoon until it’s overflowing, then level it off with a straight edge (like the back of a knife). This prevents compaction and ensures a lighter, more accurate measure.
- Use Proper Measuring Cups: If a recipe calls for ¼ cup, use an actual ¼ cup measuring cup, not four individual tablespoons. This helps maintain accuracy for larger volumes.
- Adjust as Needed: Pay attention to your dough’s consistency. If it seems excessively dry and crumbly, add a tiny bit of liquid (like milk or water, a teaspoon at a time) until it reaches the desired texture. Conversely, if it’s too wet and sticky, add a very small amount of flour or cocoa powder until it firms up.
Understanding these nuances will not only help you troubleshoot a dry dough but also improve the overall consistency and success of all your baking endeavors.
Exploring the Depths of Flavor with Black Cocoa Powder
Beyond the standard Dutch-process cocoa, an exciting ingredient to consider for your chocolate wafers is black cocoa powder. This unique cocoa is an intensely dark Dutch-processed variety, known for its deep, almost black color and a distinct flavor profile often associated with the classic cocoa in Nabisco Oreos. If you’re aiming for that iconic dark chocolate look and a slightly less bitter, more mellow chocolate taste, black cocoa is an excellent addition.
In my experience, black cocoa powder is best used in combination with other Dutch-process cocoa rather than entirely on its own. Its flavor can be quite potent, and using it exclusively might result in a less complex chocolate taste than you desire. For these homemade chocolate wafer recipes, I recommend replacing just 1 or 2 tablespoons of your regular Dutch cocoa with black cocoa powder if you happen to have some on hand. This small substitution will significantly deepen the color of your wafers, giving them that striking, almost black appearance, and infuse them with that characteristic Oreo-like notes.
I’m currently enjoying a bag of Modern Mountain black cocoa, and I can attest to its quality. It imparts a beautiful dark hue and a wonderful flavor without overwhelming the overall chocolate profile. When incorporating black cocoa, remember that its high alkalinity means it reacts differently with leavening agents than natural cocoa, so it’s generally best paired with recipes that already call for Dutch-process cocoa and baking soda (or adjusted leavening) to ensure proper rise and texture. Don’t be afraid to experiment with this ingredient to achieve your desired shade and taste!
Mastering the Art of the Famous Chocolate Wafer Icebox Cake
After diving deep into the nuances of making homemade chocolate wafers, I realized that some readers might be new to the delightful tradition of the Famous Wafer Icebox Cake. In case all the original recipes for this simple yet elegant dessert disappear into the annals of history, here’s a comprehensive rundown on how to assemble it. This method is specifically for a mini cake using about 12 of the homemade wafers. If you opt for alternative store-bought cookies, such as Dewey’s or Anna’s Ginger Thins (for a unique ginger-flavored twist), you might need around 18 cookies, as they tend to be smaller than our homemade versions.
How To Make a Nabisco Chocolate Wafer Cake (or a Delicious Homemade Version)
Time needed: 9 hours (including chill time)
How To Make a Small Chocolate Icebox Cake with Famous Wafers
- Prepare Your Wafers (Homemade or Store-Bought).
First, ensure you have your chocolate wafers ready. You can use the fantastic homemade recipe provided below, which yields cookies with superior flavor and texture. Alternatively, if you’re looking for convenience, several brands offer suitable alternatives. My daughter has had great success with a brand called Dewey’s. For a delightful twist, consider using Anna’s Ginger Thins to create a spiced ginger-flavored icebox cake. Ensure your chosen cookies are completely cooled if baking them from scratch.
- Whip Up the Sweetened Cream.
For a small cake, you’ll need just 1 cup of heavy whipping cream, ¼ cup of powdered sugar (adjust to your sweetness preference – feel free to use less for a less sweet cake), and ½ teaspoon of pure vanilla extract. Pour the cold whipping cream into a chilled bowl (a metal bowl works best for this). Using an electric mixer, whip the cream on medium-high speed until it begins to thicken and stiff peaks just start to form. Be careful not to over-whip, or it will become grainy. Once stiff peaks are visible, gently fold in the powdered sugar and vanilla extract until just combined. This amount should be sufficient for a cake made with 12 to 18 cookies, depending on their size and how generously you apply the cream.
- Assemble Your Icebox Cake.
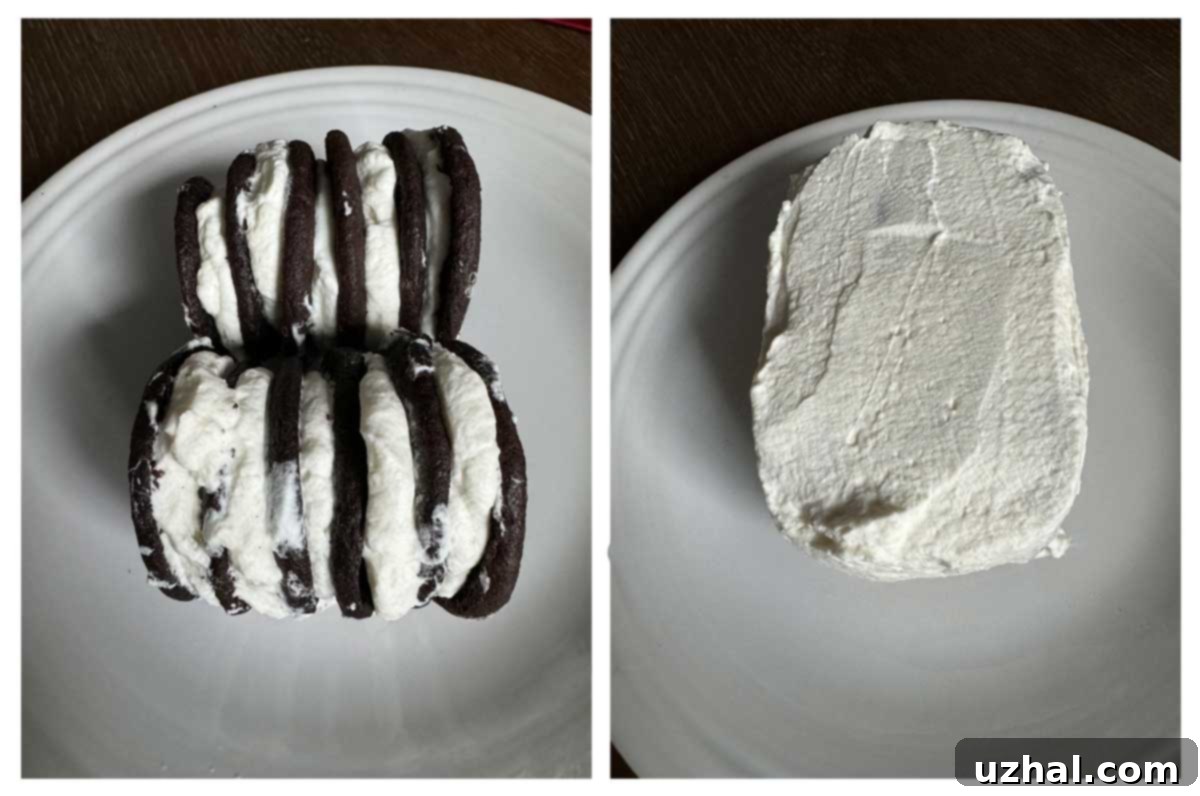
This is where the magic happens! To create individual stacks, spoon about a tablespoon of whipped cream onto the flat side of one cookie. Gently place a second cookie on top, pressing lightly to adhere. Repeat this process until you have a stack of 6 cookies, each layered with a dollop of whipped cream. Lay this stack on its side on your serving plate or a small rectangular dish. Repeat the process to create a second stack of 6 cookies and lay it next to the first. If your cookies are smaller, you can make a third stack of 6 and arrange it alongside the others. Carefully use an offset spatula or knife to cover the entire assembly with the remaining whipped cream, ensuring all the cookies are fully enveloped. This creates a seamless exterior, allowing the cookies to soften evenly.

- Chill for Transformation.
Once assembled, loosely cover the cake with plastic wrap or aluminum foil. Transfer it to the refrigerator and chill overnight, or for a minimum of 6 hours. This chilling period is crucial: it allows the wafers to gradually absorb moisture from the whipped cream, transforming them from crisp cookies into a soft, cake-like texture. Different types of cookies may require slightly longer to soften completely, so plan accordingly. For an extra firm cake, you can also freeze it. I sometimes apply a thin layer of whipped cream, freeze it as I would a crumb coat for a regular cake, and then add a fresh, decorative layer of whipped cream just before serving for a pristine finish.
- Decorate to Impress!
Before presenting your masterpiece, take a moment to tidy up the edges with an offset spatula. Then, get creative with your decorations! A simple dusting of cocoa powder or chocolate shavings adds an elegant touch. For a more festive look, scatter some colorful sprinkles, drizzle with chocolate or caramel sundae syrup, or garnish with fresh berries. A few extra dollops of whipped cream on top never hurt either!
- Slice and Serve with Joy.
When it’s time to serve, use a sharp knife to slice the cake along the short side. Each slice should reveal beautiful vertical layers of softened chocolate cookie and creamy whipped cream, creating an appealing striped effect. The texture will be unbelievably tender, almost like a rich, moist cake. Serve immediately and enjoy the fruits of your labor!
This icebox cake is not just a dessert; it’s a nostalgic journey back to simpler times, now made even better with your own homemade chocolate wafers. It’s surprisingly easy to make, yet always impresses with its elegant presentation and delightful texture. Give it a try – you won’t regret reviving this classic!
- Sugar Wafers
- Raspberry Icebox Cake
- Tiramisu Cheesecake for 3 or 4
- Brown Edge Wafers
- Amazing Hard Boiled Egg Oatmeal Cookie
Recipe: Homemade Nabisco Famous Chocolate Wafers
Homemade Nabisco Famous Chocolate Wafers
Anna
Pin Recipe
Ingredients
- 1 ⅓ to 1 ½ cups all-purpose flour (180 grams) Best to weigh for accuracy
- ½ cup Dutch process cocoa powder (42-45 grams) Weigh or spoon lightly into a cup and level carefully
- 8 tablespoons unsalted butter, softened (114 grams)
- 1 cup granulated sugar (200 grams)
- ½ teaspoon baking powder
- ¾ teaspoon salt
- 1 large egg
- 1 teaspoon vanilla extract
Instructions
-
Begin by accurately measuring your dry ingredients. For the all-purpose flour, you’ll need 180 grams, which typically translates to between 1 ⅓ and 1 ½ cups depending on how it’s measured. Using a kitchen scale for flour is highly recommended for consistent results. Similarly, measure the Dutch process cocoa powder precisely by weighing out 42 grams. If you don’t have a scale, gently spoon the cocoa powder into a ½ cup measuring cup and level it off without compacting. Set these dry ingredients aside.
-
In a separate, larger mixing bowl (preferably a stand mixer bowl fitted with the paddle attachment), beat the softened unsalted butter on medium speed until it is light and creamy, about 1-2 minutes. Gradually add the granulated sugar and continue beating for another 2-3 minutes until the mixture is well incorporated, light, and fluffy. Scrape down the sides of the bowl frequently. Next, beat in the baking powder and salt until just combined. Finally, add the large egg and vanilla extract, beating until everything is thoroughly blended and smooth.
-
Add the pre-measured cocoa powder to the butter mixture. Beat on low speed until the cocoa powder is fully blended and no streaks remain. At this point, the batter will start to become noticeably thicker and richer in color.
-
Gradually add the 1 ⅓ cups (or 180 grams) of flour to the chocolate mixture. Beat on the lowest speed until the flour is just incorporated. Be careful not to overmix, as this can develop gluten and lead to tough cookies. The dough should have a consistency that is slightly looser than Play-Doh and still a bit sticky. If you measured by volume and your dough seems too wet or overly sticky, you may add an additional tablespoon or two of flour, one at a time, until the desired pliable yet slightly sticky texture is achieved.
-
Preheat your oven to 325 degrees F (160 degrees C). Line two large cookie sheets with parchment paper. This will prevent sticking and make cleanup much easier.
-
Divide the dough into two equal halves. Scrape each half onto a separate sheet of parchment paper. Press each portion into a flat disc, then cover each disc with another sheet of parchment paper. Chill the dough in the refrigerator until it is firm enough to roll, approximately 30-60 minutes. Once chilled, remove one disc from the refrigerator (keeping the other chilled) and, with the parchment paper above and below, roll it out evenly to about ⅛ of an inch thick. The goal is thin, uniform wafers. If the dough becomes too soft or sticky during rolling, return it to the refrigerator or freezer for a few minutes to firm up again.
-
Using a 2-inch round cookie cutter, cut circles from the rolled-out dough. If your dough is sufficiently cold and firm, you should be able to lift the cut circles directly off the bottom parchment paper and transfer them onto your parchment-lined baking sheets without needing extra flour or cocoa dust. Arrange them about 1 inch apart to allow for slight spreading. Gather the scraps, re-roll, chill if necessary, and cut more circles until all dough is used.
-
Alternatively, for a slightly less precise but still effective method, you can roll the dough out on a silicone baking mat lightly dusted with cocoa powder (instead of flour, to avoid dulling the chocolate color) and then cut your circles. For a rustic approach, simply scoop rounded teaspoons of dough, roll them into small balls, and then gently press them into uniform circles using the palm of your hand or the bottom of a glass. Ensure they are as uniform as possible, especially if you plan to use them for an icebox cake, to ensure even softening.
-
Bake the cookies in the preheated oven at 325 degrees F (160 degrees C) for approximately 10-12 minutes. The exact baking time may vary depending on your oven and the thickness of your wafers. They should be firm to the touch and slightly darker around the edges. For extra crispness, if they don’t seem crisp enough after cooling, turn off the oven and leave the cookies inside with the oven door closed for an additional 5-10 minutes. This gentle residual heat will help them dry out further without over-baking.
-
Immediately transfer the baked cookies from the hot baking sheets to a wire rack using a thin spatula. Allow them to cool completely at room temperature. They will crisp up as they cool. Once fully cooled, they are ready to be stored or used in your favorite dessert recipes. Store them in an airtight container at room temperature for up to two weeks.
