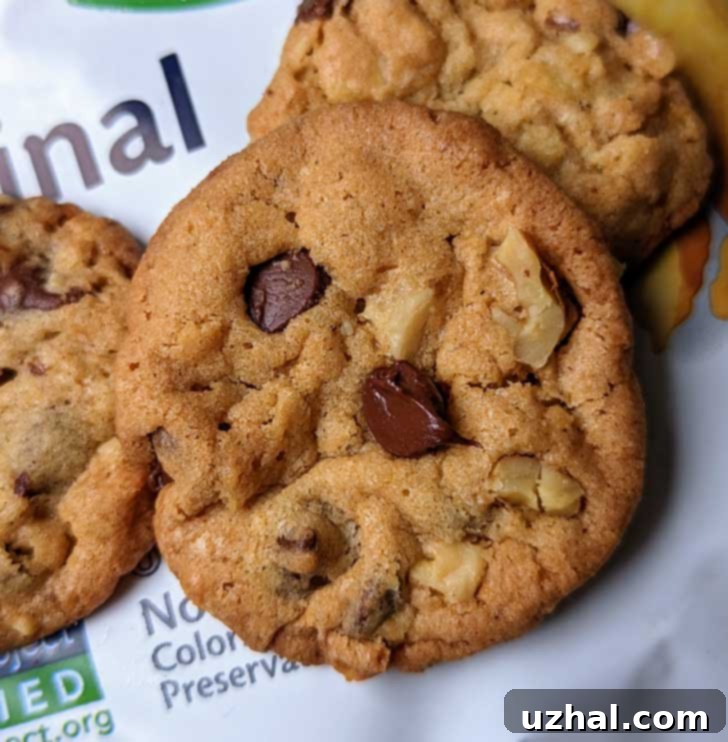
The Ultimate Crispy Potato Chip Cookies: A Sweet & Salty Masterpiece
There’s something uniquely satisfying about the combination of sweet and salty flavors, and when it comes to cookies, the addition of potato chips takes this experience to an entirely new level. Many home bakers, myself included, often embark on the journey of making potato chip cookies with high hopes for a perfectly crisp texture, only to find the results leaning towards chewy rather than truly crunchy. While a soft, chewy cookie certainly has its charm, a potato chip cookie, by its very nature, demands that satisfying crunch throughout – a quality reminiscent of beloved thin, crisp cookies like Tate’s. This pursuit of the ideal crispy texture led to the creation of this very recipe, meticulously developed by blending elements from my favorite thin and crisp chocolate chip cookie recipes. The goal was simple: to achieve a cookie that isn’t just flavorful but also boasts an undeniable crispness with every bite, perfectly integrating the salty, crunchy potato chips. The only caveat? Like their irresistible namesake, these crispy potato chip cookies are incredibly addictive, making it nearly impossible to stop at just one. Prepare to discover your new favorite sweet and salty treat!
Jump to Recipe
Achieving Perfection: The Butter vs. Butter & Shortening Debate for Crispy Cookies
One of the most crucial elements in determining a cookie’s final texture and shape is the type of fat used. In my initial trials for these crispy potato chip cookies, I experimented with using butter exclusively. The batches made with 100% butter were undoubtedly delicious and wonderfully thin. However, I found them to be almost *too* thin, sometimes spreading more than desired, and lacking a certain structural integrity that makes for a truly perfect cookie. While excellent in flavor, I felt there was room for improvement in their overall presentation and crispness profile.
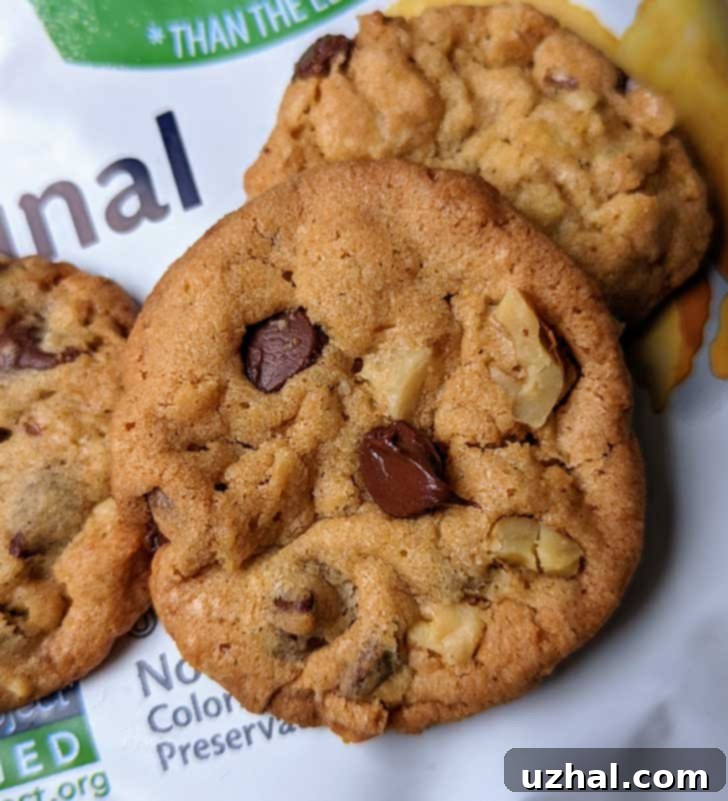
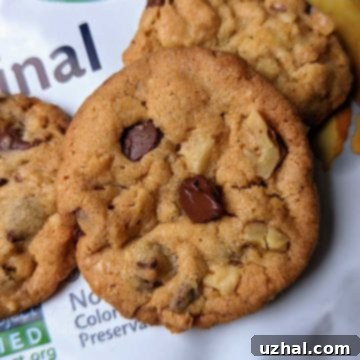
This led me to explore the classic baking combination of butter and shortening. The difference was immediately noticeable. When I switched to a blend of half butter and half shortening, the cookies developed a slightly more refined and appealing shape, as prominently featured in the image above. Beyond aesthetics, the texture experienced a significant upgrade, becoming noticeably lighter and more consistently crisp throughout. This improved texture is largely due to the unique properties of shortening. Unlike butter, which contains water and milk solids that evaporate and can contribute to a chewier texture or increased spread, shortening is 100% fat. This higher fat content, coupled with a higher melting point, helps to create a more tender crumb and prevents excessive spreading, leading to a cookie that holds its shape better while still delivering that sought-after crispness.
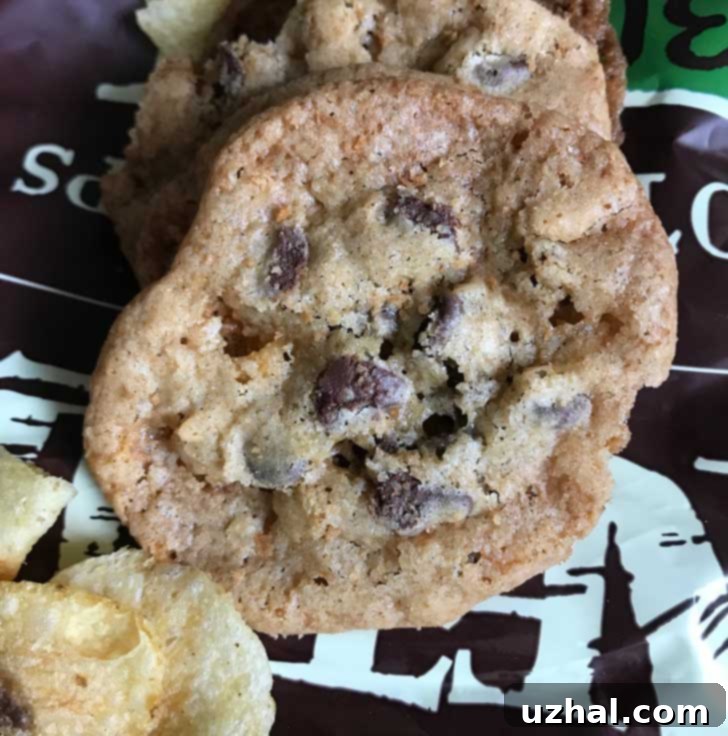
Therefore, while using all butter (as pictured below) will still yield excellent, flavorful cookies, the butter and shortening combination offers several advantages. The dough becomes slightly easier to handle and shape, and the resulting cookies possess a lighter, more consistently crisp texture that truly enhances the potato chip inclusion. If you’re aiming for that ideal thin-but-not-too-thin, light, and uniformly crispy cookie, the blend is highly recommended. However, if butter is all you have, don’t hesitate to proceed; your cookies will still be delightful, just with a slightly different character.
Baking for Everyone: Delicious Gluten-Free Crispy Potato Chip Cookies
For those navigating dietary restrictions or simply looking for gluten-free alternatives, I’m thrilled to share that these crispy potato chip cookies adapt beautifully to a gluten-free diet. My experimentation revealed that these cookies are genuinely excellent when prepared with gluten-free flour. However, there’s a crucial caveat to ensure success: always use a 1:1 gluten-free all-purpose flour blend that explicitly includes xanthan gum.
My first attempt with gluten-free flour served as a vital learning experience. I initially used a popular brand of gluten-free flour, King Arthur, which clearly states on its packaging, “does not contain xanthan gum.” The resulting cookies, while still tasty, came out noticeably misshapen and lacked the cohesive structure that contributes to their crispness. This incident highlighted the indispensable role of xanthan gum in gluten-free baking. In traditional baking, gluten acts as a binder, providing elasticity and structure to doughs and batters. In its absence, xanthan gum steps in as a substitute, mimicking gluten’s binding properties to prevent crumbling and improve the overall texture and shape of baked goods.
Fortunately, the issue was easily rectified by adding a small amount of xanthan gum to the batter. This adjustment immediately restored the cookies to their desired form and crispness. This experience serves as an important reminder that not all gluten-free blends are created equal, and the inclusion of xanthan gum in a 1:1 ratio is often key for recipes designed to replace wheat flour directly. When selecting your gluten-free flour, double-check the ingredient list. If xanthan gum isn’t present, you’ll need to add it separately according to package directions or general baking guidelines (typically about ¼ to ½ teaspoon per cup of flour for cookies).
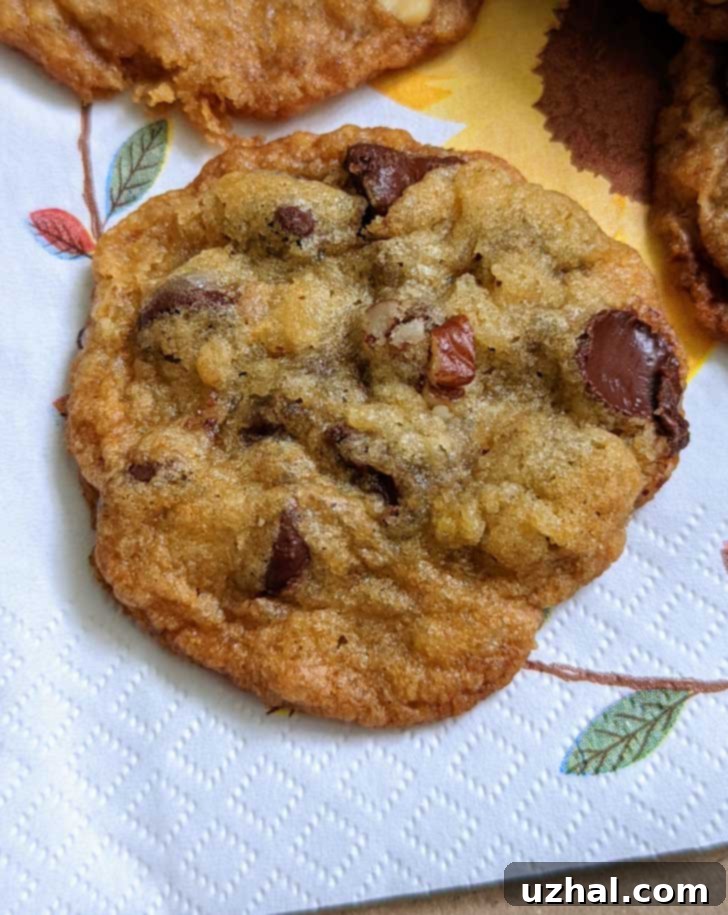
As you can see from the image below, the gluten-free potato chip cookies might not always be as perfectly symmetrical as their gluten-containing counterparts, often displaying a slightly more rustic charm. However, what they might occasionally lack in visual perfection, they more than compensate for in exceptional flavor and that satisfying crispy texture. This means that everyone, regardless of gluten sensitivity, can indulge in these delightful sweet and salty treats.
The Secret Ingredient: Unveiling the Role of Vinegar in Crispy Cookies
Upon first glance at the ingredient list, the inclusion of a little vinegar in cookie dough might raise an eyebrow or two. It might even seem like a quirky gimmick, especially since you won’t discern its taste in the final product. However, this unassuming pantry staple plays a surprisingly significant, albeit subtle, role in achieving the desired crispy texture and delicate lift in these potato chip cookies. Far from being a mere novelty, vinegar acts as a “baking powder lite,” offering a gentle leavening boost without the common drawbacks associated with traditional baking powder in some crispy cookie recipes.
My experiments with various leavening agents revealed a recurring issue with baking powder: while it certainly provided lift, it often resulted in cookies that were a little softer or chewier than my ideal crisp standard. The goal was uniform crispness, not a fluffy middle. This is where vinegar shines. When added to the dough, particularly in recipes that also include baking soda, the acid in the vinegar reacts with the alkaline baking soda. This reaction produces carbon dioxide gas, which creates tiny air bubbles in the dough, contributing to a slight lift and a more open, lighter crumb structure. Crucially, this reaction is less powerful and more controlled than what baking powder typically provides, preventing the cookies from becoming too soft or cake-like.
The beauty of using vinegar is that it delivers just that tiny bit of lift, enhancing the cookie’s texture and promoting an airy crispness, all without introducing any unwanted softness. It’s a precise adjustment that makes a noticeable difference to the overall “snap” of the cookie. Think of it as a subtle assist in achieving that perfect thin and crispy profile. You might wonder if you can simply omit the vinegar. The answer is yes, you certainly can, and your cookies will still be very good and very crispy. However, I found that the batches made with vinegar possessed a slightly airier quality, a delicate lightness that elevated the eating experience. So, while optional, it’s a small step that makes a big impact on the final texture, helping to create a truly exceptional crispy cookie. And no, I didn’t just need a gimmick – though it certainly makes for an interesting conversation starter!
Choosing Your Crunch: The Best Potato Chips for Crispy Cookies
When it comes to selecting the star ingredient – the potato chips – for these crispy delights, the good news is that most plain, unflavored varieties will work wonderfully. The key is to focus on the texture and saltiness they bring, rather than overpowering flavors. Steer clear of heavily flavored chips like BBQ, sour cream and onion, or cheese varieties, as these will likely clash with the sweet chocolate and vanilla notes of the cookie, creating an unbalanced and potentially unpleasant taste.
I’ve personally achieved excellent results using various brands and types of plain potato chips, including reduced-fat options and those with regular thickness. Kettle-cooked chips and Cape Cod chips have been consistent winners in my kitchen, contributing a robust crunch and a satisfying salty balance. These types of chips often have a slightly firmer texture and a more pronounced potato flavor, which translates beautifully into the cookie. The irregular shapes and varied crispness of kettle-cooked chips can also add an extra dimension of texture to each bite.
Initially, I considered adding a note about updating the recipe after testing with thick-cut potato chips, anticipating a potential difference in the outcome. However, to spare all of you fellow cookie enthusiasts the wait, I decided to immediately put thick and “wavy” potato chips to the test. (Conveniently, they were on sale for Memorial Day, making it an opportune moment for experimentation!) I’m happy to report that the thick-cut chips performed admirably. While they maintain a slightly more substantial crunch than thinner chips, they still integrate seamlessly into the cookie dough, contributing their characteristic salty bite and enhancing the overall crispness. So whether you prefer standard-thickness chips or the hearty crunch of thick-cut varieties, feel confident in your choice – just remember to crush them to an appropriate size for even distribution throughout the dough. The goal is to have noticeable pieces of chip for texture, but not so large that they overwhelm the cookie’s structure.
Explore More Crispy Cookie Creations
If you’ve fallen in love with the satisfying crunch of these potato chip cookies, you’ll be delighted to know there are many other ways to achieve that perfect crisp texture in your chocolate chip cookie endeavors. Here are some of my other favorite recipes that consistently deliver a delightful snap:
- Crispy Chocolate Chip Cheerio Cookies – An unexpectedly delicious combination that’s sure to surprise and delight! The Cheerios add an extra layer of crunch and a subtle nutty flavor.
- Mini Chocolate Chip Cookies– These bite-sized treats are a bit more effort to shape, but their delicate crispness and perfect portion size make them absolutely worth it for parties or a personal stash.
- Fanny Farmer Chocolate Chip Cookie Recipe – A timeless classic that, when baked correctly, almost always delivers a wonderful crispy edge and chewy center, often leaning towards a crisp overall texture.
- Crunchy Chocolate Chip Cookies – A unique, egg-free recipe focusing entirely on achieving maximum crunch, elevated by the addition of roasted pecans for depth of flavor.
Recipe
Crispy Potato Chip Cookies
Anna
Pin Recipe
Ingredients
- 1 stick unsalted butter, softened (114 grams) or alternatively use 56 grams unsalted butter + 48 grams shortening for a lighter texture)
- ½ cup granulated sugar (100 grams)
- ½ cup packed light brown sugar (100 grams)
- 1 large egg
- ½ teaspoon vanilla extract
- ½ teaspoon fine sea salt
- ½ teaspoon baking soda
- ½ teaspoon apple cider, malt, or white vinegar
- 1 cup all-purpose flour or 1:1 gluten-free flour blend (with xanthan gum) (135 grams)
- ¾ cup crushed plain potato chips (70 grams – adjust amount to your preference)
- 1 cup semisweet chocolate chips, slightly heaping
- ½ cup toasted and chopped pecans or walnuts (optional, but highly recommended for extra flavor and crunch)
Instructions
-
In a large mixing bowl, using an electric mixer, cream together the softened butter (or butter and shortening combination) and both granulated and light brown sugars until the mixture is light, fluffy, and creamy. This typically takes 2-3 minutes. Next, beat in the vanilla extract and the large egg until fully incorporated. Once the egg is mixed in, add the salt and baking soda, ensuring to scrape down the sides of the bowl thoroughly with a spatula. Finally, beat in the vinegar, then scrape the sides of the bowl once more to ensure everything is well combined.
-
Gradually add the flour to the wet ingredients, stirring on low speed until just blended and no dry streaks remain. Be careful not to overmix the dough. Once the flour is incorporated, gently fold in the crushed potato chips and the semisweet chocolate chips. If you are using nuts, fold in the toasted and chopped pecans or walnuts at this stage as well.
-
Using a small cookie scoop (approximately 1.5 tablespoons) or a rounded teaspoon, portion out about 42-44 dough balls, each weighing roughly 17-20 grams. Arrange these dough balls onto plates or a baking tray lined with plastic wrap. Cover the dough balls and chill them in the refrigerator for at least one hour. Chilling is highly recommended as it helps the cookies maintain a rounder shape and contributes to a crispier texture. Alternatively, you can bake the dough balls immediately, but be aware that they might spread a bit more and may not achieve the perfectly round shape.
-
While the dough is chilling, preheat your oven to 350 degrees F (175 degrees C). Prepare your baking sheets by lining them with parchment paper; this prevents sticking and helps with even baking and easy removal.
-
Once the dough is adequately chilled, retrieve it from the refrigerator. Briefly roll each portion of dough between your palms to form compact and relatively neat balls. This ensures a consistent shape and helps prevent jagged edges. Place the cookie dough balls about 1.5 to 2 inches apart on the prepared parchment-lined baking sheets. Bake in the preheated oven at 350°F (175°C) for approximately 12 minutes. Begin checking for doneness around the 10-minute mark. The cookies should be golden brown around the edges and appear very flat. They might still seem slightly soft in the center, but they will firm up as they cool. Let the cookies cool briefly on the parchment-lined baking sheet for about 3 minutes before carefully transferring them to a wire rack to cool completely. Cooling on the rack ensures air circulation, which is crucial for achieving maximum crispness.
-
Troubleshooting Tip for Crispness: If you find that your cookies are consistently coming out chewy, or if they are significantly darker around the edges but remain soft in the middle, consider adjusting your baking technique. Reduce your oven temperature slightly to 325 degrees F (160 degrees C) and extend the baking time by a few minutes. I have found that baking at a slightly lower temperature for a longer duration promotes a more even bake and results in a more uniformly crispy cookie throughout, preventing the edges from over-browning while the center remains undercooked.
