Mastering the Loaf Pan Basque Burnt Cheesecake: An Effortless & Irresistible Recipe
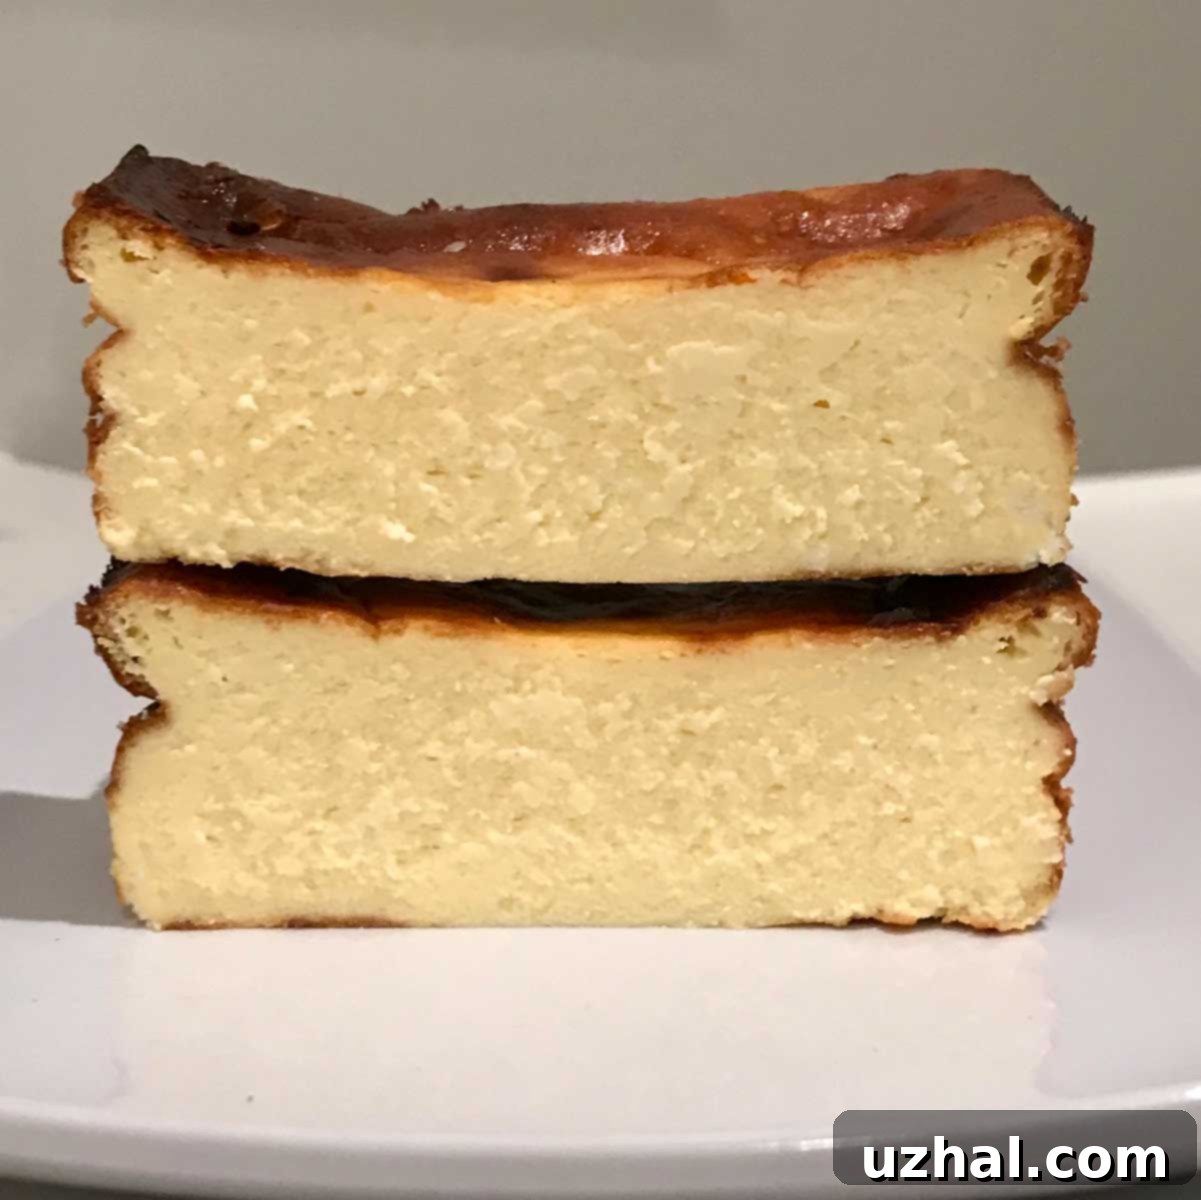
There’s a reason why the Basque Burnt Cheesecake, famously originating from La Viña in San Sebastián, Spain, has taken the culinary world by storm. Its intentionally burnt, caramelized exterior gives way to an incredibly creamy, custardy interior, offering a delightful contrast of textures and flavors. While a trip to Spain to savor the original is an experience in itself, we’re bringing the magic right into your kitchen with a more manageable and equally delightful version: the Loaf Pan Basque Burnt Cheesecake.
This smaller-scale adaptation of the trendy, crustless cheesecake is remarkably quick to prepare, making it a high-reward, low-effort dessert. Despite the substantial chill time required for its perfect set, the hands-on prep is minimal, allowing you to enjoy a slice of sophisticated Spanish dessert with ease. Forget fussy water baths or intricate crusts; this cheesecake celebrates simplicity and bold flavor.
Perfecting Your Loaf Pan Basque Burnt Cheesecake: Key Adjustments
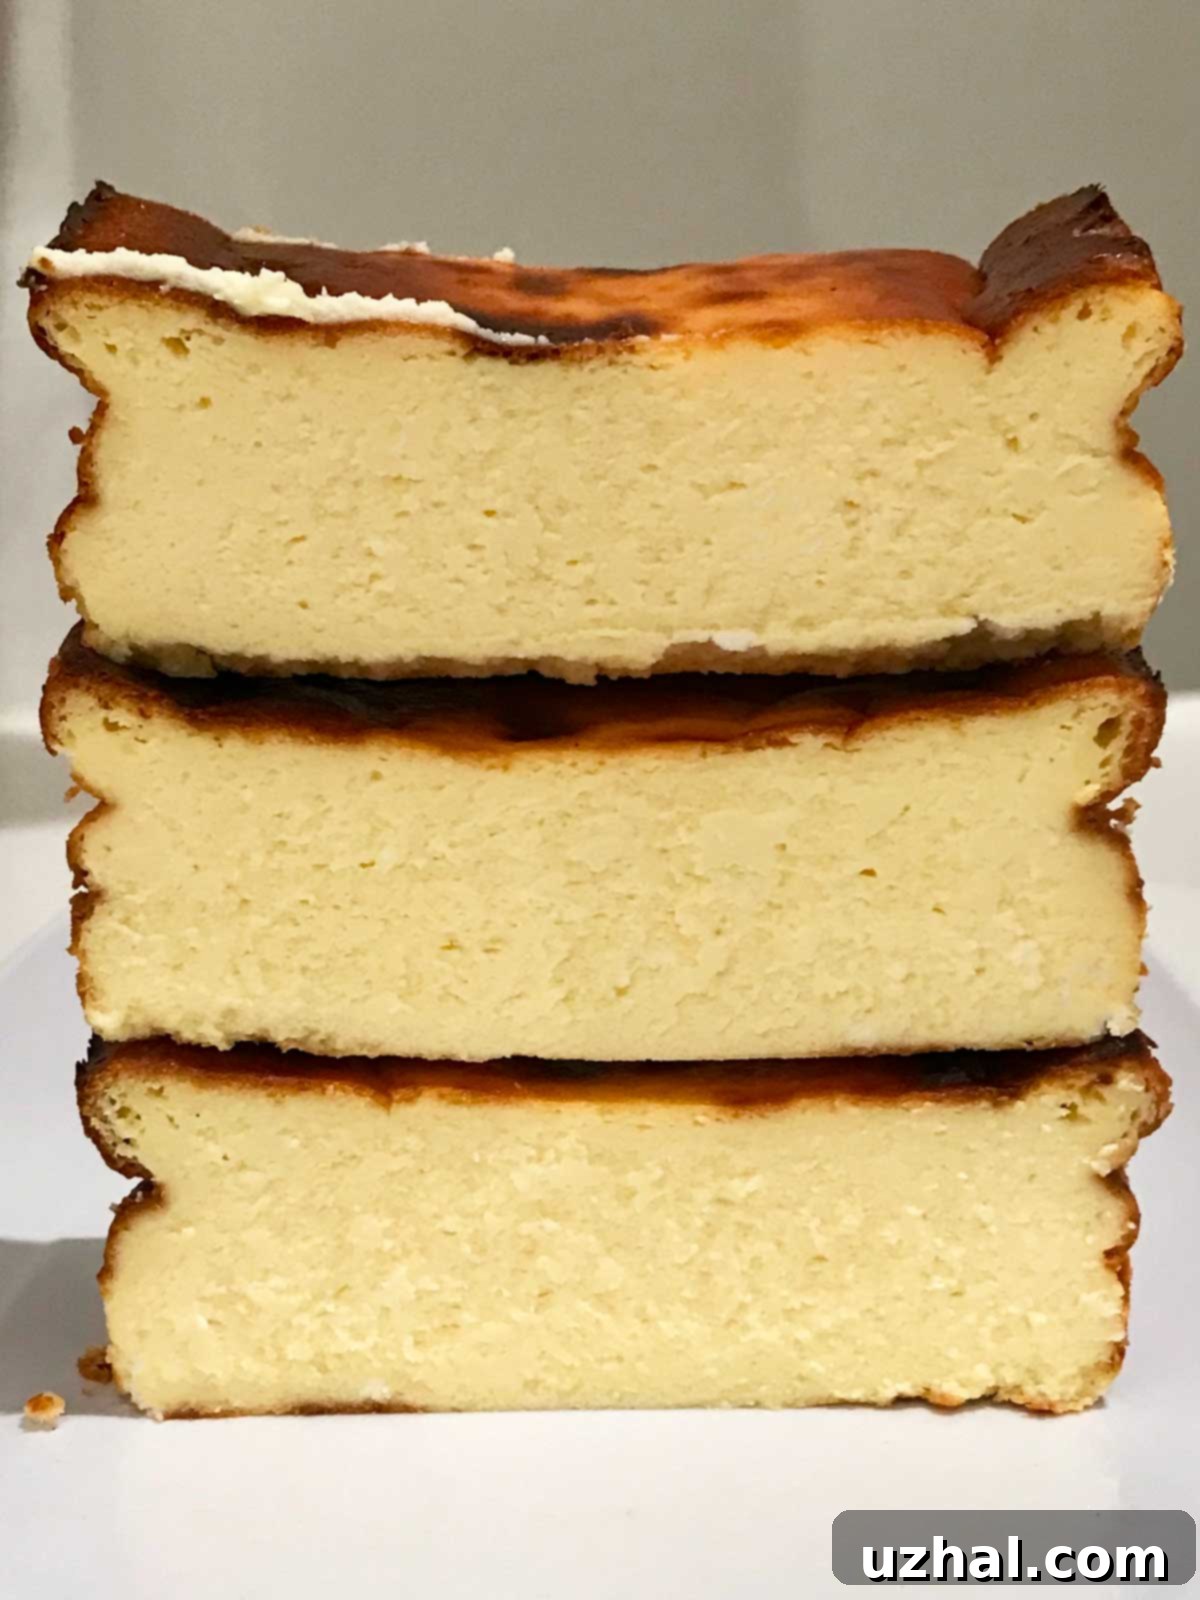
Our journey to the ideal Loaf Pan Basque Burnt Cheesecake involved several crucial adjustments from initial inspirations, like a recipe from U-Taste. The original inspiration often lacked sufficient sweetness and distinct flavorings, which, while acceptable for showcasing premium, high-quality cheese, falls short when using standard American grocery store cream cheese. For a truly irresistible cheesecake, a little enhancement goes a long way.
To elevate the flavor profile, we found that incorporating vanilla extract and a touch of lemon juice makes a significant difference. Vanilla provides a warm, classic sweetness, while lemon juice brightens the overall taste, cutting through the richness of the cream cheese and adding a subtle tang. These simple additions transform a bland cheesecake into a memorable dessert. Experimenting with different flavor extracts, such as almond or even a hint of orange zest, can also yield fantastic results, allowing you to customize your Basque cheesecake to your personal preferences.
It’s worth noting that traditional Basque Burnt Cheesecakes are, by definition, crustless. The beauty of this dessert lies in its simplicity and the unique texture created by the high-heat bake. The “burnt” top and sides naturally form their own thin, caramelized crust, contributing to the cheesecake’s distinct rustic charm. While I confess to getting carried away and adding a cookie crust to a couple of my test batches, it’s genuinely not necessary for this recipe. The authentic experience is all about that intensely creamy, deliberately charred interior and exterior.
Choosing the Right Loaf Pan Size for Your Basque Cheesecake
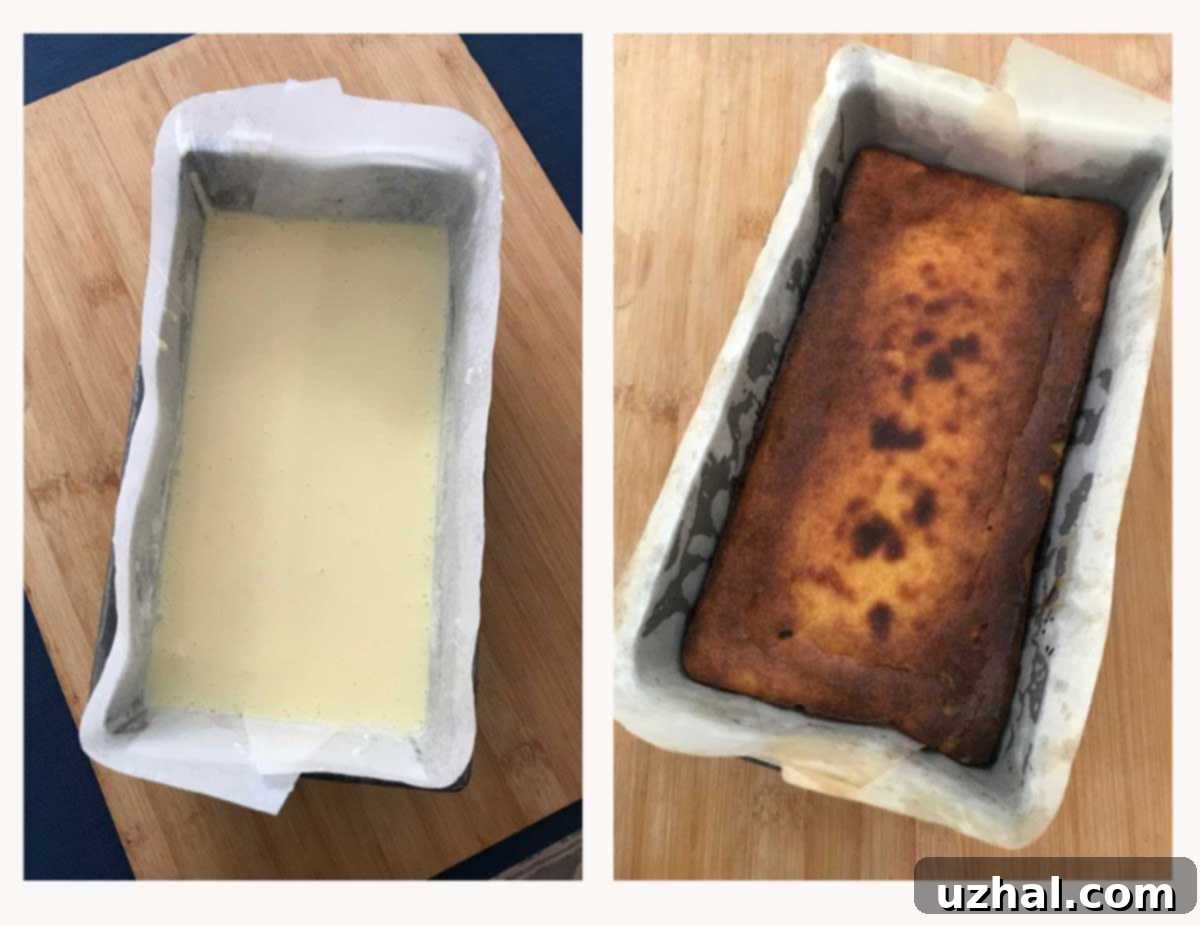
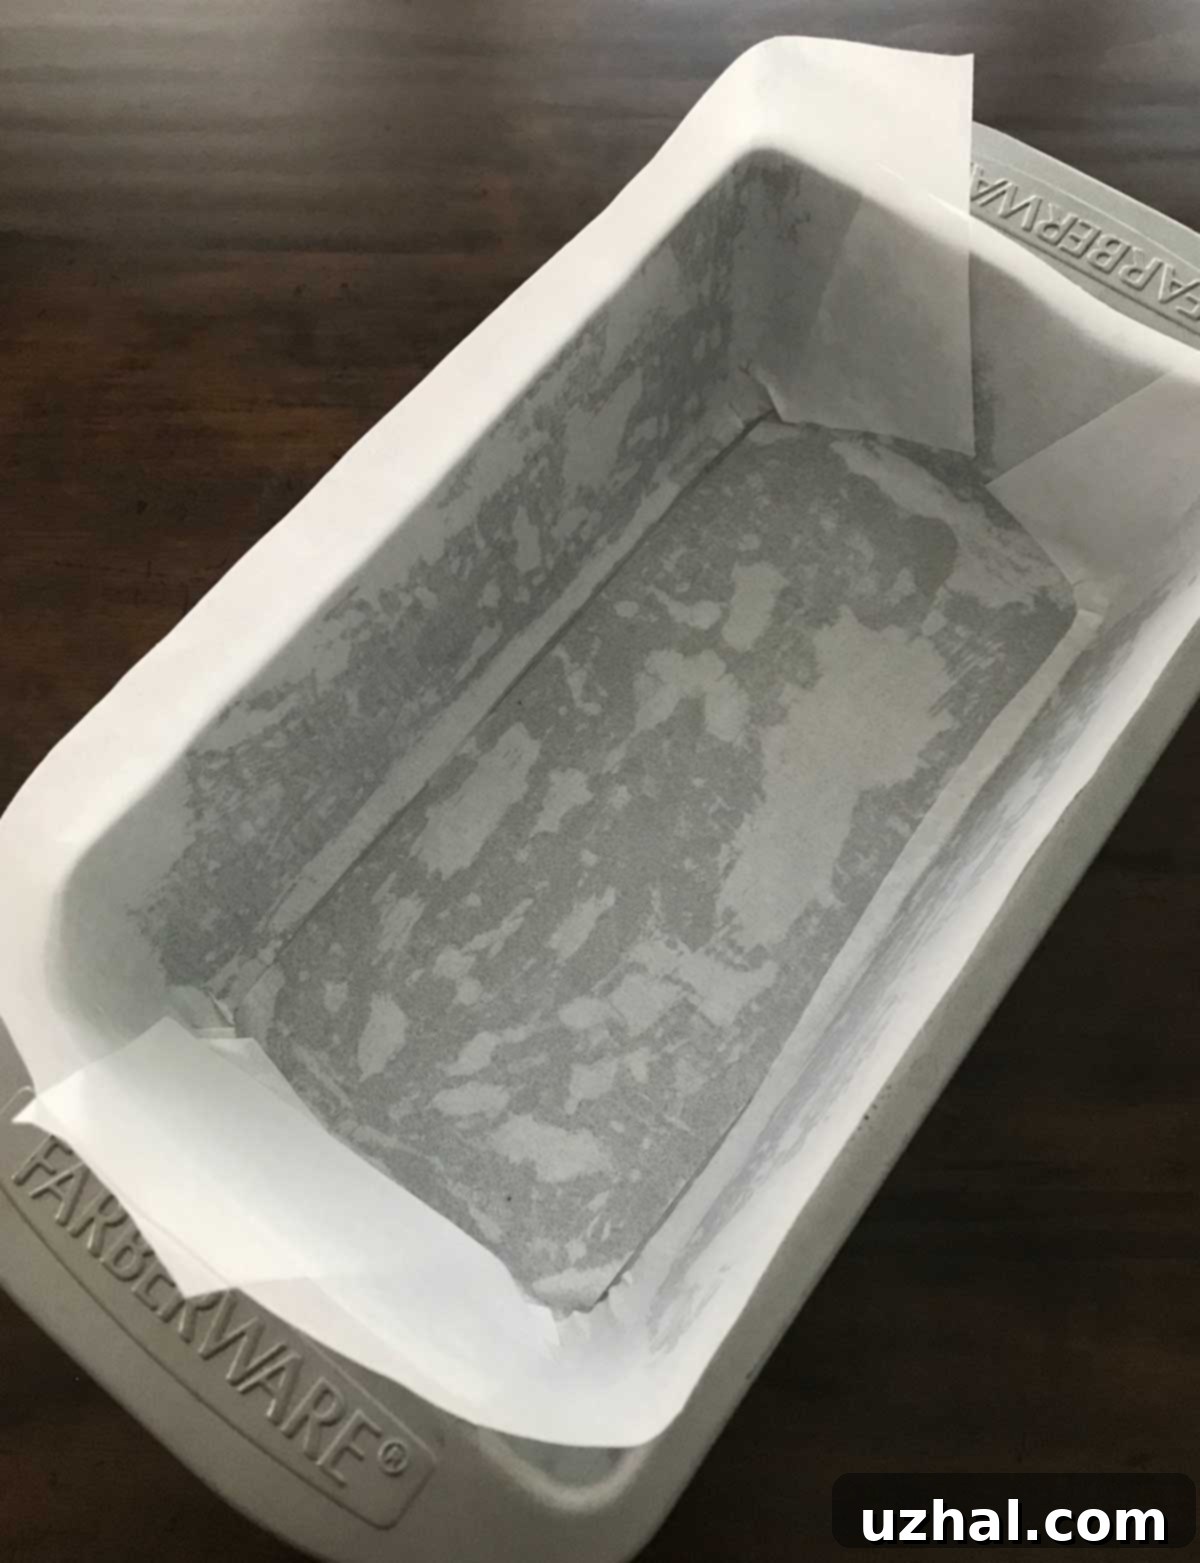
The choice of loaf pan size might seem minor, but it can significantly impact the final texture and height of your Basque Burnt Cheesecake. During my initial trials, I used a standard 9×5 inch loaf pan, which is widely available and works perfectly fine. The image below demonstrates how to effectively line this size pan with parchment paper, ensuring easy release and that signature crinkled edge.
However, for the second batch, I experimented with a slightly smaller 8 ½ by 4 ½ inch pan. The results were noticeably superior. The cheesecake baked in the smaller pan emerged slightly taller and, crucially, even creamier in the center. This is likely due to the increased depth, which allows the interior to remain more custardy while the exterior achieves its characteristic ‘burnt’ crust.
Therefore, for optimal results and that coveted extra-creamy texture, I highly recommend using an 8 ½ by 4 ½ inch loaf pan. If a 9×5 inch pan is what you have on hand, don’t fret – it will still produce a delicious Basque cheesecake, though it might be marginally less tall and dense. Just be mindful that baking times might need a slight adjustment based on your pan’s dimensions; a wider, shallower pan may bake a minute or two faster. Always line your chosen pan generously with parchment paper, allowing it to overhang the sides. This not only prevents sticking but also helps to create the rustic, crinkled appearance that is part of the Basque cheesecake’s charm.
The Secret to a Silky Smooth Batter: Room Temperature Ingredients
One of the most critical steps for achieving a perfectly smooth, lump-free cheesecake batter is ensuring all your ingredients are at true room temperature. And by room temperature, I mean a “warm room temperature” – not just slightly cool. This seemingly small detail has a profound impact on the final texture and consistency of your Basque Burnt Cheesecake.
When cream cheese is cold, it’s firm and doesn’t blend easily, leading to lumps in your batter. These lumps won’t magically disappear during baking, resulting in an uneven texture. Warm cream cheese, on the other hand, cream cheese that’s soft enough to be easily stirred with a silicone scraper, incorporates smoothly with the sugars and other ingredients. To achieve this, I often lightly microwave the cream cheese at 50% power, stirring it every 30 seconds until it reaches a very soft, pliable consistency. Be careful not to overheat it, as melted cream cheese can affect the cheesecake’s structure.
Similarly, eggs and heavy cream should also be brought to room temperature. Cold eggs can cause the butterfat in the cream cheese to seize, leading to a curdled or chunky batter. Warm eggs, along with warm cream, emulsify beautifully, creating a homogenous, velvety batter that bakes evenly and results in that signature creamy interior. For eggs, simply placing them in a bowl of warm (not hot) water for 5-10 minutes does the trick. The cream can sit on the counter for about 30 minutes, or you can gently warm it in the microwave for a few seconds. While I personally prefer stirring everything by hand with a scraper to avoid overmixing, an electric mixer on a very low speed can certainly be used, just be mindful not to incorporate too much air, which can lead to cracks.
Baking Your Basque Cheesecake to Perfection in a Breville Toaster Oven
This Loaf Pan Basque Burnt Cheesecake recipe shines particularly well when baked in a Breville oven, which has been my exclusive testing ground. The precision and consistent heat of a Breville oven make it an excellent choice for achieving that ideal “burnt” top and creamy center. The internal light is a fantastic feature, allowing you to monitor the browning process, which typically intensifies towards the very end of the bake time.
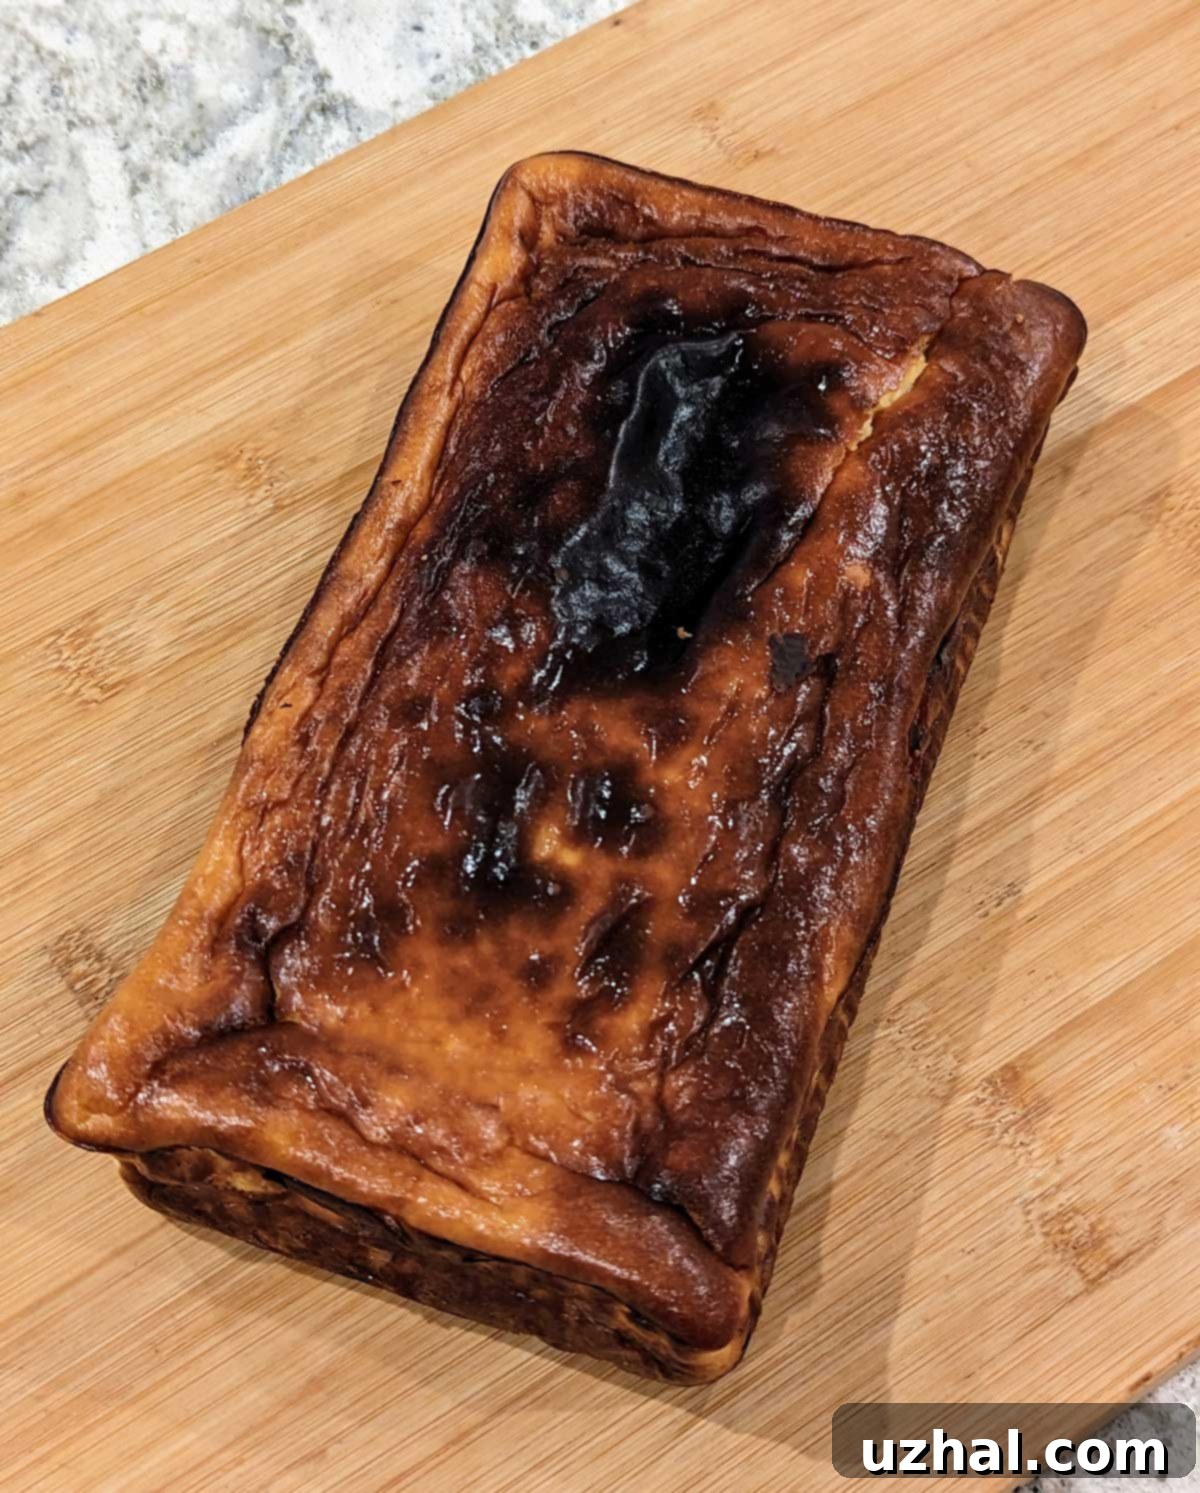
For this particular cheesecake, a temperature of 440°F (approximately 225°C) has proven to be perfect, with a baking duration of 25 to 28 minutes. The key challenge with Basque Burnt Cheesecake is synchronizing the external browning with the internal cooking. You’re aiming for a deeply caramelized, almost blackened top and sides, while the center remains incredibly soft, custardy, and slightly jiggly. It’s a delicate balance; you might risk an overly dark top with an overbaked, firm center, or a perfect center with a top that hasn’t achieved the desired dramatic char.
Don’t be discouraged if your first attempt isn’t absolutely perfect. Oven temperatures can vary significantly, even within the same model. It’s entirely possible you’ll need to make minor adjustments to either the temperature or bake time in your specific oven to achieve that ideal harmony between the perfectly “burnt” top and the luscious, molten center. Trust your instincts and the visual cues: a deep, dark brown (almost black) top, and a wobbly but not liquid center when gently shaken, indicate a successful bake. The beauty of this cheesecake is its rustic nature, so even if it’s not “perfect,” it’s almost guaranteed to be delicious!
An Optional Indulgence: Basque Cheesecake with a Cookie Crust
The inherent beauty of the Basque Burnt Cheesecake lies in its simplicity and intentional crustless design. It’s meant to be an unfussy, rustic dessert where the focus is entirely on the rich, creamy interior and the caramelized exterior. However, for those who enjoy an added layer of texture and flavor, incorporating a cookie crust can be a delightful deviation. It’s a creative way to personalize the recipe while still enjoying the core elements of this magnificent cheesecake.
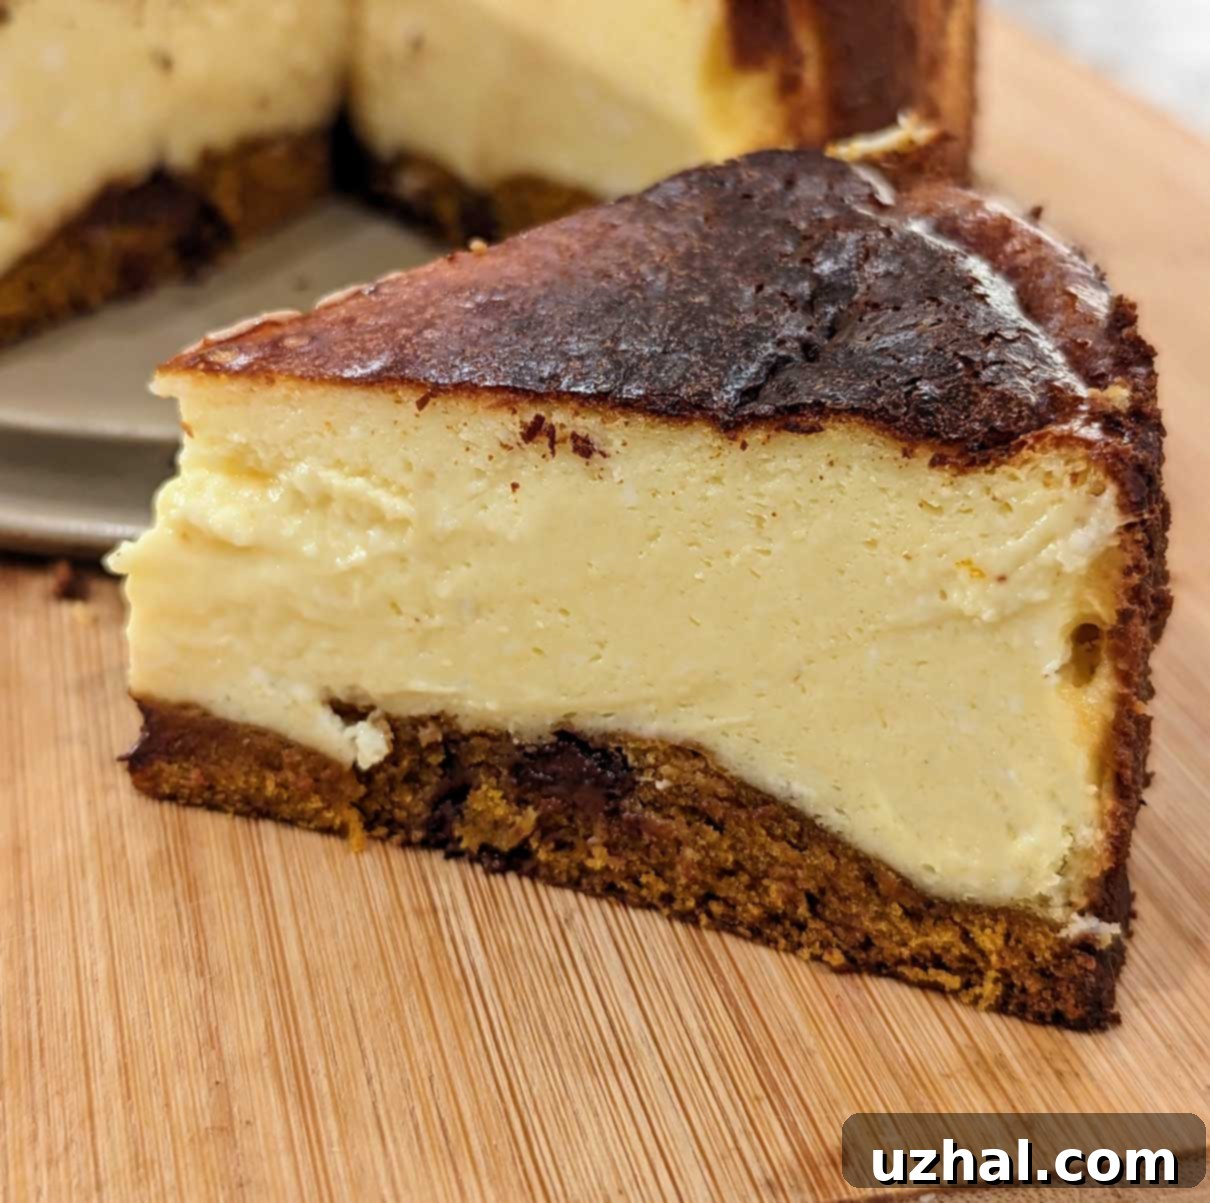
If the idea of a pumpkin chocolate chip cookie crust, as pictured in some of my experiments, appeals to you, the process is straightforward. Start by making a batch of your favorite Pumpkin Chocolate Chip Cookie dough. Once prepared, form the dough into small rounds. You can save most of these rounds for baking classic cookies, using only about 3 or 4 for your cheesecake crust. Simply press these dough rounds evenly into your prepared loaf pan, covering the bottom. Bake this cookie crust at 400°F (200°C) for approximately 10 minutes, allowing it to set and become lightly golden. Once cooled slightly, you can then pour your Basque cheesecake batter directly over this baked cookie base before proceeding with the main bake.
The possibilities for crust variations don’t stop there. A rich Molasses cookie dough would also create a fantastic, warmly spiced base that complements the creamy cheesecake beautifully. For a festive touch, especially during the holidays, a soft gingerbread dough would be an excellent choice. I would suggest starting with a sturdy gingerbread dough recipe, such as one designed for gingerbread men cookies, which will hold its structure well during the pre-bake. While not traditional, these optional crusts offer a unique twist and an extra dimension of flavor and texture to your homemade Basque Burnt Cheesecake.
Adapting to a 6-inch Springform Pan: Versatility in Baking
Good news for those who prefer round cheesecakes or already own a springform pan: this Loaf Pan Basque Cheesecake recipe is incredibly versatile and can indeed be made in a 6-inch springform pan! The transformation from a loaf shape to a traditional round is seamless, requiring no significant changes to the ingredient ratios or the overall method. This allows you to achieve the same creamy, “burnt” deliciousness in a classic presentation.
When using a 6-inch springform pan, simply follow the identical directions for preparing the batter and baking. Ensure your springform pan is properly prepared by greasing it and lining it generously with parchment paper. This is especially crucial for springform pans, as it prevents leaks and ensures your cheesecake lifts out cleanly after chilling. Allow the parchment to extend above the rim of the pan to help achieve that rustic, crinkled edge characteristic of Basque cheesecakes.
The bake time should generally remain consistent with the loaf pan instructions, typically around 25 to 28 minutes at 440°F (225°C). However, as with all baking, slight variations can occur between different ovens and even different pan materials. Keep a close eye on the cheesecake as it bakes, looking for that deep, caramelized brown top and a wobbly but not liquid center. My own 6-inch springform, a reliable gold-colored one from Aldi, performs beautifully, but these pans are widely available online and in most kitchenware stores, making this adaptation accessible to almost any home baker.
Exploring Other Cheesecake Delights: New York Style Loaf Pan Cheesecake
While the rebellious charm of intentionally “burning” a cheesecake is undeniably fun and produces a unique flavor profile, sometimes you might crave a different kind of classic. If you prefer a cheesecake with a lighter, golden top, a firmer texture, and a distinct crust, then a New York Style Loaf Pan Cheesecake might be exactly what you’re looking for. It offers a wonderful contrast to the rustic Basque version, showcasing the incredible versatility of cheesecake.
The New York Style cheesecake follows a different set of baking principles. It traditionally calls for a water bath, which provides a gentle, even heat, preventing cracks and ensuring a smooth, dense, and creamy interior. This method results in a beautifully pale, un-burnt top, often garnished with fruit toppings like cherry or strawberry. Furthermore, New York Style cheesecakes are almost always built upon a buttery shortbread or graham cracker crust, adding a delightful textural component that contrasts with the rich filling. If you’re looking to broaden your cheesecake repertoire and explore a different flavor and texture profile, I highly recommend giving the New York Style loaf pan cheesecake a try. It’s a timeless classic that appeals to those who appreciate a more traditional and perfectly uniform cheesecake experience.
- A Review of Basque Cake Recipes aka Basque Cake Madness
- 6-Inch Coconut Layer Cake
- Six Inch Instant Pot Chocolate Cake
- Self Rising Flour Red Velvet Half-Cake
- Loaf Pan Cheesecake
Recipe: Loaf Pan Basque Burnt Cheesecake
Basque Loaf Pan Cheesecake
Anna
Pin Recipe
Ingredients
- 12.9 oz cream cheese (this is a little over 1 ½ blocks) (360 grams), *at warm room temperature*
- 1 ½ tablespoon granulated sugar (optional, adds extra caramelization)
- ⅔ cup powdered sugar (80 grams)
- 1 ¼ tablespoon cornstarch (or just a generous tablespoon) (10 grams)
- ½ tablespoon lemon juice (14 grams), *freshly squeezed for best flavor*
- ½ tablespoon vanilla extract (14 grams)
- 3 large eggs, room temperature (150 grams)
- 1 large egg yolk (18 grams), *room temperature*
- 7 tablespoons heavy cream (that’s ½ cup minus a tablespoon) (100 grams), *room temperature*
Instructions
-
Prepare Ingredients: Before you begin mixing, ensure all your ingredients are at true room temperature. This is crucial for a smooth batter. You can submerge the eggs in warm water for 5-10 minutes, gently soften the cream cheese using a low setting on the microwave (stirring every 30 seconds until very soft but not melted), and warm the heavy cream slightly.
-
Prepare Pan: Grease the inside of your chosen loaf pan (8.5×4.5 inch or 9×5 inch recommended) and line it generously with parchment paper strips, allowing the paper to overhang the sides. This helps with easy removal and creates the signature rustic edges. If you’d prefer a round cheesecake, a 6-inch springform pan works wonderfully too; prepare it similarly with parchment.
-
Mix Batter: In a large mixing bowl, either by hand with a silicone scraper or using the lowest speed of an electric mixer, beat together the very softened cream cheese, granulated sugar (if using), powdered sugar, cornstarch, lemon juice, and vanilla extract until completely smooth and lump-free. Then, stir in the three large eggs one at a time, ensuring each is fully incorporated before adding the next. Follow with the single egg yolk. Lastly, gently stir in the room temperature heavy cream until just combined. Be careful not to overmix and incorporate too much air.
-
Pour and Bake: Pour the creamy cheesecake mixture into your prepared loaf pan or springform. If you opted to make an optional cookie crust, ensure it’s completely cooled before pouring the batter over it.
-
High Heat Baking: Bake the cheesecake in a preheated oven at 440°F (225°C) for approximately 25 to 28 minutes, or until the top is deeply browned, almost black, and the center still has a distinct wobble when gently shaken. The exact bake time may vary slightly depending on your oven and the type and size of pan used. A wider pan (like a 9×5 inch) might be done closer to 25 minutes, while narrower, deeper pans or the 6-inch springform might require the full 28 minutes.
-
Cool and Chill: Once baked, remove the cheesecake from the oven and let it cool completely at room temperature for about an hour. During this time, it will continue to set. After cooling, transfer the cheesecake (still in its pan) to the refrigerator and chill for at least 6 hours, or ideally overnight, for the best texture and flavor. This crucial chilling period allows the cheesecake to firm up and its flavors to fully develop.
In conclusion, the Loaf Pan Basque Burnt Cheesecake is more than just a dessert; it’s an invitation to embrace the beauty of simplicity and the unexpected pleasure of a “burnt” crust. Its effortless preparation, coupled with its irresistibly creamy texture and distinctive caramelized flavor, makes it a perfect choice for both novice and experienced bakers alike. Whether you’re craving a taste of Spain or simply seeking a unique and satisfying treat, this recipe promises a delightful culinary adventure. Don’t be shy about that dark, caramelized top – it’s the signature of a truly authentic and incredibly delicious Basque Burnt Cheesecake. Serve it chilled, perhaps with a handful of fresh berries or a drizzle of honey, and prepare to impress your guests with this remarkable, rustic creation. Happy baking!
