Irresistible Root Beer Magic Shell & Brown Butter Blondies: A Nostalgic Dessert Recipe and Review
Welcome to a truly delightful journey into a classic American flavor, reimagined! This post delves into a unique dessert combination featuring the intriguing Root Beer Magic Shell paired with rich, homemade Brown Butter Blondies. We’ll explore the fun, flavor, and practicality of this dynamic duo, offering both a detailed review of the “magic” shell and a comprehensive recipe for the utterly irresistible blondies. Whether you’re a long-time root beer float aficionado or simply looking for a novel treat to impress, this pairing promises a nostalgic taste experience with a sophisticated twist. The blondies, a perfect vehicle for the root beer topping, are made with a single egg yolk, making this recipe an excellent choice if you’re looking for clever ways to use up leftover yolks from other baking projects.
Reflecting on special occasions, I often find myself wishing I had thought to serve something truly memorable. This Root Beer Magic Shell and Brown Butter Blondie combo perfectly fits that bill! It’s the kind of fun, flavorful dessert that brings smiles to faces and sparks conversation, making it ideal for any festive gathering, from casual backyard barbecues to celebratory dinner parties. The unique flavors and textures provide a refreshing change from traditional desserts and evoke a sense of carefree joy and indulgence.
An Indepth Review of Smucker’s Root Beer Magic Shell
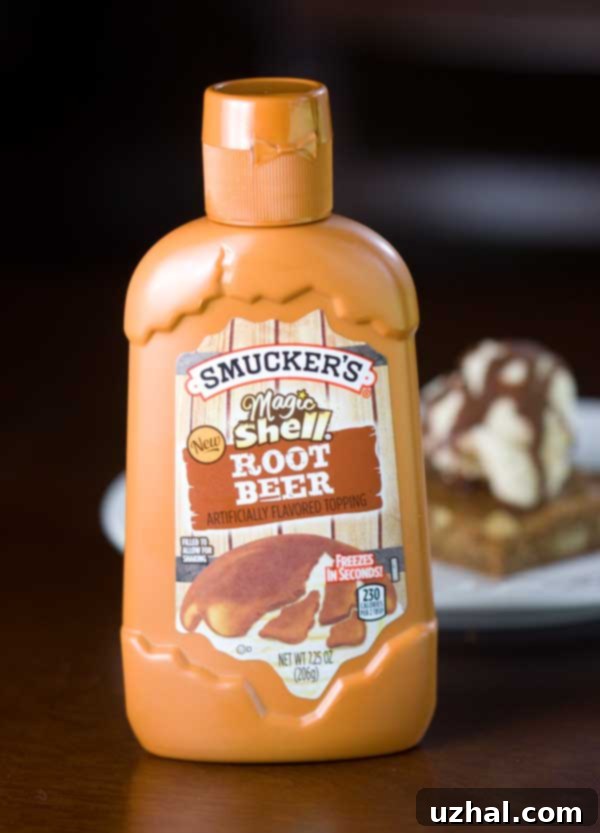
My first encounter with the Root Beer Magic Shell was pure serendipity. A surprise package from Smucker’s, containing a free sample of this then-new product, landed on our doorstep. Perhaps the universe knew my husband, Todd, is a devout root beer float fanatic, and this was an unannounced treat for his taste buds! Regardless, it was a delightful and unexpected surprise that immediately set my culinary imagination alight. The novelty of a root beer-flavored hardening shell was incredibly exciting, prompting an amusing diversion of brainstorming all the possible ways to incorporate it into a dessert. After much consideration, the ultimate decision was clear: pair it with rich, chewy blondies topped with creamy vanilla ice cream. This combination felt like the perfect canvas to showcase the unique flavor profile of the Root Beer Magic Shell, elevating a simple treat into an extraordinary dessert experience.
Unpacking the Unique Flavor and Versatile Uses
Visually, the Root Beer Magic Shell presents a familiar appearance, resembling its popular chocolate counterpart but with a slightly lighter, appealing caramel-like hue. Its true magic, however, lies in its distinct flavor. Upon tasting, there’s an undeniable, clear root beer essence that immediately takes center stage, reminiscent of a classic root beer barrel candy or a frosty root beer float. This prominent flavor is beautifully complemented by a subtle, intriguing hint of licorice, adding a layer of complexity without overpowering the main profile. The texture, once applied to a cold treat, transforms from a liquid into a satisfyingly crisp, thin shell, offering a delightful snap with every bite.
Initially, I theorized that this unique topping would best shine when paired with a “brown sugary” treat, which is precisely why I opted for the rich and chewy brown butter blondies. The caramel notes of the blondies truly harmonize with the root beer flavor. However, after experimenting, I’ve come to believe it might be even more exceptional when generously drizzled over a scoop of creamy vanilla ice cream and served alongside a warm, fudgy chocolate brownie or a decadent slice of chocolate fudge brownie pie. The contrast of the cool, firm shell against the soft, warm dessert creates an incredible textural experience, while the chocolate amplifies the darker, more complex notes of the root beer and licorice. Ultimately, the Root Beer Magic Shell is incredibly versatile and immensely fun to use, making it an absolute showstopper for any gathering, whether it’s a lively pool party or a cozy ice cream social. Its hardening effect fascinates both kids and adults, transforming a simple dessert into an interactive and memorable treat.
A Closer Look at the Ingredients: A Welcome Surprise
One of the most pleasant discoveries during my Root Beer Magic Shell experience came when I decided to scrutinize the ingredient list. To my surprise, right after sugar, the primary ingredients listed were sunflower oil and coconut oil. This revelation was incredibly satisfying, primarily because it meant a complete absence of hydrogenated oils, which are often a concern for health-conscious consumers. Eager to see if this was a brand-wide change, I visited the Smucker’s website and confirmed that this positive shift extends across their entire range of Magic Shell flavors. This commitment to using cleaner, more natural oils like sunflower and coconut oil is a significant improvement, not just from a nutritional standpoint but also in terms of flavor and texture. These specific oils are naturally solid or semi-solid at cooler temperatures, which is precisely what allows the Magic Shell to harden so effectively and quickly upon contact with cold ice cream, without the need for artificial stabilizers or less desirable fats. It’s a testament to Smucker’s evolving efforts to meet consumer demand for more wholesome and transparent product formulations.
If you’re looking to explore more creative dessert ideas or other root beer-infused delights, check out these related posts:
- Root Beer Fudge Brownies
- Root Beer Gelato
- Magic Blondies
- Homemade Soft Pretzels with Beer
- All Time Favorite Black Magic Cake
Recipe

Decadent Brown Butter Blondies with Vanilla Ice Cream and Root Beer Magic Shell
Anna
Pin Recipe
Ingredients
- 8 tablespoons unsalted butter (114 grams), preferably a good quality butter for browning
- ⅔ cup packed light brown sugar (135 grams), for moisture and rich flavor
- ¼ cup granulated sugar (50 grams), to balance sweetness
- 1 cup all-purpose flour or use 1 cup plus 2 T. White Lily all-purpose (140 grams), for a tender crumb
- ¼ teaspoon baking powder
- ¼ teaspoon baking soda
- ½ teaspoon salt omit if using salted butter, important for flavor balance
- 1 large egg (cold)
- 1 large egg yolk (cold), for extra chewiness
- 1 tablespoon light corn syrup (helps achieve a chewy texture)
- 2 teaspoons vanilla extract (pure vanilla for best flavor)
- 1 cup chopped toasted walnuts (optional, but adds great texture and depth)
- Vanilla Ice Cream (for serving)
- Root Beer Magic Shell (for topping)
Instructions
-
Begin by preheating your oven to 325 degrees F (160 degrees C). Prepare an 8-inch glass baking dish by lining it with strips of parchment paper. This parchment paper should extend up the sides, creating “slings” that will make it incredibly easy to lift the blondies out of the pan once they’ve cooled.
-
In a small, light-colored saucepan, melt the unsalted butter over medium heat. Continue to cook the butter, swirling the pan frequently, until it transforms into a rich, nutty brown color and emits a fragrant, toasted aroma. Watch carefully, as this process can go from perfectly browned to burnt very quickly. Immediately remove the pan from the heat and stir in both the packed light brown sugar and the granulated sugar until well combined. Allow this mixture to cool for approximately five minutes; it’s crucial that it’s not too hot when you add the eggs.
-
While the butter-sugar mixture is cooling, combine the all-purpose flour, baking powder, baking soda, and salt in a separate medium bowl. Whisk these dry ingredients together thoroughly to ensure even distribution of the leavening agents and salt.
-
Return to your slightly cooled butter and sugar mixture. Add the cold large egg and the cold large egg yolk, stirring vigorously until they are fully incorporated and the mixture is smooth. The cold eggs help prevent the mixture from getting too thin and contribute to the chewy texture. Next, stir in the light corn syrup and the pure vanilla extract until everything is well blended. Finally, gradually add the dry flour mixture, mixing just until no streaks of flour remain. Be careful not to overmix, as this can lead to tough blondies. Gently fold in the toasted walnuts, if using, ensuring they are evenly distributed throughout the batter. Scrape the entire batter into your prepared 8-inch glass pan, using an offset spatula to spread it evenly to all edges.
-
Bake in the preheated oven for 25 to 35 minutes (refer to the notes section below for important baking insights), or until the top of the blondies is beautifully golden brown, and a wooden toothpick inserted into the very center comes out clean or with only a few moist crumbs attached. It’s better to slightly underbake than overbake for optimal chewiness. Once baked, remove the pan from the oven and allow the blondies to cool completely in the pan on a wire rack. For easier cutting and to enhance their rich texture, chill them slightly in the refrigerator before slicing into perfect squares.
-
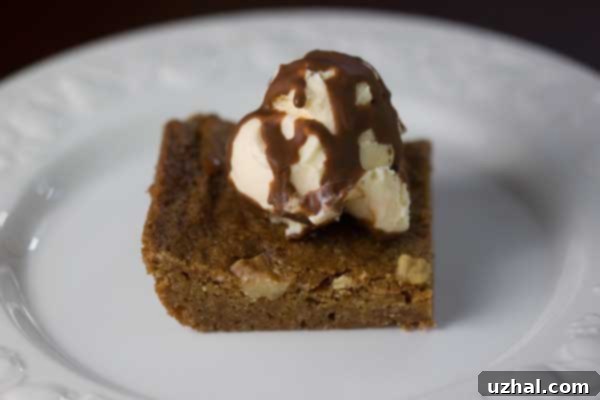
To serve, place a warm or room-temperature blondie square on a plate. Top it generously with a scoop of your favorite creamy vanilla ice cream. Finish with a liberal drizzle of Root Beer Magic Shell, watching as it magically hardens into a crisp, flavorful coating, adding a delightful crunch and a burst of nostalgic flavor.
Notes
After 25 minutes in the glass dish, the edges of the blondies were already a lovely golden brown, but a toothpick test revealed that the center was still quite raw. It took an additional 10 minutes of baking before the toothpick finally came out clean, indicating they were fully cooked. Despite the extended baking time, the resulting blondies, once cooled completely, were perfectly chewy and exceptionally flavorful. This experience highlights a crucial baking lesson: always pay close attention to your specific oven and the type of bakeware you’re using, as cooking times can vary significantly.
Furthermore, I chose to use White Lily all-purpose flour for this recipe. White Lily flour is a soft wheat flour with a lower protein content compared to conventional all-purpose flours, often resulting in a more tender and delicate crumb. This choice contributed to the blondies being delightfully soft and moist, preventing them from becoming overly hard or dense, even after being chilled or frozen. If you use a different brand of all-purpose flour, your blondies may have a slightly firmer texture, but they will still be delicious. Remember, cooling the blondies completely and even chilling them slightly before cutting is key to achieving clean slices and the best chewy texture.
