Rooster’s Famous Fire Crackers: The Ultimate Cheesy, Crispy Saltine Snack Recipe
Life has a funny way of throwing curveballs, even when it comes to the mundane. Just recently, during unexpected rolling blackouts in Austin, I found myself in a culinary predicament. What do you bake when the power might cut out at any moment? While the thought of “rolling blackouts” sounds somewhat festive, the reality of having your electricity randomly disappear is anything but. My local electric co-op promised outages of only ten minutes, but the city-wide estimates were up to an hour. This uncertainty necessitated a recipe that could withstand an abrupt oven shutdown – something quick, resilient, and utterly delicious.
That’s when I rediscovered Shirley Corriher’s Bakewise, a treasure trove of baking wisdom. Her recipe for “Rooster’s Famous Fire Crackers” immediately caught my eye. With an astonishingly short bake time of just 10 seconds, followed by a hands-off drying period in the cooling oven, it was the perfect solution. This recipe promised not only to be blackout-proof but also to deliver a snack that would become an instant family favorite. And oh, did it deliver!
The Deceptively Simple Ingredients: Only Three Required!
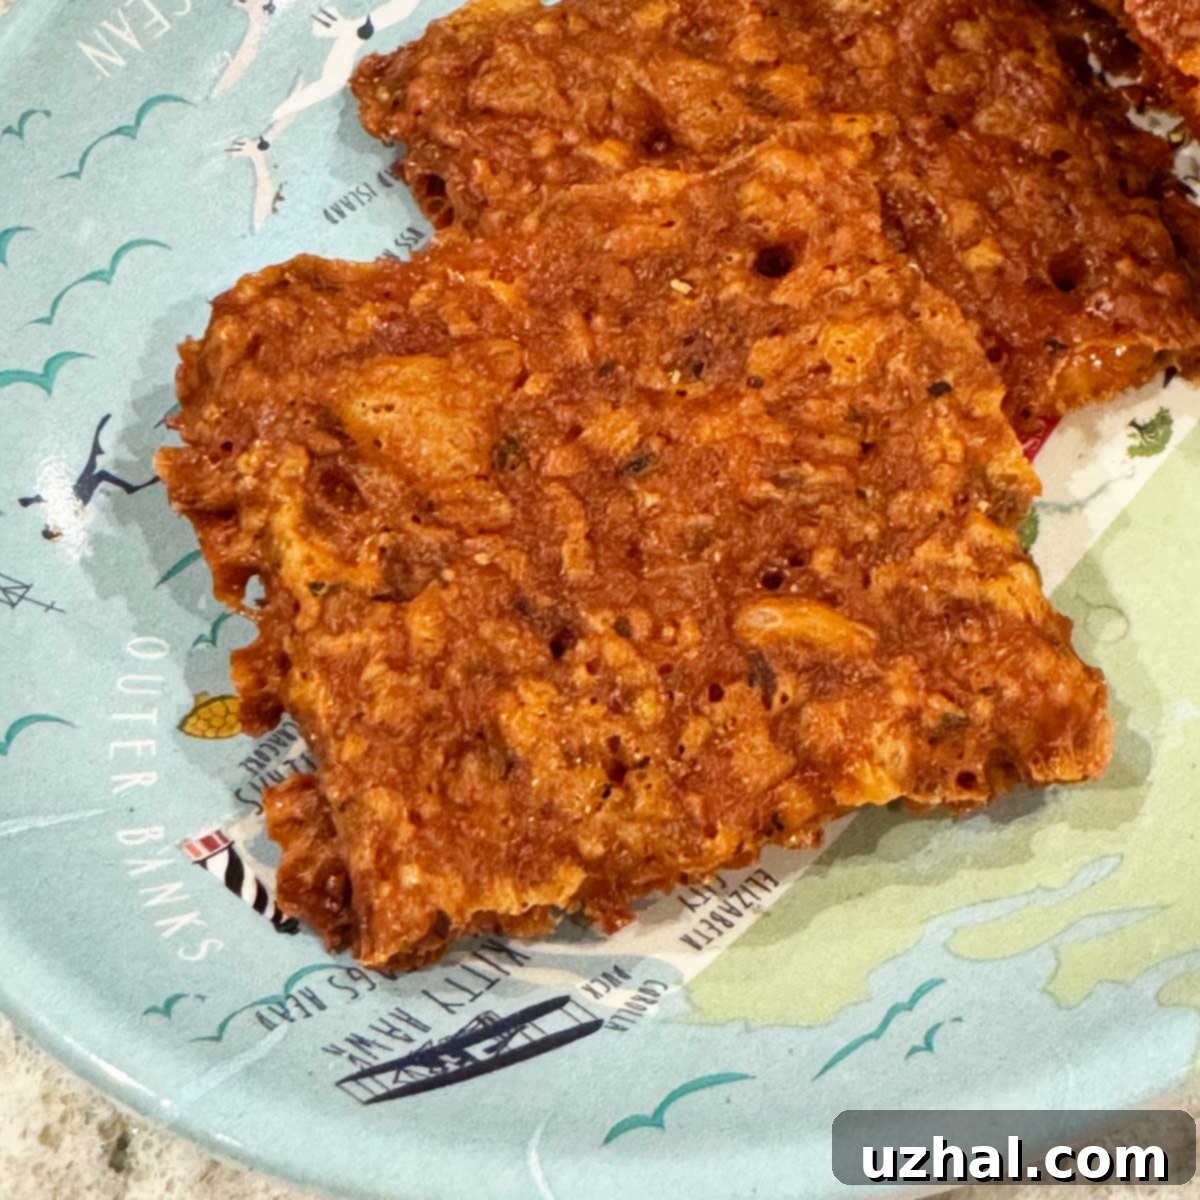
What makes Rooster’s Famous Fire Crackers so remarkable is their incredible simplicity. You only need three core ingredients to create these intensely cheesy, peppery, and wonderfully crisp crackers. These are not just any crackers; they bear a striking resemblance to the gourmet savory snacks once made by a popular store in North Carolina called “Rooster’s.” The magic lies in how these humble ingredients transform into something truly extraordinary.
Our household, especially my daughter Fuzz, has become utterly obsessed. After school, a plate of these disappears in record time, which is a testament to their addictive quality. The combination of salty cracker, sharp cheddar, and a hint of spice creates a flavor profile that’s hard to resist. This recipe proves that you don’t need a long list of exotic ingredients to create a show-stopping snack. Sometimes, less truly is more, especially when each ingredient plays a crucial role in achieving the desired texture and taste.
The Secret to Perfection: The Unique Baking Method (or How to Make Your Fire Crackers)
While the ingredients are straightforward, the brilliance of Rooster’s Famous Fire Crackers lies in Shirley Corriher’s ingenious baking method. It’s a two-step process that, at first glance, seems almost too simplistic to yield such impressive results, yet it’s precisely this method that creates their signature crispness and deep cheese flavor. Understanding this technique is key to mastering these addictive crackers.
Here’s how the magic unfolds: You start by evenly covering your crackers with a generous layer of finely grated cheese. Then, they go into a preheated, high-temperature oven for a mere 10 seconds. Yes, you read that right – just ten seconds! The high heat immediately begins to melt the cheese. Immediately after this brief bake, the oven is turned off, and the crackers are left to dry out completely in the residual heat for a minimum of two hours, or even longer. During this extended drying phase, the fat from the melting cheese renders and slowly absorbs into the Saltine crackers, creating an incredibly crisp and flaky texture. Simultaneously, the cheese itself continues to dry and brown, intensifying its flavor and developing a delightful crunch. The resulting cracker is a symphony of textures and flavors – a testament to a perfectly executed, albeit unconventional, baking process.
Because timing is so critical in this recipe, especially regarding oven temperature and the initial 10-second bake, Shirley Corriher wisely suggests doing a small test run. This allows you to calibrate your oven and technique before committing a large batch of delicious, good-quality cheese. Every oven is different, and finding that sweet spot for yours is vital for achieving the ideal golden-brown, crispy result without burning.
My First Attempt: Learning from Mistakes
My inaugural attempt at making these fire crackers was, shall we say, a valuable learning experience. I made a couple of common mistakes. Firstly, I used shiny aluminum foil to line my pan. Shirley explicitly recommends a dull gray or brown pan, and for good reason: shiny surfaces reflect heat, which can lead to uneven baking and prevent proper browning. Secondly, I used shredded cheese instead of grated. While shredded cheese wasn’t a deal-breaker and still tasted good, finely grated cheese tends to melt and spread more evenly, creating that perfect, seamless cheese layer.
My first batch came out slightly overcooked, with the cheese a bit darker than ideal. This might have been due to the foil, or perhaps my oven temperature was running a little hot. Despite the slight imperfection, they were still incredibly tasty, proving just how forgiving and delicious this recipe is even when not executed perfectly. However, for that optimal, gourmet-like result, following Shirley’s advice on equipment and technique is paramount. After some experimentation, I found that an oven temperature of 450°F worked best for my particular oven, even with foil lining. It’s truly a recipe that encourages a bit of experimentation to find your personal perfect setting.
Customizing Your Fire Crackers: Changing Peppers & Seasonings
The beauty of Rooster’s Famous Fire Crackers extends beyond their ease and deliciousness; they are also incredibly versatile. Once you’ve mastered the basic technique, the possibilities for customization are endless. These crackers were such a hit that I immediately started dreaming up new flavor combinations. It’s an open invitation to explore various cheeses and seasonings to create your signature snack.
My daughter Fuzz and I particularly enjoyed a version where we incorporated a touch of smoked paprika, which added a wonderful depth and smoky aroma to the cheesy crackers. But why stop there? Imagine the possibilities: a sprinkle of Italian pizza seasoning for a savory, herb-infused bite; a scattering of pepitas (roasted pumpkin seeds) for added crunch and nutty flavor; or even embedding a pecan in the center of each cracker for a truly unique sweet and savory treat. I’m also eager to experiment with different types of cheese, such as sharp white cheddar, which I’ve seen used in other successful versions of similar crackers. Garlic powder, onion powder, a pinch of cayenne for extra heat, or even finely chopped fresh rosemary could all elevate these simple saltines into gourmet delights. The only limit is your imagination!
Essential Ingredients: Fat-Free Saltines & Good Cheddar Cheese
Even years later (it’s now 2024), these crispy crackers remain a staple in my kitchen. Over time, I’ve experimented with various cheeses and cracker types, consistently returning to the core recommendations for the best results. Shirley Corriher’s original Bakewise recipe specifically calls for fat-free Saltines. While I’ve made these many times with regular Saltines and found them to be perfectly delicious, if you are purchasing crackers explicitly for this recipe, opting for the fat-free version is a good idea. The theory behind the fat-free recommendation is that it allows the rendered fat from the cheese to more fully penetrate and crisp the cracker, rather than competing with existing fats.
However, when it comes to the cheese, there’s no compromise: always use a full-fat, extra-sharp cheddar cheese. The quality of your cheese makes a significant difference in both flavor and texture. A good, robust cheddar will provide that intense, savory cheesiness that defines these crackers, while its fat content is crucial for the unique melting and crisping process. Avoid pre-shredded cheeses if possible, as they often contain anti-caking agents that can hinder smooth melting. Grating your own fresh block of extra-sharp cheddar will yield the best possible outcome, ensuring an even, delicious coating on every single cracker.
More Delicious Cracker-Inspired Recipes
If you’ve enjoyed the simplicity and deliciousness of these cheesy Saltine crackers, you might want to explore other creative ways to use crackers in your baking and snacking. Here are some related recipes that are sure to delight:
- Hell Fire Pepper Jelly Peanut Butter Sandwich Cookies
- Graham Cracker Candy
- Saltine Brownie Ice Cream Sandwiches
- Saltine Cracker Candy Recipe
- Saltine Meringue Cookies
Recipe

Rooster’s Famous Fire Crackers
By Anna
Pin Recipe
10
10
20
Snack
American
12
Ingredients
- ½ teaspoon red pepper flakes or a pinch or two of paprika
- 40 Saltines, fat free or regular
- 10 ounces extra sharp cheddar cheese, grated fine
Instructions
-
Arrange a rack in the center of your oven and preheat the oven to 475ºF (245°C). Note: In some ovens, you may find that 425°F (218°C) or 450°F (232°C) works better, so be prepared to adjust.
-
Lightly spray a non-shiny 10×15-inch jelly-roll pan (or similar baking sheet) with cooking spray. Arrange the Saltine crackers in tight, even rows so they are touching each other. Alternatively, you may line the pan with parchment paper for easier cleanup.
-
Evenly sprinkle the grated extra sharp cheddar cheese over all the crackers, ensuring a good, solid layer. Then, sprinkle the red pepper flakes (or paprika) over the cheese for a hint of spice.
-
Place the pan in the preheated oven and bake for *exactly* 10 seconds. Immediately turn the oven off after the 10-second baking period.
-
Leave the crackers in the turned-off oven with the door closed for at least 2 hours, or even longer (up to 4 hours is fine). The residual heat in the oven will continue to melt and gently brown the cheese, creating a beautiful, even coating of crisp, flavorful cheese. The fat from the cheese will soak into the crackers, puffing them slightly and making them incredibly crisp. The cheese should turn a dark, brownish-orange. If it appears completely brown or black, the crackers might be burnt, so adjust your initial oven temperature for next time.
Notes
These incredible cheesy Saltine crackers store exceptionally well. Once completely cooled, transfer them to an airtight container. They will maintain their crispness and flavor for several weeks, if you can resist eating them all first!
Fire Crackers, Firecrackers, Rooster’s, Saltines, Cheesy Crackers, Easy Snack
Tried this recipe?
Let us know how it was!
These Rooster’s Famous Fire Crackers are more than just a snack; they’re a testament to the power of simple ingredients and clever techniques. Whether you’re facing a power outage or just craving an incredibly satisfying treat, this recipe from Shirley Corriher’s Bakewise is an absolute must-try. Get ready to fall in love with your new favorite cheesy, crispy delight!
