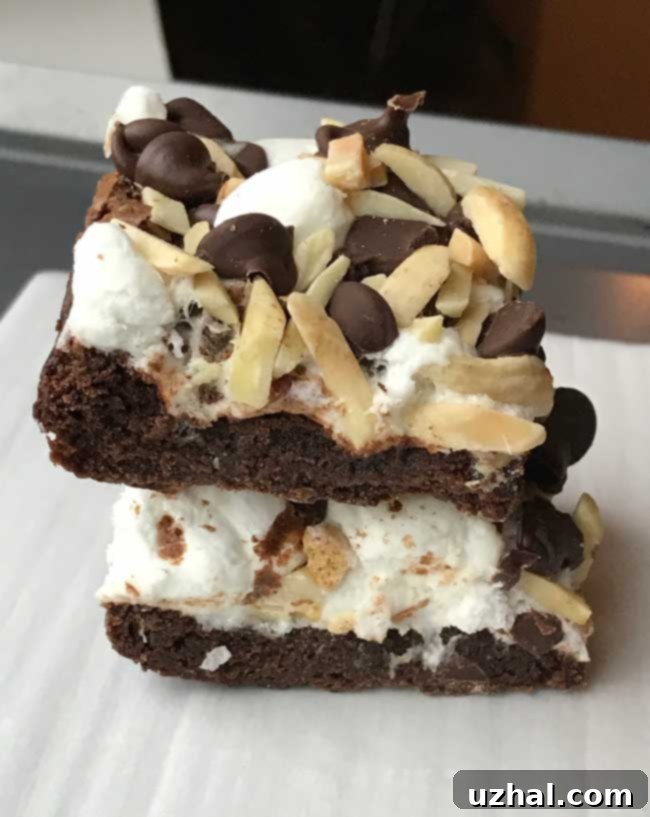
Irresistible Rocky Road Loaf Pan Brownies: Your Ultimate Guide to Easy, Fudgy Perfection
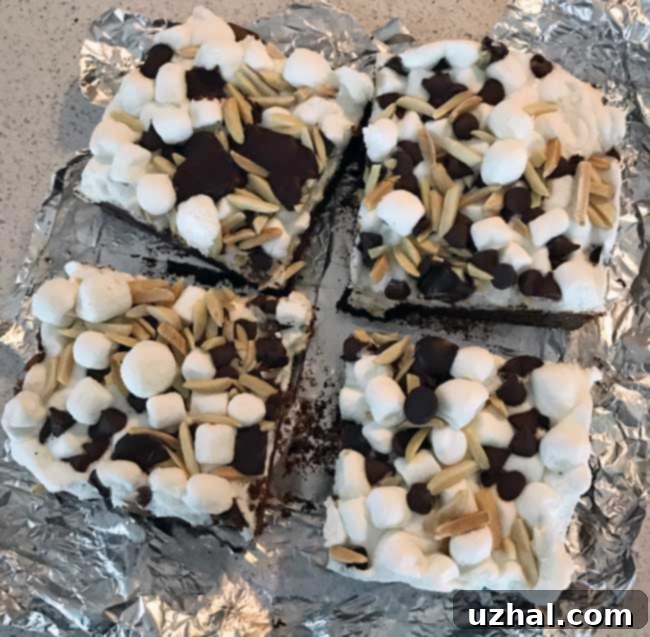
If the craving for rich, chocolatey goodness hits, and you’re dreaming of a baking project that’s both satisfying and wonderfully low-stress, then you’ve landed in the perfect spot. Imagine the blissful combination of dense, fudgy brownies topped with gooey marshmallows, crunchy nuts, and extra chocolate chips – all baked conveniently in a loaf pan. We’re talking about the ultimate comfort dessert: Rocky Road Loaf Pan Brownies. This recipe is designed for ease, maximum flavor, and that delightful textural contrast that makes Rocky Road a timeless favorite. Gather your marshmallows, chocolate chips, and nuts, because a batch of these extraordinary brownies is just a few simple steps away.
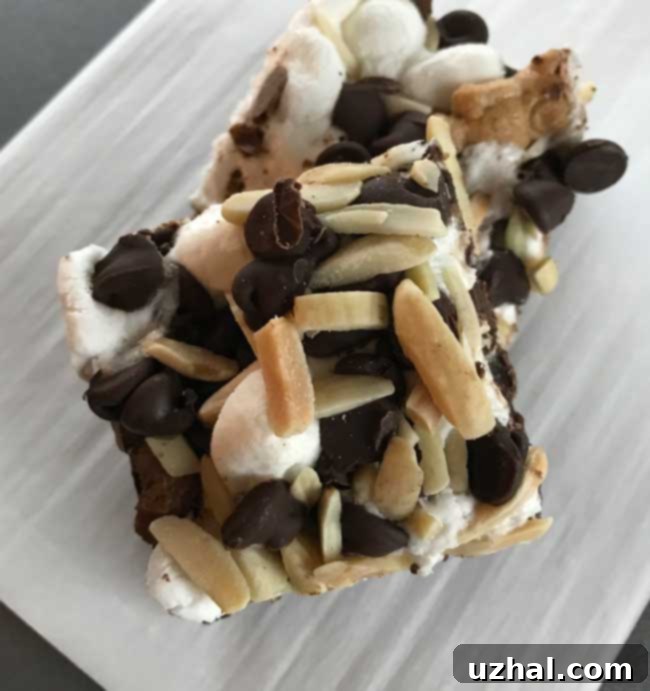
The Evolution of a Beloved Brownie Recipe
This particular Rocky Road Brownie recipe is the culmination of many years of baking and refining. Over time, I’ve experimented with countless variations, always striving for that perfect balance of fudginess, chewiness, and delightful mix-ins. While the core concept of a rich brownie remains, this latest rendition truly stands out as the best so far. It’s cleverly adapted from the cherished Glass Dish Brownies, a reliable base known for its consistently delicious results.
What makes this version superior? I’ve carefully streamlined the original process, making it even more approachable for bakers of all skill levels. The recipe has been precisely halved to perfectly fit a standard loaf pan, a brilliant modification for those who desire a smaller, more manageable batch without sacrificing quality. This adjustment ensures perfectly proportioned brownies, ideal for a cozy night in or a small gathering. And, of course, the signature rocky road topping—a generous scattering of marshmallows, extra chocolate, and crunchy nuts—was added to elevate these brownies from merely good to truly spectacular, offering a symphony of textures and flavors in every bite.
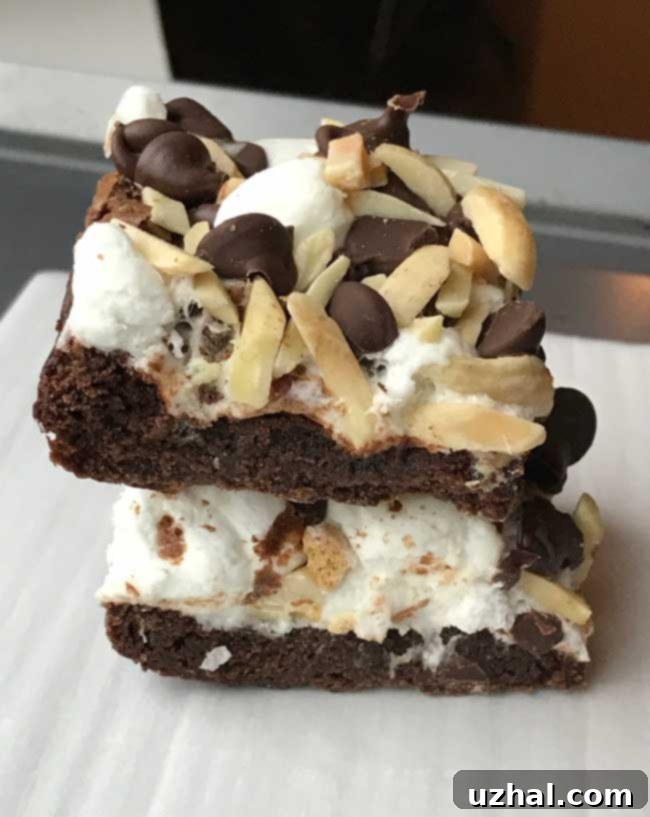
Achieving Your Perfect Brownie Texture: Gooey or Firm?
One of the most debated topics in the world of brownies is texture. Do you prefer them warm and wonderfully gooey, or firm and perfectly sliceable? This recipe delivers beautifully on both fronts, allowing you to customize your experience. When these brownies first emerge from the oven, they are undeniably a little gooey – a delightful state that many chocolate lovers adore. The chocolate chips are still molten, and the marshmallows are soft and slightly toasted, creating a truly decadent treat best enjoyed with a spoon or a scoop of ice cream.
However, if you, like me, prefer your brownies to be firm and easy to cut into neat squares or bars, there’s a simple trick. After letting them cool for a while at room temperature, a brief stint in the freezer will work wonders. This quick chill helps to solidify the chocolate and set the entire brownie, making them much firmer and incredibly easy to slice cleanly. This step ensures that each piece holds its shape, perfect for serving at parties or packing into lunchboxes. Don’t worry, even after chilling, these brownies retain their rich, fudgy core; they just gain a delightful structural integrity. Feel free to skip this step if you’re a fan of that irresistible, straight-from-the-oven molten goodness!
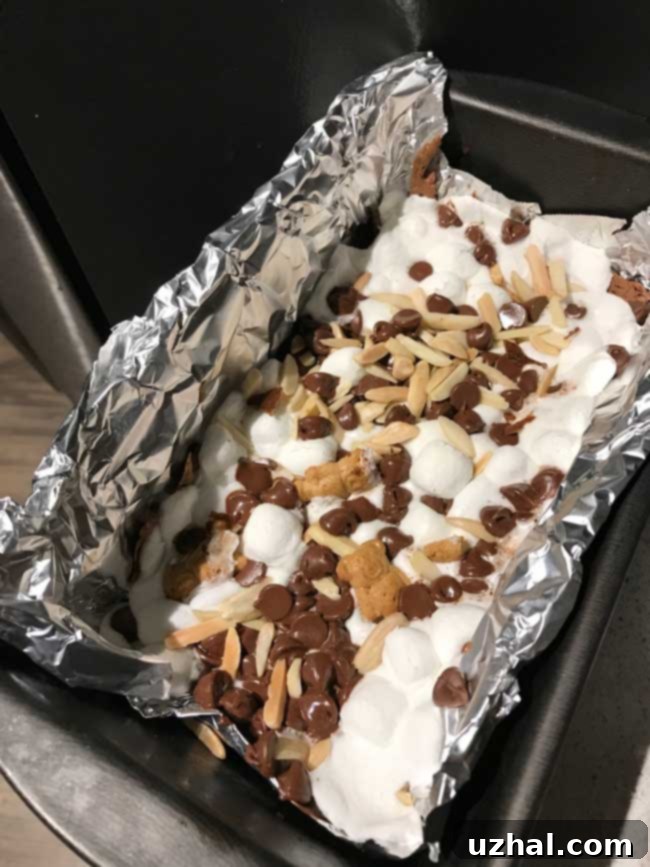
Ingredient Spotlight and Creative Customizations
The beauty of Rocky Road Brownies lies in their classic combination of chocolate, marshmallows, and nuts, but this recipe also offers fantastic opportunities for customization. Let’s delve into the key ingredients and how you can make this recipe uniquely yours.
For the chocolate base, you’ll need a mix of granulated and brown sugar for depth, unsalted butter for richness, and a touch of water to help dissolve the sugars and ensure a smooth chocolate mixture. The choice of chocolate for melting is crucial: 4.5 ounces of chopped semisweet or bittersweet chocolate (or chips) provides the foundational flavor. Semisweet offers a balanced sweetness, while bittersweet delivers a more intense chocolate punch. Feel free to use high-quality chocolate bars, roughly chopped, or good-quality chocolate chips for convenience. A large, cold egg acts as a binder and adds richness, while vanilla extract enhances the overall flavor profile.
The dry ingredients – all-purpose flour, baking soda, and a scant pinch of salt – provide structure and balance the sweetness. The magic truly happens with the “rocky road” elements. An additional ½ cup of semisweet or bittersweet chocolate chips gets folded into the batter or sprinkled on top, ensuring pockets of melted chocolate throughout. A full cup of marshmallows, ideally miniature ones, will puff up and create delightful pockets of sweetness on top. For the nuts, a handful of chopped pecans, walnuts, or almonds adds a wonderful crunch and earthy flavor. However, if you’re looking for a fun alternative, or perhaps catering to a nut allergy, Teddy Grahams are a fantastic substitute! Their honey-graham flavor and satisfying crispiness offer a unique twist that kids especially love.
Baking Tips for Brownie Perfection
Even though this is a “no-stress” recipe, a few key tips can elevate your Rocky Road Loaf Pan Brownies to truly legendary status:
- Pan Preparation is Key: Don’t skip lining your 9×5 inch loaf pan with foil and greasing it well. This makes lifting the baked brownies out of the pan incredibly easy, allowing for clean cuts without damaging the edges. Alternatively, a good nonstick pan can work wonders.
- Melting Chocolate Gently: When combining the sugars, butter, and water with the initial chocolate chips, microwave in short intervals (30 seconds, then 15-30 seconds as needed). Stir well after each interval. This prevents the chocolate from overheating and seizing, ensuring a smooth, glossy base. The chocolate will thicken as it cools slightly, which is perfectly normal.
- The Cold Egg Trick: Adding a cold egg to the warm chocolate mixture helps to cool it down slightly, preventing the egg from scrambling. Whisk it in thoroughly until fully incorporated.
- Don’t Overmix the Flour: Once you add the flour, mix just until no dry streaks remain. Overmixing develops the gluten in the flour, which can lead to tough, cake-like brownies instead of the desired fudgy texture.
- Timing the Toppings: The instructions call for baking the brownies until they appear set, then immediately adding the marshmallows, extra chocolate chips, and nuts before returning them to the oven for just 3 minutes. This timing is crucial. It allows the brownies to bake mostly through while giving the toppings just enough heat to melt and puff the marshmallows without burning them.
- Patience for Perfection: While it’s tempting to dive in immediately, allowing the brownies to cool, and then chilling or freezing them briefly, truly makes a difference if you prefer a cleaner slice. The setting time allows the flavors to meld and the texture to firm up, resulting in a more enjoyable eating experience.
Recipe: Rocky Road Loaf Pan Brownies
Rocky Road Loaf Pan Brownies
Recipe adapted by Cookie Madness
Pin Recipe
Ingredients
- 2 tablespoons granulated sugar
- 2 tablespoons brown sugar
- 1 tablespoon unsalted butter
- 1 tablespoon water
- 4 ½ oz chopped semisweet or chips or bittersweet chocolate
- 1 large cold egg
- ½ teaspoon vanilla extract
- ⅓ cup (1 ½ oz) all-purpose flour
- ⅛ teaspoon baking soda
- ⅛ scant teaspoon salt
- Another ½ cup semisweet or bittersweet chocolate chips
- 1 cup mini marshmallows
- Handful of chopped nuts such as pecans or walnuts, or crushed Teddy Grahams
Instructions
-
Preheat your oven to 350 degrees F (175 C). Line a 9×5 inch loaf pan with aluminum foil, ensuring enough overhang to easily lift the brownies out later. Lightly grease the foil (or use a nonstick loaf pan).
-
In a medium microwave-safe mixing bowl, combine both granulated and brown sugars, the unsalted butter, and water. Heat on high in the microwave for 30 seconds. Remove and stir vigorously until well combined. Add the 4 ½ oz of chocolate chips (or chopped chocolate) and stir again until the chips begin to melt. If needed, microwave for another 15-30 seconds, stirring thoroughly until all the chocolate is melted and the mixture is smooth and glossy. The chocolate will start to thicken as you stir; this is normal.
-
Crack the cold large egg into the chocolate mixture and whisk immediately to incorporate it evenly. Continue whisking until the mixture is uniform and smooth. Stir in the vanilla extract, ensuring it’s well blended, and scrape down the sides of the bowl to mix everything thoroughly.
-
Add the baking soda and salt to the chocolate mixture and stir until combined. Next, add the all-purpose flour and stir gently until just blended and no streaks of dry flour remain. Be careful not to overmix.
-
Ensure the brownie batter is not too warm (allowing it to cool slightly if necessary) so that any additional chips don’t melt prematurely. If desired, stir in about ¼ cup of the additional chocolate chips into the batter. Pour the batter evenly into the prepared loaf pan and spread it out smoothly.
-
Bake for approximately 18 minutes on the center rack of your preheated oven, or until the edges appear set and a toothpick inserted into the center comes out with moist crumbs, not wet batter.
-
Immediately after removing the brownies from the oven, evenly sprinkle the remaining marshmallows, chocolate chips, and chopped nuts (or Teddy Grahams) over the hot surface. Return the pan to the oven for an additional 3 minutes. This brief second bake will allow the marshmallows to puff and lightly toast, and the chocolate chips to melt slightly.
-
Allow the brownies to cool in the pan for at least an hour on a wire rack. For easier, cleaner slicing and a firmer texture, transfer the cooled brownies (still in the foil) to the refrigerator for an hour or the freezer for 15-20 minutes to set the chocolate. If you adore gooey brownies, you can certainly skip this chilling step and enjoy them warm!
-
Once cooled and set (if desired), lift the foil from the pan and carefully peel it away from the brownies. Cut into 4 generous large bars or 8 smaller squares, depending on your preference.
Notes
Serving Suggestions and Storage
These Rocky Road Loaf Pan Brownies are incredibly versatile and delicious on their own, but a few serving suggestions can elevate them even further. For the ultimate indulgence, serve a warm slice with a scoop of vanilla bean ice cream, allowing the melting ice cream to mingle with the soft marshmallows and rich chocolate. A drizzle of homemade caramel sauce or an extra swirl of chocolate ganache can also take them to a new level of decadence. For a simple yet elegant presentation, a light dusting of powdered sugar makes them look even more appealing.
To store, place leftover brownies in an airtight container at room temperature for up to 3-4 days. If you prefer them firmer, store them in the refrigerator, which can extend their freshness slightly. For longer storage, these brownies freeze wonderfully. Wrap individual slices tightly in plastic wrap, then place them in a freezer-safe bag or container for up to 2-3 months. Thaw at room temperature or gently warm in the microwave for a quick treat.
Why These Loaf Pan Brownies Are a Must-Try
In a world full of complex recipes, sometimes the simplest pleasures are the best. These Rocky Road Loaf Pan Brownies embody that sentiment perfectly. They’re not just a dessert; they’re an experience – from the ease of preparation to the delightful textures and flavors in every bite. The fudgy chocolate base, the soft, sweet marshmallows, and the satisfying crunch of nuts (or playful Teddy Grahams) create a harmonious blend that’s hard to resist. Perfect for satisfying a sudden chocolate craving, bringing to a potluck, or simply enjoying a quiet moment, this recipe proves that delicious doesn’t have to be difficult.
So, whether you’re a seasoned baker or just starting your culinary journey, I wholeheartedly encourage you to try this recipe. It’s a guaranteed crowd-pleaser and a truly rewarding baking project that promises rich, chocolatey bliss with minimal fuss. Dive in and discover the joy of homemade Rocky Road Loaf Pan Brownies!
