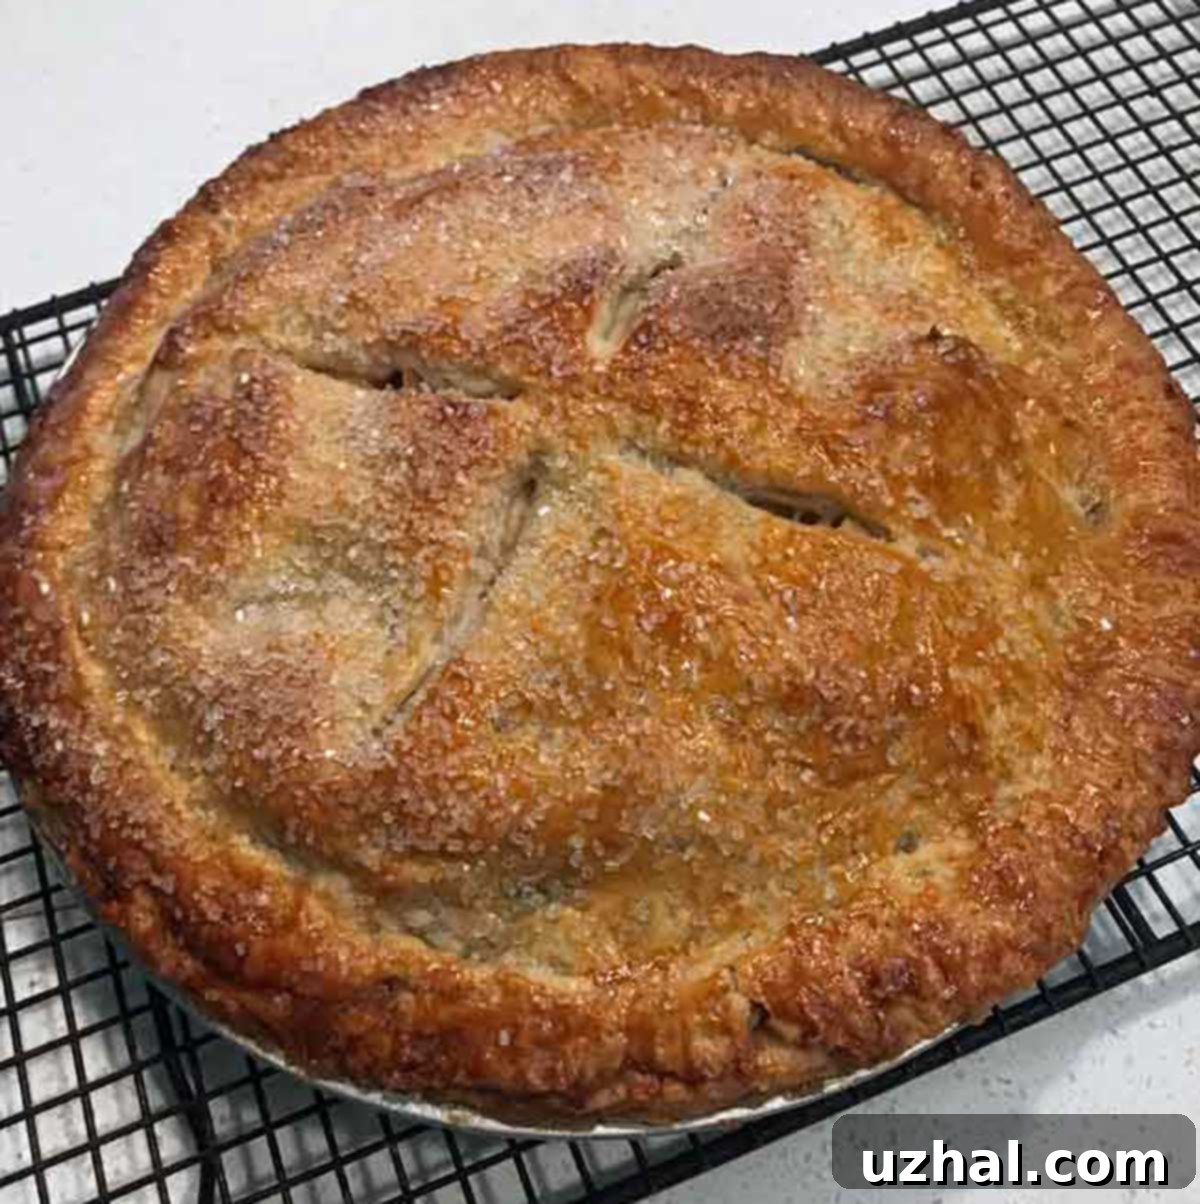
The Ultimate Roasting Pan Apple Pie: Your New Favorite Effortless Dessert
It’s about time for an exciting update to our beloved “favorite apple pie” collection, and this one truly stands out: the Roasting Pan Apple Pie. This recipe has quickly become a new staple in our kitchens, thanks to its ingenious method that promises a perfectly cooked filling every single time, without the fuss. Prepare to be amazed by how simple it is to achieve a deliciously tender, aromatic apple pie that’s ideal for any occasion, from a casual family dinner to a grand holiday feast. We guarantee this innovative approach will change the way you bake apple pie forever.
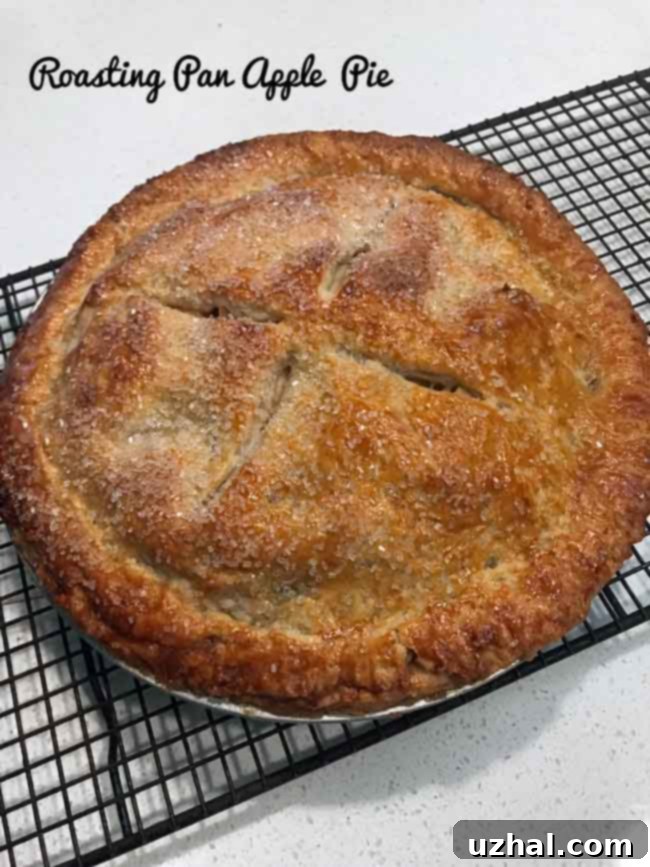
The secret to this exceptional pie lies right in its name: the apples are quickly and conveniently broiled directly in a roasting pan. This initial step softens them beautifully and encourages them to release their natural juices, setting the stage for an incredibly flavorful filling. What makes it even better is that all the other filling ingredients are then mixed right into the same roasting pan, minimizing cleanup and maximizing efficiency. We’ve put this recipe through its paces, making it three times this week alone, and even had a trusted tester, Sue, confirm its deliciousness and ease in her own kitchen. So, if you’re searching for a reliable, utterly delicious, and surprisingly straightforward apple pie recipe that yields consistent, spectacular results, look no further – this one is a true winner that will impress everyone.
Unlock the Perfect Pie: Essential Roasting Pan Apple Pie Tips & Tricks
Creating an outstanding homemade apple pie doesn’t have to be complicated. With a few key considerations and techniques, you can elevate your baking from good to extraordinary. Here are our top tips specifically tailored for the Roasting Pan Apple Pie, ensuring a flawless result every time, from the flaky crust to the luscious, perfectly spiced apple filling.
Selecting the Best Pie Pan for an Evenly Baked Crust
Shallower Pie Pan – While a standard deep-dish pie plate works, we highly recommend using a shallower, sturdy metal pan for this recipe. A pan like the USA Pan is an excellent choice. Its lighter color and durable construction promote even browning of the crust, ensuring it cooks thoroughly and beautifully golden. The shallower depth also allows the oven’s heat to penetrate the apple filling more effectively, resulting in a quicker, more consistent bake. This design significantly helps to prevent a dreaded soggy bottom crust, which is often a common apple pie challenge, by ensuring the bottom crust cooks through alongside the filling. Look for one with a reliable non-stick coating for effortless pie removal and easy cleanup.
Crafting a Buttery, Flaky Crust: Homemade or Store-Bought Perfection
Buttery, flaky crust – The crust is arguably half the pie’s appeal, providing that delightful textural contrast to the soft apple filling. While you can certainly use your favorite high-quality store-bought refrigerated pie crusts for convenience (and we understand the need for shortcuts!), crafting a homemade crust takes your pie to the next level in terms of flavor and flakiness. The double crust recipe provided below ingeniously combines mostly butter with a touch of vegetable shortening. Butter delivers that rich, irresistible dairy flavor, while shortening contributes to a wonderfully tender and ultra-flaky crumb that practically melts in your mouth. The golden rule for a truly flaky crust is to keep all your ingredients, especially the butter and ice water, as cold as possible. Work quickly to prevent the butter from melting, and avoid overmixing the dough, as this can develop the gluten too much and lead to a tough, chewy crust. Embrace the rustic charm of a homemade crust; its slight imperfections often add to its appeal and indicate a truly handmade dessert.
Choosing the Perfect Apple Blend for Optimal Flavor and Texture
Apple Type – The selection of apples is paramount for a balanced and delicious filling. For the best Roasting Pan Apple Pie, we highly recommend a blend of tart and sweet varieties to create a complex flavor profile and varied texture. Primarily, Granny Smiths are indispensable; their firm texture means they hold their shape beautifully when baked, and their sharp tartness provides a crucial counterpoint to the sweetness of the sugars. Complement these with a few “fun sweeter apples” like Opal, Fuji, and/or Honeycrisp. Honeycrisp apples are celebrated for their exceptional crisp texture and perfectly balanced sweetness, Fuji apples offer a delightful sweetness and appealing firmness, and Opal apples contribute a naturally sweet, aromatic, and slightly tangy note. This thoughtful combination ensures a filling that’s neither too sweet nor too tart, and offers a pleasant mix of tender and slightly firm apple pieces with every bite. Don’t hesitate to experiment with other good baking apples such as Braeburn, Gala, Golden Delicious, or Jonagold to discover your personal favorite blend, always aiming for a mix of textures and flavors.
The Revolutionary Broiling Method for a Superior Apple Filling
Filling – This is where the “roasting pan” technique truly shines, elevating this pie above traditional recipes. Broiling the thinly sliced apples for just 6 to 8 minutes serves multiple vital purposes. Firstly, this brief burst of intense heat quickly softens the apples, jump-starting the cooking process and ensuring they become perfectly tender in the final baked pie without ever turning mushy. Secondly, and perhaps most importantly, this gentle pre-cooking encourages the apples to release a significant amount of their natural juices *before* the pie is even assembled. This proactive juice release is key to preventing the dreaded “sinking” of the pie filling under the top crust, which often results in an unsightly gap, and helps maintain the pie’s structural integrity. It also concentrates the apple flavor slightly and reduces excess moisture in the pie, leading to a firmer, more stable, and less watery filling. The ultimate goal here is to soften the apples just enough so they are aromatic and pliable, but still retain some structure and a slight bite, rather than fully cooking them down into applesauce. This method guarantees a cohesive, juicy, and perfectly textured apple filling.
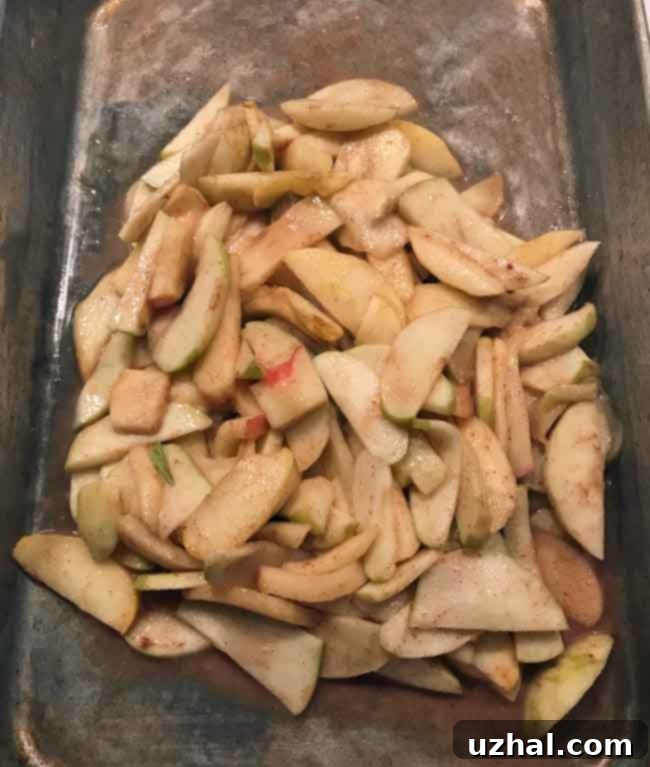
After their quick broil, simply mix the softened apples with all the other filling ingredients – granulated sugar, light brown sugar, all-purpose flour, ground cinnamon, fresh lemon juice, and salted butter – directly in the same roasting pan. This integrated approach ensures every apple slice is beautifully coated with spices and sugars, and helps in minimizing cleanup, which is always a bonus! The residual warmth from the broiled apples assists the sugars in dissolving slightly and allows the spices to meld harmoniously, enhancing the overall depth of flavor in your delicious apple pie filling.
Achieving the Perfect Balance of Flavor: Cinnamon, Lemon & Butter
Flavor – Sometimes, simplicity is the ultimate sophistication. For this Roasting Pan Apple Pie, a classic combination of fragrant cinnamon and a generous amount of bright fresh lemon juice creates a wonderfully vibrant and deeply comforting taste profile. Cinnamon adds that characteristic warmth and familiar sweetness that is synonymous with the very best apple pies, enveloping the fruit in a cozy embrace. The lemon juice is far more than just a deterrent for browning apples; it acts as a crucial flavor enhancer, brightening the entire filling and providing a much-needed tart counterpoint to the inherent sweetness of the apples and added sugars, truly making all the flavors pop. Additionally, two tablespoons of rich salted butter are incorporated into the filling. This not only adds a lovely richness and silky mouthfeel but also helps to tie all the complex flavors together, creating a luxurious and cohesive filling that’s truly irresistible. For those who enjoy a little extra aromatic complexity, a tiny pinch of freshly grated nutmeg or allspice can also be added, but the basic combination of cinnamon, lemon, and butter is perfection itself.
Choosing the Right Thickener for a Flawless, Spoonable Filling
Thickener – While there are various options for thickening fruit pies, all-purpose flour remains a consistently convenient and highly effective choice for most home bakers. It reliably creates a beautifully viscous, clear, and perfectly spoonable filling without introducing any unwanted flavors that might detract from the natural taste of the apples. When mixed diligently with the sugars and spices, the flour efficiently absorbs the apple juices released during baking, preventing a common issue of a watery pie filling. For those who prefer alternatives, cornstarch or tapioca can also be used, often resulting in a slightly clearer, more gel-like filling. However, all-purpose flour is readily available, simple to use, and produces a consistently excellent result for this particular Roasting Pan Apple Pie recipe, making it a reliable, no-fuss option for any baker.
This Roasting Pan Apple Pie is actually an evolution of an old favorite, our Broiled Apple Pie. While that recipe is also incredibly good and highly recommended, this updated version features significantly less sugar. This intentional reduction allows the natural sweetness and delightful tartness of the apples to truly shine through, resulting in a more fruit-forward and balanced flavor profile. It’s a testament to how small, thoughtful adjustments in a recipe can lead to a fresh, equally delicious, and perhaps even more refined and balanced outcome that caters to a modern palate.
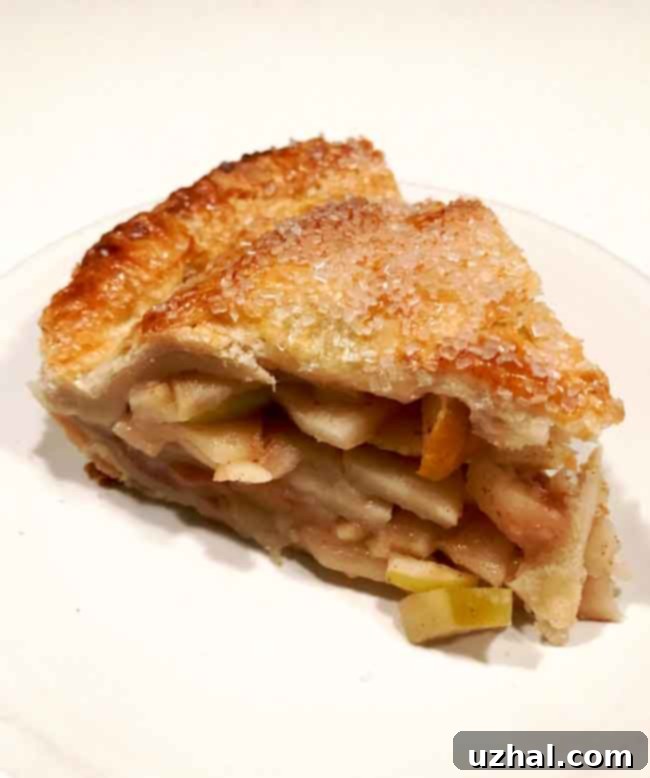
Serving & Storing Your Incredible Homemade Apple Pie
Once your Roasting Pan Apple Pie emerges from the oven, irresistibly golden brown and bubbling with fragrant juices, it’s incredibly tempting to dive right in immediately. However, allowing it to cool and set for at least 3-4 hours (or ideally, even overnight) is absolutely crucial. This patient cooling period allows the filling to firm up properly as it cools, ensuring clean, elegant slices that hold their shape beautifully when served. For the ultimate indulgence, serve your apple pie warm or at a pleasant room temperature. A classic scoop of creamy vanilla bean ice cream or a generous dollop of freshly whipped cream makes for an irresistible pairing. For a surprising yet traditional savory twist, a thin slice of sharp cheddar cheese is a delightful accompaniment that complements the sweet and tart apples beautifully. It’s an unexpected combination that truly enhances the pie’s flavors.
Leftover pie can be stored at room temperature, loosely covered with foil or plastic wrap, for up to 2 days, maintaining its deliciousness. If you need to keep it longer, refrigerate for up to 4-5 days. To reheat individual slices and bring back that comforting warmth and slightly re-crisp the crust, a quick warm-up in the microwave or a few minutes in a moderate oven (around 300°F/150°C) is perfect. This Roasting Pan Apple Pie is also a fantastic make-ahead dessert, making it an ideal choice for busy holiday preparations or when you want to plan ahead for a special gathering.
- Broiled Apple Pie
- Honey Caramel Corn
- Prize Winning Apple Pie and Best Crust Ever
- Roasted Flour Chocolate Chip Cookies
- Apple Streusel Bread
Recipe: The Roasting Pan Apple Pie
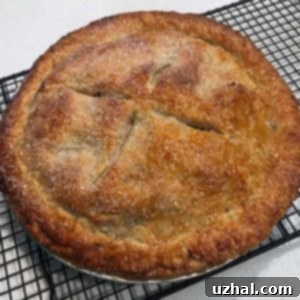
Roasting Pan Apple Pie
Anna
Pin Recipe
Ingredients
Double Crust (Optional — You can skip this and use refrigerated pie dough)
- 380 grams all-purpose flour plus more for work area (about 2 ¾ cups, using a good quality pastry flour like Bob’s Red Mill Pastry Flour or White Lily will result in a more tender crust)
- 25 grams granulated sugar (2 tablespoons, adds a subtle sweetness to the crust)
- ¾ teaspoon salt (enhances overall flavor)
- 170 grams unsalted butter (1 ½ sticks or 6 oz, cut into small chunks and kept very cold)
- 48 grams vegetable shortening (1.7 oz or 4 tablespoons, chilled)
- 114 ml ice cold water (½ cup, crucial for a flaky crust; use sparingly)
Pie Filling: The Heart of the Pie
- 8 cups sliced apples (A mix of 6 cups Granny Smith for tartness and firm texture, and 2 cups of your choice such as Fuji, Honeycrisp, or Opal for sweetness and aroma. Total weight should be a little over 2 pounds AFTER being cored and sliced.)
- 25 grams granulated sugar (2 tablespoons)
- 50 grams light brown sugar (¼ cup, for a deeper, caramelized note)
- ¾ teaspoon ground cinnamon (for classic apple pie warmth and spice)
- 30 grams all-purpose flour (3 tablespoons, to thicken the apple juices)
- 42 ml fresh lemon juice (3 tablespoons, essential for brightness and preventing apple browning)
- 28 grams salted butter (2 tablespoons, cut into small pieces for even distribution and richness)
- Egg wash (1 egg, lightly beaten with a little water or cream, for a beautiful golden crust)
- Coarse sugar for garnish (adds sparkle and a delightful crunch to the top crust)
Instructions
Preparing the Double Crust (Homemade Option)
-
In the bowl of a food processor, combine the measured flour, granulated sugar, and salt. Pulse a few times (about 3-5 quick pulses) to ensure all the dry ingredients are thoroughly and evenly mixed before the fats are introduced.
-
Add the cold, cubed unsalted butter and chilled vegetable shortening to the food processor. Pulse in short bursts (approximately 1-second pulses) until the mixture resembles coarse meal, with some visible pea-sized pieces of butter still present. It’s crucial to avoid over-processing at this stage, as breaking down the butter too much will prevent a beautifully flaky crust. Next, gradually add the ice-cold water, 2 tablespoons at a time, pulsing briefly after each addition (1-2 pulses). Continue adding water and pulsing until the mixture just begins to come together and holds its shape when you pinch a small amount between your fingers. Do not add more water than strictly necessary, as too much moisture will result in a tough crust.
-
Carefully empty the dough mixture onto a lightly floured pastry mat or a clean, cool work surface. Gently bring the dough together with your hands, pressing it into a cohesive mass. Avoid kneading excessively. Divide the dough into two equal discs, flatten each slightly, wrap them tightly in plastic wrap, and chill in the refrigerator for at least 30 minutes, or until thoroughly firm and ready to use. Chilling the dough is an essential step as it allows the gluten to relax, prevents shrinkage during baking, and makes the dough much easier to roll out without sticking. While the crust is chilling, proceed to prepare the pie filling.
Crafting the Aromatic Apple Filling
-
Preheat your oven’s broiler to high. Spread the evenly sliced apples in a large roasting pan, ensuring they are arranged in a relatively single layer for even broiling. Toss them gently with 2 tablespoons of white granulated sugar. Place the roasting pan under the preheated broiler, positioning the apples about 6 to 7 inches underneath the heating element. Broil for approximately 6 to 8 minutes, or just until the apples begin to soften and become delightfully aromatic, releasing some of their natural juices. This crucial pre-cooking step helps to tenderize the apples and prevents a watery pie filling. NOTE: Broiler temperatures can vary significantly, so it is imperative to check the apples after just 3 minutes! If your apple slices are thin, they will soften much faster. The goal is to soften the apples without turning them into mush; they should still retain some structural integrity and a slight bite. Stir the apples once or twice during broiling to ensure even cooking and prevent scorching.
-
Carefully remove the roasting pan from the broiler. While the apples are still warm, add the light brown sugar, all-purpose flour, ground cinnamon, and fresh lemon juice directly to the pan. Toss everything together thoroughly with a spoon or spatula until the apples are well coated with the spice and sugar mixture. Then, scatter the small pieces of salted butter over the mixture and stir gently until the butter is mostly melted and evenly incorporated throughout the filling. This creates a luscious and fragrant filling. Set this apple filling aside to cool completely to room temperature while you prepare and roll out your pie crusts. Cooling the filling is vital as it prevents the warm apples from melting the butter in your pie crust dough, which could lead to a less flaky crust.
Assembling and Baking Your Masterpiece
-
On a very well-floured pastry mat or a clean, cool work surface, take one of your chilled pie dough discs. Roll it out into a large circle, aiming for approximately 12-13 inches in diameter and a thickness slightly greater than a coin. Carefully drape the rolled dough over your chosen 9-inch pie pan (a shallower metal pan is recommended for the best crust results). Gently press the dough into the pan, ensuring it fits snugly into all the contours without stretching it, which can cause shrinkage during baking. Trim any excess dough, leaving about a ½ inch overhang around the rim of the pie pan.
-
Spoon the completely cooled apple filling from the roasting pan into the prepared pie crust. Make sure to get all the flavorful liquid from the bottom of the pan and drizzle it evenly over the apples. Press the apples down tightly and evenly into the pie shell to prevent large air pockets or gaps, creating a compact and bountiful filling that will hold its shape beautifully.
-
Roll out the second half of the pie dough into another large circle, similar in size to the first. Carefully lay this top crust over the mounded apples. Press the edges of the top and bottom pie dough sections together firmly to seal the pie. Then, trim any excess dough to match the overhang of the bottom crust. Create a decorative edge by turning down the combined edges and crimping them elegantly with your fingers or a fork. Cut several slits in the top crust (or create a beautiful lattice design) to allow steam to escape during baking, preventing a soggy crust and ensuring even cooking of the apples. Brush the entire top crust with a light, even coating of egg wash (1 egg lightly beaten with a tablespoon of water or cream) for a rich golden sheen, and generously sprinkle with coarse sugar for added sparkle and a delightful crunch.
-
Preheat your oven to a hot 400°F (200°C). For the very best results and to guarantee a wonderfully crispy bottom crust, place a foil-lined rimmed baking sheet into the oven while it preheats. This hot baking sheet will help to jump-start the cooking of the bottom crust, preventing sogginess, and will also catch any potential drips from the pie, making cleanup significantly easier.
-
Carefully place the assembled pie onto the preheated hot baking sheet in the oven. Bake for an initial 30 minutes at 400°F (200°C). During this period, the crust should begin to turn a beautiful golden brown around the edges. Keep a close eye on it and check slightly earlier if you know your oven tends to run hot. If the crust edges are browning too quickly, you can loosely tent them with small strips of aluminum foil to prevent over-browning. After 30 minutes, reduce the oven temperature to 375°F (190°C), cover the entire pie loosely with a larger piece of foil to prevent further browning of the top crust, and continue to bake for another 15 minutes. The total baking time will be approximately 45 minutes, but the pie is done when the filling is visibly bubbly around the steam vents and the apples are perfectly tender when pierced with a thin knife or skewer inserted through a steam vent.
-
Once baked to perfection, carefully remove the pie from the oven and transfer it to a wire rack to cool completely. This is a critical step that cannot be rushed! Allow the pie to cool for at least 3-4 hours, or ideally, overnight. Cooling completely allows the fruit filling to properly set and thicken, preventing it from being too runny when sliced. Patience truly is key for achieving that perfect, clean slice of apple pie. Enjoy your incredible homemade Roasting Pan Apple Pie – it’s worth the wait!
