The Ultimate Chocolate Maple Nut Bars Recipe: A Decadent Treat
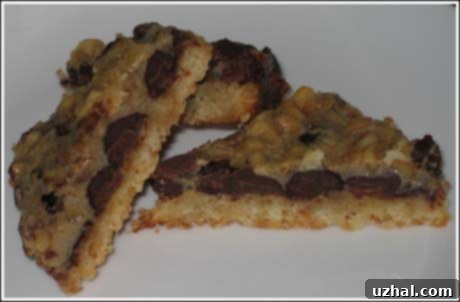
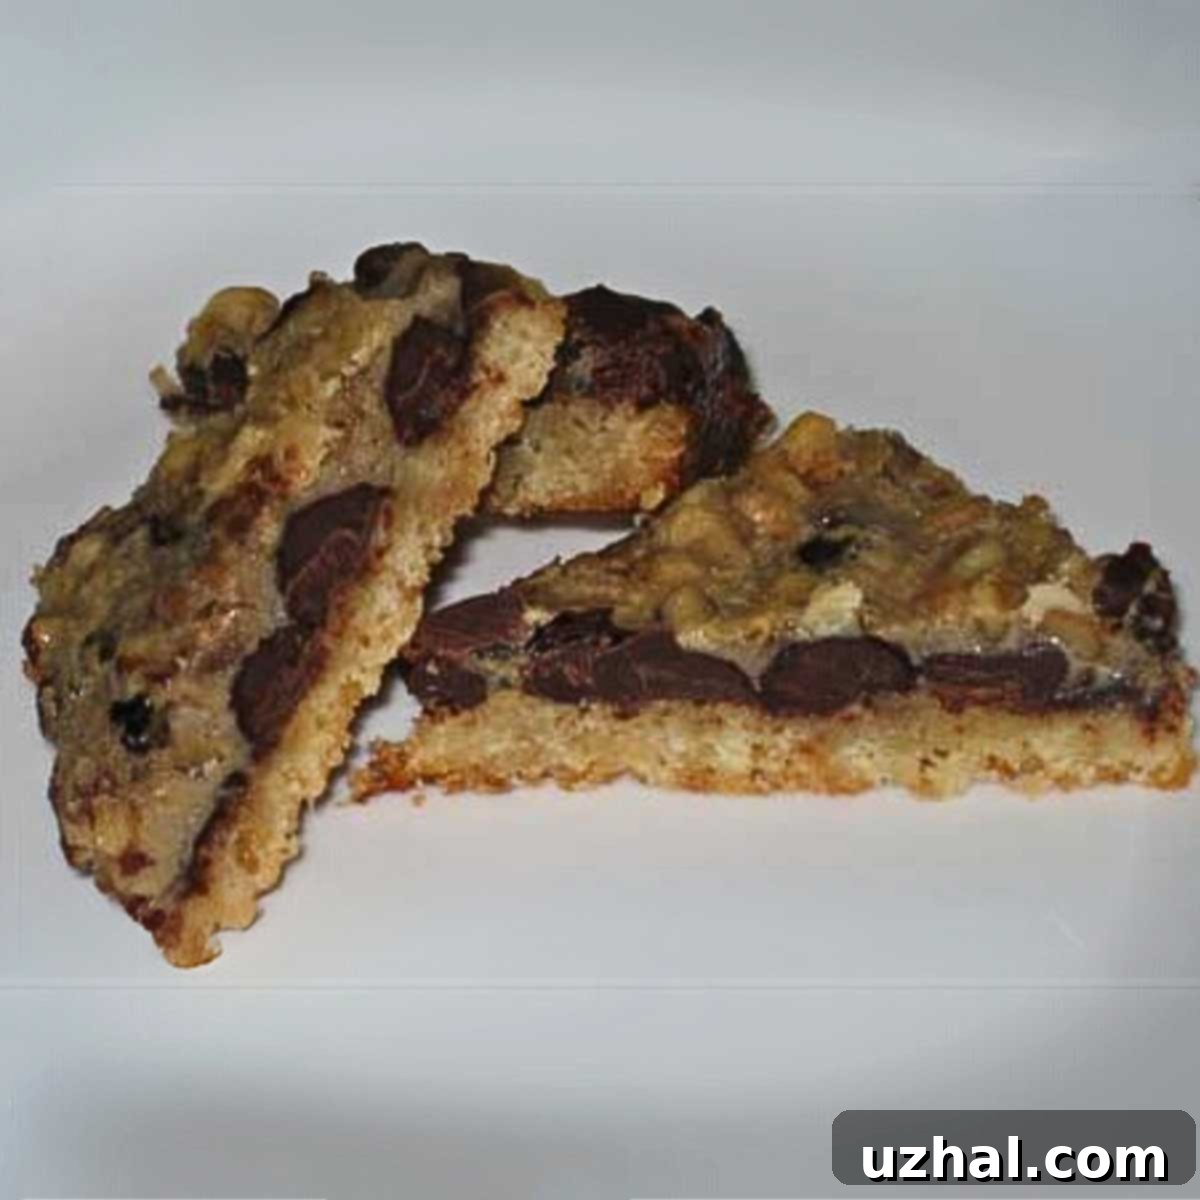
Prepare to indulge in a truly delightful dessert experience with these incredible Chocolate Maple Nut Bars. Originally inspired by the timeless Eagle Brand recipe collection, these bars offer a harmonious blend of flavors and textures that will captivate your taste buds. Imagine a golden, buttery shortbread crust providing the perfect foundation for a rich, creamy maple-flavored filling, generously studded with crunchy nuts and delectable semi-sweet chocolate chips. Each bite delivers an unparalleled richness and sweetness, making these bars an ideal choice for a special occasion, holiday gatherings, or simply a decadent treat enjoyed in smaller, satisfying portions. Their unique combination of classic flavors ensures they stand out from typical dessert bars.

The Irresistible Allure of Homemade Chocolate Maple Nut Bars
These bars are more than just a dessert; they are an experience that evokes warmth and comfort. The classic combination of shortbread, maple, nuts, and chocolate creates a symphony of taste that’s both familiar and exciting. From the moment you take your first bite, you’ll understand why this recipe, or variations of it, has been cherished for generations, becoming a beloved staple in many households, especially during the festive season. The ease of preparation, coupled with the impressive results, makes them a go-to for many home bakers.
A Symphony of Flavors and Textures in Every Bite
At the heart of these Chocolate Maple Nut Bars lies a robust shortbread crust. Crafted with a simple yet effective mix of all-purpose flour, granulated sugar, a pinch of salt, cold butter, and an egg, it bakes up into a delightfully firm, tender, and slightly crumbly base. This buttery crust provides the perfect structural and flavor counterpoint to the soft, gooey, and intensely flavored filling that follows. The topping layer is where the true magic happens and the distinct character of these bars shines through. It features a luscious blend of sweet condensed milk, another large egg for binding and added richness, and a generous amount of maple flavoring. The strategic inclusion of semi-sweet chocolate chips introduces a delightful cocoa note and a melting texture that beautifully complements the sweet and sometimes robust maple, while two cups of chopped nuts (pecans or walnuts are highly recommended for their inherent sweetness and texture) add a crucial textural contrast and earthy depth. The interplay of soft, crunchy, sweet, and nutty elements creates a truly unforgettable dessert.
Finding Your Perfect Maple Flavor: Artificial vs. Natural
One of the defining characteristics of these Chocolate Maple Nut Bars is their distinctive maple taste. The original Eagle Brand recipe often results in a fairly strong, pronounced maple flavor. While this is fantastic for those who adore the rich, sweet notes of artificial maple, some may find it a bit too intense or artificial for their palate. The good news is that for enthusiasts who prefer a more authentic, nuanced maple experience, the choice of flavoring agent is paramount. Many bakers, including the original author of this recipe, have discovered that high-quality, natural maple flavorings can significantly elevate this dessert. Brands like OliveNation, for instance, are noted for producing natural-tasting maple flavorings that avoid any artificial undertones. Investing in a good quality maple flavoring will truly make a difference, transforming a simple bar into an extraordinary, gourmet-like treat. It’s a small change that yields a remarkable improvement in the overall flavor profile, ensuring your bars taste genuinely maple-rich.
Why These Decadent Bars Are a Must-Bake for Every Occasion
Beyond their delicious taste and satisfying texture, Chocolate Maple Nut Bars are a fantastic and versatile addition to any baker’s repertoire. Their relatively straightforward preparation belies the sophisticated flavor they deliver, making them suitable for both seasoned bakers looking for a reliable recipe and enthusiastic beginners eager to impress. They are perfect for sharing at potlucks, serving as a standout dessert at holiday parties, impressing guests at dinner parties, or simply enjoying as a well-deserved, comforting treat after a long day. Their make-ahead potential also makes them ideal for busy schedules.
Richness That Commands Attention and Delight
These bars are undeniably rich, sweet, and incredibly satisfying. The indulgent combination of condensed milk, the sugar in the shortbread crust, and the intense maple and chocolate flavors means a small piece goes a long way. This inherent richness is a desirable feature, not a drawback – it makes each serving incredibly satisfying and leaves a lasting impression. You’ll find yourself cutting them into fairly small squares, which allows everyone to savor the depth of flavor without being overwhelmed by the sweetness. This characteristic also makes them an economical choice for feeding a crowd, as a single batch, yielding 36 servings, can generously serve a large gathering or provide delightful leftovers for days.
A Timeless Recipe, Thoughtfully Reimagined
While the core of this recipe remains true to its condensed milk bar origins, the inclusion of semi-sweet chocolate chips adds a delightful and universally loved modern twist. This simple addition elevates the classic maple nut bar to new heights of deliciousness, creating a more complex and engaging flavor profile. The simplicity of preparing the press-in shortbread crust, combined with the pour-and-bake topping, ensures a consistent and impressive result every time, even for those new to baking. It’s a testament to how classic, comforting recipes can be gently adapted and enhanced to suit contemporary tastes, offering familiar comfort with an exciting new dimension that appeals to a broader audience.
Mastering Your Chocolate Maple Nut Bars: Essential Tips for Success
Achieving bakery-quality Chocolate Maple Nut Bars at home is entirely within reach with a few key considerations and careful attention to detail throughout each stage of the baking process. By focusing on proper technique, especially during the preparation of the crust and the precise baking times, you will ensure your bars turn out perfectly golden, structurally sound, and wonderfully gooey with that ideal balance of chewiness and crunch.
Crafting the Perfect Buttery Shortbread Crust
The foundation of these delectable bars is a sturdy yet tender shortbread crust, which requires cold butter for the best texture. For optimal results, ensure your butter is very cold and cut into small chunks before combining it with the dry ingredients. If you’re using a food processor, pulse the ingredients together until they resemble fine, coarse crumbs, then add the egg and process until the mixture is just moist and comes together. It’s crucial to avoid overworking the dough, as this can develop the gluten too much and lead to a tough, less tender crust. When pressing the dough into your prepared pan, apply firm, even pressure across the entire surface to create a compact, uniform base that won’t crumble excessively once baked. Lining your 13×9 inch metal pan with aluminum foil and spraying it generously with cooking spray is a non-negotiable step for effortless removal and clean cutting of the finished bars.
Preparing the Luscious Maple-Nut-Chocolate Topping
The topping for these bars comes together with remarkable ease, making it a joy to prepare. In a separate large mixing bowl, whisk together the condensed milk, the remaining large egg, and your chosen maple flavoring until all ingredients are thoroughly combined and smooth. As previously emphasized, selecting a high-quality, natural maple flavoring can truly make these bars sing, providing an authentic and rich taste. Once this creamy base is ready, gently fold in the chopped nuts and semi-sweet chocolate chips. Take care to ensure the chocolate chips are evenly distributed over the pre-baked crust before pouring the condensed milk and nut mixture over them. This prevents the chips from sinking to the very bottom during baking and guarantees a delightful burst of chocolate in every single bite.
Baking for Golden Perfection and Optimal Texture
After the initial bake of the shortbread crust, the bars return to the oven for an additional 25 minutes with the topping. It’s important to keep a close eye on them during this second baking stage; you’re looking for the topping to achieve a beautiful golden-brown color, which indicates it’s set and has caramelized slightly. The edges might appear a bit firmer and more set than the very center, which is perfectly normal for bar cookies with a gooey filling. It’s crucial not to overbake, as this can lead to a dry or crumbly topping rather than the desired rich, creamy texture. A slight wobble in the very center of the bars when you gently shake the pan after removing them from the oven is acceptable, as the filling will continue to set and firm up significantly as it cools.
The Art of Cooling and Precise Slicing
Patience is truly a virtue when it comes to cutting these rich and sticky bars into neat, presentable squares. For the cleanest and most precise slices, it is absolutely essential to let the bars cool completely, ideally chilling them in the refrigerator for at least an hour, or even longer, after they have reached room temperature. This crucial firming process prevents the sticky topping from clinging to your knife, minimizes crumbling, and ensures each bar holds its shape beautifully. Once thoroughly chilled, use the foil edges to carefully lift the entire slab of bars out of the pan and place it onto a sturdy cutting board. For the best results, use a sharp, warm knife for cutting. You can achieve this by running your knife under hot water and then wiping it completely dry before each cut. This technique will give you those perfectly clean, professional-looking bar slices.
Customizing Your Chocolate Maple Nut Bars: Creative Variations and Adjustments
While this recipe for Chocolate Maple Nut Bars is absolutely fantastic as written and yields consistently delicious results, it also serves as an excellent canvas for customization. Don’t hesitate to experiment with different nuts, incorporate additional warming spices, or explore various chocolate varieties to tailor these bars to your personal preferences, dietary needs, or simply what you have readily available in your pantry. Personalizing your bake can be a fun and rewarding experience.
Nutty Adventures: Beyond Pecans and Walnuts
While pecans and walnuts are undoubtedly classic choices that pair wonderfully with the sweet maple and rich chocolate flavors, feel free to explore other nut options to vary the texture and taste. Chopped almonds can add a slightly different crunch and a more delicate flavor, while toasted hazelnuts could introduce a delightful, sophisticated, and earthy note that complements the maple beautifully. You could even try a mix of different nuts for a more complex and interesting profile, adding pistachios for a pop of color and unique flavor, or cashews for a milder, buttery taste.
A Touch of Warming Spices
For those who enjoy a little extra warmth and aromatic depth in their desserts, consider adding a pinch of ground cinnamon, a tiny grating of fresh nutmeg, or a dash of allspice to the maple filling. These warming spices beautifully complement the existing maple and chocolate flavors, adding another subtle layer of aromatic complexity to your bars. Just a quarter to half a teaspoon will usually be enough to infuse that extra coziness without overpowering the main flavors.
Chocolate, Your Way: Exploring Different Varieties
Semi-sweet chocolate chips provide a balanced sweetness and a familiar flavor, but don’t feel limited to them! Dark chocolate chips will intensify the cocoa flavor, providing a lovely bittersweet contrast to the sweetness of the maple filling, appealing to those who prefer less sugar. Alternatively, milk chocolate chips will make the bars even more decadent, creamy, and melt-in-your-mouth sweet. For a visually appealing contrast and a different flavor dimension, a mix of chocolate chips (e.g., semi-sweet and white chocolate, or even butterscotch chips) can create an attractive visual and a unique flavor variation that delights the palate.
Making a Smaller Batch: Perfectly Proportioned
If you’re baking for a smaller household, have limited ingredients, or simply want to try out the recipe without committing to a full 13×9 inch pan, the original author notes that a half batch is entirely feasible and works wonderfully. Using half a can of condensed milk and an 8-inch square pan (or an 8×8 inch pan) would be a perfect adjustment. Simply halve all the ingredients for both the crust and the topping accordingly. When baking a smaller batch, keep a close eye on the baking times, as they might be slightly reduced, typically by 5-10 minutes, so start checking for doneness a bit earlier.
Serving and Storage Recommendations for Peak Enjoyment
To fully appreciate the richness and delightful textures of these Chocolate Maple Nut Bars, it’s important to consider how you serve and store them. Proper handling and storage techniques will ensure they remain fresh, flavorful, and incredibly delicious for as long as possible, allowing you to savor every last crumb.
Optimal Serving Suggestions
As previously mentioned, due to their inherent richness and sweetness, these bars are best served in relatively small squares. They are excellent on their own, perhaps perfectly paired with a warm cup of coffee, a soothing tea, or a cold glass of milk, making them an ideal after-dinner treat or a luxurious afternoon snack. Beyond personal enjoyment, these bars also make a wonderfully thoughtful homemade gift, beautifully packaged in a decorative tin or a rustic box lined with parchment paper. Their impressive appearance and exquisite taste are sure to be appreciated by friends, family, or neighbors. Consider dusting them with a light layer of powdered sugar for an extra touch of elegance before serving or gifting.
Extended Storage for Freshness
Once your Chocolate Maple Nut Bars have completely cooled and been cut into individual portions, store them in an airtight container at room temperature for up to 3-4 days. For extended freshness, especially in warmer climates or if you prefer a firmer texture, you can store them in the refrigerator for up to a week. If you plan to keep them longer, these versatile bars freeze exceptionally well. To freeze, wrap individual bars or small batches tightly in plastic wrap, ensuring no air exposure, then place them in a freezer-safe bag or an airtight container. They can be stored in the freezer for up to 2-3 months without significant loss of quality. To enjoy, simply thaw them at room temperature for an hour or two, or overnight in the refrigerator, before serving. This makes them a perfect make-ahead dessert for future cravings or unexpected guests.
These Chocolate Maple Nut Bars are more than just a recipe; they are a delightful journey into the world of rich, satisfying desserts that are both comforting and incredibly indulgent. Whether you’re a long-time fan of maple-flavored treats or looking for a new favorite bar cookie to add to your baking repertoire, this recipe promises to deliver pure indulgence with every bite. So gather your ingredients, preheat your oven, and get ready to create a batch of these truly unforgettable, decadent bars that are sure to become a beloved household favorite!
- The Easiest Pumpkin Pie – Condensed Milk
- Creamy Lemon Pie with Condensed Milk
- Eagle Mills (Ultragrain) Flour Test
- Condensed Milk Chocolate Cream Pie
- Two Nut Maple Bars
Recipe

Chocolate Maple Nut Bars
Anna
Pin Recipe
Ingredients
Crust
- 1 ½ cups all-purpose flour
- ½ teaspoon salt
- ⅔ cup sugar
- ¾ cup cold butter, cut into chunks
- 1 large egg
Topping
- 1 can condensed milk
- 1 large egg
- 1 ½ teaspoon maple flavoring
- 1 cup semi-sweet chocolate chips
- 2 cups chopped nuts pecans or walnuts
- 6 ounces butter cold
Instructions
-
Preheat the oven to 350°F (175°C). Line a 13×9 inch metal pan with foil, ensuring the foil extends over the sides to create handles. Spray the foil generously with cooking spray.
-
For the crust, combine the all-purpose flour, granulated sugar, and salt in a large mixing bowl or in the bowl of a food processor. Add the cold butter, cut into chunks. Cut in the butter with a pastry blender, or pulse the food processor until the mixture forms fine, coarse crumbs. Add the large egg and process or mix until the mixture is just moistened and comes together into a dough. Be careful not to overmix.
-
Press the crust mixture firmly and evenly onto the bottom of the prepared pan. Bake for 25 minutes, or until lightly golden brown.
-
Meanwhile, prepare the topping. In a large mixing bowl, beat together the can of condensed milk, the remaining large egg, and the maple flavoring until well combined and smooth. Stir in the chopped nuts (pecans or walnuts).
-
Once the crust is baked, sprinkle the semi-sweet chocolate chips evenly over the warm, pre-baked crust. Then, carefully pour the condensed milk and nut mixture over the chocolate chips, spreading it gently to cover the entire surface.
-
Return the pan to the oven and bake for an additional 25 minutes, or until the topping is golden brown and set. The center may still have a slight wobble, which is normal as it will firm up upon cooling.
-
Allow the bars to cool completely in the pan on a wire rack. This is a crucial step for clean slicing. For even easier and more precise slicing, I highly recommend chilling the bars in the refrigerator for at least 1-2 hours (or longer) before lifting them from the pan using the foil handles and cutting them into squares or bars.
