The Ultimate Guide to Baking Shiny, Fudgy Chocolate Cookies: A Delectable Recipe
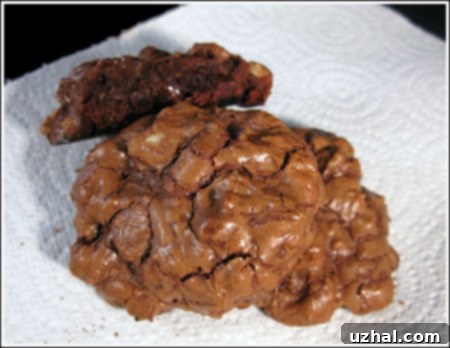
There’s something uniquely satisfying about a perfectly baked chocolate cookie – especially one that boasts a gorgeously shiny, slightly crackled top and a rich, fudgy interior. Today’s recipe is a testament to how simple techniques, like precisely beating eggs, can elevate a humble cookie into a visually stunning and incredibly delicious treat. It also demonstrates just how much luscious chocolate you can generously pack into a single bite! While I initially had reservations about this recipe, it turned out to be an absolute triumph. In fact, these cookies were so good, they inspired me to name them after an R.E.M. song – a true sign of a memorable creation.

The secret to achieving that coveted shiny top lies in a few key steps, primarily centered around how you handle the egg and sugar mixture, and subsequently, the cookie dough. For the ideal glossy finish and a dough that’s easy to manage, it’s crucial to allow the batter to cool and thicken sufficiently. If the batter is too warm or too thin, it will be difficult to scoop into uniform balls, leading to flat, spreading cookies. For maximum shininess, resist the urge to chill the dough in the refrigerator. Instead, let the batter cool naturally at room temperature until it reaches a thick, scoopable consistency. Chilling the dough, while making it firmer and easier to handle, can sometimes diminish that desirable sheen. The slower cooling process at room temperature allows the sugar and egg proteins to settle and form a beautiful, reflective crust on the surface of the cookies during baking.
The Science Behind the Shine: Eggs and Sugar
Ever wondered why some chocolate cookies have that signature shiny, almost brownie-like top, while others don’t? It’s largely thanks to the way the eggs and sugar are combined and handled. When you beat eggs and sugar together at high speed for several minutes, you’re essentially creating a stable emulsion and incorporating air. This aeration is critical. The trapped air, combined with the dissolved sugar, creates a delicate meringue-like structure on the surface of the cookie as it bakes. This structure then sets and caramelizes, resulting in that distinct crackly, shiny crust. It’s similar to the glossy top you find on high-quality brownies, and mastering this technique is a game-changer for chocolate cookie enthusiasts.
Use Good Chocolate: The Foundation of Flavor
The quality of your chocolate directly translates to the flavor of your cookies. This is not a recipe where you want to skimp on ingredients. When I first developed this recipe, I used Scharffen Berger brand chocolate, known for its rich, intense flavor. Since then, I’ve experimented with various brands, and the lesson remains constant: the better the chocolate, the better the cookies. Opt for high-quality semi-sweet or bittersweet chocolate, ideally in bar form that you can chop yourself, as it often melts more smoothly and provides a richer flavor profile than standard chocolate chips. Chocolate chips contain stabilizers that help them hold their shape, which is great for chips, but for a truly fudgy, integrated chocolate experience, chopped bar chocolate is superior. Consider brands like Ghirardelli, Valrhona, Callebaut, or other premium chocolates available in your local store. The depth of flavor these chocolates bring will elevate your cookies from good to extraordinary.
Mastering Chocolate Melting: Double Boiler vs. Microwave
Melting chocolate can seem daunting, but with the right technique, it’s straightforward. Back when I first created these cookies, I was a devoted fan of the double boiler method. And while it remains an excellent way to gently melt chocolate, the microwave is just as effective if used correctly.

The Double Boiler Method
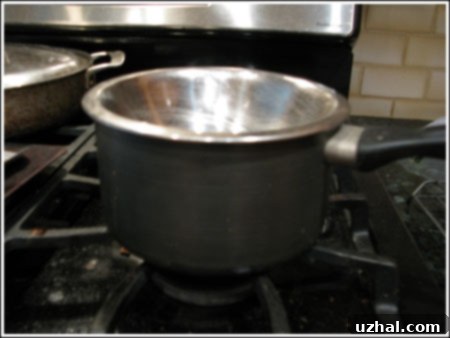
To use a double boiler, place your chopped chocolate and butter in a heatproof bowl set over a saucepan of barely simmering water. Ensure the bottom of the bowl does not touch the water. The steam from the simmering water will gently melt the chocolate and butter, preventing scorching. Stir constantly until the mixture is smooth and fully melted. This method offers precise control and is less prone to burning, making it ideal for beginners or those working with delicate chocolates. Once melted, remove the bowl from the heat and allow the chocolate mixture to cool slightly before incorporating it into the egg mixture. This cooling step is crucial to prevent the hot chocolate from cooking the eggs.
The Microwave Method (UPDATE)
I still frequently use the microwave for melting chocolate, and it yields equally fantastic results. The key is to melt the chocolate gently and in short intervals. Place your chopped chocolate and butter in a microwave-safe bowl. Microwave on 50% power for 30-second intervals, stirring thoroughly after each interval. Continue until the chocolate is mostly melted, then stir until completely smooth. The residual heat will melt any remaining lumps. Be extremely careful not to overheat the chocolate, as it can seize or burn very quickly, developing a grainy texture and bitter taste. Patience and frequent stirring are your best friends here.
Toasting Nuts for Enhanced Flavor
For an extra layer of flavor and texture, I highly recommend toasting your walnuts or pecans. Toasting brings out the nuts’ inherent oils, intensifying their nutty aroma and adding a delightful crunch. This step, while optional, truly elevates the overall cookie experience. You can toast nuts in a few ways:
- Microwave: Spread the chopped nuts in a single layer on a microwave-safe plate. Microwave on 50% power for about 1 to 1.5 minutes, stopping halfway through to shuffle the nuts around. Keep a close eye on them, as they can burn quickly.
- Oven: Spread nuts on a baking sheet and toast in a preheated oven (around 325°F/160°C) for 5-10 minutes, stirring occasionally, until fragrant and lightly browned.
- Stovetop: Heat a dry skillet over medium-low heat. Add nuts and toast for 3-5 minutes, stirring frequently, until aromatic.
Now that we’ve covered the foundational tips for these exceptional cookies, let’s dive into the recipe itself. Prepare to be amazed by these shiny, happy chocolate delights!
- Shiny Top Brownies
- Shiny Top Blackberry Cobbler
- Roasted Hazelnut Oil Hazelnut Brownies
- Fudge Brownies With a Shiny Top
- Chocolate Mint Buttercream Brownies
Recipe for Shiny Happy Chocolate Cookies
This recipe will guide you to perfect shiny, fudgy chocolate cookies every time. Follow these steps closely for the best results, paying special attention to the cooling process to achieve that desirable glossy finish.

Shiny Happy Chocolate Cookies
Anna
Pin Recipe
Ingredients
- ¼ cup sifted all-purpose flour (28 grams)
- ¼ tsp. baking powder
- ¼ teaspoon salt
- 8 oz chopped semi-sweet chocolate (228 grams – high quality recommended for best flavor)
- 4 tablespoons unsalted butter (56 grams)
- 2 large eggs
- 2 tablespoons brown sugar
- ½ cup granulated sugar
- ¼ teaspoon vanilla extract
- 1 ½ cups chocolate chips (for extra chocolatey goodness)
- ⅔ cup walnuts or pecans chopped and toasted (optional, but highly recommended for flavor)
Instructions
-
In a small bowl, whisk together the sifted all-purpose flour, baking powder, and salt. Sifting the flour ensures a lighter texture and prevents lumps. Set this dry mixture aside.
-
Prepare your melting setup. In a metal bowl, combine the chopped semi-sweet chocolate and unsalted butter. Set this bowl over a saucepan containing about an inch of barely simmering water (ensure the bowl’s bottom does not touch the water). Stir gently and continuously until the chocolate and butter are fully melted and smooth. Alternatively, use the microwave method as described above (50% power in 30-second intervals, stirring between). Once melted, remove the bowl from heat and allow the mixture to cool slightly for about 3-5 minutes. It should still be liquid but not hot to the touch.
-
In a separate large mixing bowl, using an electric mixer on high speed, beat the large eggs, brown sugar, and granulated sugar for 2-3 minutes. The mixture should become light, pale, and thick, almost ribbon-like when the beaters are lifted. This vigorous beating is essential for the shiny, crackled top. Once adequately beaten, reduce the mixer speed to low and slowly beat the slightly cooled melted chocolate mixture into the egg mixture until just combined. Stir in the vanilla extract. Finally, add the reserved flour mixture to the batter and stir gently with a spatula until no streaks of flour remain. Be careful not to overmix, as this can lead to tough cookies. Ensure the batter is cool (not warm) before proceeding. Fold in the chocolate chips and the toasted walnuts or pecans (if using).
-
For the best shiny tops, let the cookie batter stand at room temperature for at least 1 hour, or longer, until it has thickened to a scoopable consistency. This allows the sugar to fully dissolve and a slight crust to form, which contributes to the shine. If you prefer a firmer dough for easier handling, you may chill the dough in the refrigerator for at least one hour; however, be aware that chilling can sometimes slightly reduce the shininess of the cookie tops.
-
Preheat your oven to 375 degrees F (190 degrees C). Line two large cookie sheets with parchment paper. Parchment paper is highly recommended as it prevents sticking and aids in easy cleanup.
-
Using a rounded tablespoon or a small cookie scoop, drop spoonfuls of dough onto the prepared parchment paper, spacing them about 2 ½ inches apart to allow for spreading. Bake for 11-13 minutes. The cookies are done when the edges are set and lightly golden, but the centers still look slightly soft and fudgy. Avoid overbaking if you want to maintain that desirable fudgy texture. Let the cookies cool on the baking sheet for about 3 minutes before carefully transferring them to a wire rack to cool completely. Cooling on the sheet initially helps them set without breaking.
Variations and Customizations for Your Shiny Chocolate Cookies
While these cookies are perfect as is, they also lend themselves beautifully to customization. Don’t be afraid to experiment and make them your own!
- Spice it Up: Add a pinch of cayenne pepper or a dash of cinnamon to the dry ingredients for a subtle warmth and complex flavor profile that pairs wonderfully with chocolate.
- Citrus Zest: A teaspoon of orange or tangerine zest can brighten the chocolate flavor and add an aromatic lift.
- Different Chocolates: Instead of or in addition to semi-sweet chocolate chips, try dark chocolate chunks, white chocolate chips, or even a mix of milk and dark chocolates for varying levels of sweetness and intensity.
- Nut Alternatives: If walnuts or pecans aren’t your preference, consider roasted almonds, hazelnuts, or macadamia nuts for a different texture and taste.
- Extracts: A few drops of almond extract or peppermint extract can introduce new dimensions of flavor. Peppermint chocolate cookies are especially delightful during the holidays.
- Sea Salt Finish: A sprinkle of flaky sea salt on top of the cookies just before baking can enhance the chocolate’s depth and provide a lovely contrast in flavor and texture.
Serving Suggestions
These shiny, fudgy chocolate cookies are incredibly versatile. Enjoy them warm straight from the oven, when the chocolate is still gooey and irresistible. They pair wonderfully with a tall glass of cold milk, a hot cup of coffee, or a scoop of vanilla bean ice cream for an indulgent dessert. Pack them in an airtight container for school lunches, office treats, or share them with friends and family. They also make a thoughtful homemade gift, beautifully packaged in a decorative box or tin.
There you have it – the ultimate guide to creating shiny, fudgy chocolate cookies that are sure to impress. By understanding the simple science behind the shine and paying attention to ingredient quality and technique, you can consistently achieve these picture-perfect, incredibly delicious treats. So go ahead, gather your ingredients, put on your favorite R.E.M. song, and get ready to bake some shiny, happy chocolate cookies!
