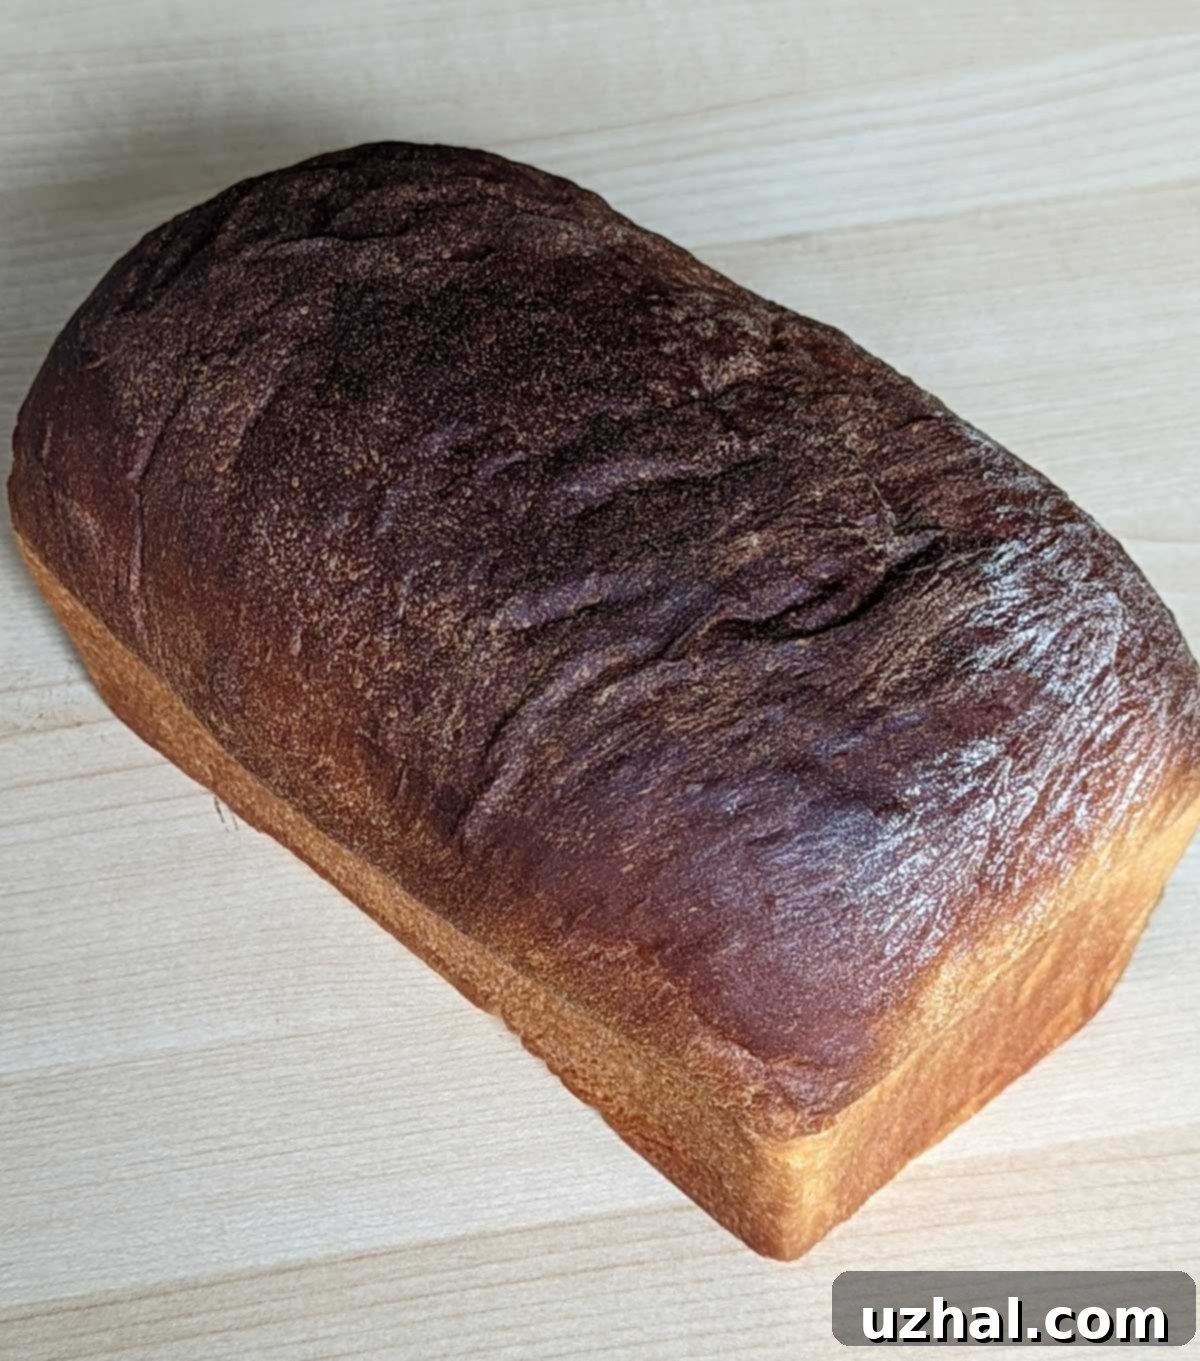
Perfectly Pillowy Potato Flour Sandwich Bread: Your New Favorite Homemade Loaf
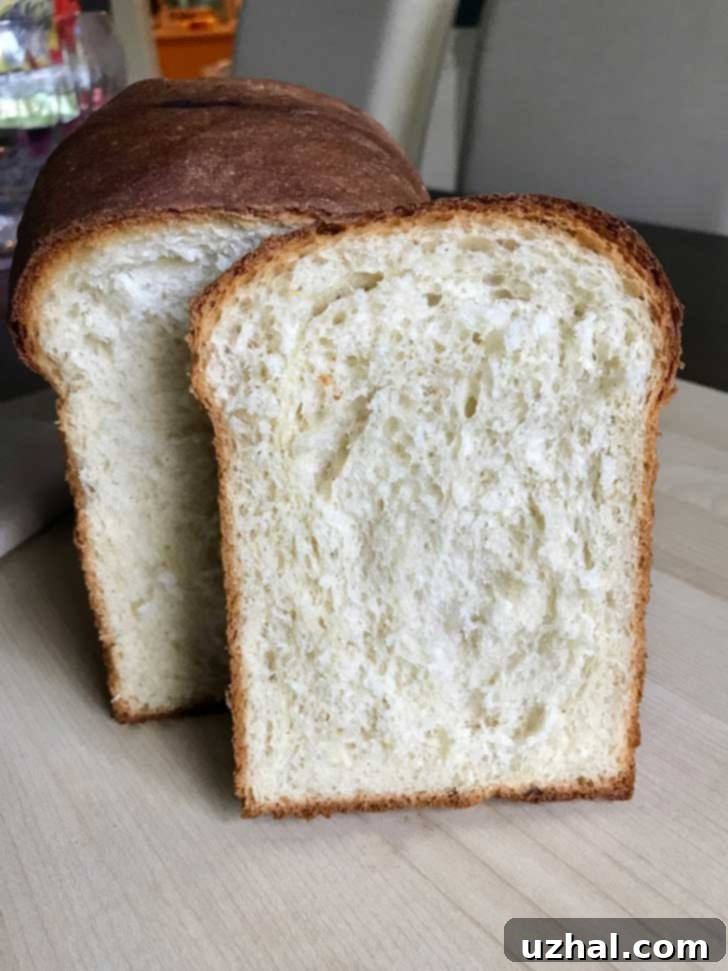
Discover the delightful world of Potato Flour Bread, a truly exceptional homemade loaf that promises a unique texture and flavor profile. This recipe is a fantastic evolution from our beloved Potato Flakes Kolaches, where we’ve ingeniously substituted potato flakes with finely ground potato flour and adapted the dough for baking in a traditional loaf pan. The result is nothing short of spectacular: a large, incredibly soft, and wonderfully pillowy loaf with an appealing bounce and a subtly complex flavor that will surprise and impress. The best part? You’ll have a delightful secret ingredient to share with curious friends and family!
This potato flour bread is more than just a novelty; it’s a staple in the making. Its delicate crumb and tender crust make it ideal for everything from everyday sandwiches to luxurious toast. The potato flour works magic, enhancing moisture retention and contributing to the bread’s signature airy, yet substantial, texture. Prepare to elevate your home baking game with a loaf that stands out from the crowd.
Understanding the Difference: Potato Flour vs. Potato Starch in Baking
The burgeoning popularity of gluten-free baking has thankfully made many previously niche ingredients much more accessible in mainstream grocery stores. Among these, potato starch and potato flour are two often-confused ingredients that play very different roles in baking. While potato starch, an isolated starch frequently used in gluten-free flour blends to provide structure and binding, is now a common sight, potato flour is a distinct product that you might still need to seek out or order online.
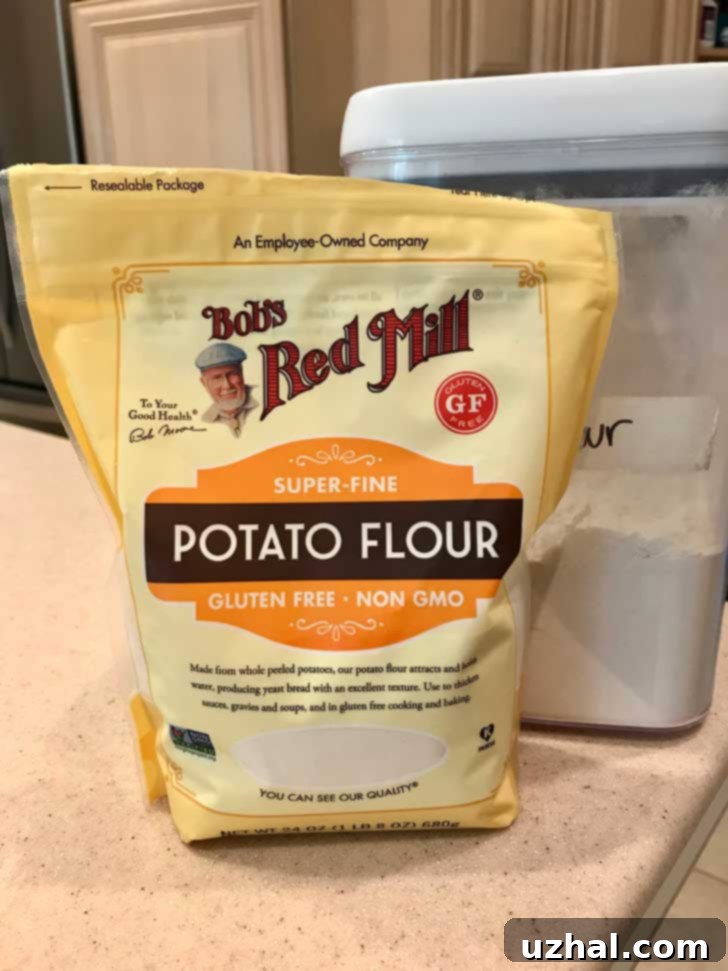
So, what exactly is potato flour? Unlike potato starch, which is just the starch extracted from potatoes, potato flour is made from whole potatoes that have been cooked, dehydrated, and then finely ground into a powder. This means it retains the entire potato’s nutrients, fiber, and flavor, giving it a heavier, denser consistency than starch. It absorbs a significant amount of liquid, acting almost like a thickener, and imparts a unique, subtle potato flavor and an incredible tenderness to baked goods. For this particular recipe, we rely on potato flour’s distinct properties to achieve the bread’s signature soft, pillowy crumb and a hint of earthy sweetness. I’ve personally had great success using Bob’s Red Mill Potato Flour, which offers consistent quality for exceptional results.
Mastering the Unique Texture of Potato Flour Bread Dough
Achieving the perfect consistency for this potato flour bread dough is key, and I highly recommend using weight measurements over volume for all your ingredients to ensure precision. A kitchen scale will be your best friend here, as the dough behaves uniquely due to the potato flour. If you have a stand mixer equipped with a dough hook, the process becomes significantly easier and more consistent. However, be prepared for this dough to play a few tricks on you!
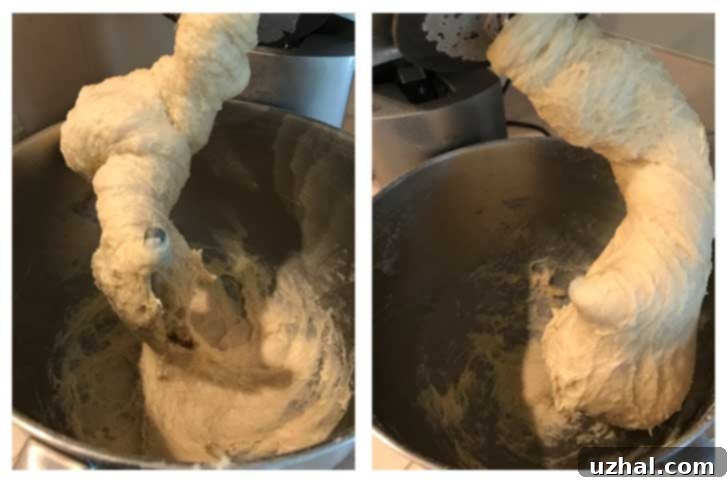
Initially, when you first combine the ingredients, the dough will appear quite thick and somewhat dry. Don’t be alarmed! As the machine begins to knead, the potato flour, known for its high absorbency, will start to release moisture, causing the dough to transform and become surprisingly sticky again. It’s important to note that this dough never completely detaches from the sides of the bowl. During the kneading process, especially as you gradually add the reserved flour, you’ll need to pause frequently to scrape down the sides of the bowl. This ensures that all the dough is evenly incorporated and properly kneaded. You’ll know the dough is perfectly kneaded when it primarily clings to the bottom of the bowl, rather than sticking stubbornly to both the bottom and the sides. Its elasticity will also improve, feeling pliable and soft, albeit still with a slight stickiness to the touch. The goal is a dough that is soft and just barely tacky, indicating optimal hydration. The accompanying photos illustrate the progression: the first shows the dough nearing completion but still too sticky on the sides, while the second, after just an additional ¼ cup of flour, demonstrates the ideal consistency where it mostly clings to the bottom of the bowl. This is precisely when I stopped adding flour, having used the entire 350 grams as specified.
Choosing the Right Loaf Pan for Optimal Rise and Shape
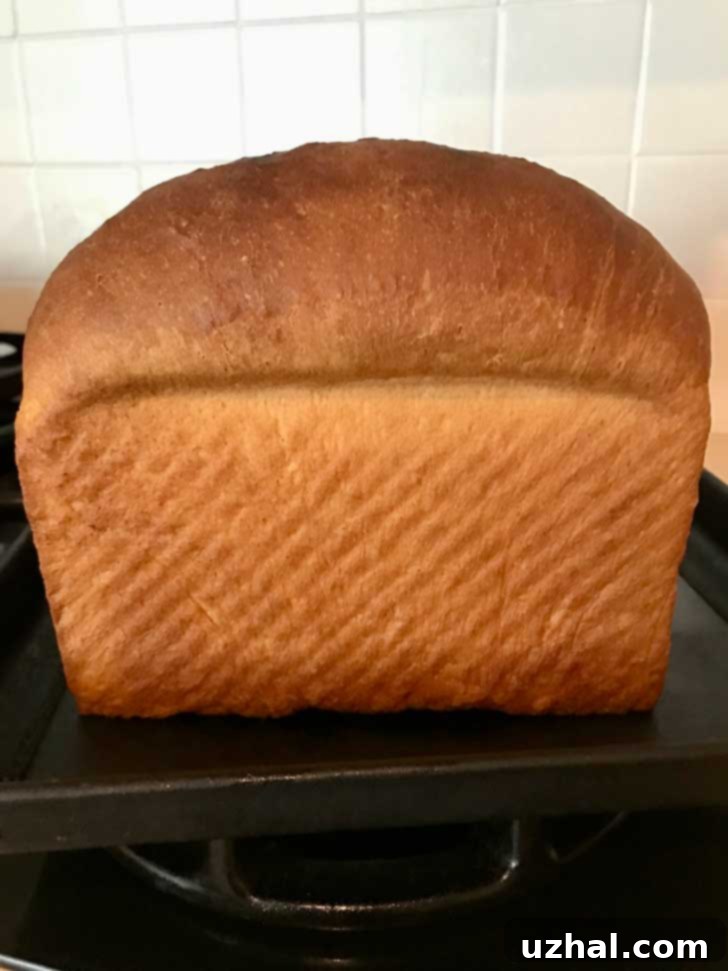
The size and style of your loaf pan can significantly impact the final shape and rise of your Potato Flour Bread. For many of my bread recipes, I typically reach for an 8 ½ by 4 ½ inch USA pan with 2.75 inch high sides. However, for this particular recipe, and ever since acquiring a 1 pound Pullman loaf pan, I’ve found it to be the superior choice, especially when used without its lid. The Pullman pan is renowned for its straight, high sides, which are incredibly beneficial for breads that require ample vertical expansion, such as this potato flour dough. The tall sides provide excellent structural support, encouraging the dough to rise upwards rather than spreading outwards, resulting in a beautifully shaped, square-cut loaf with a consistent crumb.
While I haven’t yet experimented with using the Pullman lid for this specific recipe, I imagine it would yield an even denser, perfectly square loaf, ideal for uniform sandwich slices. For now, I’m simply enamored with the exceptional height and structure that the open-top Pullman pan provides, and I sincerely hope manufacturers continue to produce these high-sided loaf pans, with or without the lid. If you don’t own a Pullman pan or a loaf pan with similarly high (around 4-inch) sides, I strongly recommend opting for a 9×5 inch pan instead of a smaller 8 ½ by 4 ½ inch one. This dough has a remarkable capacity to expand and needs plenty of room to achieve its characteristic soft, airy height. Using a pan that’s too small could lead to an overflowing loaf and an uneven bake, so giving this bread ample space to grow is crucial for the best possible results.
Smart Storage and Freezing Techniques for Freshness
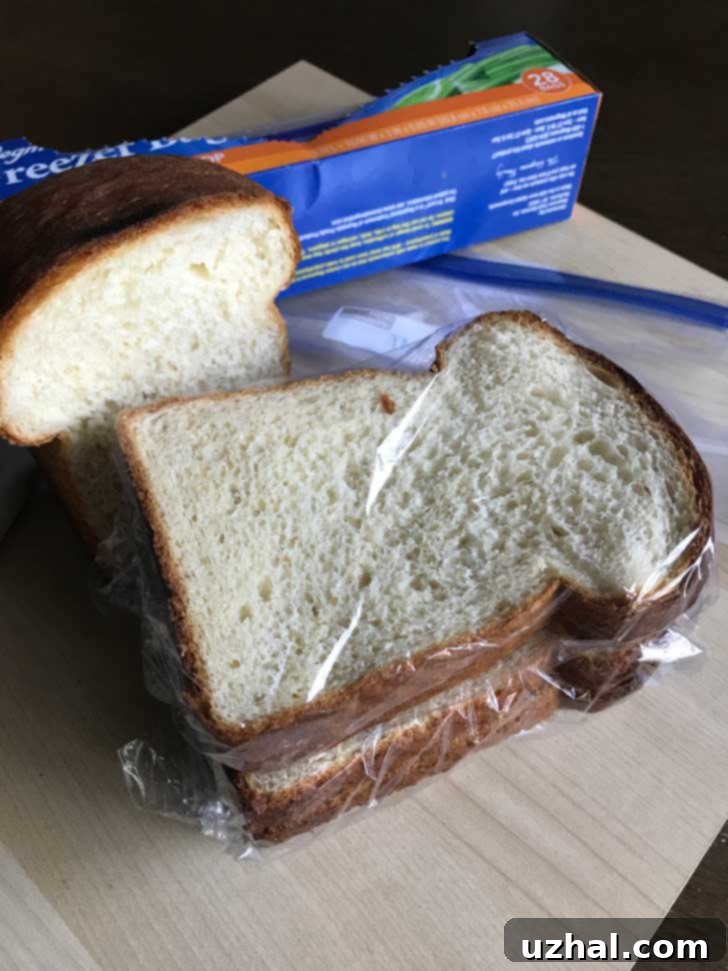
As much as I adore baking fresh bread, my household’s bread consumption habits often can’t keep pace with my enthusiasm. This delightful problem means I frequently find myself needing to store freshly baked loaves, and the freezer is my trusted ally for preserving their quality and flavor. My preferred method for freezing bread, especially for a soft loaf like this Potato Flour Bread, is designed to combat dreaded freezer burn and maintain freshness for weeks.
First, ensure the bread has completely cooled to room temperature before slicing. Attempting to slice warm bread will compress its delicate crumb. Once cooled, I slice the entire loaf into individual portions. Then, to protect each slice, I wrap them in pairs (or individually, if preferred) with a layer of plastic wrap. This initial layer of plastic forms a crucial barrier against air and moisture loss. Finally, all the wrapped bread slices are placed together into a thick, airtight freezer bag. This double-layer protection – plastic wrap directly on the bread, followed by the robust freezer bag – does an excellent job of preventing ice crystals from forming and moisture from evaporating, effectively preventing freezer burn. When you’re ready for a slice, simply remove a pair or an individual slice, thaw it on the counter for a short while, or pop it directly into the toaster for a perfectly fresh and warm experience. This method ensures that every slice of your homemade Potato Flour Bread tastes as good as the day it was baked.
Beyond the Loaf: More Thoughts and Future Culinary Adventures with Potato Flour Bread
Oh, how I wish I could bake this incredible Potato Flour Bread every single day! Its inviting aroma, tender texture, and subtly sweet flavor make it an absolute joy. However, with so much deliciousness constantly emerging from my oven, we often have an abundance of bread. This means I frequently explore creative ways to utilize leftover loaves, ensuring not a single crumb goes to waste. This particular bread would be magnificent in a rich and comforting dish like this White Chocolate Bread Pudding recipe. The inherent moisture and pillowy softness of the potato flour bread would absorb the custard beautifully, yielding an even more luxurious and satisfying bread pudding experience.
My culinary curiosity doesn’t stop there. I’m incredibly eager to experiment with this versatile potato flour dough for other applications, specifically doughnuts! Years ago, I had what remains the best doughnut of my life in Seattle – a truly ethereal creation with an unparalleled big, fluffy texture. I’ve been chasing that perfect airy lightness ever since, and I believe this potato flour dough holds the secret. The unique properties of potato flour, which contribute to the bread’s incredible softness and bounce, seem perfectly suited to creating those dreamy, cloud-like doughnuts I remember. I envision perfectly golden, lightly sweet doughnuts that melt in your mouth, a true testament to the magic of this special ingredient. This bread is not just for sandwiches; it’s a foundation for countless delicious possibilities and a constant source of inspiration for new baking adventures.
- Sweet Potato Pie
- Sweet Potato Bread
- Maple Cream Cheese Frosted Sweet Potato Bars
- Crispy Potato Chip Cookies
Recipe
Potato Flour Sandwich Bread
Anna
Pin Recipe
Ingredients
- ¾ cup whole milk (6 oz/170 grams)
- 4 tablespoons unsalted butter, cut in chunks (56 grams)
- 2 ¼ teaspoons active dry yeast
- ¼ cup warm water (105 to 110 degrees F) (2 oz/56 grams)
- 2 ½ tablespoons granulated sugar (30 grams)
- 2 ½ cups bread flour, divided use (280 grams and 70 grams for 350 grams total)
- ¼ cup fine potato flour (Bob’s Red Mill recommended) (45-50 grams) – Note: This is a heavy flour!
- 1 teaspoon kosher salt (Morton) or table salt
- 1 large egg, room temperature
Instructions
-
Lightly grease and flour your chosen 9 by 5 inch loaf pan or a Pullman pan (remember, you won’t be using the lid for this recipe). Set aside.
-
Combine the whole milk and unsalted butter chunks in a small saucepan over medium heat, or in a 2-cup Pyrex type microwave-safe measuring cup. Heat gently until the milk just begins to simmer and the butter is fully melted. This controlled heating ensures the milk is warm enough to activate yeast but not so hot that it kills it. Remove from heat and allow the mixture to cool to a warm temperature, ideally between 120 and 130 degrees F.
-
While the milk mixture cools, proof your active dry yeast. In a separate small bowl or measuring cup, combine the ¼ cup of warm water (ensure it’s around 105 to 110 degrees F – finger-test warm, not hot) with the active dry yeast. Add about 1 teaspoon of the granulated sugar from the recipe to “feed” the yeast. Stir gently to dissolve, then let this mixture stand for approximately 8 minutes, or until it becomes noticeably foamy and active. This indicates your yeast is alive and ready to work.
-
As the yeast proofs, prepare your dry ingredients. In the bowl of a stand mixer, combine the remaining granulated sugar, 2 cups (280 grams) of the bread flour, the fine potato flour, and the kosher salt. Whisk these dry ingredients together thoroughly. Keep the reserved ½ cup (70 grams) of bread flour close at hand for later use, as the dough’s hydration will be adjusted during kneading.
-
Once the yeast is foamy, add the proofed yeast mixture to the dry ingredients in the stand mixer bowl. Follow with the cooled 120-degree warm milk and butter mixture, and finally, the room temperature egg. Mix the ingredients as thoroughly as you can by hand with a sturdy spoon or spatula to bring everything together. Then, attach the bowl to your stand mixer and fit it with the dough hook.
-
Begin kneading the dough on low to medium speed with the dough hook. The dough will initially appear quite dry, then quickly transform into a very sticky consistency, clinging heavily to the sides of the bowl due to the potato flour’s high absorbency. At this point, gradually begin adding the reserved ½ cup of bread flour, one heaping tablespoon at a time. Continue to let the dough hook knead, stopping frequently to scrape down the sides of the bowl with a rubber spatula, until the dough detaches from the sides and clings primarily to the dough hook at the bottom of the bowl. It will still feel slightly sticky to the touch, but it should be manageable and elastic. This kneading process typically takes 6 to 8 minutes. You will likely use all of the reserved ½ cup flour, but if the dough appears sufficiently kneaded, smooth, and clinging to the hook before you’ve added all of it, stop adding flour to prevent a dry loaf.
-
Once kneaded, transfer the soft and just slightly sticky dough to a lightly greased (with butter or oil) clean bowl. Roll the dough around in the bowl to pick up some of the grease, then flip it over to form a slick, soft ball of dough. This light coating prevents it from drying out during the rise. Cover the bowl tightly with plastic wrap or a clean kitchen towel and let it rise in a warm, draft-free place for approximately 1 hour, or until it has visibly doubled in bulk.
-
Gently punch down the risen dough to release the accumulated gases. Turn the dough out onto a lightly floured pastry mat or clean work surface. Press the dough into a roughly rectangular shape. Take the top corners of the rectangle, fold them down towards the center, and then roll the dough downward tightly into a cylinder, pressing out any air pockets as you go. This shaping technique creates tension on the surface of the dough, which helps with a uniform rise and beautiful crumb.
-
Once rolled, taper the ends of the dough by gently pinching and tucking them under to form a neat loaf shape. Carefully transfer the shaped loaf into your prepared loaf pan. Cover the pan loosely with a piece of greased plastic wrap (greasing prevents sticking) and let the dough rise for a second time for about 50 minutes, or until it has expanded and crowned nicely above the rim of the pan.
-
Preheat your oven to 350 degrees F (175 degrees C). Once heated, bake the bread for approximately 45 minutes, or until the crust is a beautiful golden brown and the internal temperature reaches around 200-210 degrees F (93-99 degrees C) when checked with an instant-read thermometer. Allow the bread to cool in the pan for about 10 minutes. This allows the crust to set and makes it easier to remove. If needed, gently loosen the edges with a knife, then carefully invert the pan to turn the loaf out onto a wire rack. Let it cool completely on the rack. If the bread feels too soft to slice cleanly when fully cool, placing it in the refrigerator for about 30 minutes can help firm it up slightly. This is a very soft bread, but it should be sturdy enough for delicious sandwiches. We often find that a light toasting enhances its flavor and texture even further for sandwich perfection!
