Mastering Fluffy Pita Pockets: Your Ultimate Guide to Homemade Bread Perfection
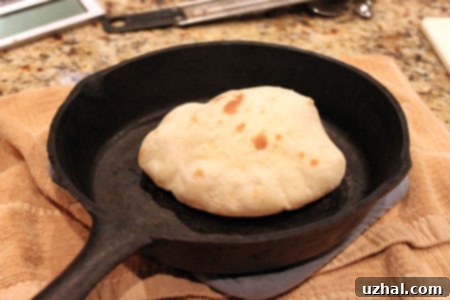
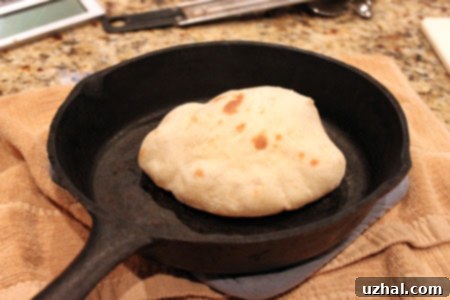
Embarking on the journey of yeast bread baking can feel daunting, but the rewards are truly exceptional. This week, I celebrated a small yet incredibly satisfying victory in my kitchen: my homemade pita bread not only rose beautifully but also transformed into perfect, airy pita pockets! This accomplishment, often elusive for novice bakers, marks a significant step towards mastering one of the most versatile and ancient breads.
Achieving the Perfect Puff: Cast Iron Skillet Pita Pockets
In the past, my attempts at pita bread often resulted in flatter, more naan-like loaves with scattered air bubbles rather than the distinct, inflatable pocket. While still delicious, they lacked the characteristic cavity essential for stuffing. This culinary mystery spurred me to experiment with various recipes and techniques, ultimately leading to a breakthrough. The secret, I discovered, lies in a combination of extreme heat and the right cooking surface. A blazing hot 500-degree Fahrenheit oven combined with a fiercely preheated cast iron skillet proved to be the magic formula for creating those coveted, airy pita pockets.
The science behind this phenomenon is fascinating yet simple. When the pita dough, which contains a good amount of moisture, hits a super-hot surface, the water within the dough rapidly turns into steam. This steam becomes trapped inside the dough, forcing the top and bottom layers to separate and puff up, creating that wonderful pocket. The cast iron skillet excels at this because it retains heat incredibly well, providing an instant, intense burst of heat to the dough. While a pizza stone can also work effectively, the skillet offers exceptional heat retention, making it an ideal choice for this specific technique.
One common concern with using a cast iron skillet is the need to cook pitas one at a time. However, each pita cooks in just about 3 minutes, making the entire process surprisingly quick and efficient. This individual cooking method ensures each pita receives consistent, high heat, maximizing its potential for a perfect puff. The slight inconvenience of single-batch cooking is a small price to pay for superior results.
Our Tried-and-True Pita Pocket Recipe
This recipe has been refined through numerous trials to consistently deliver excellent results. Whether you opt for a pizza stone or a cast iron skillet, the key is ensuring your cooking surface is piping hot. Below, you’ll find the detailed instructions for making these magnificent pita pockets right in your own kitchen. I’ve also incorporated a revised method using parchment paper, which I’ve found simplifies the process and makes handling the delicate dough even easier.
A little note from my kitchen: for those who have been following my pita-making journey, I’ve developed a slightly modified baking method that I believe improves the overall experience and outcome. Instead of transferring raw dough directly, you now bake the pita dough on small pieces of parchment paper. This update makes handling the dough much more manageable, especially when dealing with a scorching hot skillet, and helps maintain the dough’s shape, contributing to a better puff.
- Italian Spiced Pita Chips
- Melted Marshmallow Brownies
- Small Cast Iron Skillet Chocolate Cake
- Cast Iron Skillet Brownies with Browned Butter
- White Whole Wheat Flour Carrot Bread
Recipe

Perfectly Puffed Pita Pockets
Recipe by Cookie Madness
Pin Recipe
Ingredients
- 1 ¼ cups warm water Ensure water temperature is between 110-115 degrees F (43-46°C) for active dry yeast. This is crucial for yeast activation without killing it.
- 1 packet active dry yeast or 2 ¼ teaspoons. Instant yeast can also be used; see notes below for temperature adjustment.
- 2 ½ teaspoons granulated sugar This feeds the yeast, aiding in a robust rise and contributing to the pita’s flavor and browning.
- 1 ½ teaspoons salt Essential for flavor and regulating yeast activity.
- 3 cups all-purpose flour (approximately 380 grams) All-purpose flour yields the best puff and soft texture for this recipe.
- 1 tablespoon olive oil or as needed for greasing the bowl. Adds a subtle flavor and keeps the dough moist.
Instructions
-
Activate Yeast and Mix Dough: Begin by pouring the warm water into the bowl of a stand mixer. Sprinkle the active dry yeast over the water and stir gently until it dissolves. Allow it to sit for about 5-10 minutes until it looks foamy, indicating the yeast is active. Then, add the granulated sugar, salt, and all-purpose flour to the bowl. Stir the ingredients well with a spoon or spatula until a shaggy, somewhat sticky dough forms.
-
Knead Until Smooth and Elastic: Attach the dough hook to your stand mixer and knead the dough on medium-low speed for approximately 5 minutes. The dough will transform into a smooth, elastic, and slightly slippery ball. It should pull away from the sides of the bowl but still feel soft and pliable. Proper kneading is vital for developing the gluten structure needed for the pita to puff.
-
First Rise: Lightly grease a clean, large bowl with olive oil. Transfer the kneaded dough into the oiled bowl, turning it once or twice to coat it thoroughly with oil. This prevents it from sticking and keeps it moist. Cover the bowl tightly with plastic wrap or a damp kitchen towel. Let the dough rise in a warm, draft-free place for about 1 hour, or until it has visibly doubled in bulk. The exact time may vary depending on your room temperature.
-
Divide and Rest Dough Rounds: Gently punch down the risen dough to release the air. Transfer it to a lightly floured surface. Divide the dough into 6 equal portions. Shape each portion into a round or “gob.” They don’t need to be perfectly spherical at this stage but should be relatively smooth. Place these dough rounds on a baking sheet lined with parchment paper, ensuring they have enough space between them. Cover lightly with plastic wrap or a clean towel and let them rest for another 15 minutes. This resting period helps relax the gluten, making the dough easier to roll.
-
Preheat Oven and Skillet: While the dough rounds are resting, place a cast-iron skillet (or pizza stone) inside your oven. Preheat the oven to a scorching 500 degrees F (260°C). It’s crucial that the oven and the skillet are thoroughly preheated and incredibly hot to ensure the pita puffs properly. Allow at least 20-30 minutes for the skillet to get uniformly hot.
-
Roll Dough and Prepare for Baking (Parchment Method): For the parchment method, which I highly recommend for ease of handling, take one of your rested dough rounds and place it directly on a small 6-inch square of parchment paper. Using a rolling pin, gently flatten and shape the dough into an even 5-inch round directly on the parchment. Aim for a consistent thickness across the entire round. The slight oiliness of the dough should prevent it from sticking to the parchment.
-
Bake the Pita: Once the oven and skillet are screaming hot, carefully open the oven. Using heat-resistant gloves, lift the parchment with the rolled dough and gently flip the dough (still attached to the parchment, but parchment on top) onto the center of the hot cast iron skillet. Immediately place the skillet, with the dough and parchment (parchment now on top of the dough), back into the preheated oven. Set a timer for 5 minutes.
-
Flip and Finish Baking: After 3 minutes, or when you see the pita puffing up significantly, carefully open the oven door. With tongs, very gently peel the parchment paper off the cooked pita. The pita should have puffed into a beautiful pocket. Flip the pita over using tongs or a spatula and cook for another 2 minutes to slightly brown the other side and ensure it’s cooked through. The total cooking time for each pita will be approximately 5 minutes.
-
Repeat and Serve: Using oven mitts, carefully remove the hot skillet from the oven and place it on a heat-safe surface. Transfer the cooked pita to a clean kitchen towel or wire rack to cool slightly while you repeat the process with the remaining dough rounds. You’ll make 6 perfectly puffed pita breads. Enjoy them warm, fresh from the oven, for the best flavor and texture!
Notes
Yeast Type: If you opt to use quick-rise or instant yeast instead of active dry yeast, you can add it directly to the dry flour mixture without proofing it first. In this case, ensure your warm water is slightly hotter, between 120 and 130 degrees F (49-54°C), to encourage rapid activation and a quick rise.
Troubleshooting the Puff: If your pita isn’t puffing into a pocket, several factors could be at play:
- Oven/Skillet Temperature: It cannot be stressed enough – the oven and skillet must be extremely hot. If they aren’t fully preheated, the dough won’t get the initial shock needed for steam generation.
- Dough Thickness: Ensure your dough rounds are rolled to an even thickness of about ⅛ inch (3-4 mm). If they are too thick, the steam might not be strong enough to separate the layers. If too thin, they might tear or dry out before puffing.
- Resting Time: Don’t skip the second resting period for the dough rounds. This allows the gluten to relax, making the dough more pliable and capable of expanding.
- Old Yeast: Ensure your yeast is fresh and active.
Storing Homemade Pita: Once cooled, store your homemade pita bread in an airtight bag or container at room temperature for up to 3 days. For longer storage, freeze them for up to 3 months. Reheat gently in a warm oven or toaster for best results.
Serving Suggestions & The Joy of Homemade Pita
Once you’ve mastered these perfectly puffed pita pockets, a world of culinary possibilities opens up! These versatile breads are incredible when served warm, straight from the oven. You can easily fill them with classic Mediterranean ingredients like falafel, hummus, and a fresh cucumber-tomato salad for a satisfying vegetarian meal. They also make an excellent vessel for grilled chicken or lamb, thinly sliced roasted vegetables, or even a simple spread of tzatziki.
Beyond pockets, don’t limit their potential. Slice them into triangles, brush with olive oil and a sprinkle of Italian herbs, then bake until crisp to create delicious homemade pita chips – perfect for dipping in hummus, baba ghanoush, or your favorite salsa. They can also be used as a base for mini pizzas or as a side to hearty stews and soups, soaking up all the flavorful broth. The soft, chewy texture and subtle flavor of homemade pita far surpass anything you’ll find in a grocery store.
Making your own pita bread is not just about the incredible taste and texture; it’s also a deeply rewarding experience. There’s immense satisfaction in creating something so fundamental and delicious from scratch. Plus, you have complete control over the ingredients, ensuring a fresh and wholesome product for your family and friends. This recipe, perfected over time, is designed to give you that success, transforming your kitchen into a hub of warm, inviting aromas and delightful pockets of bread.
Happy baking!
