The Ultimate Guide to Baking Giant, Chewy Peanut Butter Platters: A Unique Cookie Experience
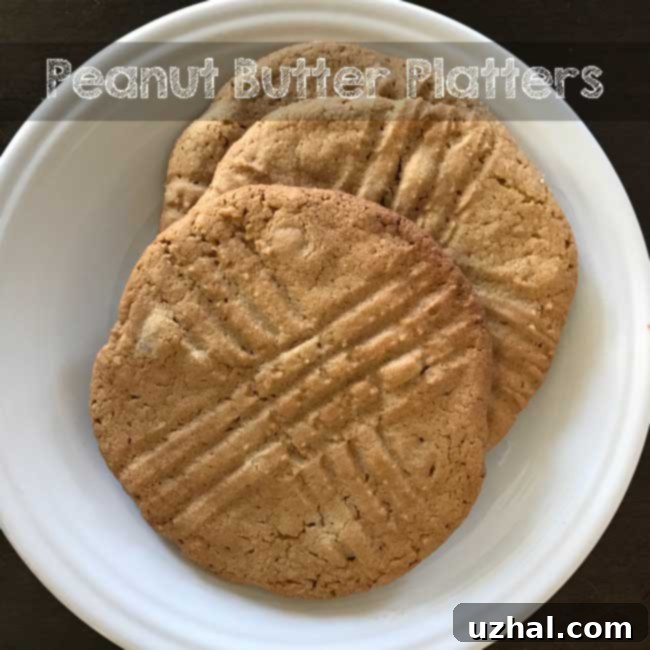
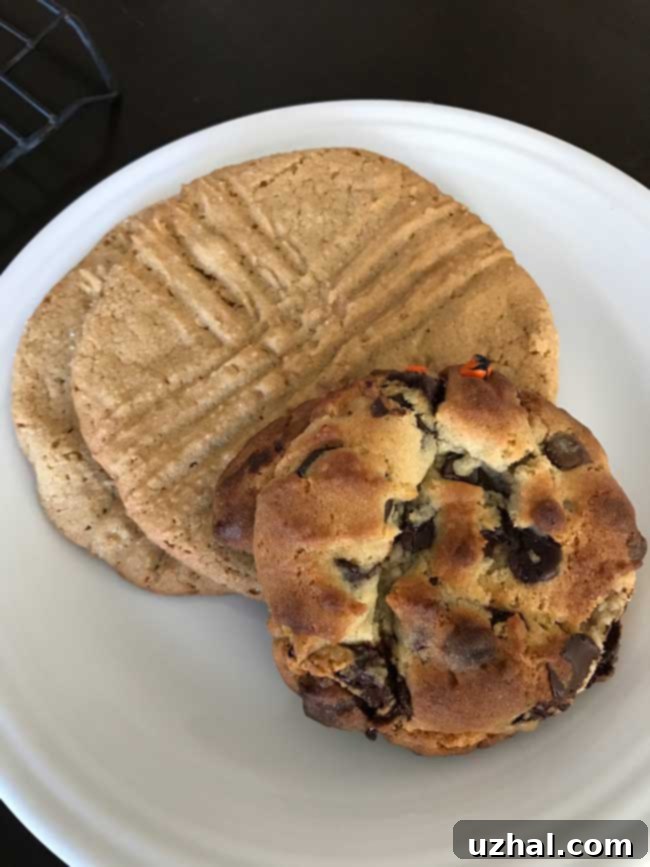
There’s nothing quite like the irresistible charm of a homemade cookie, and this week, I’ve found myself completely immersed in the delightful world of baking giant cookies. My kitchen in Chicago has been a hub of activity, producing various oversized treats for friends and neighbors. Among these confectionery experiments, I unearthed a cherished old recipe for what I affectionately call “Peanut Butter Platters.” These aren’t your average peanut butter cookies; they are exceptionally large and distinctively flat, offering a wonderful textural contrast to the more traditional “big and fat” chocolate chip cookies I often bake. Despite their differences, I firmly believe that these two magnificent cookie types can coexist in perfect harmony on any dessert platter, each offering a unique bite of bliss.
If you’re searching for a peanut butter cookie recipe that truly stands out, one that promises a delightful chewiness and an impressive size, then you’ve come to the right place. These Peanut Butter Platters are more than just a dessert; they’re an experience. They embody that perfect balance of salty and sweet, with a rich, nutty flavor that peanut butter lovers crave. Their generous size makes them a showstopper, ideal for sharing (or not, if you prefer!). Prepare to discover the secrets behind these extraordinary cookies that have delighted palates for years.
Unlocking the Secrets of Peanut Butter Platters: Key Recipe Notes
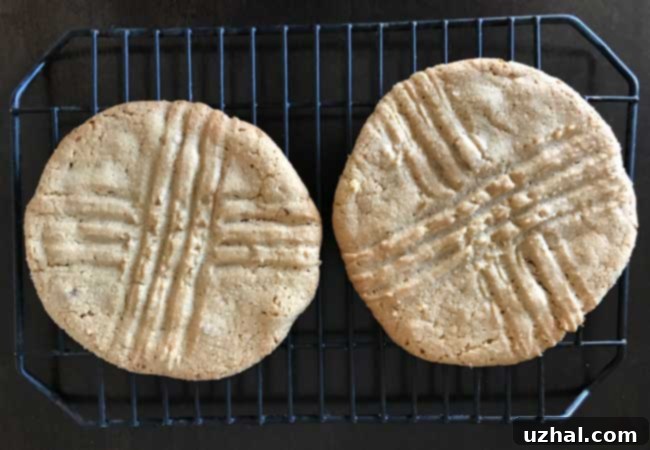
The journey of this Peanut Butter Platters recipe is quite heartwarming. Years ago, a dedicated reader reached out, heartbroken that she had lost this specific recipe—it was, she claimed, the *only* peanut butter cookie her husband would eat. That sentiment speaks volumes about how special these cookies truly are. While they might appear like a standard peanut butter cookie at first glance, a closer look reveals several unique characteristics that contribute to their unparalleled flavor and texture.
What makes these giant peanut butter cookies so different? Let’s delve into the distinctive elements that set them apart:
- All Brown Sugar Brilliance: Unlike many recipes that combine brown and granulated sugar, this one exclusively calls for brown sugar. This isn’t just a minor detail; it’s a game-changer. Brown sugar is hygroscopic, meaning it retains moisture, which is crucial for achieving that signature chewy texture these cookies boast. It also imparts a deeper, more complex molasses flavor that complements the richness of the peanut butter beautifully, giving these flat peanut butter cookies an irresistible depth.
- A Hefty Dose of Leavening: You’ll notice a surprisingly generous amount of both baking soda and baking powder in the ingredient list. This isn’t an oversight! This substantial leavening is key to their impressive spread and airy-yet-chewy interior. It helps them achieve their desired “platter” flatness while ensuring they don’t become dense or cake-like. This balance of leavening agents works in tandem with the brown sugar to create the perfect structure for these large cookies.
- Generous Portions: Each individual cookie requires almost a half-cup of dough! This might seem extravagant, but it’s precisely why these are called “platters.” This ample portion ensures each cookie is truly giant, delivering a satisfyingly large treat that feels indulgent and substantial. When you’re making giant peanut butter cookies, you commit to the size, and this recipe delivers on that promise.
- The Unique Pressing Technique: Perhaps the most unusual and fun part of the preparation involves pressing the chilled dough balls down using the bottom of a buttered and sugared pie dish. This unconventional method is vital for achieving their characteristic flat shape and contributes to the crispy edges and chewy centers. The sugared bottom of the pie dish not only prevents sticking but also imparts a delicate sweetness and a slight textural crunch to the exterior of the cookie, making them truly special.
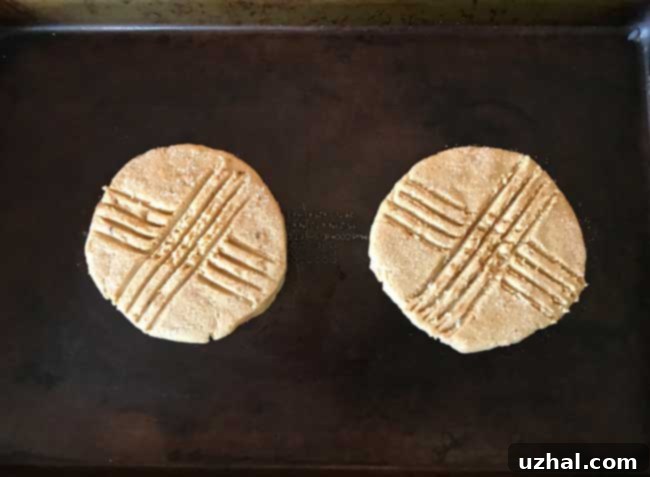
These elements combine to create a cookie that is truly a little different and a whole lot of fun to bake and eat! The resulting giant peanut butter cookies are soft in the middle, delightfully chewy throughout, and boast perfectly crispy edges. Their impressive size makes them perfect for bake sales, where they are sure to catch every eye, or for gifting to your most appreciative “cookie monster” friends who will marvel at their scale and flavor. Just be prepared to dedicate a bit more time to baking these masterpieces, as their sheer size means you can typically only fit two or three cookies per baking sheet. The extra effort is undoubtedly worth it for these big, flat, and wonderfully chewy peanut butter delights.
Beyond their unique characteristics, these Peanut Butter Platters offer a deeply satisfying experience. The aroma that fills your home as they bake is pure comfort, and the first bite is a revelation. They manage to be both familiar and exciting, taking a classic flavor and elevating it to new heights with their distinctive texture and generous proportions. Whether you’re a seasoned baker or new to the kitchen, this recipe provides an engaging and rewarding baking project, culminating in a batch of homemade peanut butter cookies that are truly unforgettable.
Why These Giant Peanut Butter Cookies Are a Must-Try
If you’re still on the fence about trying these Peanut Butter Platters, let me convince you. They are not just big; they are perfectly balanced in flavor and texture. The robust peanut butter taste is enhanced by the rich caramel notes of brown sugar, while the combination of leavening agents creates a cookie that is both tender and incredibly chewy. The crispy edges, achieved through the unique pressing method, add another layer of texture that makes each bite exciting.
These cookies are also incredibly versatile. While delicious on their own, they serve as a fantastic base for further customization. Imagine adding a drizzle of melted chocolate, a sprinkle of sea salt, or even some mini chocolate chips for a peanut butter chocolate chip platter hybrid. They are robust enough to handle extra additions without losing their structural integrity or signature chewiness.
Tips for Baking Success: Achieving the Perfect Flat Peanut Butter Cookies
Baking giant cookies requires a little attention to detail, but the payoff is immense. Here are some expanded tips to ensure your Peanut Butter Platters turn out perfectly every time:
- Room Temperature Ingredients: Ensure your butter and peanut butter are truly softened to room temperature. This allows them to cream together smoothly with the brown sugar, creating a light and airy base for your cookie dough. Cold ingredients can result in a lumpy dough and affect the spread of your cookies.
- Measure Accurately: Especially with flour and leavening agents, precise measurements are crucial. Too much flour can make the cookies dry and stiff, while too little can make them spread excessively thin. Use a kitchen scale for the most accurate results, especially for flour.
- The Importance of Chilling: Do not skip the chilling step! Chilling the dough for at least 30 minutes (or even longer, up to an hour) is vital for giant cookies. It solidifies the fats in the butter and peanut butter, which helps prevent the cookies from spreading too much too quickly in the oven. It also allows the flavors to meld, resulting in a more delicious cookie. Well-chilled dough is easier to handle and shape into neat balls.
- The Pressing Technique Masterclass: When pressing the dough balls, ensure the bottom of your pie plate (or saucepan) is adequately buttered and sugared. This creates a non-stick surface and adds that wonderful sugary crunch. Press firmly but evenly until the dough forms a large circle, approximately 4.5 to 5.5 inches in diameter, and about a half-inch thick. If the edges crack, gently press them back together with your fingers. For the crisscross pattern, a fork works best; lightly score the surface, don’t press too deep, as this can tear the dough. If using a wire cake rack is too cumbersome, a simple fork works perfectly.
- Spacing is Key: These cookies spread significantly, so proper spacing on your baking sheet is non-negotiable. Stick to only two or three cookies per large baking sheet to prevent them from merging into one colossal cookie. Use large, ungreased baking sheets to encourage even spreading and browning.
- Know Your Oven: Ovens can vary widely. Keep a close eye on your cookies, especially during their first bake. The edges should be lightly browned, and the centers should still look slightly soft but set. They will continue to set as they cool on the baking sheet. Overbaking can lead to a dry cookie, so err on the side of slightly underbaked for maximum chewiness.
- Cooling Process: Allow the cookies to cool on the baking sheets for at least 5 minutes before transferring them to a wire rack. This allows them to firm up slightly, preventing them from breaking when moved. Cooling completely on a rack ensures they reach their optimal chewy texture and crispy edges.
Storage Suggestions for Your Giant Peanut Butter Cookies
Once cooled, these Peanut Butter Platters can be stored in an airtight container at room temperature for up to 3-4 days. For longer freshness, they can also be frozen for up to 2-3 months. To freeze, arrange cooled cookies in a single layer on a baking sheet until solid, then transfer to a freezer-safe bag or container, separating layers with parchment paper. Thaw at room temperature when ready to enjoy.
- Big Flat Chocolate Chunk Cookies
- Flat and Chewy Small Batch Oatmeal Cookies
- Brownie Flats
- Chewy Honey Oatmeal Cookies
- Big, Flat Chewy Chocolate Chip Cookies
Recipe for Delicious Peanut Butter Platters
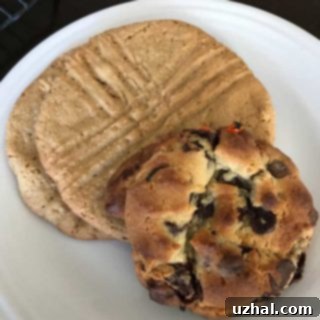
Peanut Butter Platters
Anna
Pin Recipe
Ingredients
For the most delectable Giant Peanut Butter Platters, using quality ingredients is key. Ensure your butter is softened, and your peanut butter is crunchy for that extra texture. All brown sugar contributes to the rich, chewy profile.
- 8 oz unsalted or salted butter, softened (230 grams)
- 1 cup crunchy peanut butter (260 grams)
- 2 cups firmly packed brown sugar (400 grams)
- 2 large eggs
- 2 ½ cups all purpose flour (315 grams)
- 1 ½ teaspoons baking soda
- 1 teaspoon baking powder
- 1 teaspoon salt only if using unsalted butter
- 1 cup chopped salted peanuts or ½ cup peanut butter chips optional, for extra crunch and flavor
- Granulated sugar (for pressing)
Instructions
-
Prepare Your Workspace: Preheat your oven to 350 degrees F (175 degrees C). Get ready with two of the largest, ungreased baking sheets you own. It’s important that they are ungreased to prevent excessive spreading. Due to the massive size of these cookies, you will likely only be able to bake 2 or 3 cookies per sheet at a time, so plan for multiple batches.
-
Cream Wet Ingredients: In a large mixing bowl, using an electric mixer, cream together the softened butter, crunchy peanut butter, and firmly packed brown sugar on high speed until the mixture is light, fluffy, and well combined. This process incorporates air and creates a smooth base. Next, beat in the two large eggs one at a time, ensuring each is fully incorporated before adding the next. Scrape down the sides of the bowl as needed to ensure everything is evenly mixed.
-
Combine Dry and Wet: In a separate medium-sized bowl, whisk together the all-purpose flour, baking soda, and baking powder. If you’re using unsalted butter, this is also the step to add the teaspoon of salt. Gradually add this dry mixture to your wet butter and peanut butter mixture, blending on low speed until just combined. Be careful not to overmix, as this can develop the gluten in the flour too much, leading to tougher cookies. If you’re using them, gently stir in the chopped salted peanuts or peanut butter chips now.
-
Portion and Chill the Dough: Using a ½ cup measure (or a large ice cream scoop), portion out 10 to 12 big balls of dough. Place these dough balls onto a couple of plates that you’ve lined with plastic wrap. This helps prevent them from sticking and makes for easy transfer. Crucially, chill these dough balls in the refrigerator for at least 30 minutes. This chilling period is essential for preventing excessive spread during baking and allows the flavors to deepen. After chilling, reshape the dough into neat, round balls if necessary.
-
The Unique Pressing Step: When you’re ready to bake a batch, lightly grease the bottom of a pie plate (or a small, flat-bottomed saucepan) and then dip it into granulated sugar. This sugary coating will transfer to the cookie, creating beautiful texture and preventing sticking. Place two chilled dough balls onto one of your ungreased baking sheets, ensuring they are spaced as far apart as possible, as these cookies spread significantly. Use the sugared pan to press each dough ball down into a large, flat circle, aiming for a thickness of a little less than ½ inch. If you’re making 12 cookies, aim for circles about 4 ½ to 5 inches in diameter. For 10 cookies, they will be slightly larger, around 5 ½ inches. If the edges aren’t perfectly round or even, gently press them with your fingers to adjust. For that classic peanut butter cookie look, create a crisscross pattern on top by lightly scoring the surface with the tines of a fork. A wire cake rack can also be used for an interesting pattern, though it might be more challenging with a rimmed pan.
-
Bake and Cool: Bake the cookies in your preheated oven for 12 to 14 minutes, or until their edges are lightly golden brown and the centers appear set but still slightly soft. Avoid overbaking to maintain their signature chewiness. Once baked, remove the baking sheets from the oven and let the cookies cool on the sheets for about 5 minutes. This allows them to firm up and prevents breakage. After 5 minutes, carefully transfer the warm cookies to wire racks and let them cool completely before serving. This recipe yields 10 to 12 spectacular giant peanut butter platters.
Notes