Irresistibly Chewy Peanut Butter Butterfinger Cookies: Your New Favorite Recipe
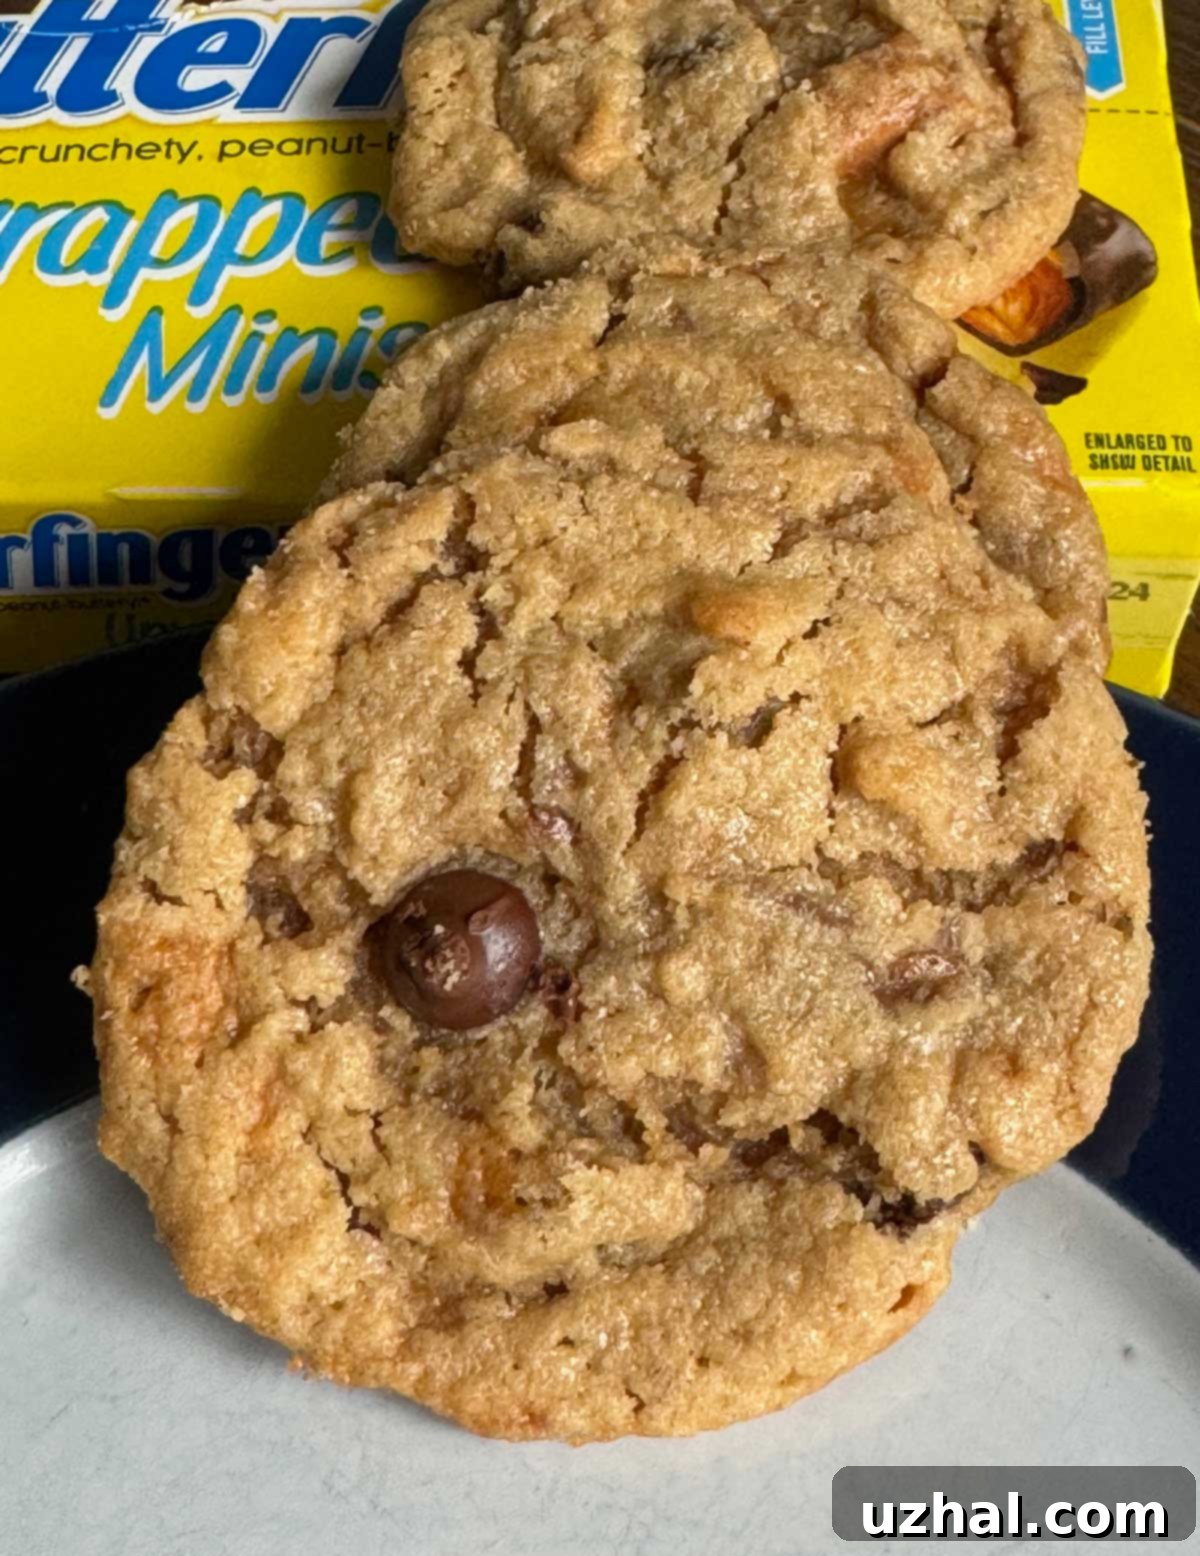
There’s a special joy in revisiting old favorites, especially when they inspire new culinary adventures. Recently, my stepmother and I dove back into The Sweet Potato Queen’s Big Ass Cookbook (and Financial Planner), and while she explored the “Chocolate Stuff” and a rather unconventional tomato soup and hard-boiled egg creation, my sights were set on something sweet and crunchy: Butterfinger Cookies. However, my journey took a delightful detour from the book’s original. Instead of strictly following its lead, I adapted a different recipe, infusing it with my own modifications to achieve a specific vision: flat, incredibly chewy, beautifully wrinkled cookies, all while ensuring that signature Butterfinger crunch truly shined through. The ultimate goal? A profoundly chewy cookie experience.

An Abundance of Peanut Butter Flavor for Lovers of All Things Nutty
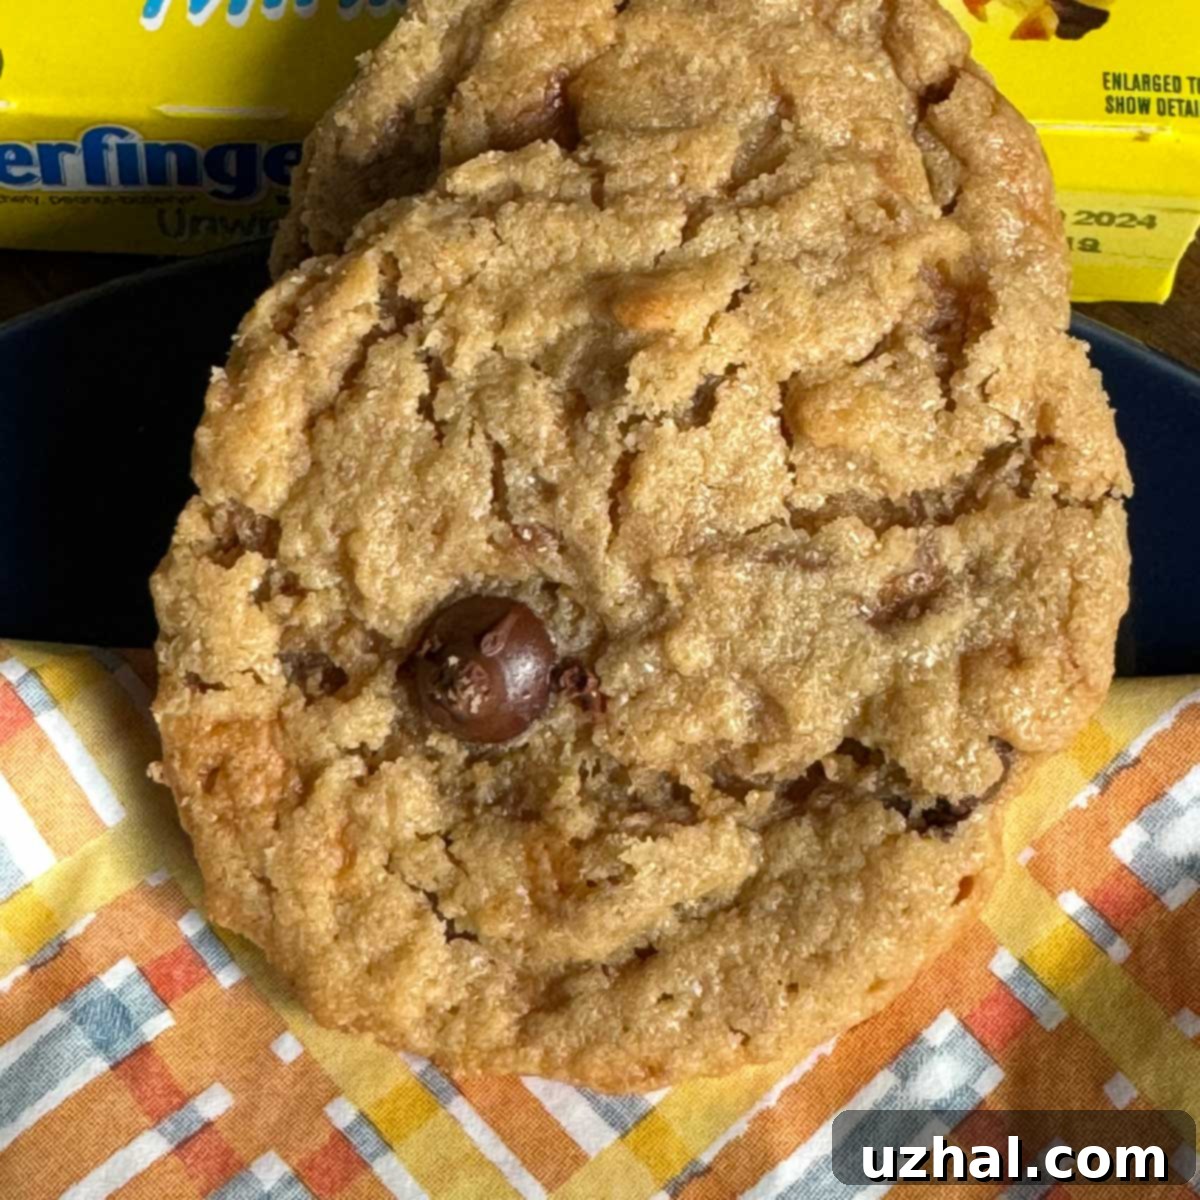
If you’re a true connoisseur of peanut butter, these cookies are crafted just for you. They boast an exceptionally rich and pronounced peanut butter flavor that stands proudly at the forefront. While other Butterfinger cookie recipes might offer a more subtle peanut butter note (like this excellent alternative), my version is designed to celebrate that deep, nutty essence. Each bite delivers a soft, yielding chewiness, adorned with characteristic crinkles, and punctuated by the delightful, unmistakable crunch of Butterfinger candy pieces. It’s a harmonious blend where the creamy peanut butter base perfectly complements the crispy, sweet candy bar, creating a texture and flavor profile that peanut butter enthusiasts will adore. For the best results, opt for a smooth, creamy peanut butter – avoid natural or “stir-free” varieties that separate too much, as they can alter the cookie’s texture and spread.
Mastering the Mixing Technique for Ultimate Chewiness and Crinkles
The secret to these cookies’ incredible texture lies in a specific mixing technique I’ve perfected over time, now a staple for many of my cookie creations. Unlike traditional methods where all sugars are creamed with butter from the start, this recipe introduces brown sugar at a later stage, alongside the flour. This strategic timing ensures that more of the brown sugar remains undissolved during the initial creaming process. The result? A “stickier bite” and enhanced chewiness that truly sets these cookies apart. Undissolved sugar crystals contribute to a more complex texture, preventing the cookies from becoming too cakey and promoting that desirable bendy chew.
Beyond the sugar timing, diligent creaming of the butter, granulated sugar, and egg whites is crucial. This step is about incorporating as much air as possible into the mixture, creating a light, fluffy foundation. The abundance of air bubbles, combined with a touch of cream of tartar, plays a pivotal role in achieving those signature crinkles. The theory is that the air helps the cookies rise rapidly in the oven, and as they spread and fall, the rapid expansion and subsequent gentle collapse create those beautiful, intricate wrinkles on the surface. While the technique itself is highly effective, I occasionally lend a helping hand with the “pan banging” method – gently dropping the baking sheet a few times during baking to encourage further collapse and even more pronounced crinkles. This creates ripples of dough that bake into a wonderfully chewy texture.
Selecting and Preparing Your Butterfinger Candies
When it comes to the star ingredient – Butterfinger candies – flexibility is key. Any variety of Butterfinger bars will work wonderfully in this recipe. For my batch, I opted for two movie theater-sized boxes of Butterfinger Minis. These individually wrapped mini bars are convenient, but full-sized bars can be easily chopped. The most important tip for preparing the candy is to chop them with purpose. I use a chef’s knife to create a mix of different sized pieces. The goal is to leave some larger chunks among the finer bits. This ensures that the distinct, crunchy texture of the Butterfinger candy is not lost during baking; instead of simply dissolving into the cookie, the bigger pieces remain detectable, offering delightful bursts of crispiness and flavor in every bite. This contrast in texture between the soft, chewy cookie and the crunchy candy is what makes these cookies truly special.
Why These Chewy Peanut Butter Butterfinger Cookies Are a Must-Try
Beyond their irresistible flavor, these cookies offer a unique textural experience that sets them apart from typical cookie recipes. The combination of intense peanut butter and crunchy Butterfinger is a classic for a reason, but our method elevates it. The deliberate focus on achieving a flat, chewy, and crinkly texture means you get a cookie that’s satisfyingly substantial without being dense. Each bite is a journey through creamy, nutty sweetness followed by that unmistakable crisp, caramel-peanut flavor of Butterfinger. They’re perfect for sharing at gatherings, an indulgent treat for a quiet evening, or a delightful addition to any dessert spread. If you’ve been searching for a cookie that hits all the right notes – flavor, texture, and homemade appeal – this is the recipe you need to try.
Tips for Baking the Perfect Chewy Cookies
Achieving cookie perfection often comes down to a few key details. Here are some additional tips to ensure your Peanut Butter Butterfinger Cookies turn out flawlessly:
- Room Temperature Ingredients: Ensure your butter and egg whites are at true room temperature. This allows them to cream together properly, incorporating more air and creating a smoother, more emulsified batter, which is essential for the desired texture and spread.
- Don’t Overmix the Flour: Once you add the dry ingredients, mix just until combined. Overmixing develops gluten, which can lead to tough, dry cookies instead of the soft, chewy texture we’re aiming for. A few streaks of flour are better than an overmixed dough.
- Chill the Dough (Optional but Recommended): While the recipe states you can bake right away, chilling the dough for at least 30 minutes (or even overnight) can significantly improve the cookies. Chilling allows the flavors to meld, the butter to firm up (which prevents excessive spreading), and results in a thicker, chewier cookie with more defined crinkles.
- Use a Cookie Scoop: For uniform cookies that bake evenly, a medium-sized cookie scoop is your best friend. Consistency in size ensures every cookie is perfectly baked.
- Parchment Paper is Your Ally: Always line your baking sheets with parchment paper or silicone baking mats. This prevents sticking, promotes even baking, and makes for easy cleanup.
- Don’t Overbake: Cookies continue to cook slightly on the hot baking sheet after being removed from the oven. Look for edges that are set and lightly golden, while the centers still appear slightly soft and puffy. They will flatten and firm up as they cool.
- Gentle Pan Banging: If you’re aiming for those extra crinkles, remember the pan banging method from the instructions. It’s an effective way to encourage spreading and create those appealing ripples.
Storing and Serving Your Delicious Creations
Once cooled, these Chewy Peanut Butter Butterfinger Cookies are best enjoyed fresh, but they also store beautifully. Keep them in an airtight container at room temperature for up to 3-5 days to maintain their chewiness and flavor. For longer storage, you can freeze baked cookies in an airtight container or freezer bag for up to 2-3 months. Thaw them at room temperature or gently warm them in the microwave for a few seconds to restore their fresh-baked goodness. These cookies are fantastic on their own, paired with a glass of cold milk, or even crumbled over a scoop of vanilla ice cream for an extra indulgent dessert. The combination of textures and flavors makes them a versatile treat for any occasion.
Dive into More Butterfinger Delights
If you’ve fallen in love with the combination of peanut butter and Butterfinger, there are plenty more recipes to explore. Here are some related links to keep your sweet tooth satisfied:
- Chewy Butterfinger Bar Cookies
- Brownie Bottom Butterfinger Ice Cream Pie
- Butterfinger Meringues
- Butterfinger Cookies with Butterscotch Morsels
- Chocolate Butterfinger Pie
Recipe: Chewy Peanut Butter Butterfinger Cookies

Butterfinger Cookies
Anna
Pin Recipe
Ingredients
- 1 stick unsalted butter, softened (114 grams, at room temperature)
- ⅔ cup granulated sugar (130 grams)
- 2 large egg whites (60-65 grams, at room temperature)
- 1 cup creamy peanut butter (260 grams, not natural/stir-free)
- 1 teaspoon vanilla extract
- 1 cup all-purpose flour (130 grams)
- ⅔ cup light brown sugar (130 grams, packed)
- ½ teaspoon baking soda
- ½ teaspoon cream of tartar
- ¼ teaspoon salt (plus an extra pinch if using unsalted butter)
- ¾ cup milk or semisweet chocolate chips (can use a little more if desired)
- 1 cup chopped Butterfinger candy (I used 2 boxes of the unwrapped minis, chopped into varying sizes for texture)
Instructions
-
In a large mixing bowl, using an electric mixer, beat the softened butter and granulated sugar for about 2 minutes until the mixture is light, pale, and creamy. Add the egg whites and continue to beat for another 2 minutes until the mixture is visibly light and fluffy. Incorporate the creamy peanut butter and vanilla extract, beating for one more minute. Make sure to scrape down the sides of the bowl as needed to ensure everything is well combined.
-
In a separate medium bowl, whisk together the all-purpose flour, light brown sugar, baking soda, cream of tartar, and salt until thoroughly combined. Gradually add this dry mixture to the wet ingredients in the large bowl, stirring by hand (or on very low speed with the mixer) just until blended and no dry streaks of flour remain. Be careful not to overmix.
-
Gently fold in the chopped Butterfinger candy and chocolate chips (if using) until they are evenly distributed throughout the dough.
-
Using a medium-sized cookie scoop (about 1.5-2 tablespoons), scoop mounds of dough onto a dinner plate or small baking sheet. Cover the dough balls tightly with plastic wrap and chill them in the refrigerator for at least 30 minutes, or until you are ready to bake. Chilling the dough is optional but highly recommended for better texture and less spreading.
-
When you are ready to bake, preheat your oven to 350°F (175°C).
-
Line a baking sheet with parchment paper or a silicone baking mat. Arrange the chilled dough balls on the prepared baking sheet, ensuring you leave approximately 2 ½ inches of space between each cookie to allow for proper spreading.
-
Bake for approximately 12-14 minutes. You can start checking for doneness around the 10-minute mark. The edges should be lightly golden, and the centers might still look slightly soft.
-
For those wonderfully flat and crinkly cookies, open the oven door after about 10 minutes of baking. Gently lift and drop (bang) the baking sheet on the oven rack once or twice. This helps release air and encourages the cookies to spread and crinkle. Repeat this once or twice more during the remaining bake time if desired. Remove from oven and let cool on the baking sheet for 5 minutes before transferring to a wire rack to cool completely.
