The Ultimate Creamy Coconut Cream Tart: An Easy Recipe with a Revolutionary French Dough
Every now and then, a recipe comes along that completely shifts your perspective on baking. This exquisite Coconut Cream Tart is precisely that kind of culinary revelation. What began as a simple experiment to try an intriguing French tart dough recipe from David Lebovitz’s renowned blog transformed into a potential staple in our dessert rotation. Its luscious, smooth, and creamy filling, perfectly complemented by a surprisingly effortless crust, is so delightful that it just might permanently replace our beloved traditional coconut cream pie. This tart offers a sophisticated yet approachable dessert experience, blending classic flavors with an innovative baking technique. It’s perfect for impressing guests or simply indulging in a moment of pure bliss.
The Revolutionary French Tart Dough: A No-Fuss Crust You’ll Love
Let’s talk about the foundation of this incredible tart: the crust. This particular recipe for French tart dough was shared with David Lebovitz by a French friend, and it boasts a method that truly redefines “easy.” Forget the painstaking process of cutting in cold butter, handling delicate dough, or endless chilling. This technique involves melting butter, oil, and sugar together directly in the oven before stirring in the flour. This innovative approach yields a remarkably tender and flaky crust with minimal effort, making it ideal for both novice and experienced bakers seeking a less stressful pastry experience.
The beauty of this “oven-melted” method lies in its simplicity and the consistent results it delivers. By pre-melting the fats and sugar, you bypass the need for precise temperature control or extensive blending, which are often the most intimidating parts of traditional pie crust making. The hot liquid mixture quickly combines with the flour, forming a cohesive dough that’s pliable and easy to press into a tart pan. The resulting crust is not only incredibly good but also surprisingly sturdy, providing the perfect counterpoint to the rich filling without becoming soggy. Once you try this relaxed approach, you’ll likely find yourself reaching for this technique again and again for various tart creations. For the precise crust instructions, I highly recommend visiting David Lebovitz’s blog, as this recipe focuses primarily on the exquisite filling.
Crafting the Perfect Creamy Coconut Filling
While the crust sets a fantastic stage, the star of this dessert is undoubtedly its rich and velvety coconut cream filling. This recipe builds upon the principles of a classic coconut cream pie but refines them to achieve an even smoother, creamier, and more luxurious texture. We’ve optimized the balance by using fewer egg yolks and less butter than many traditional recipes, which results in a lighter, yet equally satisfying, custard. This careful adjustment prevents the filling from becoming overly dense or greasy, allowing the pure, tropical flavor of coconut to truly shine through.
Beyond its superior taste and texture, this coconut cream filling is also relatively inexpensive to prepare, utilizing common pantry ingredients. It creates just the right amount of luscious filling for a shallow 9-inch pie or, in this case, a beautiful 9-inch tart. The blend of vanilla and optional coconut extract enhances the natural flavor of the sweetened flaked coconut, delivering a truly immersive tropical experience with every spoonful. The result is a filling that is both comforting and sophisticated, perfectly marrying the familiar sweetness of coconut with a silken, melt-in-your-mouth consistency that will leave everyone craving another slice.
Why This Coconut Cream Tart is a Must-Try
The combination of the easy-to-make, tender French tart crust and the incredibly smooth, rich coconut cream filling makes this dessert an absolute winner. It’s a testament to how simple techniques can lead to extraordinary results. Whether you’re a seasoned baker looking for a new favorite or someone who usually shies away from elaborate pastries, this recipe is designed to be approachable and rewarding. The subtle sweetness of the coconut, combined with the creamy texture, creates a harmonious balance that is both decadent and refreshing. It’s perfect for any occasion, from casual family dinners to elegant gatherings, offering a taste of the tropics that’s sure to delight. This tart is not just a dessert; it’s an experience, promising a moment of pure culinary delight.
Explore More Tart Recipes
If you’ve enjoyed this delightful Coconut Cream Tart, we encourage you to explore other fantastic tart creations that offer unique flavor profiles and baking adventures. Tarts are incredibly versatile, allowing for endless creativity with seasonal fruits, rich custards, and diverse crusts. Here are some of our other favorite tart recipes to inspire your next baking project:
- Lemon Blueberry Tart
- Reduced Fat Key Lime Tart
- Lemon Pie Collection
- Key Lime Tart (Reduced Fat)
- Lemon Cream and Berry Tart With Coconut Crust
- Dorie Greenspan’s Lemon Tart
Recipe

Coconut Cream Tart
Cookie Madness
Pin Recipe
Ingredients
- 1 baked 9 inch tart shell see note for the easy tart crust recipe
- ½ cup granulated sugar
- 3 tablespoons cornstarch
- ¼ teaspoon salt
- 2 eggs yolks slightly beaten
- 2 cups half and half
- 1 tablespoon butter
- 1 teaspoon vanilla extract
- 1 teaspoon coconut extract optional, but highly recommended for intense coconut flavor
- ⅔ cup sweetened flaked coconut plus extra for topping
- 3 cups sweetened whipped cream freshly whipped or non-dairy topping
Instructions
-
In a large saucepan, away from heat, thoroughly combine the granulated sugar, cornstarch, and salt. Add the slightly beaten egg yolks and stir vigorously until a thick, uniform yellow paste forms. Gradually whisk in the half and half until the mixture is smooth and free of lumps.
-
Place the saucepan over medium heat and whisk constantly to prevent sticking and ensure even cooking. Continue whisking until the mixture begins to boil and visibly thickens. Once it reaches a boil and has thickened, continue whisking for precisely 1 minute to ensure the cornstarch is fully activated. Remove the saucepan from the heat and immediately whisk in the butter until it is fully melted and incorporated. Allow the mixture to cool slightly, then stir in the vanilla extract, the optional coconut extract (for an extra burst of tropical flavor), and the ⅔ cup of sweetened flaked coconut.
-
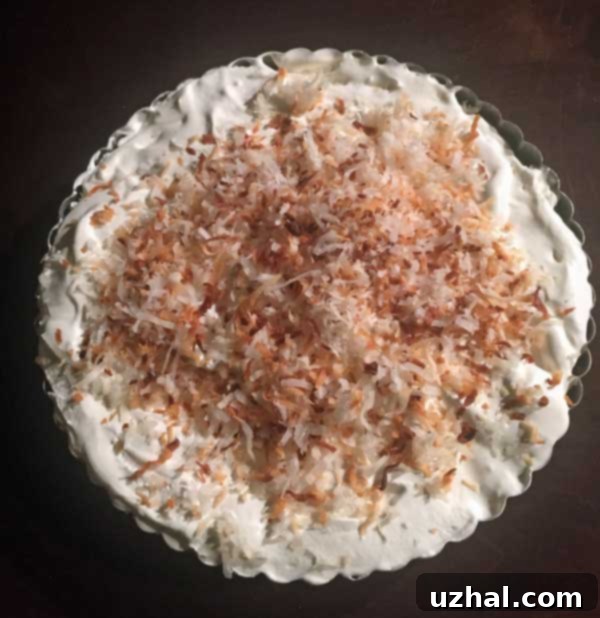
Let the filling cool completely to room temperature before transferring it to the baked tart shell. Spread the filling evenly, ensuring it reaches all the edges of the crust. To prevent a skin from forming and to keep the filling fresh, cover the tart with a piece of plastic wrap pressed directly onto the surface of the filling. Refrigerate until thoroughly chilled and set, ideally for at least 4 hours or overnight. Just before serving, spread a generous layer of sweetened whipped cream over the top of the chilled tart and sprinkle with the reserved coconut. To toast the reserved coconut for an enhanced flavor and crunchy texture, spread it on a foil-lined baking tray and bake at 350°F (175°C) for a few minutes, watching carefully until the edges just begin to brown. Stir it on the pan to ensure even toasting, then let it cool completely before using.
Notes
This unique tart dough is incredibly forgiving and yields a wonderfully tender crust.
Ingredients for the Crust:
6 tablespoons unsalted butter, cut into small pieces
1 tablespoon vegetable oil
3 tablespoons water
1 tablespoon granulated sugar
⅛ to ¼ teaspoon salt (I recommend ¼ teaspoon for better flavor balance)
1 cup plus 2 tablespoons (150 grams) all-purpose flour
Instructions for the Easy Tart Crust:
1. Preheat your oven to 350°F (175°C). In an oven-proof bowl (a Pyrex bowl or a Pampered Chef Batter Bowl works perfectly), combine the cut butter, vegetable oil, water, sugar, and salt. This is the magic part – no need for chilling or elaborate mixing methods at this stage.
2. Place the bowl directly into the hot oven for approximately 15 minutes, or until the butter has completely melted and just begins to turn a light golden brown, indicating a slight nutty flavor. Be cautious not to burn it.
3. Carefully remove the hot bowl from the oven. Immediately add the 1 cup plus 2 tablespoons (150 grams) of all-purpose flour to the hot liquid ingredients. Stir vigorously with a spoon or sturdy spatula until the mixture clumps together into a ball. The heat from the melted butter mixture will help the flour come together without overworking the gluten.
4. Allow the dough ball to cool slightly until it’s comfortable enough to handle. Press the warm dough evenly over the bottom and up the sides of a 9-inch removable-bottom tart pan. The warmth of the dough makes it incredibly easy to spread and shape without tearing.
5. Place the tart pan on a baking sheet (this makes it easier to transfer in and out of the oven and catches any potential drips). Bake for about 15 minutes, or until the edges of the crust are nicely browned and crisp. This pre-baking (blind baking) ensures a firm and delicious base for your creamy filling.
6. Let the baked tart shell cool completely on a wire rack before filling.
**Tips for the Filling:**
– Ensure constant whisking while the filling cooks to prevent lumps and scorching. The cornstarch needs continuous agitation to thicken properly.
– Don’t skip chilling the tart. It’s crucial for the filling to fully set and achieve its perfect creamy consistency. Overnight chilling often yields the best results.
– For an extra festive touch, drizzle with a bit of melted chocolate or sprinkle with finely chopped toasted nuts before serving. Fresh berries also make a beautiful and delicious garnish.
