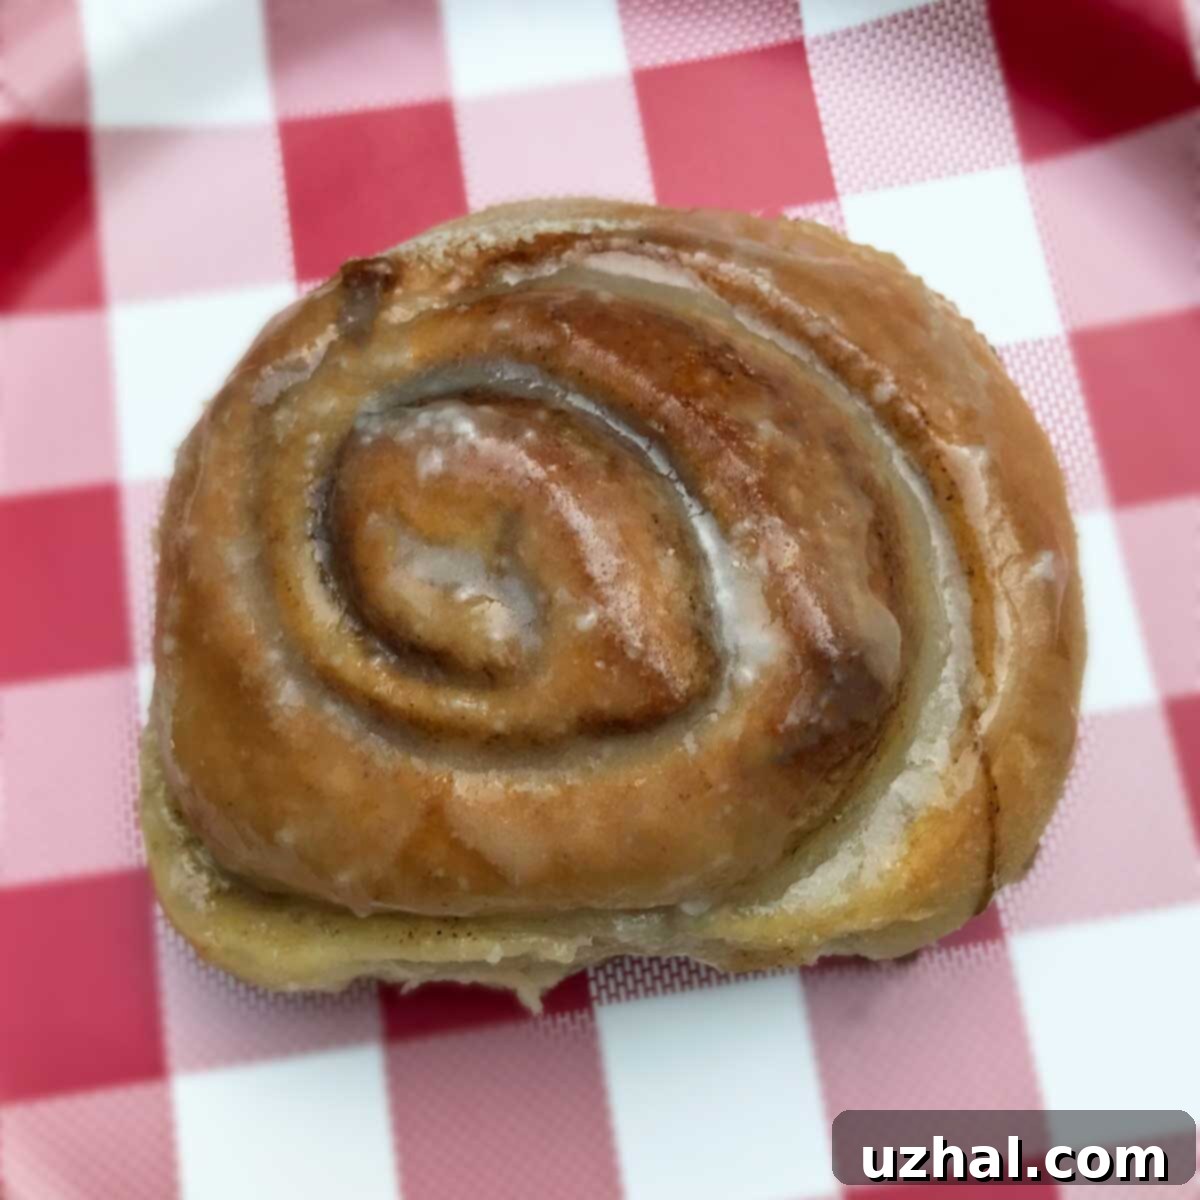
The Ultimate Make-Ahead Cinnamon Rolls: Your Guide to Stress-Free Mornings
Imagine waking up to the irresistible aroma of freshly baked cinnamon rolls, without the early morning rush and extensive prep work. Make-Ahead Cinnamon Rolls are the dream solution for anyone who loves a warm, gooey breakfast treat but doesn’t enjoy waking up at dawn to bake. This revolutionary approach allows you to prepare the dough the night before, letting it slowly rise in the refrigerator overnight. The next morning, all that’s left is to assemble, bake, and enjoy the sweet rewards. It’s truly the best of both worlds: homemade deliciousness with maximum convenience.
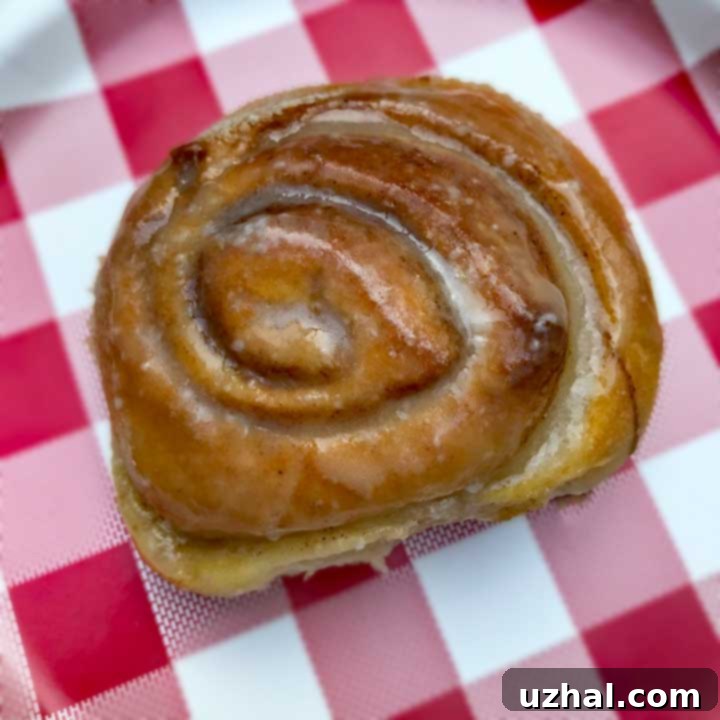
Transforming a Classic: Our Recipe Modifications for Perfection
The foundation of this incredible recipe traces back to a classic version from Domino Sugar, which many home bakers might recall finding on the side of their brown sugar boxes. While their original recipe yields wonderfully traditional cinnamon rolls, it requires an immediate rise time, adding an hour or more to your morning routine. Our modifications, however, are specifically designed to leverage the benefits of a slow, overnight fermentation, making the process much more manageable and the end product even better.
Here are the key changes we’ve implemented and why they make all the difference:
- Overnight Dough Chilling: The most significant alteration is chilling the dough overnight. This isn’t just about convenience; it’s about flavor and texture. A slow, cold rise allows the yeast to work more gradually, developing a deeper, more complex flavor in the dough. It also results in a more tender crumb and makes the dough incredibly easy to handle the next morning when it’s cold and firm.
- Doubling the Brown Sugar in the Filling: We’ve increased the amount of brown sugar in the filling to ensure a more pronounced caramel-like sweetness and a richer, stickier interior. This creates that irresistible gooey texture that everyone craves in a perfect cinnamon roll.
- Simplified Filling (No Pecans or Raisins): While we appreciate the addition of pecans and raisins, we’ve opted to eliminate them from the core recipe. This choice was made to accommodate diverse preferences (as some family members might politely pick them out!). However, these are fantastic optional additions if you and your family enjoy them, offering a delightful crunch or chewiness.
- Enriched Icing with Butter: A touch of butter added to the icing provides a luxurious richness and a smoother, more substantial body. This isn’t just a glaze; it’s a creamy, decadent topping that complements the warm rolls beautifully.
Why Make-Ahead Cinnamon Rolls Are a Game-Changer
Beyond the simple act of baking, opting for make-ahead cinnamon rolls transforms your baking experience and your mornings:
- Effortless Mornings: Say goodbye to early alarms just to start baking. With the dough ready and waiting in your fridge, you can enjoy a leisurely morning, simply taking out the dough, shaping, and baking. This is especially invaluable for busy weekdays, weekend brunches, or holiday mornings when you want to maximize time with loved ones.
- Superior Flavor and Texture: The slow, cold fermentation of the dough isn’t just convenient; it’s a secret to superior taste. The extended proofing time allows the yeast to develop more complex flavors, resulting in a richer, more nuanced dough. The cold also relaxes the gluten, leading to an incredibly tender and soft texture that melts in your mouth.
- Stress-Free Entertainment: Hosting breakfast or brunch becomes a breeze. You can do all the heavy lifting of dough preparation the day before, leaving you free to focus on other aspects of entertaining or simply relaxing on the day of.
- Easy Dough Handling: Cold dough is much less sticky and significantly easier to roll out and shape. This makes the assembly process smoother and less messy, even for novice bakers. You’ll appreciate this benefit when you haven’t had your first cup of coffee yet!
Half Batch Make Ahead Cinnamon Rolls: Perfect for Smaller Servings
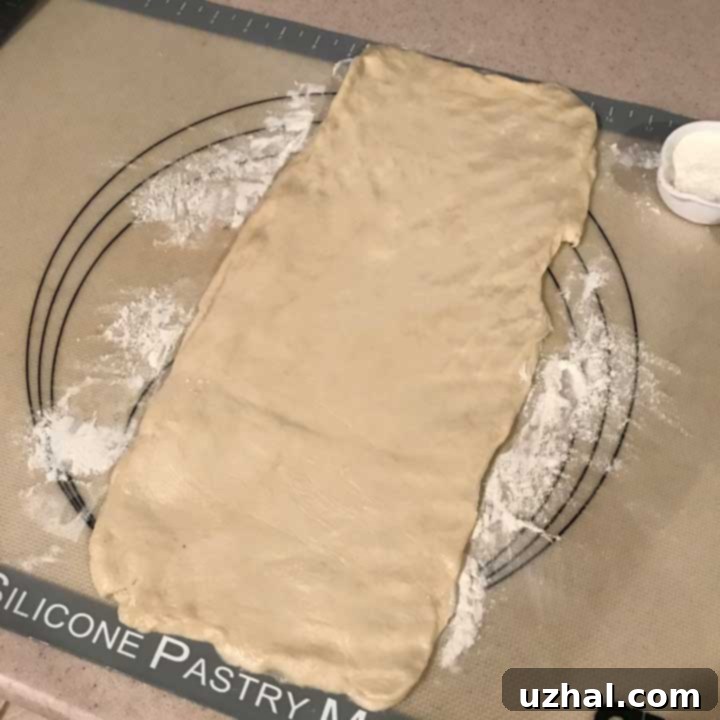
The full recipe below yields a generous dozen large cinnamon rolls, perfect for a crowd or if you want leftovers. However, it also scales down beautifully if you don’t need quite so many. If you’re cooking for a smaller household or simply want to try the recipe with a manageable amount, you can easily make a half batch. Just halve all the ingredient quantities for the dough, filling, and icing. When it comes to shaping, you’ll roll the dough into a narrower rectangle, approximately 6×14 inches, instead of the full 12×14. This will give you 6 perfectly sized rolls, and as mentioned, the cold dough is exceptionally easy to work with, making early morning shaping a pleasant task even before your first coffee.
A half batch conveniently fits into a standard 7×11 inch baking pan. Remember that the dough will undergo a significant rise during baking, so ensure there’s adequate space for expansion.
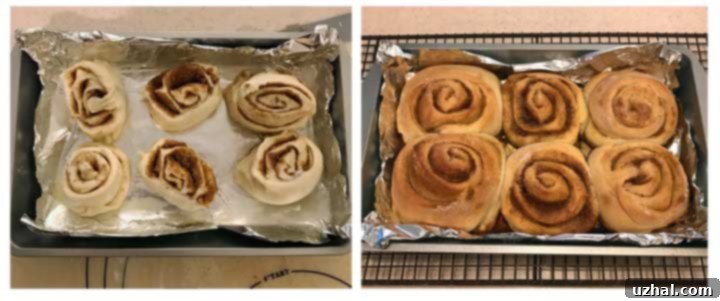
Pro Tips for Perfect Make-Ahead Cinnamon Rolls
Achieving bakery-quality cinnamon rolls at home is entirely possible with a few key techniques:
- Temperature Control: Ensure your water is warm (around 105-115°F or 40-46°C) to properly activate the yeast. For blending butter into the flour, cold butter works best to create those “coarse crumbs” that lead to a tender dough. However, for brushing the dough before the filling, melted butter is essential.
- Kneading for Texture: Whether by hand or with a stand mixer, knead the dough until it’s smooth and elastic. This develops the gluten, which is crucial for the rolls’ soft, chewy texture. Don’t overdo it, as the dough is meant to be very soft.
- Rolling the Dough: Aim for an even thickness when rolling your dough into the rectangle. This ensures that all your cinnamon rolls bake consistently. A pastry mat with measurements can be incredibly helpful. If your dough is a bit oily from the cold, you might not even need extra flour on your surface.
- Filling Distribution: Spread the melted butter and cinnamon-sugar mixture evenly over the dough, leaving a small border. This ensures every bite is packed with flavor.
- Cutting the Rolls: For neat, perfectly round spirals, use a serrated knife or even unflavored dental floss to cut the jelly roll into slices. A sharp, non-serrated knife can sometimes squash the dough, but a gentle sawing motion with a serrated knife or a quick pull with floss will give you clean cuts.
- Proofing for Fluffiness: After cutting and placing the rolls in the pan, allow them to rise in a warm place for about 30 minutes. This final proof is vital for achieving light and fluffy rolls. Look for them to visibly puff up.
- Don’t Overbake: Cinnamon rolls are best when slightly underbaked, leaving them soft and gooey. Bake until the edges are golden brown, but the centers still look tender.
- Icing Consistency: Adjust the milk in the icing incrementally until you reach your desired drizzling consistency. You want it thick enough to cling to the rolls but thin enough to spread.
Variations to Customize Your Cinnamon Rolls
While our base recipe is a proven winner, feel free to unleash your creativity and customize your make-ahead cinnamon rolls:
- Nutty Additions: If you enjoy them, add toasted chopped pecans or walnuts to the brown sugar filling for extra crunch and flavor.
- Fruity Twists: Incorporate plump raisins, dried cranberries, or finely diced dried apples into the filling for a fruity dimension.
- Citrus Zest: Grate some orange or lemon zest into the filling or the icing for a bright, refreshing aroma and taste.
- Cream Cheese Frosting: For an even richer topping, swap the simple icing for a classic cream cheese frosting. Beat together 4 oz (113g) softened cream cheese, 1/4 cup (56g) softened butter, 2 cups (240g) confectioners’ sugar, and 1-2 tablespoons milk or cream until smooth.
- Maple Glaze: For a different flavor profile, make a maple glaze by mixing confectioners’ sugar with maple syrup and a splash of milk.
- Spice it Up: Experiment with other warm spices like a pinch of nutmeg, cardamom, or allspice in addition to the cinnamon for a more complex spiced flavor.
Storage and Freezing Options
One of the many advantages of make-ahead recipes is their flexibility, especially when it comes to storage and freezing:
- Storing Baked Rolls: Once cooled, baked cinnamon rolls can be stored in an airtight container at room temperature for 2-3 days. Reheat briefly in the microwave or a warm oven for that fresh-from-the-oven experience.
- Freezing Baked Rolls: You can wrap individual baked and cooled cinnamon rolls tightly in aluminum foil and then place them in a freezer-safe bag. They will keep for up to 1-2 months. To serve, simply unwrap and heat in a preheated 350°F (175°C) oven for about 5-10 minutes, or microwave until warm.
- Freezing Unbaked Dough Spirals (Chef’s Secret!): This is a fantastic time-saving tip from Cookie Madness: after you’ve cut your jelly roll into spirals, arrange however many you need for immediate baking in your pan. For the remaining dough spirals, place them on a baking sheet lined with parchment paper and freeze until solid. Once firm, transfer them to an airtight freezer bag. The next time you crave cinnamon rolls, simply arrange the frozen dough spirals in a greased baking pan the night before, cover, and let them thaw and rise slowly in the refrigerator overnight. Wake up, preheat your oven, and bake! This method allows you to have fresh cinnamon rolls with minimal effort on demand.
Recipe

Make Ahead Cinnamon Rolls
Anna
Pin Recipe
Ingredients
Dough
- 2 large eggs
- ¾ cup warm water
- 1 packet active dry yeast (2 ¼ teaspoons)
- 3 ½ cups sifted all-purpose flour (440 grams)
- 1 teaspoon salt
- 2 Tablespoons granulated sugar (25 grams)
- 1 stick unsalted butter, cut into chunks (114 grams)
Filling
- ¼ cup butter (56 grams), melted
- ⅔ cup brown sugar (140 grams)
- 1 tablespoon cinnamon (can use more if you like)
Icing
- 2 teaspoons butter (10 grams), melted
- ¾ cup confectioners’ sugar (80 grams)
- 3 tablespoons milk
Instructions
-
Prepare the Yeast Mixture: In a medium-sized bowl, lightly beat the eggs with a fork. Add ¾ cup warm water (ensure it’s not too hot, typically 105-115°F or 40-46°C, to avoid killing the yeast) and the active dry yeast, stirring gently to help dissolve the yeast. Don’t worry if it doesn’t fully dissolve at this stage. Place this mixture in the refrigerator for 10 minutes to allow the yeast to bloom slightly in the cold environment.
-
Combine Dry Ingredients: Meanwhile, in a large mixing bowl (or the bowl of a stand mixer), combine the sifted all-purpose flour, salt, and granulated sugar. Add the cold unsalted butter, cut into chunks. Using a pastry blender, two forks, or your fingertips, cut the butter into the dry ingredients until the mixture resembles coarse crumbs. This technique helps create a tender, flaky dough.
-
Form the Dough: Make a well in the center of the flour mixture and pour in the refrigerated yeast-egg mixture. Stir with a wooden spoon or a spatula until all the ingredients are just combined and a shaggy dough forms. The dough will be quite loose and a little sticky at this point. Transfer the dough onto a lightly floured surface and knead gently until it becomes smooth and elastic, about 2 minutes. Alternatively, if using a stand mixer, attach the dough hook and knead on low speed for about 2-3 minutes.
-
First Rise (Overnight Chill): The dough should be smooth, elastic, but still very soft. Form the dough into a ball and place it in a lightly greased bowl, turning once to coat. Cover the bowl tightly with plastic wrap or a clean kitchen towel. Place the covered bowl in the refrigerator for at least 2 hours, or preferably overnight (for 8-12 hours). This slow, cold rise is crucial for flavor development and ease of handling.
-
Roll Out the Dough: The next morning, remove the chilled dough from the refrigerator. On a lightly floured surface or a pastry mat, roll the cold dough into a large rectangle, approximately 12×14 inches. If you are making a half batch, roll the dough into a 6×14-inch rectangle. The cold dough will be much easier to work with, requiring minimal flour on your surface.
-
Prepare and Apply Filling: In a small bowl, combine the brown sugar and cinnamon for the filling. Evenly brush the rolled-out dough with the ¼ cup melted butter, leaving a 1-inch border along one of the long sides. Generously sprinkle the brown sugar and cinnamon mixture over the butter, making sure to spread it evenly across the buttered surface. Starting from the short side (the 12-inch side for a full batch, or 6-inch side for a half batch), carefully roll the dough into a tight “jelly roll” shape. Once rolled, use a sharp serrated knife or unflavored dental floss to cut the roll into 1-inch slices.
-
Second Rise and Bake: Arrange the cut cinnamon roll slices on a greased baking sheet or in your prepared baking pan, leaving a little space between each roll for expansion. Cover the pan loosely with plastic wrap or a clean kitchen towel and allow the rolls to rise in a warm place for about 30 minutes, or until visibly puffy. While they are rising, preheat your oven to 350°F (175°C). If desired, generously sprinkle the tops of the rolls with a little extra granulated sugar before baking for a sparkling finish. Bake in the preheated oven for 25-30 minutes, or until the edges are golden brown and the centers are just set. Avoid overbaking to keep them soft and gooey. Allow the rolls to cool slightly on wire racks placed over wax paper before icing.
-
Prepare and Apply Icing: While the rolls are cooling slightly, prepare the icing. In a medium bowl, whisk together the 2 teaspoons melted butter, confectioners’ sugar, and milk until smooth and creamy. Adjust milk quantity as needed to achieve your desired drizzling consistency. Drizzle the luscious icing generously over the warm (but not hot) cinnamon rolls and serve immediately. Enjoy your homemade, stress-free make-ahead cinnamon rolls!
Notes
Storing Baked Rolls: Cooled, baked rolls can be wrapped in aluminum foil and stored in an airtight container at room temperature for 2-3 days, or individually frozen for up to 2 months. To serve, heat in a pre-heated 350°F (175°C) oven for about 5 minutes, or microwave until warm.
Tip from Cookie Madness – Freezing Unbaked Spirals: This clever trick allows you to enjoy fresh cinnamon rolls anytime! After cutting the jelly roll into rounds, arrange the number of rolls you need for baking. Place the remaining dough spirals on a parchment-lined baking sheet and freeze until solid. Once firm, transfer them to an air-tight freezer bag. The next time you wish to make cinnamon rolls, simply arrange the frozen dough spirals in a greased pan the night before, cover, and let them thaw and rise slowly overnight in the refrigerator. In the morning, wake up and bake as directed.
Indulge in the Magic of Make-Ahead Cinnamon Rolls
There’s nothing quite like the warmth and comfort of a homemade cinnamon roll, and this make-ahead recipe takes all the stress out of the process. By front-loading the preparation, you unlock a world of flavor, tenderness, and morning ease. Whether it’s for a special holiday breakfast, a leisurely weekend treat, or just to brighten an ordinary day, these make-ahead cinnamon rolls are sure to become a cherished recipe in your kitchen. Embrace the magic of overnight baking and savor every single bite of these perfect, gooey delights!
We encourage you to try this recipe and experience the difference for yourself. Don’t forget to share your baking adventures and any personal twists you add in the comments below!
