Quick & Easy Food Processor Cinnamon Rolls: Your Ultimate Guide to Fluffy, Homemade Perfection
For years, I relied on my trusty stand mixer for all my yeast bread endeavors. While effective, it always felt like a significant undertaking. Then, a culinary revelation struck: the kneading attachment on my food processor. This unassuming tool transforms dough from simple ingredients to a “smooth and elastic” masterpiece in record time, making homemade yeast breads, like these incredible food processor cinnamon rolls, surprisingly accessible. My latest experiment with this method has resulted in some of the lightest, fluffiest, and most satisfying cinnamon rolls I’ve ever made.

The Magic of Fast & Easy Cinnamon Rolls
This recipe takes one of our most beloved, time-tested cinnamon roll recipes, halves it for a more manageable batch, and ingeniously revamps it for the speed and efficiency of the food processor. The outcome? Perfectly baked rolls that are incredibly light and irresistibly fluffy, just as you’d dream a homemade cinnamon roll should be. Beyond the dough, the icing offers a delightful twist. Unlike traditional butter-based glazes, this version features cream cheese as its base, enriched with a touch of corn syrup and heavy cream. This unique combination ensures the icing remains lusciously soft and doesn’t harden as it cools, providing that delightful, melt-in-your-mouth texture reminiscent of high-quality packaged cinnamon rolls. Of course, you’re always welcome to use your favorite icing, but I highly recommend giving this one a try for its exceptional consistency and flavor profile.

Understanding the Dough: Ingredients and Technique
Let’s dive deeper into the star of the show: the dough. You might notice the egg measurements are a bit unconventional due to halving the original recipe. However, the inclusion of an extra egg yolk, alongside the carefully balanced proportions of milk, water, butter, and flour, creates an exceptionally forgiving and delightful dough to work with. The added yolk contributes to a richer flavor and a tender crumb, making these rolls truly stand out. During the initial rise, I generously coat the dough with a thin layer of oil. This simple step serves a dual purpose: it prevents the dough from sticking to the bowl and, more importantly, makes it wonderfully slick. When it’s time to punch down the dough, this slight oil coating means I can often skip the mess of a floured surface entirely. Instead, I can effortlessly press the dough directly onto my silicone mat, shaping it into a perfect rectangle with ease, streamlining the entire process from start to finish.
A Secret Ingredient for Unforgettable Cinnamon Rolls!
For those who love to elevate their baking, I have a special tip: a secret ingredient that truly transforms sweet yeast doughs. While it might require a bit of searching, if you can get your hands on McCormick Butter & Nut Extract (now sometimes labeled as “Cake Batter Flavor”), it’s an absolute game-changer. Using a tiny amount of this extract alongside a bit of vanilla, instead of just vanilla alone, adds an incredible depth and warmth to the dough. This particular extract has a potent flavor and a noticeable color, so moderation is key – a little goes a very, very long way. It imparts “a little something extra” that makes your cinnamon rolls, and even some cakes, irresistibly complex and delicious. I’ve found it challenging to locate in certain regions, like Chicago or Texas in the past, but it’s often available on Amazon or in grocery stores in specific areas like Pennsylvania, Florida, and North Carolina. If you find it, seize the opportunity; it’s worth the hunt for that extra layer of flavor!

Adapting and Enhancing Your Cinnamon Roll Experience
Since first developing this recipe, I’ve had a few updates and insights to share to make your baking even more versatile and enjoyable. Firstly, I’ve added an alternative icing recipe. I understand that cream cheese isn’t always on hand, and sometimes a different flavor profile is desired. This new option is just as delicious and ensures you can still enjoy beautifully iced cinnamon rolls regardless of your pantry stock. Secondly, it’s important to clarify that while this recipe highlights the efficiency of the food processor, it’s by no means a strict requirement. When I initially created these rolls, my food processor happened to be out and ready for action, inspiring the method. However, a stand mixer equipped with a dough hook works just as wonderfully and will yield equally fantastic results. The goal is delicious, homemade cinnamon rolls, and either tool will get you there. Choose the method that best suits your kitchen and comfort level!
Tips for Cinnamon Roll Success
Achieving bakery-quality cinnamon rolls at home is easier than you think with a few key tips:
- Yeast Activation: Ensure your milk and water mixture is at the perfect temperature (around 125°F or 50°C) to properly activate the yeast. Too hot, and it kills the yeast; too cold, and it won’t activate. This is crucial for a good rise.
- Don’t Over-Knead: While the food processor is fast, keep an eye on the dough. Over-kneading can result in tough rolls. Aim for a smooth and elastic texture, as described in the recipe, usually within 2-3 minutes in a food processor.
- Proofing Environment: A warm, draft-free spot is ideal for rising dough. If your kitchen is cool, you can use a slightly warmed oven (turned off!) or a sunny spot. Patience during proofing is rewarded with lighter, fluffier rolls.
- Even Spreading: When applying the filling, try to spread it as evenly as possible right to the edges of the dough rectangle. This ensures every bite has that delightful cinnamon-sugar swirl.
- Don’t Overbake: Overbaking is the enemy of soft cinnamon rolls. Bake until they are golden brown on top and cooked through, but still soft to the touch. The internal temperature should be around 200-205°F (93-96°C).
- Warm Icing Application: Icing warm rolls allows the glaze to melt slightly and seep into the nooks and crannies, enhancing the flavor and moisture.
Storage and Reheating
While these food processor cinnamon rolls are best enjoyed fresh and warm from the oven, you can certainly store and reheat them to savor later:
- Countertop Storage: Once completely cooled, store leftover cinnamon rolls in an airtight container at room temperature for up to 2-3 days.
- Refrigeration: For longer storage, refrigerate them in an airtight container for up to 5 days.
- Freezing: Un-iced rolls can be frozen for up to 1 month. Wrap individual rolls tightly in plastic wrap, then place them in a freezer-safe bag or container. Thaw at room temperature before warming and icing. You can also freeze iced rolls, but the icing might change texture slightly upon thawing.
- Reheating: For the best experience, reheat individual rolls in the microwave for 15-30 seconds until warm and soft. Alternatively, warm them in a preheated oven at 275°F (135°C) for 10-15 minutes, covering them lightly with foil to prevent drying out.
- Baked All Butter Pie Crust
- Quick Cinnamon Rolls With No Yeast
- Wheat Free Oat Nut Chocolate Chip Cookies
- Butter Crunch Lemon Cheese Bars
- Pineapple Cheesecake Squares
Recipe

Food Processor Cinnamon Rolls
Cookie Madness
Pin Recipe
Ingredients
Dough
- ¼ cup milk skim, reduced fat or whole all work
- ¼ cup water
- 4 tablespoons butter I used unsalted
- ½ teaspoon vanilla or vanilla butter & nut extract if you can find it!
- 1 ¾ to 2 cups unbleached all-purpose flour
- 1 ¼ teaspoons of instant quick rising yeast about half a packet
- 2 ½ tablespoons sugar
- ¾ teaspoon salt
- 2 tablespoons lightly beaten egg
- 1 egg yolk
Filling
- ½ cup packed light brown sugar
- ½ tablespoon cinnamon
- 2 teaspoons melted butter
Icing (See notes for a second version without cream cheese)
- 4 ounces cream cheese softened
- 1 tablespoon corn syrup
- ½ cup confectioners’ sugar
- ½ teaspoon vanilla extract
- 1 tablespoon heavy cream
Instructions
-
Put the butter in a saucepan and allow it to melt over medium heat. Once it’s almost fully melted, add the milk and water. Bring mixture to a simmer, then remove from heat and let cool to 125 degrees F. Add the vanilla.
-
Meanwhile, combine 1 cup of the flour, yeast, sugar, egg and salt in a bowl. Add the warm milk mixture, then add remaining flour ¼ cup at a time, stirring to make a soft, slightly sticky dough.
-
Put the ball of dough into a food processor fitted with a kneading hook and let the processor knead the dough until smooth and elastic. Note: The processor works pretty quickly. My dough is done in less than 3 minutes. Check dough, scraping it a bit, every 40 seconds or so to make sure it’s not too warm from friction of processor.
-
Scrape the dough into a well-oiled bowl and roll it around so it’s coated with a thin layer of oil. Cover and let rise until doubled in bulk (about 45 minutes with the quick rising yeast).
-
After the dough has doubled, press it down and turn it out onto a lightly floured work surface. I’ve found that if the dough is coated with oil, I don’t need to use flour, I just press the dough right down onto a clean surface (I use a big silicone mat). Shape the dough into a rectangle that is 12×8 inches.Mix together the filling ingredients and sprinkle the filling evenly over the dough. Roll the dough, beginning with the 8 inch side, into a tight spiral.
-
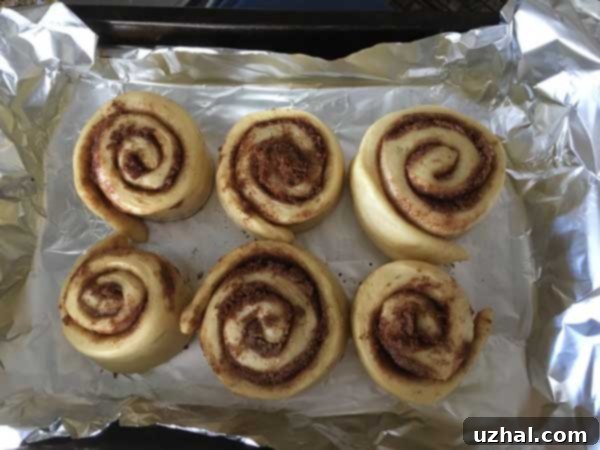
Line a 9×13 inch metal pan with nonstick foil. Cut the spiral into 6 equal pieces and set in the pan cut side by, spaced about an inch apart. Cover with plastic wrap and place in a warm draft free spot until doubled in bulk (another 45 minutes to an hour with the quick rising yeast).
-
Preheat oven to 350 degrees and adjust oven rack to the middle position.
-
Bake the rolls for 25 to 30 minutes or until golden brown.
-
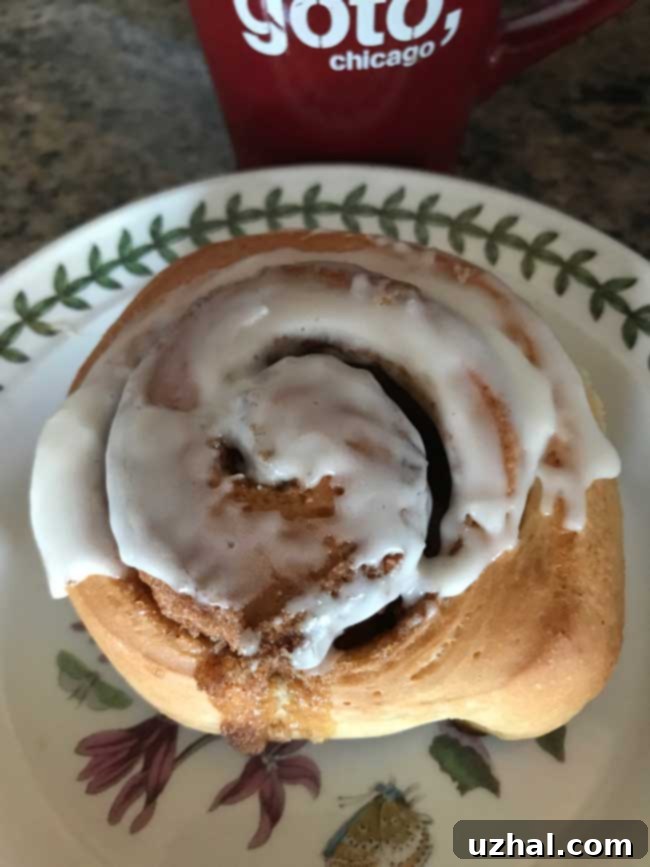
To make the icing, beat the cream cheese until smooth, then beat in corn syrup, vanilla and sugar. Add cream until icing is smooth and creamy. Spread icing over rolls while still warm.
Notes
