Mastering The New York Times No-Knead Bread: Classic and Speedy Versions for Perfect Homemade Loaves
Few recipes have captured the imagination of home bakers quite like Jim Lahey’s revolutionary No-Knead Bread, famously published by The New York Times. What began as a simple technique quickly became a global phenomenon, transforming the way countless individuals approach bread making. For years, this recipe has been a staple in my kitchen, consistently delivering a loaf that rivals artisanal bakery offerings with surprisingly minimal effort. Its appeal lies in its simplicity: no laborious kneading, just a magical combination of time, basic ingredients, and a hot Dutch oven. This comprehensive guide explores both the original, flavor-rich version and the convenient “speedy” adaptation, ensuring you can enjoy a perfect, crusty loaf whenever the craving strikes.
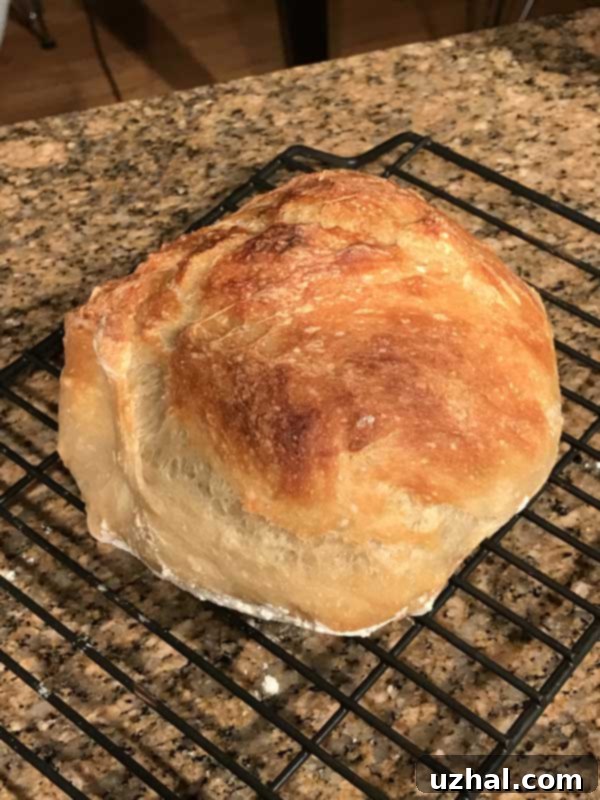
Whether you’re new to baking or a seasoned pro looking for an effortlessly impressive bread, the No-Knead method promises a rewarding experience. The process is straightforward, requiring just flour, water, yeast, and salt, along with ample time for the dough to develop its character. The result is a bread that is not only delicious but also boasts a professional-grade appearance and texture, perfect for any meal or occasion. Below, you’ll see a photo of my latest creation, a beautiful loaf crafted using the Speedy No-Knead Bread recipe.

The Genius Behind No-Knead Bread: Jim Lahey’s Revolutionary Method
The innovation introduced by Jim Lahey, owner of Sullivan Street Bakery, fundamentally changed home baking. His No-Knead Bread recipe demystifies the bread-making process, proving that exquisite results don’t require extensive kneading or advanced techniques. The secret lies in a very wet dough and a long, slow fermentation period. This extended rest allows the gluten to develop naturally, creating a strong network that gives the bread its characteristic chewiness and open crumb structure, all without any manual effort. This method harnesses the power of time and natural processes, requiring minimal hands-on work from the baker.
Furthermore, baking the bread in a preheated Dutch oven is a critical component of Lahey’s method. This technique traps steam around the dough during the initial baking phase, which keeps the crust soft and pliable, allowing the loaf to expand fully before it sets. This burst of oven spring is essential for a lofty loaf. As the baking continues, the steam dissipates, and the high, even heat of the Dutch oven works its magic, producing that undeniably crisp, crackly, and deeply caramelized crust that is the hallmark of artisanal bread. The Dutch oven acts as a miniature, steamy oven, replicating conditions found in professional bakeries.
Original vs. Speedy: Choosing Your No-Knead Adventure
While the core principles remain the same, the No-Knead Bread recipe has evolved into different versions to suit various schedules and preferences. The two most popular variations are the original Jim Lahey recipe and the quicker “speedy” version. Both yield fantastic results, but understanding their differences can help you choose the best approach for your baking needs, balancing flavor development with convenience.
The Classic Jim Lahey No-Knead Recipe: Deep Flavor, Slow Fermentation
The original New York Times No-Knead Bread recipe is renowned for its depth of flavor, which develops over an extended fermentation period. Typically, the dough ferments at room temperature for 12 to 18 hours, or even longer in a cooler environment. This slow rise allows the yeast to work gradually, producing a complex array of organic acids and esters that contribute to a more pronounced, slightly tangy, and wonderfully nuanced flavor profile. The longer fermentation also results in a more robust gluten structure, contributing to an even airier crumb. If you have the foresight and patience to plan a day ahead, the original recipe is highly recommended for its superior taste and aroma, truly showcasing the power of time in bread making. It’s an experience that truly rewards patience.
The Speedy No-Knead Version: Convenience Without Compromise
For those moments when a sudden craving for fresh bread strikes, or when time is of the essence, the “speedy” no-knead bread version is an absolute game-changer. While the original Jim Lahey No Knead Bread recipe has a bit more flavor due to its longer fermentation, the speedy version is wonderful as well, offering an excellent alternative that doesn’t sacrifice quality. It’s usually what I make since I don’t always think about making it a day ahead, providing a quick path to homemade goodness. This adaptation accelerates the fermentation process, often by using warmer water and sometimes a slightly increased amount of yeast. This allows the dough to be ready for baking in just a few hours, typically between 3 to 5 hours, depending on the ambient temperature and specific recipe variations.
While the speedy version might offer a slightly less complex flavor compared to its slow-fermented counterpart, it still delivers an exceptionally delicious loaf with all the signature characteristics: a perfect crust and a delightful crumb. The convenience of being able to prepare and bake a fantastic loaf on the same day makes it an incredibly popular choice for busy individuals or spontaneous baking sessions. It’s my go-to when I haven’t planned ahead, and it never disappoints. The magic of the Dutch oven ensures that even with a shorter fermentation, the texture remains outstanding, making it a truly versatile and reliable recipe.
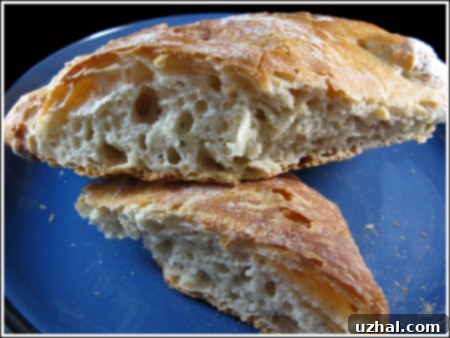
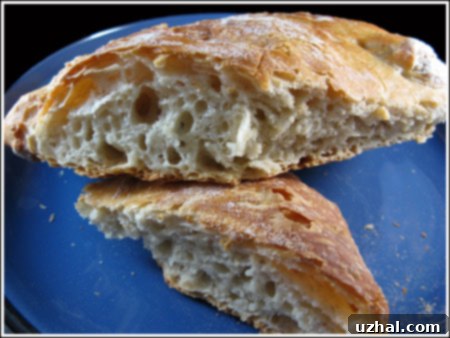
Here’s another glimpse of the exceptional bread you can create with these methods, adapted from Jim Lahey’s original recipe for The New York Times, highlighting the beautiful internal structure.

Achieving That Perfect Crust and Crumb: A Taste of Artisan Quality
One of the most compelling reasons to bake No-Knead Bread is its unparalleled texture, which often evokes memories of artisan bakeries like La Brea. The bread reminds me of some bread I had years ago from La Brea bakery, consistently producing a loaf that excels in both crust and crumb, areas where many other home baking methods fall short. It has a good flavor, but the best feature is its crisp and crackly crust—a characteristic I was never able to achieve with other bread recipes and what I like most about bread. Despite an occasional loaf spreading a little bit more than hoped, it still tastes excellent and boasts a light and slightly chewy (but not overly so) crumb, making every bite a delight.
The Irresistible Crackly Crust
The hallmark of a truly great bread is its crust, and the No-Knead method delivers perfection every time. The intense, consistent heat generated by baking in a preheated Dutch oven, coupled with the trapped steam, creates an incredibly thin, crisp, and wonderfully crackly exterior. This is a texture often elusive in home baking, where ovens typically lack the steam injection capabilities of commercial bakeries. The steam prevents the crust from forming too quickly, allowing the dough to rise maximally (known as oven spring) before drying out and crisping to a deep golden-brown. Each bite offers a satisfying crunch and a rich caramelized flavor, a testament to the effectiveness of this simple yet brilliant technique.
A Light, Chewy, Open Crumb
Beyond the magnificent crust lies an equally impressive interior: a light, airy, and slightly chewy crumb. The long fermentation, whether in its original slow form or the accelerated speedy version, allows for significant development of flavor and an open, irregular cellular structure. This creates a bread that is substantial enough to hold up to hearty toppings but delicate enough to melt in your mouth. The chewiness is just right – present but not overly dense or tough – making it incredibly satisfying. The subtle yeasty flavor, enhanced by the fermentation, complements a wide range of meals, from simple sandwiches and bruschetta to elaborate charcuterie boards or as a simple accompaniment to soups and stews.
Troubleshooting Common Issues: Preventing Your Loaf from Spreading
Occasionally, a loaf might spread a bit more than desired, resulting in a flatter profile rather than a tall, rounded boule. While this doesn’t diminish the taste, it can affect the aesthetic. This issue is often related to the dough’s hydration level or the shaping process. If your dough is too wet, it might not hold its shape as well, especially if your flour has a lower protein content. Ensuring you use the correct flour-to-water ratio as specified in your chosen recipe is crucial. Additionally, a strong final shaping can help create surface tension that encourages the dough to rise upwards rather than spreading outwards. A gentle but firm hand during the final fold and transfer to the Dutch oven, minimizing unnecessary handling, can make a significant difference in achieving a beautifully rounded loaf.
The Indispensable Dutch Oven: Your Secret Weapon for Perfect Bread
The Dutch oven isn’t just a pot; it’s arguably the most critical piece of equipment for achieving the signature No-Knead Bread results. Its heavy construction and tight-fitting lid create a miniature oven environment that perfectly mimics professional bakery conditions. This enclosed space traps the steam released by the dough as it bakes, which is essential for developing that coveted thin, crisp crust and achieving maximum oven spring. Without the Dutch oven, the bread would likely develop a much thicker, drier crust and a less impressive rise, lacking the artisan quality that defines this recipe.
Why a Dutch Oven is Crucial for No-Knead Bread
When you preheat the Dutch oven to a very high temperature, it stores a tremendous amount of heat. This radiant heat instantly surrounds the dough when it’s placed inside, providing an immediate surge of energy that causes rapid expansion. The trapped moisture during the initial baking phase prevents the crust from setting prematurely, allowing the loaf to expand beautifully and develop an open crumb structure. This steamy environment is critical for creating a tender crust that can stretch as the bread rises. Once the lid is removed for the final baking phase, the direct heat can then caramelize the crust to a deep, golden-brown perfection, adding both color and incredible texture.
Sizing Up Your Dutch Oven: Finding the Perfect Fit
I personally rely on a Le Creuset 7 ¼-Quart Round French Oven, which consistently produces excellent loaves. Its generous size is ideal for standard-sized recipes, allowing the bread to bake evenly without crowding. However, the size of your Dutch oven can influence the shape and size of your final loaf. A larger pot, while versatile, might allow a standard recipe loaf to spread a bit more, resulting in a slightly flatter appearance. I’m often tempted to invest in a smaller pot, perhaps a 3-quart or 4-quart round Dutch oven, specifically for baking smaller, possibly rounder loaves. This would be perfect for yielding a taller, more compact boule, or even for experimenting with half-batch recipes, offering greater control over the final shape.
For most home bakers, a 5-quart or 6-quart round Dutch oven is an excellent all-around choice. It provides sufficient space for a standard loaf while still promoting a good, rounded shape. If you prefer oval loaves, an oval-shaped Dutch oven is also available and works wonderfully for creating baguettes or oblong artisan breads. The key is to ensure the pot is oven-safe to at least 450-500°F (230-260°C) and has a snug-fitting, heat-proof lid. Consider the diameter and depth in relation to the dough volume you typically work with.
Beyond Le Creuset: Other Excellent Options for Dutch Ovens
While Le Creuset is a premium brand known for its exceptional quality, aesthetic appeal, and durability, many other excellent Dutch oven options are available at various price points. Brands like Lodge offer incredibly robust and affordable cast iron Dutch ovens that perform just as admirably for this recipe, proving that you don’t need to break the bank for quality results. Staub is another high-end contender, often praised for its superior heat retention and self-basting spikes. Even more budget-friendly options from brands like Cuisinart or Amazon Basics can yield fantastic results, as long as they meet the critical criteria of being heavy-bottomed, oven-safe, and having a tight-fitting lid. Investing in a good quality Dutch oven is an investment in countless delicious homemade bread loaves for years to come.
Proper care of your cast iron or enameled cast iron Dutch oven will ensure it lasts a lifetime. For enameled pots, avoid abrasive cleaners that can scratch the surface and sudden temperature changes that can cause thermal shock. For raw cast iron, regular seasoning with oil is key to maintaining its non-stick properties and preventing rust, ensuring it remains a reliable tool in your kitchen arsenal.
Tips for No-Knead Bread Success: Enhancing Your Baking Journey
- Use Good Quality Flour: While all-purpose flour works, a good quality bread flour (with higher protein content) will provide the necessary protein for stronger gluten development, resulting in a better crumb structure and rise.
- Accurate Measurements: While no-knead is forgiving, precise measurements, especially of water, can significantly impact the dough’s consistency and final texture. Use a kitchen scale for best accuracy.
- Temperature Matters: Room temperature significantly affects fermentation time. Adjust your expectations accordingly: warmer rooms mean faster rises, cooler rooms mean slower. Don’t rush it; watch the dough, not the clock.
- Don’t Skimp on Proofing: Allow your dough to proof fully. It should be bubbly and more than doubled in size for the first rise, and light and airy (often with visible bubbles on the surface) for the second proof. An under-proofed dough will be dense, while an over-proofed one might collapse.
- Preheat Thoroughly: Ensure your Dutch oven is fully preheated in the oven for at least 30 minutes, ideally an hour, before baking. This is crucial for that initial burst of steam and heat, which is key to a superior crust and oven spring.
- Handle with Care: When transferring the delicate, airy dough to the hot Dutch oven, work quickly but gently to avoid deflating it. Parchment paper is an invaluable aid here, allowing you to lift and drop the dough without direct contact.
- Cool Completely: Resist the urge to slice into your bread immediately after it comes out of the oven. Allowing it to cool on a wire rack for at least an hour (or longer) allows the internal structure to set and steam to escape, preventing a gummy or doughy texture.
Conclusion: Bake Your Own Artisan Loaf Today!
The New York Times No-Knead Bread recipe, in both its original and speedy iterations, is nothing short of culinary magic. It truly empowers anyone to bake a professional-quality artisan loaf right in their own kitchen with minimal effort, transforming basic ingredients into something extraordinary. The satisfaction of pulling a golden, crusty, fragrant loaf from your oven, knowing you made it yourself, is immense and deeply rewarding. From its crisp, crackly crust to its light, chewy crumb, this bread delivers on every promise of an authentic bakery experience. Whether you’re making it for a special occasion, to impress guests, or simply to elevate your everyday meals, it’s a recipe that will undoubtedly earn a permanent spot in your repertoire. So grab your ingredients, preheat your Dutch oven, and get ready to experience the joy and deliciousness of perfect homemade bread!
- Olanda Banana Chocolate Chip Cake
- Make Ahead Cinnamon Rolls
- No Knead Apple Spice English Muffins
- Small Batch Sourdough English Muffins
- Cornmeal Buttermilk Biscuits
