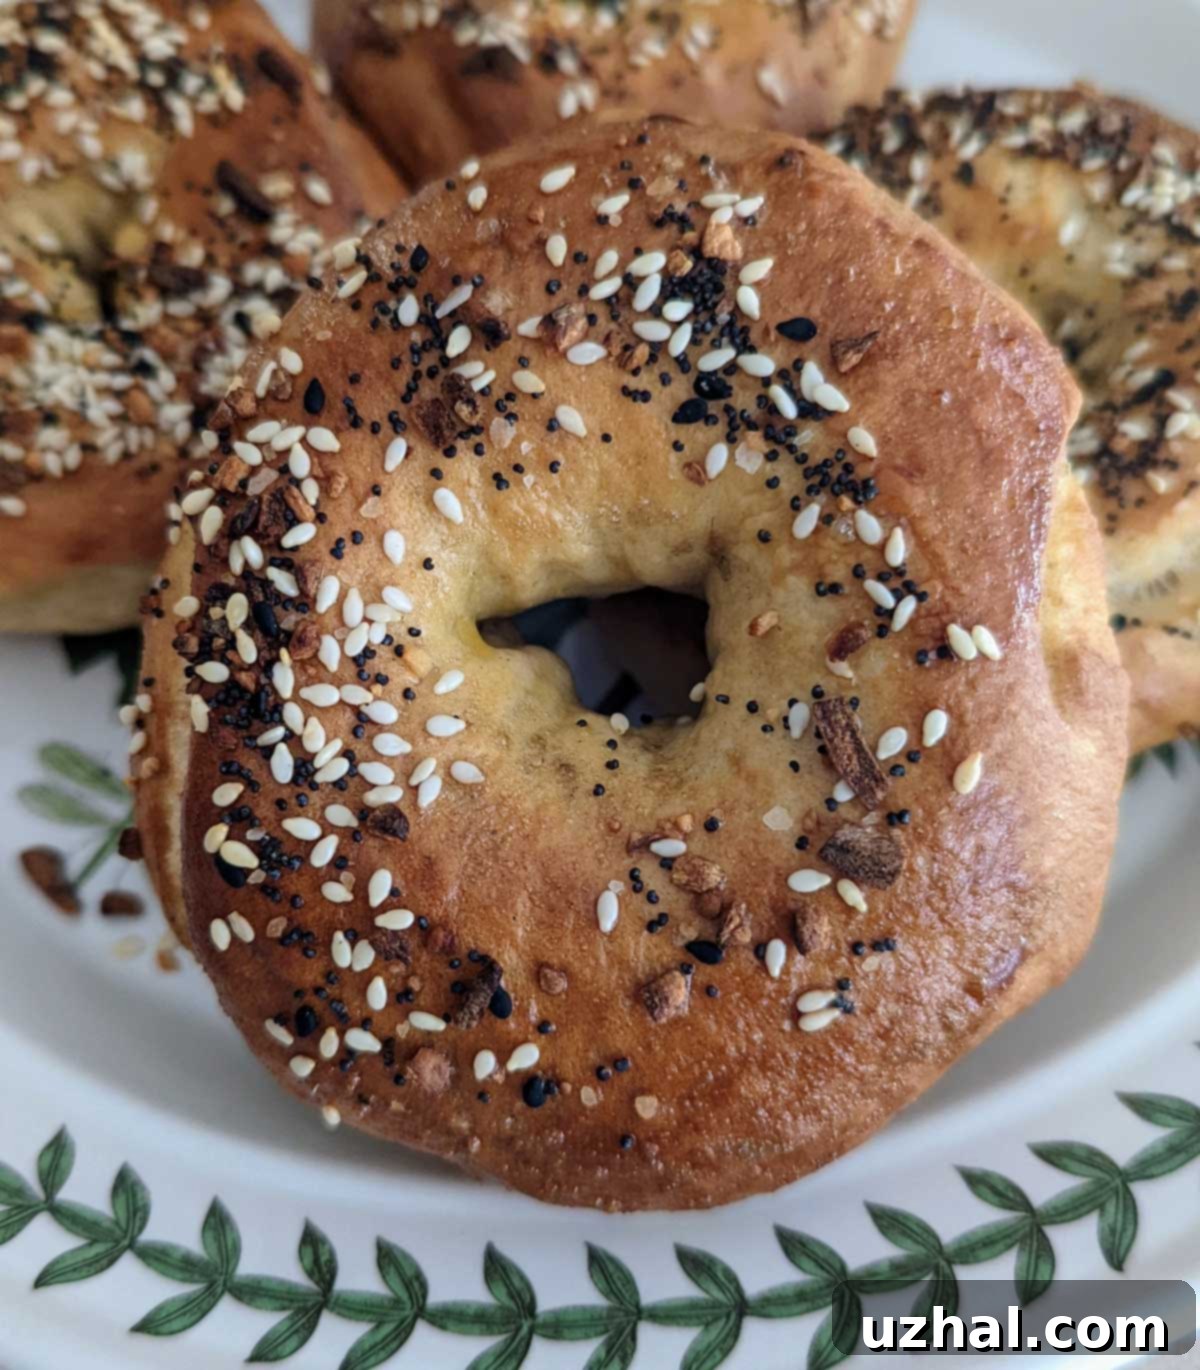
Mastering Homemade Bagels: An Easy Recipe for Chewy, Flavorful Perfection
Embarking on the journey of making homemade bagels is a deeply rewarding culinary adventure. Over the years, I’ve experimented with countless recipes, delving into the intricacies of various ingredients like barley malt syrup, non-diastatic malt powder, and specialized high-gluten flour. I’ve also tried different techniques, including extended fermentations designed to mimic the complex flavors of artisanal bakeries. While exploring these “tricks of the trade” has been fascinating, I’ve consistently found that my absolute favorite bagels come from a remarkably simple and straightforward recipe. This particular method, originally adapted from a Good Housekeeping publication, stands out because it doesn’t require any obscure or hard-to-find ingredients, making it incredibly accessible for the home baker. If you have a stand mixer equipped with a dough hook, you’re already halfway to bagel bliss.
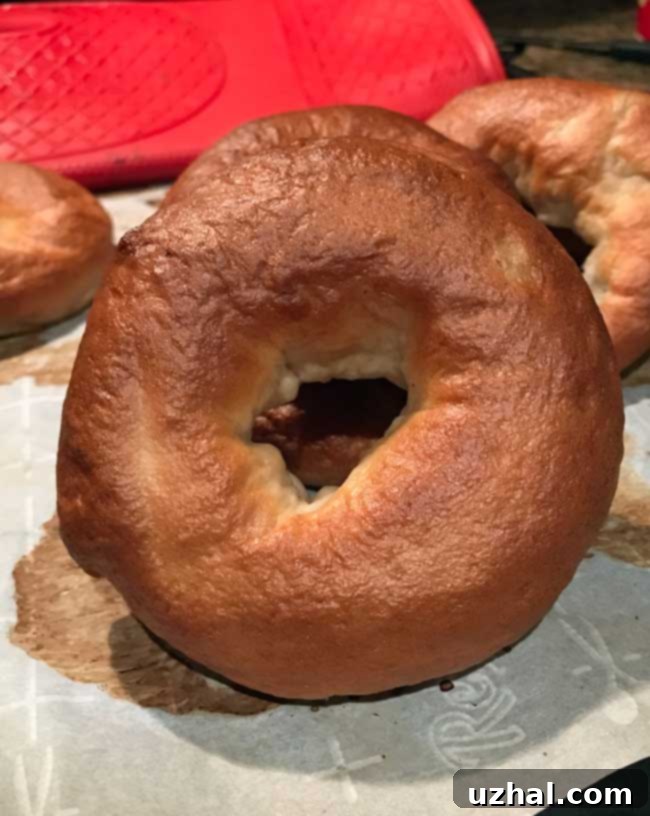
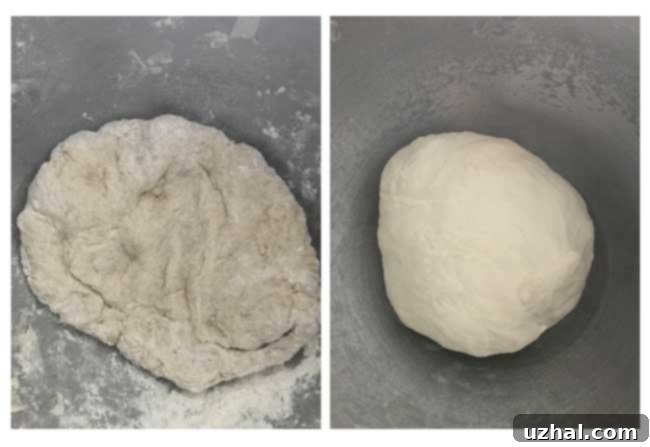
These bagels have become a beloved staple in our family. While they may not boast the exact characteristics of “authentic New York style” bagels—a title often reserved for those boiled in malt water and baked in specific ovens—they nonetheless deliver a truly satisfying experience. They are wonderfully chewy, bursting with flavor, and serve as the perfect canvas for a myriad of toppings. Whether you prefer a classic spread of cream cheese and lox, a hearty slather of peanut butter, or any other creative combination, these bagels are sure to delight. The secret to their incredible texture, much like many yeast-based breads, lies in achieving the perfect flour-to-liquid ratio. The dough needs to be quite stiff, transitioning from a shaggy mix to a firm, smooth consistency as shown in the progression of the accompanying images.
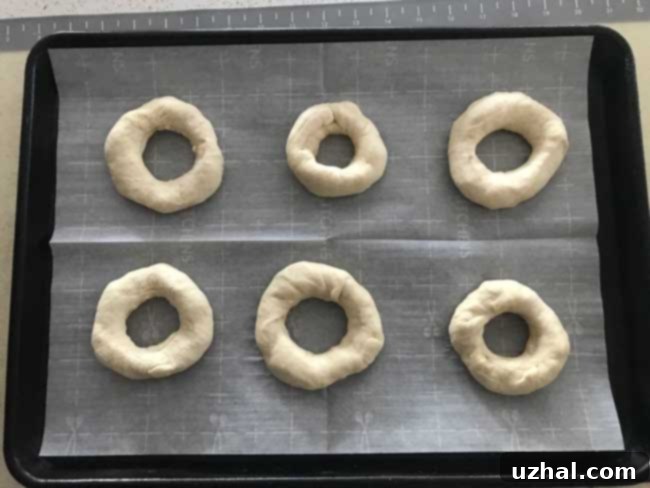
Shaping bagels is an art that comes with a little practice, but it’s a skill easily mastered. There are primarily two popular methods. Some bakers prefer the “snake method,” where they roll out the dough into a long rope, then join the ends to form a closed loop. This technique creates a perfectly round bagel with a distinct seam. My personal preference, however, is the “hole-punch method.” I start by forming the dough into smooth, taut balls, and then I simply poke a hole directly through the center using my finger. From there, I gently twirl the dough around my finger to enlarge and even out the hole. Ultimately, the best method is the one that feels most comfortable and intuitive to you. A key indicator of properly hydrated dough is its texture: if the dough is just right – firm and slightly tacky but not sticky – you shouldn’t need any additional oil or flour to prevent it from adhering to your work surface or hands, ensuring a clean and efficient shaping process.
The Secret to Chewy Perfection: Honey and Molasses Boil (No Baking Soda Needed!)
One of the primary reasons this recipe has earned its status as my “favorite bagel” is its unique approach to the boiling stage. Unlike many recipes that call for a significant amount of baking soda in the boiling water bath, this method opts for a tablespoon each of honey and molasses. This simple substitution makes a noticeable difference. I find the honey and molasses mixture not only more convenient to work with but also, arguably, contributes to a subtly superior flavor profile. The sugars in the honey and molasses caramelize beautifully during boiling and baking, giving the bagels a slightly sweeter, richer crust and that signature chewy texture without the slightly metallic aftertaste some associate with baking soda. This gentle caramelization also helps in achieving that beautiful golden-brown exterior.
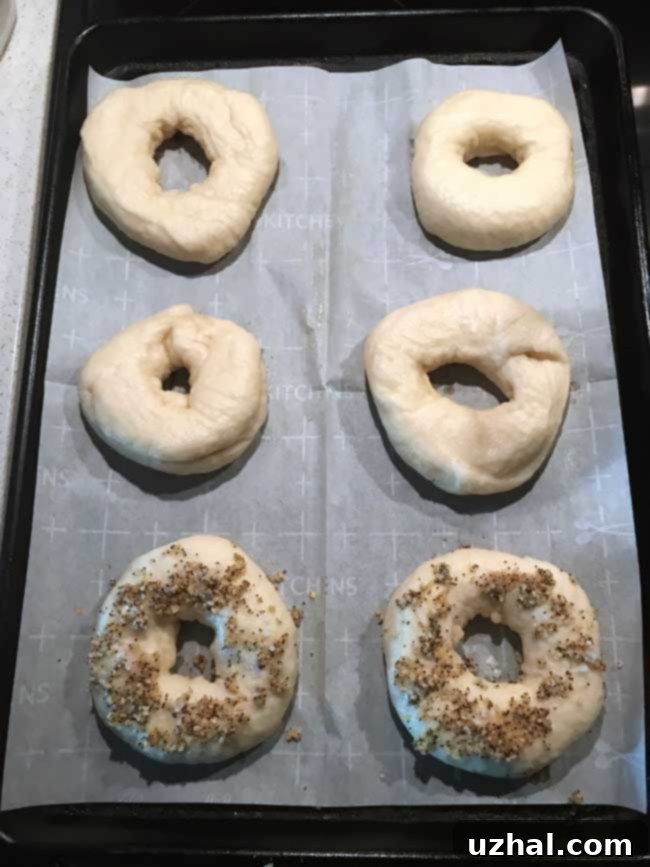
Once your delectable homemade bagels have cooled, proper storage is key to maintaining their freshness. Simply place them in an airtight freezer bag, ensuring as much air is removed as possible, and store them in the freezer. When you’re ready to enjoy one, a quick toast will bring it back to life, offering that perfect chewy interior and slightly crispy exterior.
An Evolving Journey: Favorite Bagels Update & Alternative Recipes
While this recipe remains a steadfast favorite, my culinary curiosity is always piqued by new techniques and variations. I recently delved into King Arthur Baking Company’s A Dozen Simple Bagels recipe, and I must admit, they presented a slight edge in taste and texture. I adapted their recipe by halving the ingredient quantities, but crucially, I stuck with my preferred honey and molasses water bath for the boil, as detailed below. The primary distinction of the King Arthur recipe, and its only real “downside” for those seeking instant gratification, is the requirement for an overnight pre-ferment. This involves mixing a small portion of flour, water, and yeast the day before you plan to bake, allowing it to develop flavor and strength over several hours. This extra step, while adding to the total preparation time, undeniably contributes to a deeper, more complex flavor in the final bagel. For those with a little extra planning time, it’s a worthwhile experiment to elevate your bagel game even further.
Tips for Bagel Baking Success
Achieving the Perfect Dough Consistency
The foundation of a great bagel is its dough. It should be firm, almost stiff, which is why a stand mixer with a dough hook is such a valuable tool for this recipe. A stiff dough is crucial for developing the proper gluten structure that gives bagels their characteristic chewiness. If your dough feels too sticky, add flour one tablespoon at a time until it pulls cleanly away from the sides of the bowl during kneading. Conversely, if it seems too dry, a tiny bit of water can be added. Knead until the dough is smooth and elastic—this could take 5-8 minutes in a stand mixer, but will take longer if kneading by hand. This ensures a strong gluten network, preventing your bagels from being too dense or crumbly.
Shaping Techniques: Your Choice
- Hole-Punch Method (My Preference): Roll each portion of dough into a smooth ball. Using a floured finger or thumb, carefully poke a hole through the center of the ball. Gently stretch and twirl the dough around your finger, widening the hole to about 2 inches in diameter. Don’t worry if it seems too large; the holes will shrink significantly during boiling and baking.
- Snake Method: Roll each dough portion into a rope about 8-10 inches long and ¾ inch thick. Taper the ends slightly. Bring the ends together to form a circle, overlapping them by about ½ inch, and pinch firmly to seal. Ensure the seal is strong to prevent the bagel from opening up during boiling.
Regardless of the method, aim for uniformly shaped bagels to ensure even cooking. Practice makes perfect, and even imperfectly shaped bagels will still taste delicious!
The Importance of the Boil
The boiling step is not merely for aesthetics; it’s fundamental to a bagel’s unique texture. Boiling gelatinizes the starches on the surface of the dough, which sets the crust and prevents the bagels from rising too much in the oven. This creates the dense, chewy interior and slightly crisp, shiny exterior. The honey and molasses in the boiling water add a subtle sweetness and contribute to that beautiful deep brown color. Ensure the water is simmering, not at a rolling boil, to prevent the bagels from cooking too quickly on the outside. Two minutes per side is usually ideal.
Baking to Golden Perfection
Preheat your oven to a high temperature, typically 450°F (232°C). This high heat helps to quickly set the crust and promote a final burst of oven spring. Baking until golden brown and checking the internal temperature (around 205-210°F or 96-99°C) ensures they are thoroughly cooked. For an extra shine and a better surface for toppings, consider brushing the boiled bagels with an egg wash (one egg beaten with a tablespoon of water) before baking.
Recipe: Our Favorite Chewy Homemade Bagels

Favorite Homemade Bagels
Recipe adapted from Good Housekeeping and Cookie Madness
Pin Recipe
Ingredients
For the Bagel Dough:
- 2 to 2 ½ cups bread flour (approximately 250-330 grams, depending on humidity and desired dough stiffness; using a scale for flour provides the most accurate results)
- 1 ½ teaspoons fine sea salt
- 1 tablespoon plus 1 teaspoon granulated sugar
- ½ packet instant yeast (approximately 1 ⅛ teaspoon, or one standard packet of active dry yeast proofed)
- ½ cup plus 2 tablespoons very hot tap water (approximately 5 ounces or 140-150ml; hot but not scalding)
- 2 tablespoons milk (whole milk preferred for richness)
For the Boiling Solution:
- 12 cups water
- 1 tablespoon honey
- 1 tablespoon mild molasses (do not use blackstrap molasses, which is too bitter)
Instructions
-
Prepare the Dough: In the bowl of a stand mixer (or a large mixing bowl if kneading by hand), combine 250 grams (about 2 cups) of the bread flour with the salt, sugar, and instant yeast. Whisk these dry ingredients thoroughly to ensure even distribution. Next, pour in all 5 ounces of very hot tap water and the 2 tablespoons of milk. Use a sturdy spoon or spatula to stir the mixture by hand until a soft, shaggy dough begins to form. At this point, gradually add the remaining flour, one tablespoon at a time, continuing to mix until the dough becomes stiff enough to be properly kneaded.
-
Knead the Dough: Attach the dough hook to your stand mixer. Knead the dough on medium-low speed for 5 to 8 minutes, or until it transforms into a smooth, elastic, and non-sticky ball. The dough should be notably stiff and should pull away cleanly from the sides of the mixing bowl as the machine works it. If kneading by hand, turn the dough out onto a lightly floured surface and knead vigorously for 10-15 minutes until smooth and elastic.
-
First Rise (Bulk Fermentation): Once the dough is perfectly smooth and elastic, you have a couple of options for its first rise. You can simply cover the stand mixer bowl tightly with plastic wrap. Alternatively, for easier cleanup, transfer the dough to a separate, lightly greased bowl, turning it once to coat, and then cover it with plastic wrap.
-
Proof the Dough: Allow the dough to rise in a warm, draft-free place for approximately 45 minutes to 1 hour, or until it has visibly doubled in bulk. The exact time may vary depending on the temperature of your kitchen.
-
Shape the Bagels: Gently punch down the risen dough to release the air. Transfer it to a lightly floured surface and divide it into either 4 (for larger bagels) or 6 (for standard-sized bagels) equal sections. Shape each section into a tight, smooth ball. To create the iconic bagel hole, poke your finger directly through the center of each ball. Then, gently twirl the dough around your finger, stretching it to form a loop with a hole that is about 2 inches in diameter. Remember, these holes will shrink significantly during both the boiling and baking processes, so they should appear quite large at this stage.
-
Second Rise (Proofing): Arrange the shaped bagels on a baking sheet that has been lined with parchment paper. Lightly grease a sheet of plastic wrap and use it to cover the bagels, preventing them from drying out. Allow them to rise for another short period, about 25 minutes. During this time, the bagels will puff up slightly, but not double in size.
-
Preheat Oven: While the bagels are undergoing their second rise, preheat your oven to a high temperature of 450°F (232°C). This high heat is essential for achieving a perfect crust.
-
Prepare the Boil & Boil Bagels: In a large, wide pot, bring 12 cups of water to a rolling boil. Once boiling, reduce the heat to a gentle simmer and stir in 1 generous tablespoon of honey and 1 tablespoon of mild molasses. Carefully add as many bagels as will comfortably fit in a single layer without overcrowding the pot. Simmer the bagels for 2 minutes on the first side, then gently flip them over using a slotted spoon or spatula and simmer for another 2 minutes on the second side.
-
Drain & Prepare for Baking: Using a slotted spoon or spatula, carefully remove the boiled bagels from the water, allowing excess liquid to drain. Return them to the parchment-lined baking sheet, leaving some space between each bagel. If you plan to add toppings, now is the time to do so (see notes below).
-
Bake to Perfection: Transfer the baking sheet to the preheated oven. Bake the bagels for 20 minutes, or until they achieve a beautiful golden-brown color and the internal temperature, measured with a digital thermometer, registers at least 205°F (96°C).
-
Banana Nut Bagel Variation: For a delightful twist, use only ½ cup of total water in the dough and completely omit the 2 tablespoons of milk. Increase the granulated sugar to 1 ½ tablespoons total, and reduce the salt to 1 teaspoon. Incorporate 4 ounces (approximately 114 grams) of mashed, very ripe bananas into the dough. During the final stages of the kneading process, add ⅓ cup of chopped walnut pieces. Proceed with shaping, boiling, and baking as instructed above.
Notes
- Classic Everything Bagel Seasoning (Homemade): In a small bowl, combine a few tablespoons of minced dried garlic, dried onion flakes, poppy seeds, and sesame seeds. For best results, add just enough water to cover the mixture, then let it sit for a few minutes to soften. This mixture will be quite wet, which is intentional; it helps prevent the seasonings from burning in the oven and ensures they adhere well to the bagels. Sprinkle generously over the boiled bagels before baking.
- Store-Bought Everything Bagel Seasoning: For convenience, use a pre-made everything bagel seasoning blend (such as Trader Joe’s or Badia brands, or your local grocery store equivalent). To help the seasoning stick, lightly brush the boiled bagels with a little beaten egg (an egg whisked with a splash of water) before sprinkling generously with the seasoning.
- Other Topping Ideas: Consider plain sesame seeds, poppy seeds, caraway seeds, or flaky sea salt. For a sweet bagel, try cinnamon sugar (brush with egg wash, then sprinkle with a mixture of cinnamon and sugar).
Storage Tips: Allow freshly baked bagels to cool completely on a wire rack. Store them in an airtight container at room temperature for up to 2-3 days. For longer storage, bagels freeze exceptionally well. Place cooled bagels in a freezer-safe bag, removing as much air as possible, and freeze for up to 3 months. To enjoy, simply thaw at room temperature and toast until warm and slightly crispy.
