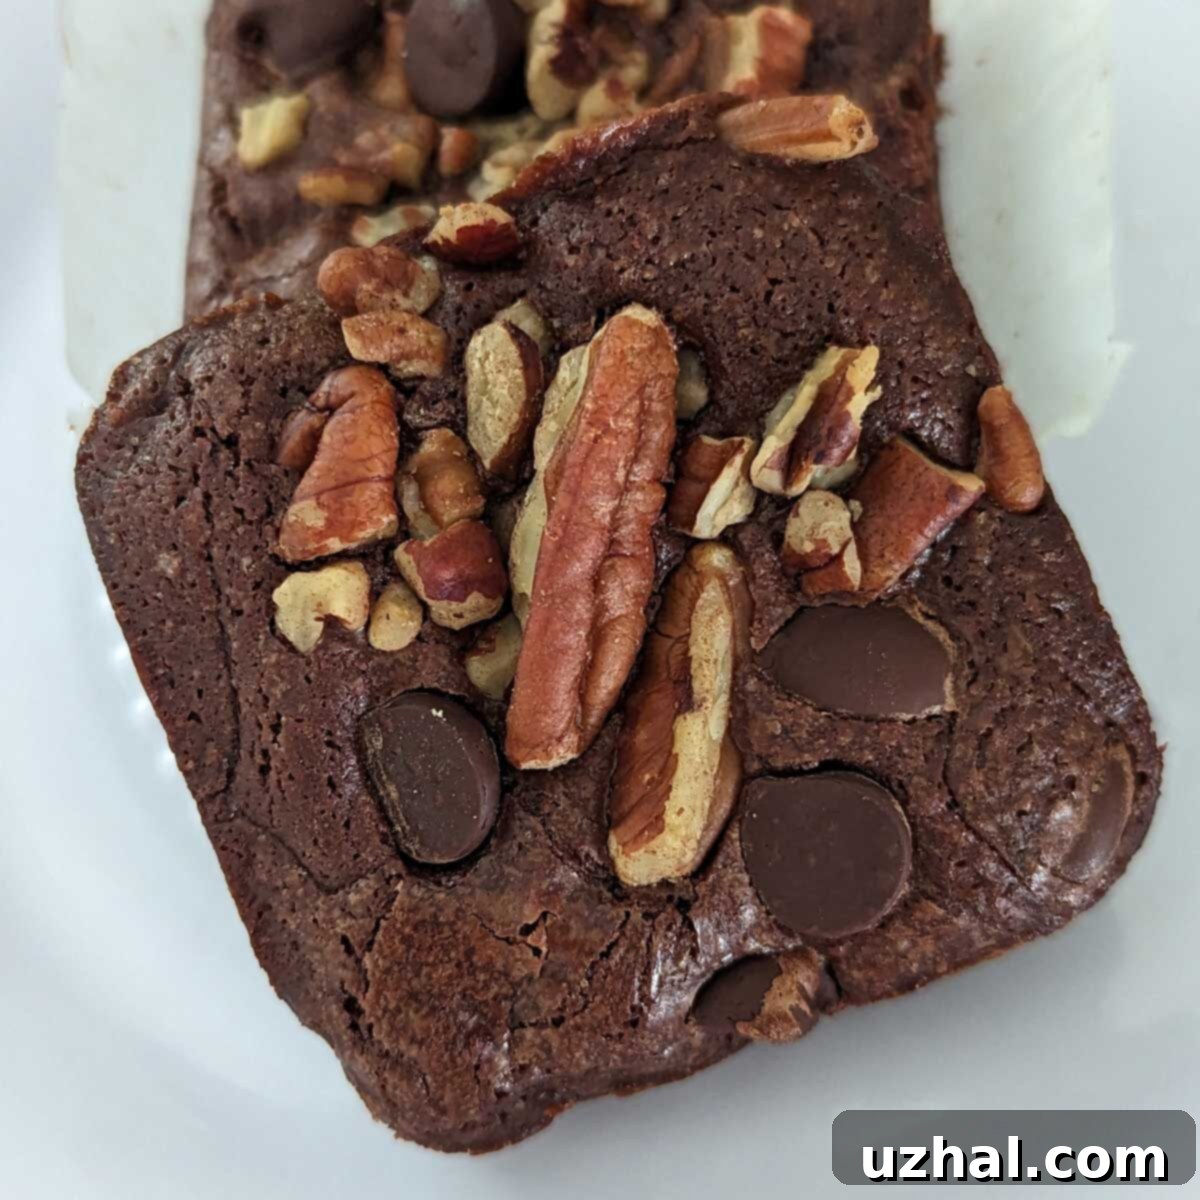
Bake Perfect Fudgy Mini Brownies Every Time: The Ultimate Guide to Bar Pans & Recipes
As seasons change and palates evolve, many of us find ourselves developing new culinary preferences. For me, that preference has increasingly shifted towards the delightful chewiness and slight crispness of brownie edge pieces. If you share this love for those coveted corner bites, then baking with a mini bar pan – often referred to as a brownie bar pan – is an absolute game-changer. This specialized bakeware ensures that every single brownie emerges with those desirable, perfectly baked edges, transforming a regular batch into a tray of individual masterpieces. It’s a method I’ve embraced wholeheartedly, leading to frequent batches of custom Mini Bar Pan Brownies.
My journey with these unique baking pans started with a reliable Calphalon model. Initially, its non-stick surface was a dream, allowing for effortless brownie release. However, as is often the case with well-loved kitchen tools, its non-stick capabilities gradually diminished over time. This meant resorting to the rather tedious task of lining each individual cavity with parchment paper – a step that felt somewhat contradictory to the pan’s initial promise of convenience. While a bit frustrating, this workaround proved essential, especially when dealing with those extra-fudgy brownie recipes that are notorious for sticking. We’ll dive deeper into these practical baking tips and pan maintenance later in this comprehensive guide, ensuring your mini brownies are always easy to release and perfectly delicious.
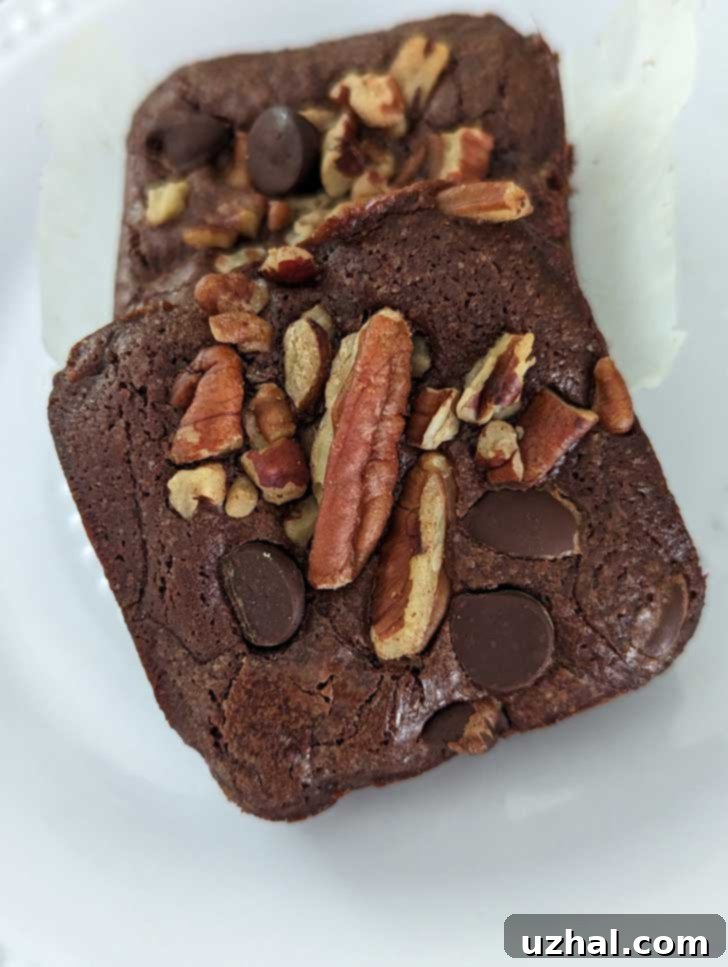
What is a Mini Brownie Bar Pan?
A mini brownie bar pan is a specialized baking pan meticulously designed for creating perfectly uniform, square-shaped brownies, muffins, or even small cakes. Unlike traditional baking pans that produce one large sheet brownie requiring cutting, this innovative pan features multiple individual compartments. These cavities, typically rectangular or square, vary in depth, allowing for different brownie thicknesses. Most modern brownie bar pans are crafted from durable materials like non-stick metal or flexible silicone, specifically chosen to guarantee easy release of your baked goods and simplify the cleaning process. While manufacturers often promise 100% effortless release and cleaning, my experience with particularly gooey, fudgy recipes has shown that a little extra care is sometimes needed, even with the best non-stick surfaces. Despite this, the convenience and consistent results these pans offer make them a valuable addition to any baker’s arsenal, especially when aiming for impressive presentation and uniform baking.
These pans are also sometimes called “brownie bite pans” or “individual brownie pans” due to the small, snack-sized portions they produce. The unique design with multiple wells allows for maximum exposure to heat, ensuring that each brownie develops a desirable crust while maintaining a moist, chewy interior. This makes them ideal for dessert platters, bake sales, or simply enjoying perfectly portioned treats at home without the fuss of slicing a large batch.
Why Use a Mini Brownie Bar Pan? The Benefits of Individual Brownies
Beyond the undeniable joy of having “more edges” – a universal craving for many brownie enthusiasts – there are numerous compelling advantages to incorporating a mini brownie bar pan into your baking routine. This versatile baking tool offers benefits that extend far beyond just satisfying your craving for crispy edges, making it a truly fun and functional addition to your kitchen.
- Perfectly Portioned Brownies: One of the primary benefits is the ability to create perfectly portioned individual brownies. Say goodbye to uneven slices and messy cutting. Each brownie emerges from its cavity with a clean, uniform shape, ensuring a neat and professional presentation every time. This is especially advantageous for parties, gatherings, or simply for strict portion control.
- Quicker and More Even Baking: Due to the smaller size and increased surface area of each individual cavity, baking time is generally quicker compared to a single large pan. More importantly, the brownies bake more evenly throughout. This uniform heat distribution results in that sought-after textural contrast: delightfully chewy edges that have a slight crisp, complementing a wonderfully soft and fudgy center. No more underbaked middles or overbaked ends!
- Unparalleled Customization: A mini bar pan provides incredible versatility with add-ins and toppings. Imagine the possibilities: you can customize each brownie individually! While the base batter remains consistent, you can swirl in different nuts, sprinkle various chocolate chips (white, milk, dark), add dollops of peanut butter, a dash of sea salt, or even a mini marshmallow to specific portions. This allows for a delightful variety in a single batch, catering to diverse tastes without requiring multiple recipes or pans.
- Consistent Texture: Because each brownie bakes in its own space, they tend to develop a consistent texture across the entire batch. This means every bite delivers that perfect balance of chewy edge and moist, gooey interior that brownie lovers adore.
- Easy to Serve: Individual brownies are inherently easier to serve and enjoy. No need for plates and forks if you’re on the go! They’re ideal for lunchboxes, picnics, or a quick dessert.
While a mini brownie bar pan might not be an absolute “must-have” bakeware item for every kitchen, its ability to produce perfectly portioned, quick-baking, highly customizable, and consistently textured brownie bars makes it a truly handy and enjoyable tool for any baking enthusiast. If you’re looking to elevate your brownie game and impress your guests, investing in one of these pans is definitely worth considering.
What’s the Best Brownie Bar Pan? Choosing the Right Bakeware
Finding the best brownie bar pan can significantly impact your baking experience and the quality of your mini brownies. When shopping for this specialized baking pan, several critical factors should guide your decision to ensure durability, even baking, and consistent non-stick performance.
- Durability: A high-quality pan should feel sturdy and substantial. Look for pans made from heavy-gauge steel or cast aluminum, which are less likely to warp under high heat and will last longer. Silicone pans, while flexible, should still be thick enough to hold their shape when filled with batter.
- Heat Conductivity: Even heat distribution is crucial for consistently baked brownies. Metal pans, especially those with a light color, tend to conduct heat evenly, promoting uniform baking and preventing burnt edges while ensuring gooey centers. Darker pans can sometimes absorb too much heat, leading to overbaking.
- Depth of Wells: The depth of the individual cavities influences the thickness of your brownies. If you prefer thicker, more substantial brownies, opt for a pan with deeper wells. Shallower wells are excellent for thinner, chewier bars. Consider your preference before purchasing.
- Non-Stick Properties: This is arguably the most vital feature. A truly effective non-stick coating allows for effortless release and easy cleanup. Look for pans with durable, PFOA-free non-stick finishes. While silicone pans are naturally non-stick, metal pans rely on a coating that can wear down over time with heavy use and abrasive cleaning.
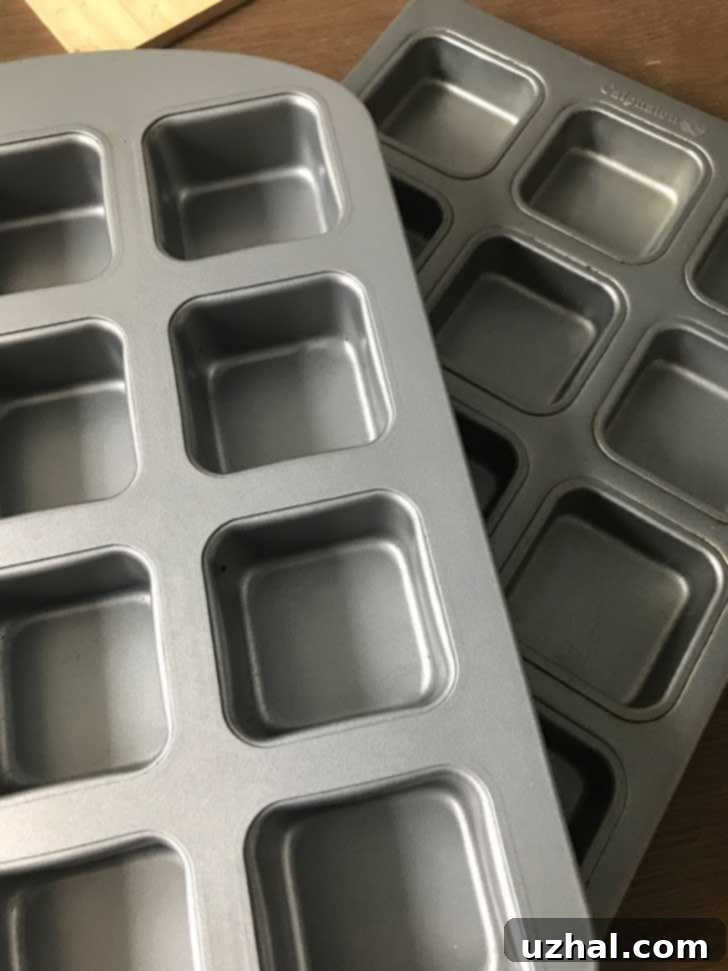
My personal experience has seen me through a few pans. I currently own the “Celebrate It!” pan, which has proven to be quite durable and bakes fairly evenly. However, after extensive use, its non-stick properties are gradually diminishing, making release a challenge with particularly fudgy recipes. For my next purchase, I’m highly considering the brownie bar pan from Chefmade. It boasts excellent reviews across all fronts – durability, even baking, and impressive non-stick capabilities – and critically, it features deeper wells, which I prefer for a slightly thicker, more satisfying brownie. The image below depicts my older Calphalon pan, which sadly had shallow wells and lost its non-stick abilities quite quickly.
Mastering Your Mini Bar Pan Brownies: Essential Recipe Tips
Now, let’s delve into the heart of the matter: perfecting your Mini Bar Pan Brownies recipe. While there are countless brownie recipes you can adapt for your special pan, this particular recipe is a fantastic starting point, designed specifically for these individual cavities. One significant advantage of this recipe is its adaptability: it halves evenly, allowing you the flexibility to bake a full dozen brownies or just six, depending on your needs and cravings. This makes it perfect for small households or when you just need a quick, sweet fix.
It’s also important to note that this is an updated, improved version of a classic. I’ve included the original 2012 recipe below the new one for those who might prefer a slightly different texture, as the older version yields a somewhat less fudgy brownie. The new recipe focuses on delivering maximum fudginess and a soft, rich interior.
Here are some crucial tips for ensuring your fudgy brownies come out perfectly from the pan, even if your non-stick surface isn’t what it used to be:
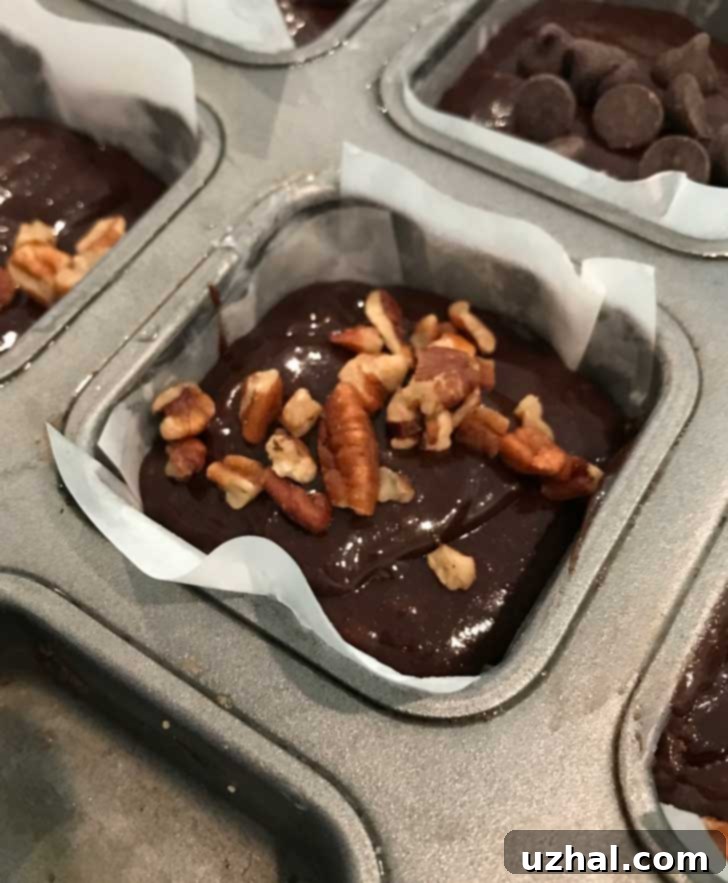
- Combatting Stickiness: Fudgy brownies, by their very nature, tend to be stickier than cakey varieties. Even with a pan that claims to be non-stick, some fudgier recipes can pose a challenge. My go-to solution has been using lightly oiled pieces of parchment paper cut to fit each cavity. Simply press a small square of parchment into the bottom of each well after a light greasing.
- Parchment Paper Alternatives: If cutting precise squares of parchment feels too tedious (which it can!), I’ve discovered a clever hack: squishing a regular old cupcake wrapper into a ball, rolling it in a little oil, and pressing it into the cavity. It works surprisingly well! I’ve yet to experiment with a light dusting of cocoa powder or flour after greasing, but that might also offer some assistance. For the ultimate peace of mind and easiest release, using strips of parchment that extend up along the walls of each well is even better, creating a “sling” to lift the brownies out. This is where the initial “nonsense” feeling comes in, as it seems counterintuitive for a non-stick pan, but it guarantees success.
- Batter Consistency and Thickness: This recipe is calibrated to yield 12 fairly thin brownies. If you prefer a richer, thicker brownie, you can adjust the portions to make 8 to 10 thicker bars. Just remember that thicker brownies will naturally require a longer baking time to cook through evenly.
- Ingredient Quality: Using high-quality ingredients, especially the chocolate and butter, will significantly impact the final flavor and texture of your brownie recipe. Bittersweet chocolate chips and Dutch-processed cocoa powder are recommended for a deep, rich chocolate flavor.
- Cooling is Key: Patience is paramount! Allow the brownies to cool completely in the pan before attempting to remove them. This not only makes them easier to handle but also helps them set properly and prevents crumbling. Once cooled and carefully pried from the pan, bring them to room temperature before serving for the best texture.
- Storage: For optimal freshness and to maintain that wonderful fudgy texture, store your baked Mini Bar Pan Brownies in a heavy-duty freezer bag. They can be kept at room temperature for a few days or stored in the freezer for longer periods, ready for a quick thaw whenever a craving strikes.
- Mini Chocolate Chip Cream Cake
- Mini Loaf Pan or Bar Cookies
- Cinnamon Chip Pecan Cookies
- Mini Pumpkin Muffins
- Mini Banana Muffins
Recipe: Ultimate Fudgy Mini Bar Pan Brownies
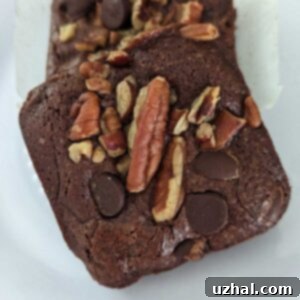
Mini Bar Pan aka Brownie Bar Pan Fudge Brownies
Anna
Pin Recipe
Ingredients
- 8 tablespoons unsalted butter, cut into chunks (114 grams)
- ⅔ cup bittersweet chocolate chips or 4 oz chopped bittersweet chocolate (114 grams)
- ⅓ cup unsweetened cocoa powder (so far I’ve only tested with Dutch)
- 1 cup granulated sugar (200 grams)
- ½ teaspoon espresso powder (optional)
- ¾ teaspoon vanilla extract
- ¼ teaspoon salt plus an extra pinch
- 2 large cold eggs (100 grams)
- ½ cup sifted or lightly spooned cake flour, best to weigh out 50 grams. If using all-purpose, use only ⅓ cup which should be 45 to 50 grams. (50 grams)
- ¼ cup chopped semisweet chocolate chips or chunks or mini chips
- ¼ to ½ cup chopped walnuts or pecans for top
Instructions
-
Preheat the oven to 350 degrees F (175 C).
-
Lightly grease your brownie bar pan. If its non-stick properties have diminished, grease and line each individual section with a small square of parchment paper for easy release. Consider ordering a new pan soon for best results!
-
In a saucepan, melt the butter over low heat. Once melted, add the bittersweet chocolate chips or chopped chocolate and stir continuously until fully melted and smooth. Remove the pan from the heat and stir in the unsweetened cocoa powder until no lumps remain. Add the granulated sugar and stir until the mixture is smooth and well combined.
-
Allow the chocolate mixture to cool slightly (to lukewarm). Then, stir or whisk in the cold large eggs, espresso powder (if you’re using it to enhance the chocolate flavor), and vanilla extract until fully incorporated.
-
Stir in the salt, then gently fold in the sifted cake flour (or all-purpose flour, adjusted as noted in ingredients). I recommend using a heavy-duty rubber spatula or scraper for this step to avoid overmixing.
-
Carefully pour the brownie batter into the individual troughs of the prepared pan, dividing it as evenly as possible among the cavities.
-
Sprinkle your desired amount of chopped walnuts or pecans and extra bittersweet or semisweet chocolate chips over the top of each brownie. Bake the brownies for approximately 15 to 18 minutes, or until the tops appear set and a toothpick inserted comes out with moist crumbs, not wet batter. The tops may not be shiny, but the insides should be wonderfully fudgy.
-
Allow the brownies to cool completely in the pan on a wire rack. Once fully cooled, carefully pry each brownie from its cavity using a small offset spatula or knife. For the best flavor and texture, bring them to room temperature before serving.
Nutrition
Old Version: Classic Mini Bar Pan Brownies (2012)
For those who prefer a slightly less fudgy, more traditional brownie texture, or if you’re curious about the evolution of this recipe, here is the original 2012 version of the Mini Bar Pan Brownies. These brownies are known for being very chewy, so remember the cardinal rule: be sure not to overbake them!
Mini Bar Pan Brownies 2012 — Very Chewy, Be Sure Not to Overbake
- 6 tablespoons unsalted butter (84 grams)
- 2 oz dark or semisweet chocolate, chopped or use ⅓ cup of chocolate chips** (56 grams)
- ⅓ cup unsweetened cocoa powder I used Dutch processed
- ¾ cup granulated sugar (150 grams)
- ½ cup all-purpose flour (weigh or measure with a light hand by spooning gently into cup) (65 grams)
- ¼ teaspoon baking powder
- Scant ¼ teaspoon salt
- ¼ teaspoon vanilla extract
- 2 large cold eggs (medium eggs would also work)
- ⅓ cup chopped and toasted walnuts
- ⅓ cup miniature chocolate chips optional but really help
- Preheat oven to 350 degrees F (175 C). Spray a 12-indentation mini bar/dessert pan with baking spray.
- Melt butter in a large saucepan set over medium heat. When melted, remove from heat and add chocolate chips. Stir until melted, then stir in the cocoa powder and sugar. Set aside and let cool to lukewarm.
- Stir the flour, baking powder and salt together in a small bowl.
- When the chocolate/butter mixture has gone from hot to warm, stir in the cold eggs and vanilla.
- Add the flour mixture and stir to combine, then stir in the walnuts (or just wait and pile them on top after you’ve poured the batter into the pan).
- Make sure the batter is cool, then add chocolate chips if using. Alternatively, just don’t add them yet. Wait until you’ve divided the batter between the cups, then spoon them on tops of each. You can swirl some in quickly before baking and leave some on top.
- Pour batter into prepared baking pan and bake 12 to 16 minutes or JUST until brownies appear set. It’s better to slightly underbake than overbake these. Let cool in the pan for about 15 minutes, then use a knife to carefully dislodge the bars from the pan.
- Whole Wheat Chocolate Chip Cookies
- Streusel Scones — Individually Portioned
- Mini Banana Muffins
- Mini Loaf Pan or Bar Cookies
- Mini Pumpkin Muffins
