Mastering Marisa’s Authentic Rainbow Cookies: A Step-by-Step Guide to Italian-American Perfection
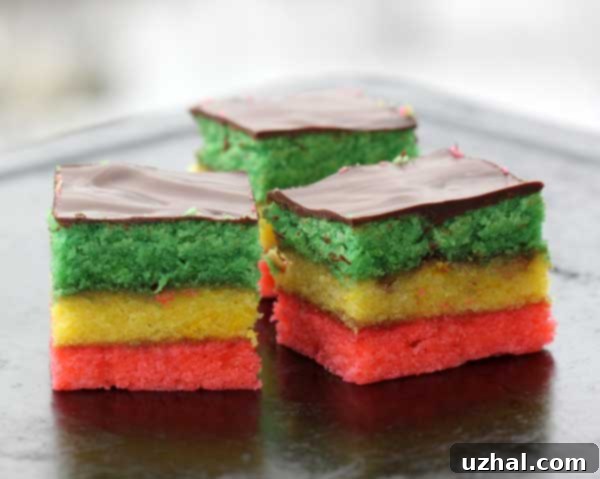
Creating a batch of Rainbow Cookies is undoubtedly a labor of love, demanding a good amount of time, precision, and a fair share of kitchen chaos. From gathering various utensils and pans to meticulously coloring the dough, separating eggs, and carefully spreading each vibrant layer, it truly feels like undertaking a detailed art project. For someone who left crafts behind years ago, the process can sometimes elicit a sigh and the thought, “Never again!” Yet, every single time, once these beautifully layered, colorful confections emerge from the kitchen, all the effort, the sink full of dishes, and the inevitable food coloring splatters around the kitchen are (almost always) forgotten and absolutely worth it. The sheer beauty and deliciousness of Rainbow Cookies make them an enduring favorite, a true testament to the joy of homemade treats.
Jump to Recipe

This cherished recipe for Rainbow Cookies comes directly from my dear friend, Marisa, whose family has perfected these delightful Italian-American treats over generations. Her passion and dedication to this classic recipe shine through every bite. Given Marisa’s profound fondness for them, and my own growing appreciation for their unique charm, I decided to bake a fresh batch this morning. There’s something truly special about a recipe passed down through a family, carrying with it a history of celebrations, gatherings, and shared joy. These cookies aren’t just a dessert; they’re a piece of culinary heritage, and Marisa’s version captures that essence perfectly.

The Secret to Richness: Odense and Solo Almond Paste
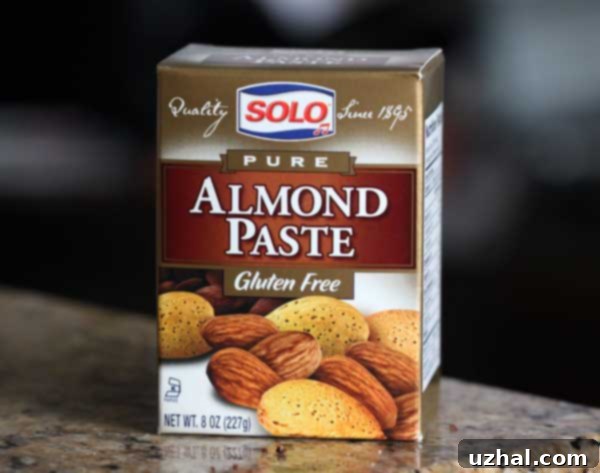
The hallmark of truly exceptional Rainbow Cookies lies in the quality of their ingredients, particularly the almond paste. Unlike some simpler, less authentic versions that might call for almond pie filling, this recipe insists on using genuine almond paste for a distinctively richer, denser flavor and texture. In my baking adventures, I’ve noted regional differences in availability. When I lived in Texas, I could reliably find a brand called Odense. However, here in Chicago, I’ve discovered Solo brand almond paste, which comes from the same company that produces the aforementioned pie filling. It’s crucial not to confuse the two.
I strongly advise against substituting almond pie filling for the paste. I once experimented with pie filling, and while the Rainbow Cookies were “okay,” they simply didn’t achieve the depth of flavor or the desirable dense, cake-like consistency that makes these cookies so special. With proper almond paste, the batter is thick and more akin to a dough, resulting in cakes that are wonderfully rich and satisfyingly dense. This density allows them to absorb the fruit preserves beautifully. In fact, one of the magical qualities of these layered cakes is that as they sit, the apricot or raspberry preserves sandwiched between each colorful layer subtly soften them, making them even more delectable on Day 2. The flavors meld and deepen, transforming a delicious cookie into an extraordinary treat.
If you decide to embark on this delightful baking journey, please let me know how the recipe turns out for you! Your feedback is always appreciated. And if any questions arise during your baking process, don’t hesitate to comment below or send me an email. I’m always happy to help. Here’s a pro tip that makes a huge difference in the visual appeal: head to your local craft store like Michael’s or a specialized baking supply shop and invest in some Wilton food coloring gel. The liquid food coloring typically found in grocery stores tends to be thinner and won’t produce the brilliantly vibrant colors that make Rainbow Cookies so visually stunning and appealing. The gel ensures rich, deep hues that truly make your cookies pop!
Baking with Parchment Paper: A Modern Approach to Lining Pans
In the realm of baking, practices and materials evolve, and one area where modern kitchens have a clear advantage is in pan lining. Some older, traditional recipes for cookies and cakes might instruct you to line your cake pans with wax paper. While I’ve certainly done this in the past, and the cakes did come out fine, it’s generally not the optimal or safest practice. Wax paper, by its very nature, is not designed to withstand high oven temperatures. It’s coated with a thin layer of paraffin wax, which can melt, smoke, or even catch fire if exposed to direct heat or temperatures above its tolerance. While it might be safe if completely covered by batter and baked at a lower temperature, the risk isn’t worth taking.
For your precious Rainbow Cookie layers, I wholeheartedly recommend using parchment paper. Parchment paper is specifically treated with silicone, making it non-stick and heat-resistant up to much higher temperatures, typically around 420-450°F (215-230°C). This ensures that your delicate cake layers won’t stick to the pan, peel off cleanly, and bake evenly without any risk of wax melting into your beautiful creation. It simplifies the baking process significantly and guarantees a better outcome, providing peace of mind. So, unless you find yourself in an absolute pinch and have no other alternative, always opt for parchment paper when baking these or any other layered cakes.
Exploring More Delicious Cookie Madness
If you’ve fallen in love with the intricate art of cookie making, or simply enjoy exploring diverse flavors and techniques, be sure to check out these other fantastic recipes. From variations on the classic Rainbow Cookie to other delightful bar and cake creations, there’s always something new to discover and bake:
- No-Almond Rainbow Cookies
- Rainbow Cookies Recipes and Tips
- Tri-Color Cookies
- Raspberry Bars
- Six Inch White Chocolate Cake
Marisa’s Authentic Rainbow Cookies Recipe

Marisa’s Rainbow Cookies
Anna
Pin Recipe
Ingredients
- 8 oz almond paste, such as Solo or Odense (228 grams – essential for true flavor and texture)
- 3 sticks unsalted butter (12 oz / 330 grams – softened to room temperature)
- 1 cup granulated sugar (200 grams)
- 1 teaspoon almond extract (enhances the almond flavor profile)
- ½ teaspoon salt (decrease to ¼ if using salted butter, balances sweetness)
- 4 large eggs (separated into yolks and whites)
- 2 cups all-purpose flour, measured after aerating well or best to weigh (9 oz / 250 grams – accurate measurement is key)
- Food coloring (red, green, and yellow – Wilton paste or gel colors are highly recommended for vibrant hues)
- Raspberry or Apricot preserves (use your preferred flavor, a good quality preserve makes a difference)
- 1 cup semisweet or bittersweet chocolate chips (for the decadent topping)
- 1 teaspoon shortening or coconut oil (helps create a smooth, shiny chocolate coating)
Instructions
-
Preheat your oven to 350 degrees F (175 C). Prepare three 9×12 inch or 8×12 inch baking pans by greasing them thoroughly, then lining the bottoms with parchment paper. This ensures easy removal and a clean bake for your delicate cake layers.
-
In the bowl of a stand mixer, break up the almond paste into smaller pieces. Add the softened butter and beat until they are thoroughly combined and smooth. Next, add the granulated sugar, almond extract, salt, and the separated egg yolks. Beat this mixture for an additional 3 to 4 minutes with the paddle attachment until it’s light, fluffy, and well-creamed.
-
Gradually stir in the all-purpose flour. You can do this by hand for better control or use the lowest speed of your stand mixer. Be sure to scrape down the sides and bottom of the bowl frequently to ensure all ingredients are incorporated without overmixing.
-
In a separate, clean bowl, beat the egg whites using an electric mixer until stiff peaks begin to form. These stiff peaks indicate that the whites are perfectly aerated and will add lightness to the dense almond batter. Gently fold these beaten egg whites into your prepared batter. Continue folding until they are just blended, taking care not to deflate the whites. The batter will visibly loosen, transforming from a very thick, dough-like consistency to something slightly looser than standard chocolate chip cookie dough.
-
Divide the batter evenly among the three mixing bowls. Aim for approximately 1 ½ cups of batter per pan, or for greater accuracy, weigh out about 14 ounces into each bowl. If you prefer, a careful eyeball estimation will also work, but consistency in layer thickness is key for even baking.
-
Using your chosen gel food colorings, dye each of the three batters a distinct color: red, green, and yellow. Mix thoroughly until the color is vibrant and uniform throughout each portion of batter. Remember, gel colors provide the best intensity.
-
Carefully spread each colored batter evenly into its respective prepared pan. This step requires a bit of patience and attention to detail. Start by spreading with a knife or offset spatula, then go back and gently press the batter with lightly dampened fingers. This helps to create a uniform layer and smooth out any imperfections. Strive to keep the layers as even as possible for a beautiful final presentation.
-
Bake the cakes in your preheated oven at 350 F (175 C) for 12 to 15 minutes. Baking times can vary depending on your oven and pan size, so start checking for doneness around the 12-minute mark. Insert a toothpick into the center of a cake; if it comes out clean, the cake is ready. Avoid overbaking to keep the layers moist.
-
Once baked, remove the pans from the oven and allow the cakes to cool completely within their pans on a wire rack. Rushing this step can lead to breakage.
-
Prepare a flat surface by laying down a large sheet of plastic wrap. Carefully invert one of the cooled cake layers onto the plastic wrap, ensuring there’s ample overhang to wrap around the entire stack. Spread a thin, even layer of your chosen raspberry or apricot preserves over the surface of this cake.
-
Gently place the second layer of cake directly on top of the preserves. Repeat the process by spreading another thin layer of preserves over this second cake layer. Finally, carefully position the third cake layer on top, completing your colorful stack.
-
Bring the plastic wrap up and snugly around the entire stack of cakes. Place the wrapped stack in the freezer for about an hour, or until it becomes firm and solid. This crucial step makes the cookies much easier to slice neatly and helps set the layers.
-
While the cake is chilling, prepare your chocolate topping. In a microwave-safe bowl, combine the semisweet or bittersweet chocolate chips with the shortening or coconut oil. Melt using high heat, stirring every 30 seconds, until the mixture is completely smooth and glossy. Alternatively, you can melt it over a double boiler. Spread this melted chocolate evenly over the top of the frozen cake.
-
Allow the chocolate topping to set until it’s firm but still slightly pliable – not completely hard. This is the optimal time to cut the cake into individual squares or desired shapes. If the chocolate is too hard, it may crack. Use a sharp, warm knife for the cleanest cuts.
Notes
Yield Variability: The stated yield of 24 cookies is approximate. The final number can vary significantly depending on the exact dimensions of the pans you use, how thinly you spread the batter, and how much you trim from the edges of the assembled cake to achieve perfectly uniform squares. Don’t worry too much about the exact count; focus on creating beautiful, even pieces.
Storage: These cookies keep wonderfully! Store them in an airtight container at room temperature for up to 3-4 days, or in the refrigerator for up to a week. For longer storage, you can freeze them for up to a month. Thaw at room temperature before serving.
Why These Rainbow Cookies Are a Must-Bake
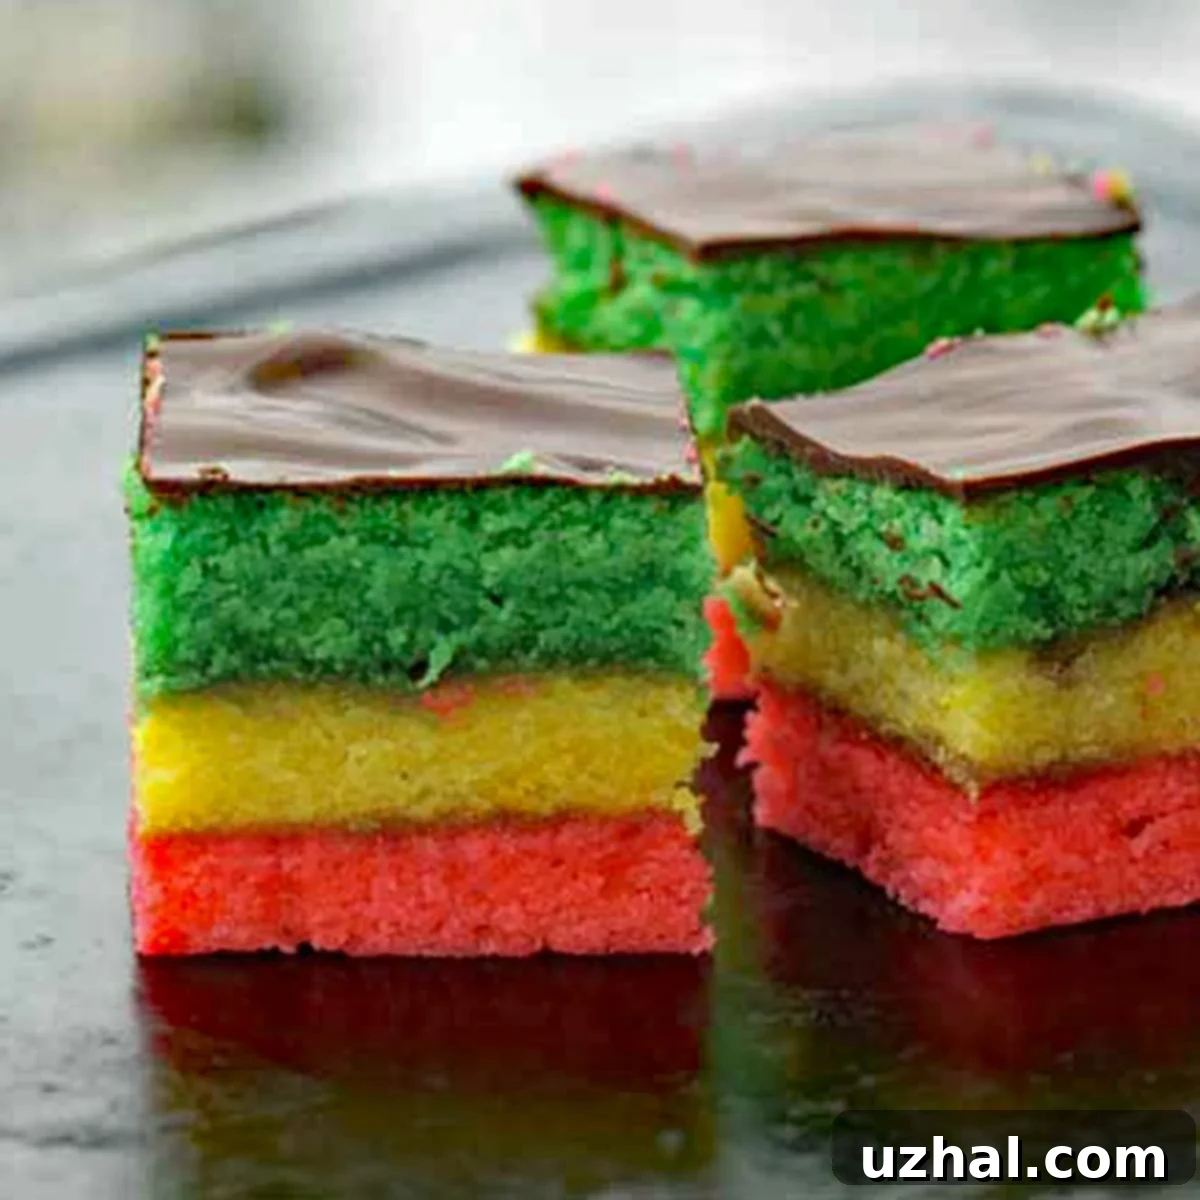
Beyond their stunning appearance, Marisa’s Rainbow Cookies offer a delightful combination of textures and flavors that captivate anyone who tries them. The rich, dense almond cake provides a satisfying chewiness, perfectly complemented by the sweet-tart fruit preserves that soften and meld into the layers over time. The final touch of a bittersweet chocolate topping adds a sophisticated crunch and a decadent finish, balancing the sweetness of the cake and preserves.
These cookies are not just for special occasions; they are a celebration in themselves. Whether you’re making them for a holiday gathering, a family reunion, or simply to treat yourself to something truly extraordinary, the effort you put in will be rewarded with enthusiastic compliments and requests for the recipe. They make fantastic edible gifts and are a beautiful centerpiece on any dessert table.
Tips for Success: Ensuring Your Rainbow Cookies Shine
- Ingredient Quality: Always use high-quality almond paste and fresh eggs. The taste truly comes through. Good quality preserves will also make a noticeable difference in flavor.
- Precise Measuring: Especially for flour, weighing your ingredients (as indicated in grams) is more accurate than cup measurements, leading to more consistent results.
- Vibrant Colors: Do not skimp on good quality gel food coloring. It’s a small investment that pays off in stunning visual appeal.
- Even Layers: Take your time spreading the batter. Even layers bake more uniformly and create a more aesthetically pleasing cookie. Dampening your fingers slightly can help achieve a smoother spread.
- Patience with Chilling: The chilling and freezing steps are non-negotiable. They firm up the cake, making it much easier to handle, layer, and most importantly, to cut into clean, professional-looking squares without crumbling.
- Cutting Technique: Use a long, sharp knife. For the cleanest cuts, you can briefly warm your knife under hot water, wipe it dry, and then slice. Re-warm and wipe as needed between cuts.
- Storage and Enjoyment: While delicious on the first day, these cookies truly develop their full flavor and soft texture after a day or two, allowing the preserves to fully integrate into the cake layers.
Making Marisa’s Rainbow Cookies is a cherished tradition for many, and it’s easy to see why. The combination of classic Italian-American flavors, the stunning visual appeal, and the satisfaction of creating something so beautiful from scratch makes every moment spent in the kitchen worth it. So, gather your ingredients, embrace the process, and get ready to enjoy one of the most beloved and visually striking cookies you’ll ever bake!
