The Perfect Creamy Chocolate Fudge Recipe: A Timeless Fine Cooking Inspired Treat
For years, this particular creamy chocolate fudge recipe, originally from Fine Cooking magazine (issue 102), has been a personal benchmark for homemade fudge. It consistently delivers a rich, smooth, and utterly delicious treat that stands apart from many other recipes. Unfortunately, as of 2023, the original recipe is no longer readily available online, which spurred me to meticulously track it down and create an adapted version. In a way, this necessity has been a silver lining, as it allowed me to incorporate my own insights and minor tweaks honed over countless batches. The ultimate goal, whether you follow the original text or my adapted take, is to achieve a fudge that is wonderfully creamy, almost melt-in-your-mouth, yet firm enough to hold its shape beautifully when cut.

Crafting Perfection: Notes on This Creamy Chocolate Fudge
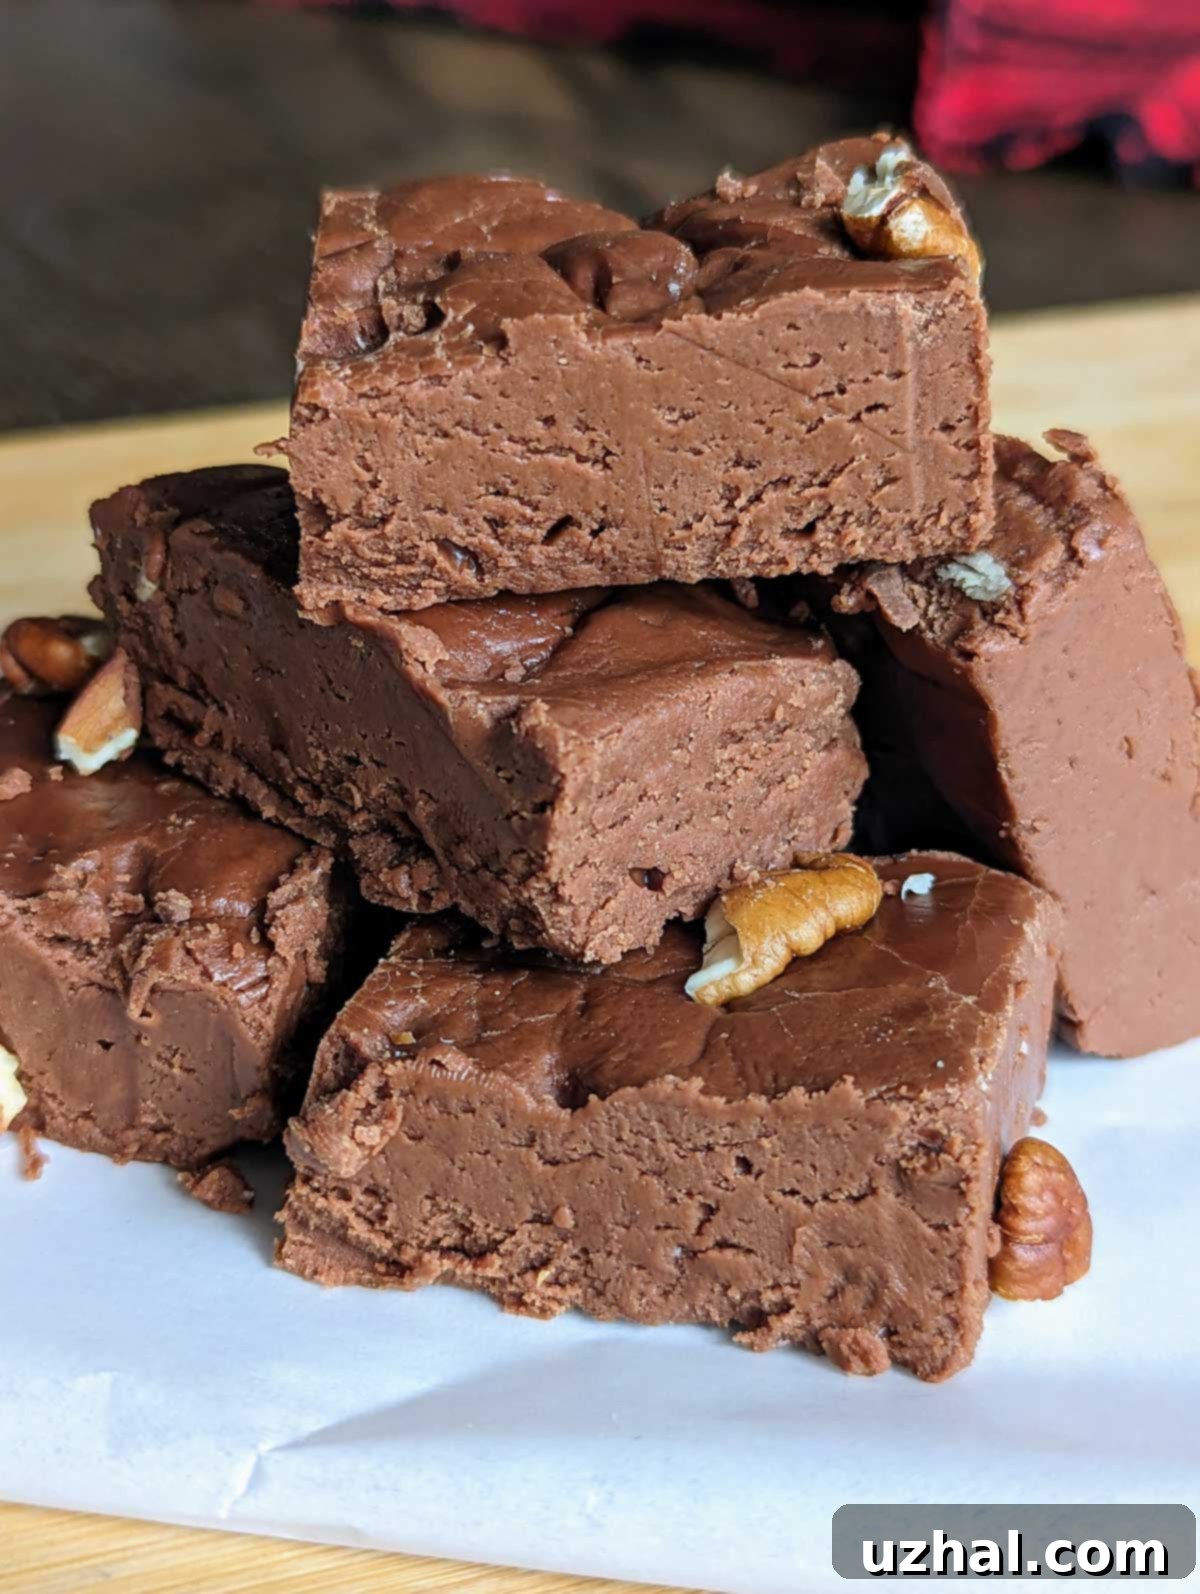
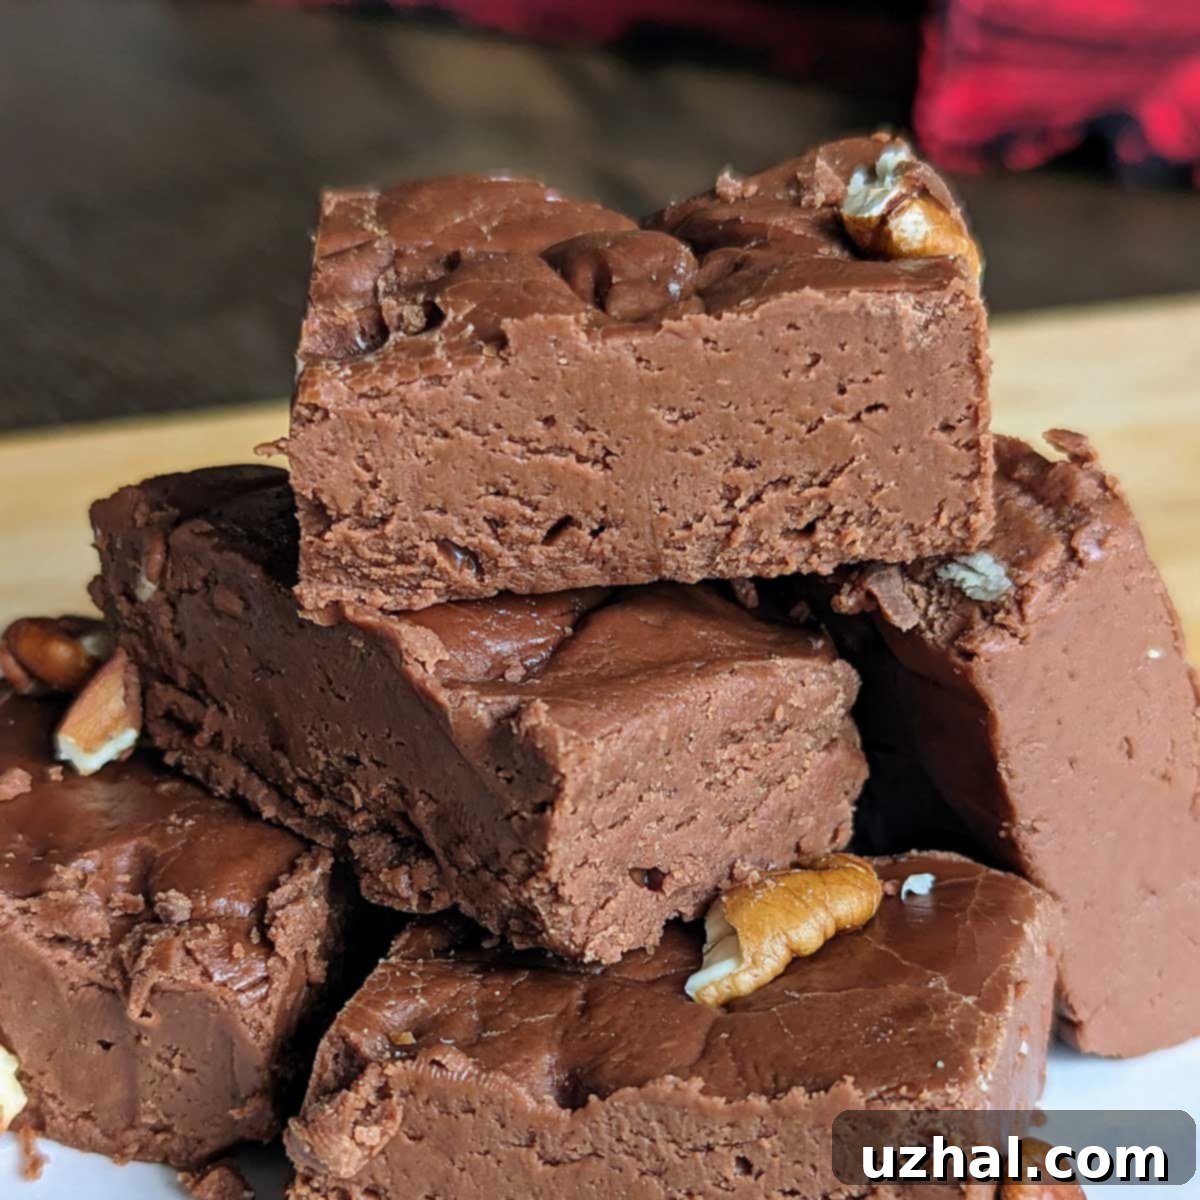
What sets this creamy chocolate fudge apart from many common recipes, particularly those relying heavily on marshmallows, is its balanced sweetness. While undoubtedly a sweet indulgence, it avoids the cloying sensation often associated with other variations. This recipe focuses on the natural richness of chocolate and cream, allowing their flavors to shine without being overshadowed by excessive sugar. In terms of texture, it boasts a delightful creaminess that melts smoothly on the tongue, combined with a subtle flakiness that good homemade fudge should have – a testament to proper crystallization. This isn’t the rubbery, overly soft kind of fudge; it’s the kind that breaks cleanly and holds its form.
Unlike many popular recipes like Fantasy Fudge, which often include marshmallows, chocolate chips, or a generous dash of vanilla extract, this Fine Cooking adaptation embraces a minimalist yet powerful ingredient list. The core components include granulated sugar, heavy cream, unsweetened chocolate, corn syrup, a touch of salt, and butter. Each ingredient plays a crucial role: the sugar forms the crystalline structure, heavy cream provides luxurious richness, unsweetened chocolate delivers an intense, pure cocoa flavor, corn syrup acts as an invert sugar to control crystallization and ensure a smooth texture, salt balances the sweetness, and butter contributes to the fudge’s silky mouthfeel and helps prevent sticking. The final flavor profile can also be subtly influenced by your choice of chocolate brand and the type of corn syrup used. While light corn syrup is specified, feel free to experiment with alternatives like Lyle’s Golden Syrup, Karo Dark Corn Syrup, or even agave, noting that these might impart slightly different flavor nuances or textures to your finished fudge.
The Power of Pure Chocolate: Unsweetened Chocolate and Cream in Fudge
One notable advantage of this recipe is its ingredient cost-effectiveness, particularly concerning chocolate. It calls for just 4 ounces of high-quality unsweetened chocolate, a stark contrast to recipes that might demand 18 ounces or more of chocolate chips. Unsweetened chocolate, often found in baking aisles, can sometimes be more budget-friendly per ounce than its sweetened counterparts, and it offers a purer, more intense chocolate flavor that is essential for this particular fudge. Lately, I’ve found immense success using Guittard unsweetened chocolate, which undoubtedly contributes to the exceptional quality and deep flavor of the final product. Ghirardelli unsweetened chocolate is another excellent choice, consistently delivering great results. For the adventurous baker, a 95% Lindt bar could also be an intriguing option, offering a very sophisticated and dark flavor profile. However, for your initial attempts, especially as you get a feel for the unique timing and temperature dynamics in your own kitchen, starting with a more accessible brand like Baker’s unsweetened chocolate can be a smart strategy. Fudge making truly is an art that benefits from practice, and understanding how your specific stovetop and thermometer interact with the ingredients is key to consistent success.
Using unsweetened chocolate allows you to precisely control the sweetness level of the fudge. Since the recipe already contains a significant amount of granulated sugar, incorporating unsweetened chocolate ensures that the chocolate flavor remains prominent and robust, without becoming overly saccharine. This balance is what gives the fudge its signature sophisticated taste. The heavy cream, on the other hand, is crucial for creating that luxurious, smooth texture. Its high-fat content contributes to the fudge’s richness and helps to prevent a grainy consistency by interfering with sugar crystallization. Together, these two primary ingredients lay the foundation for a truly exceptional chocolate fudge, emphasizing deep flavor and a wonderfully indulgent mouthfeel.
Scaling Your Fudge: 8-Inch Pan and Loaf Pan Versions
The original Fine Cooking recipe is designed for an 8-inch square pan, yielding a generous amount of fudge. Given the inherent richness of this particular recipe, an 8×8 pan is actually an ideal size, as you can easily cut smaller pieces, allowing everyone to savor this decadent treat without being overwhelmed. However, if you’re looking to make a smaller batch—perhaps for a more intimate gathering or just a personal indulgence—this recipe is quite adaptable. You can successfully scale it down to ½ or ⅔ of the original recipe within a 3-quart saucepan. For a half batch, a foil-lined loaf pan (around 9×5 inches) works exceptionally well, providing a perfectly sized mold for your creamy creation. If you opt for ⅔ of the batch, a disposable round pie tin can serve as a convenient alternative.
When scaling the recipe, particularly when reducing the quantity, it’s absolutely vital to pay even closer attention to the cooking process. The temperature of the mixture needs to climb at a very slow and steady rate. Rushing this step, especially with smaller volumes, can lead to uneven cooking and a compromised texture. While the overall cook times will naturally be shorter for reduced batches, the principle of slow, controlled heating remains paramount to achieving that desired creamy consistency and preventing crystallization. Always ensure your candy thermometer is securely placed and accurately reading the temperature without touching the bottom of the pan, providing reliable guidance for these scaled-down versions.
The Art of Beating: Achieving Creaminess with 10-20 Minute Mix Time
One of the most critical steps in achieving the signature creamy, non-grainy texture of this fudge, as highlighted in the original Fine Cooking recipe, is the extended beating time—anywhere from 10 to 20 minutes. This might seem like an eternity, especially if you’re relying on a handheld electric mixer. I’ll admit, my patience and my ears aren’t always up to the task of standing over a loud mixer for that long. My solution, and a highly recommended method, is to carefully pour the hot fudge mixture directly into the bowl of a stand mixer once it’s removed from the heat. Then, you let it cool undisturbed until it reaches approximately 110°F. Once at the target temperature, attach the paddle attachment (crucially, not the whisk, which incorporates too much air) and beat on medium-high speed. The paddle is designed to thoroughly mix and work the sugar crystals without aerating the fudge, which is exactly what we want to develop the tiny, uniform crystals characteristic of smooth fudge.
During this extended beating phase, you’re not just mixing; you’re actively developing the fudge’s structure and texture. The mixture will undergo a noticeable transformation: it will become several shades lighter in color, lose its glossy sheen, and visibly thicken. You’ll observe the beaters forming distinct trails in the fudge, eventually exposing the bottom of the mixing bowl. For a stand mixer, this process typically takes around 10 minutes of consistent beating. If you’re using a handheld mixer, you might need up to 20 minutes, requiring a bit more endurance. It’s important to avoid scraping down the sides of the bowl during this vigorous beating, as you want to encourage proper crystal formation throughout the bulk of the fudge. This entire process relies heavily on both visual and olfactory cues—the changing color, texture, and even a slight shift in aroma will tell you when the fudge is ready. Ultimately, while the recipe provides excellent guidelines, adapting to your specific kitchen environment, equipment, and learning to trust your senses are the true keys to perfecting this decadent treat.
- Gourmet Deep Dark Chocolate Brownies
- Perfect Sugar Cookies
- Triple Lemon Cake from Fine Cooking
- Chocolate Fudge Pie
- Top 10 Recipes 2014
Recipe: Fine Cooking Creamy Chocolate Fudge

Creamy Chocolate Fudge
Anna
Pin Recipe
Equipment
-
1 4-quart heavy-duty saucepan
Ingredients
- 3-¾ cups granulated sugar (750 grams)
- 1-½ cups heavy cream (12 oz/336 grams)
- 4 ounces unsweetened chocolate, coarsely chopped or broken (114 grams)
- 3 tablespoons light corn syrup (dark corn syrup also works) (54-60 grams)
- 1 teaspoon salt, scant
- 3 tablespoons cold unsalted butter; plus a little more at room temperature for buttering the thermometer and pan (42 grams)
Instructions
-
Grease the face of a candy thermometer or a deep-fry thermometer with butter. (Note: A deep-fry thermometer works perfectly for this task).
-
Off the heat, combine the granulated sugar, heavy cream, chopped unsweetened chocolate, corn syrup, and scant teaspoon of salt in a large (3 ½ to 5-quart) heavy-duty saucepan.
-
Place the saucepan over medium heat. Stirring gently and continuously, bring the mixture to a full boil. This initial heating process should typically take between 7 to 12 minutes, depending on the starting temperature of your ingredients. Once the mixture reaches a steady, rolling boil, cover the pan with a lid for a brief period (about 2 minutes). This steaming action helps to wash down any sugar crystals clinging to the sides of the pan, which is crucial for preventing a grainy fudge texture.
-
Carefully insert your deep-fry or candy thermometer, ensuring the bulb is submerged in the center of the mixture but does not touch the bottom of the pan. Allow the mixture to boil without stirring until it reaches a temperature of 236°F to 238°F. This temperature range corresponds to the soft-ball stage for candy making. With this particular fudge recipe, it is always better to slightly undercook than to overcook, so strive not to let the temperature exceed 238°F. Immediately remove the pan from the heat. If you plan to use a stand mixer for the beating step, pour the hot fudge mixture directly into your stand mixer bowl at this point.
-
Gently place the cold unsalted butter into the hot fudge mixture without stirring it at all.
-
Set the pan (or mixing bowl) onto a wire rack in a cool, undisturbed area of your kitchen. It is paramount that you do not disturb the mixture in any way—no stirring, no shaking—until it has naturally cooled down to exactly 110°F. This cooling period is critical for proper crystal formation and typically takes approximately 1 ½ hours.
-
While the fudge cools, prepare your baking pan. Line the bottom and sides of an 8×8-inch baking pan with either aluminum foil or parchment paper, ensuring it extends slightly over the edges to create “handles.” Generously butter the foil or parchment paper to prevent sticking.
-
Once the fudge mixture has reached 110°F, remove the thermometer. Using either a handheld electric mixer or a stand mixer with the paddle attachment (avoiding the whisk), begin beating the mixture on high speed. Continue beating until the fudge lightens in color by a few shades and thickens considerably, such that the beaters leave distinct trails and the bottom of the pan (or mixer bowl) becomes visible. With a stand mixer, this process typically takes around 10 minutes. A handheld mixer may require up to 20 minutes of continuous beating. A key tip: do not scrape down the sides of the bowl during the mixing process, as this can introduce larger sugar crystals and lead to a grainy texture.
-
When the fudge is properly beaten, its consistency will resemble that of a thick, canned frosting – firm, but still workable.
-
Gently scrape the thickened fudge into your prepared pan. Use a rubber spatula to carefully nudge the fudge out of the mixing bowl. You may scrape the bottom of the pot or bowl, but consciously avoid scraping the sides, which might contain unwanted larger sugar crystals.
-
Using your spatula, gently smooth the top surface of the fudge to create an even layer. Place the pan back on a wire rack and allow the fudge to cool and set completely at room temperature, which typically takes about 2 hours. While the fudge will be slightly soft on the day it’s made, it will firm up significantly overnight, achieving its perfect consistency.
-
Once fully set, lift the fudge out of the pan using the foil or parchment “handles” and invert it onto a clean cutting board. Carefully peel off the foil or parchment paper. Then, turn the slab of fudge right side up.
-
Cut the fudge into 25 uniform pieces (typically 1 ½-inch squares).
Notes
