The Ultimate Guide to Japanese Milk Bread: Achieve Unparalleled Softness with the Tangzhong Method
There’s something truly magical about Japanese Milk Bread. Its distinctively light, airy, and incredibly soft texture sets it apart from other breads, making it a beloved staple in many households. For years, I’ve been perfecting my own rendition of this delightful loaf, a journey inspired by the exceptional milk bread served at Kindred, a charming family restaurant nestled in Davidson, North Carolina. Their bread left such a lasting impression that I was compelled to recreate that same tender crumb and delicate sweetness at home, leading to a recipe that has become a consistent favorite in my kitchen.
The secret behind Kindred’s extraordinarily soft milk bread, and indeed, any authentic Japanese milk bread, lies in a traditional technique known as tangzhong. This method, originating from Asia, involves cooking a small portion of flour and liquid (typically water or milk) together to form a thick, starchy paste. This seemingly simple step is a game-changer for bread baking. When this gelatinized paste is incorporated into the main dough, it introduces a remarkable amount of moisture without making the dough sticky or difficult to handle. The flour in the tangzhong absorbs more liquid than it would normally, and this extra moisture is locked within the starch molecules. This not only results in an incredibly soft and fluffy texture but also significantly extends the bread’s shelf life, keeping it fresh and tender for days longer than conventional bread. It’s a scientific marvel that transforms a humble loaf into a cloud-like confection.
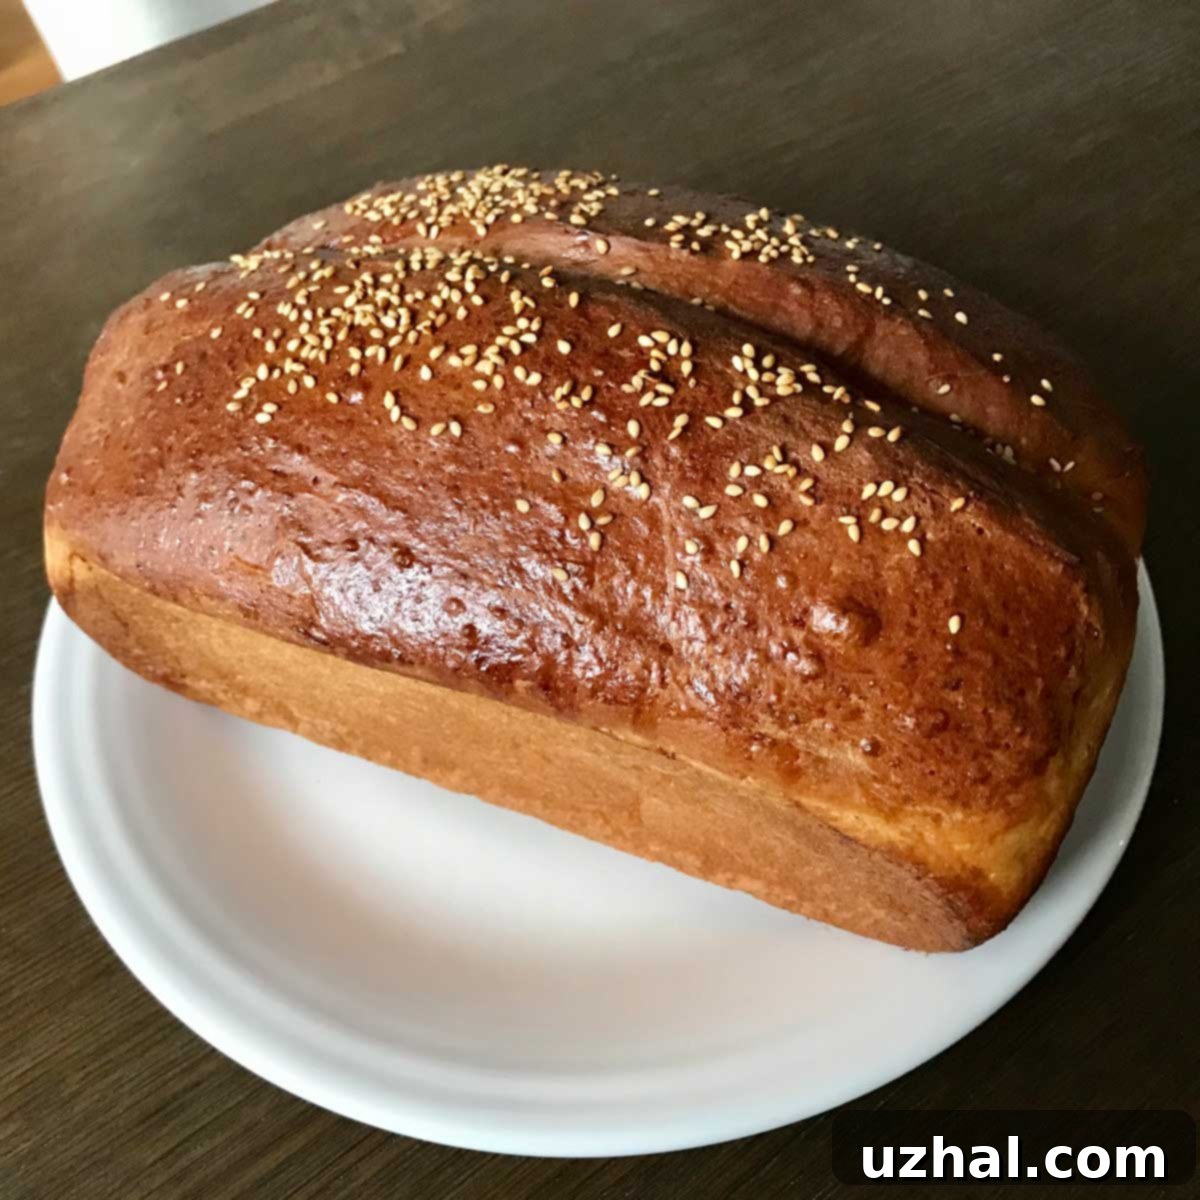
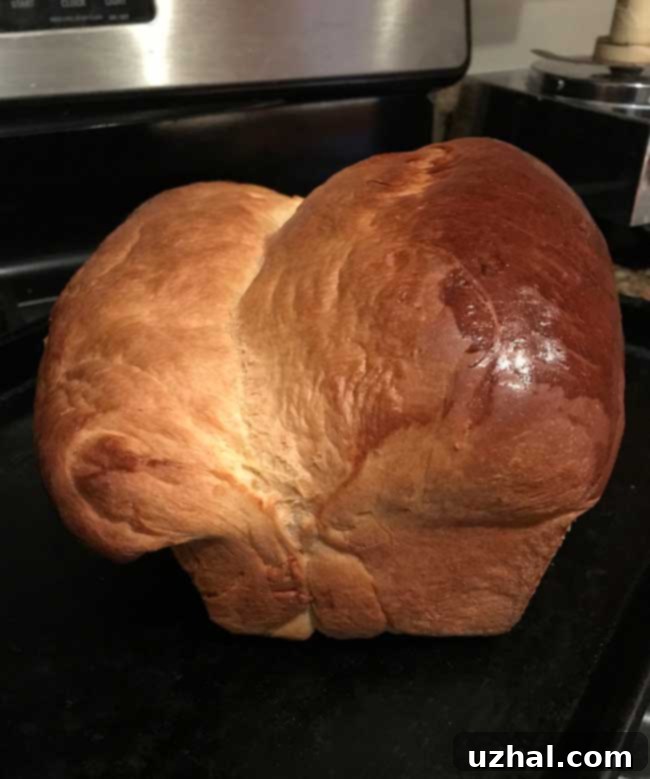
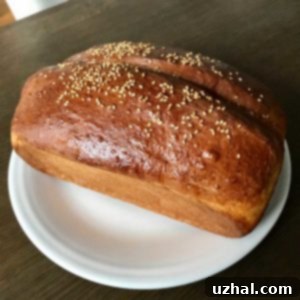
My personal journey with this recipe began by adapting a base from Food52, which I initially halved and tweaked to suit my preferences. While my adjustments have led to this beloved version, I highly recommend consulting the original Food52 recipe if you plan on baking a full-sized batch. A crucial lesson I learned early on was the importance of using the correct pan size. My first attempt, whose pictures you see here, involved an 8.5 x 4.5-inch loaf pan instead of the recommended 9 x 5-inch. The dough rose so vigorously that it overflowed the sides, creating a somewhat misshapen, albeit incredibly delicious and light-textured, loaf. This experience underscored the precision required in baking, yet also highlighted the forgiving nature of this recipe – even a “mistake” can yield fantastic results!
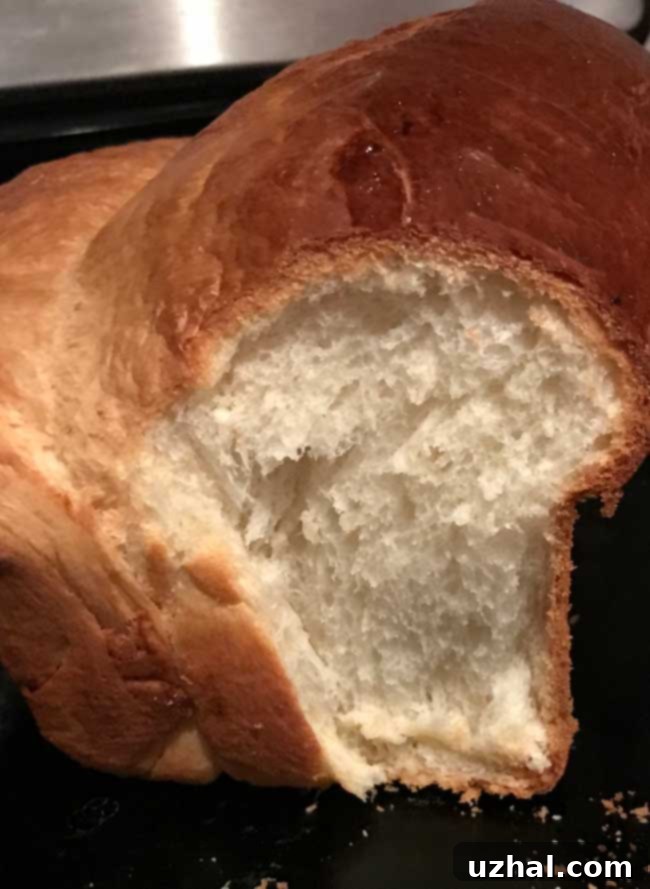
Just look at that exquisite texture – a testament to the tangzhong method and careful preparation. The fine, uniform crumb and delicate, almost cotton-like interior are what make this bread so irresistible. It’s truly a delight to slice into and behold.
Essential Ingredient Notes for Perfect Japanese Milk Bread
Achieving the signature taste and texture of Japanese Milk Bread relies heavily on understanding the role of each ingredient. Here’s a detailed breakdown of the key components:
- Bread Flour: This is a non-negotiable ingredient for truly outstanding milk bread. Bread flour contains a higher protein content compared to all-purpose flour, typically ranging from 12-14%. This higher protein level translates to stronger gluten development, which is essential for trapping the gases produced by the yeast, resulting in that incredibly airy, chewy, yet tender crumb. I consistently use King Arthur brand bread flour and always recommend measuring by weight (grams) for the most accurate and consistent results. Volume measurements can vary significantly depending on how densely the flour is packed.
- Instant Yeast: My recipe calls for instant yeast (also known as “rapid rise” or “quick rise” yeast), and all the beautiful loaves pictured were made with either standard instant yeast or Platinum yeast, a specific type of instant yeast known for its consistent and reliable performance. Instant yeast can be added directly to your dry ingredients without prior activation, making the baking process smoother and quicker. If you only have active dry yeast, you’ll need to activate it first by dissolving it in a portion of the warm liquid (water or milk from the recipe) with a pinch of sugar for about 5-10 minutes, until foamy, before adding it to the rest of your ingredients. While I haven’t specifically tested this recipe with active dry yeast, a direct substitution of the same quantity (2 ¼ teaspoons per packet) should generally work, allowing for slightly longer proofing times.
- Salt: The type of salt you use can significantly impact the final taste and texture of your bread. The original Food52 recipe, which is double the size of this one, called for 2 tablespoons of salt. This strongly suggests they used Diamond Crystal kosher salt, which has larger, flakier crystals and is less dense, making it about half as salty by volume compared to other salts. If you are using Morton kosher salt or standard table salt (which are much denser and saltier), you should only need about 1 ½ teaspoons for one loaf. Always be mindful of your salt type and adjust accordingly to prevent your bread from being either bland or overly salty. Precision here is key.
- Honey: Honey not only adds a delicate sweetness to the milk bread but also contributes to its beautiful golden-brown crust and enhances moisture retention. I find that measuring honey by weight, specifically 50 grams, yields the most accurate and consistent results. This avoids the sticky mess and inaccuracies often associated with measuring viscous liquids by volume. If you don’t have honey, you can substitute with an equal weight of granulated sugar, though it may slightly alter the flavor and color.
- Heavy Cream & Nonfat Dry Milk Powder: These dairy components are crucial for the rich flavor and tender texture of milk bread. Heavy cream adds richness and fat, contributing to the bread’s soft crumb. Nonfat dry milk powder further boosts the milk solids content, leading to a more pronounced milky flavor and a finer, silkier texture without adding excess liquid.
- Egg: A large, room-temperature egg enriches the dough, adding flavor, aiding in structure, and contributing to a softer crumb and a beautiful golden color.
- Unsalted Butter: Softened unsalted butter, added towards the end of the kneading process, contributes richness, tenderness, and a lovely aroma to the bread. Cutting it into small pieces ensures it incorporates smoothly into the dough.
Understanding these ingredients and their specific roles will empower you to create a Japanese Milk Bread that consistently achieves that coveted light, fluffy, and utterly delicious result.
Recipe
Kindred Inspired Japanese Milk Bread
Cookie Madness
Pin Recipe
Ingredients
- 2 ½ cups bread flour, plus another 2 ½ T. 350 grams plus another 20 grams
- ½ cup water
- ½ cup heavy cream
- 2 ½ tablespoons honey
- 1 ½ tablespoons nonfat dry milk powder
- 1 ½ teaspoons salt Morton kosher
- 1 packet instant yeast fast rising (2 ¼ teaspoons)
- 1 large egg room temperature
- 2 tablespoons unsalted butter, softened (28 grams), cut into small pieces
- Eggwash a little beaten egg mixed with a little water
Instructions
-
To create the tangzhong paste, combine the 2 ½ tablespoons of bread flour (20 grams) and the ½ cup of water in a small saucepan. Cook this mixture over medium heat, whisking continuously, until it thickens into a paste-like consistency. This process gelatinizes the starch, enabling it to absorb more liquid. Once thickened, add the heavy cream and honey, and continue whisking until the honey is fully dissolved and everything is well blended. This step typically takes only a few minutes.
-
Transfer the tangzhong mixture into the bowl of a stand mixer. Add the nonfat dry milk powder, salt, the remaining 2 ½ cups of bread flour, and the instant (Platinum) yeast. Using the paddle attachment or mixing by hand, stir until all the ingredients are well blended and a shaggy dough forms. Then, beat in the room-temperature egg until fully incorporated.
-
Switch to the dough hook attachment and knead the mixture until it becomes smooth and elastic. As the dough starts to smooth out, gradually add the softened butter pieces, one at a time, while the mixer continues to run. Keep kneading for another 5 minutes, or until the dough is silky smooth and highly elastic. This dough will be soft and slightly sticky, but it should clear the sides of the bowl as it kneads. If it clings persistently to the sides, add 1 or 2 tablespoons of extra flour, one at a time, until it pulls away cleanly.
-
Lightly grease a large clean bowl with butter, oil, or cooking spray. Scrape the elastic dough into this bowl. Cover the bowl tightly with plastic wrap and let the dough rise in a warm, draft-free place for approximately 45 minutes, or until it has noticeably doubled in size.
-
While the dough is rising, prepare your loaf pan. Grease and lightly flour a 9×5 inch loaf pan. For extra assurance against sticking and easier removal, you can first grease the pan, then line the bottom with a strip of parchment paper, and then grease and flour again.
-
Once the dough has risen, gently punch it down to release the air. Turn the dough out onto a lightly floured surface. Shape it into a rough rectangle, approximately the same length as your loaf pan. Divide the dough into two equal halves. Place these two dough portions side-by-side in your prepared loaf pan, running down the length of the pan. This technique encourages a beautiful pull-apart texture in the finished bread.
-
Loosely cover the shaped dough in the pan with a piece of greased plastic wrap. Allow it to rise again in a warm, draft-free spot until it has doubled in size and is just puffing over the top of the pan, which will take about another 45 minutes. This second rise is crucial for the bread’s final fluffy texture.
-
Preheat your oven to 375°F (190°C). In a small bowl, whisk together the remaining egg with 1 teaspoon of water to create an egg wash. Gently brush the top of the risen dough with this egg wash. If desired, sprinkle with a pinch of sea salt for a subtle flavor contrast, or sesame seeds for an added crunch and visual appeal.
-
Bake the bread for approximately 35 minutes, or until it achieves a deep, golden-brown crust and is thoroughly baked through. An instant-read thermometer inserted into the center of the loaf should register around 190-200°F (88-93°C). Once baked, remove from the oven and let it cool in the pan for 10-15 minutes before transferring it to a wire rack to cool completely.
Tips for a Flawless Loaf Every Time
Beyond the precise measurements and the magic of tangzhong, several techniques can elevate your Japanese Milk Bread from good to truly exceptional:
- Perfect Kneading: Don’t rush the kneading process. The dough should be smooth, elastic, and pass the “windowpane test.” This means you can stretch a small piece of dough thinly enough that light passes through it without tearing. Proper gluten development is key to the bread’s characteristic chewiness and airiness.
- Warm Environment for Rising: Yeast thrives in warmth. If your kitchen is cool, find a warm spot for your dough to rise. Options include a slightly warmed oven (turned off!), near a sunny window, or even in a proofing box. A consistent, warm temperature ensures optimal yeast activity and a quicker, more effective rise.
- Gentle Handling: Once the dough has risen, handle it gently. Over-punching or aggressively working the dough can deflate all the precious air bubbles that contribute to its light texture.
- Accurate Pan Preparation: As I learned firsthand, the right pan size is vital. A 9×5 inch loaf pan provides the ideal volume for this recipe, allowing the dough to rise beautifully without overflowing. Greasing and flouring, or using parchment paper, ensures easy removal and a pristine crust.
- Cooling Completely: While tempting, slicing into warm bread can affect its texture, making it slightly gummy. Allow your milk bread to cool completely on a wire rack. This allows the internal structure to set fully, resulting in the best possible crumb.
Serving and Storage Suggestions
Japanese Milk Bread is incredibly versatile. Enjoy it in countless ways:
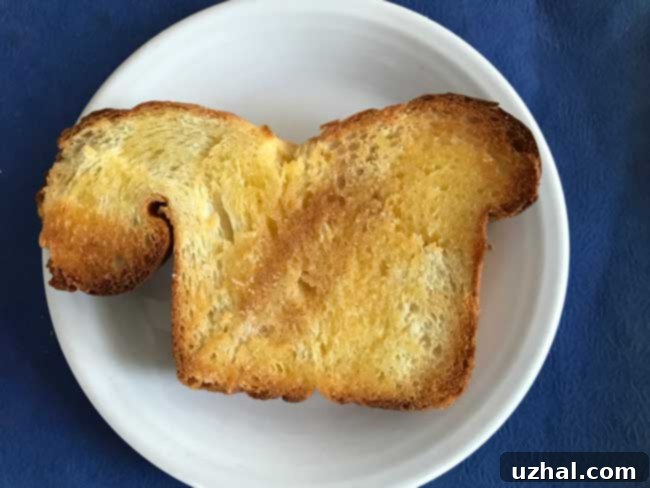
- Plain or Toasted: Savor a slice plain with just a smear of butter, or lightly toast it for a delicate crispness.
- Sweet Treats: It makes an excellent base for cinnamon toast, French toast, or even a decadent bread pudding. A sprinkle of cinnamon sugar or a drizzle of honey transforms it into a delightful breakfast or snack.
- Savory Sandwiches: Its soft texture is perfect for delicate sandwiches. Use it for egg salad, tuna salad, or even light cheese and deli meat combinations.
- Garlic Bread: Slice it, slather with garlic butter, and toast for a wonderfully aromatic side dish.
To keep your Japanese Milk Bread at its peak softness, store it in an airtight container or a plastic bag at room temperature for up to 3-4 days. For longer storage, slice the bread and freeze it in an airtight freezer bag for up to 2-3 months. Thaw individual slices as needed, or pop them directly into a toaster for quick enjoyment.
Troubleshooting Common Milk Bread Issues
Even experienced bakers can encounter hiccups. Here are some common issues and how to address them:
- Dense Bread: This often indicates insufficient kneading or under-proofing. Ensure your dough passes the windowpane test and allow it enough time to double in size during both rises. Cold environments can also hinder yeast activity; ensure your proofing spot is warm.
- Dry Bread: This could be due to over-baking. Use a thermometer to check for doneness. Tangzhong helps retain moisture, so if the bread is dry, it might also mean the tangzhong was not prepared correctly, or too much flour was added during kneading.
- Sticky Dough: While milk bread dough is soft, it shouldn’t be overly sticky after proper kneading. If it is, you might have added too little flour or too much liquid. A tablespoon or two of extra flour during the final kneading can help, but avoid adding too much, which can make the bread tough.
- Crumbly Texture: This can be a sign of under-kneading or using flour with too low protein content (e.g., all-purpose flour instead of bread flour). Ensure thorough kneading to develop strong gluten.
With these detailed notes and instructions, you’re well-equipped to bake a truly exceptional Japanese Milk Bread. The process is a rewarding one, yielding a loaf that will impress with its unparalleled softness and delicate flavor. Happy baking!
