Bake Julia Waldbaum’s Festive Eggnog Cake: A Classic Holiday Tradition
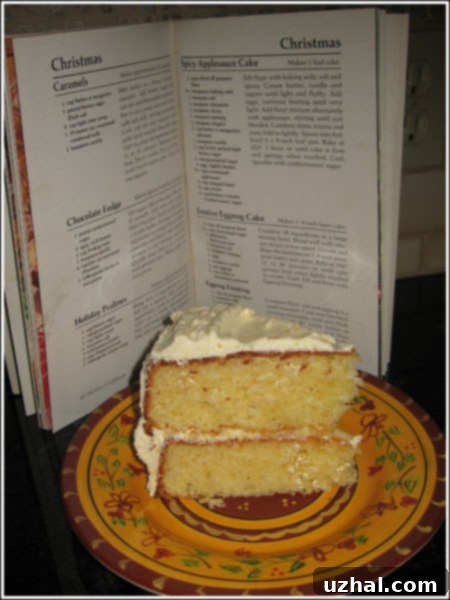
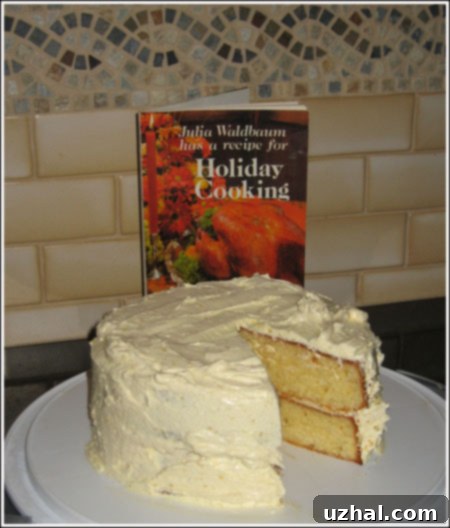
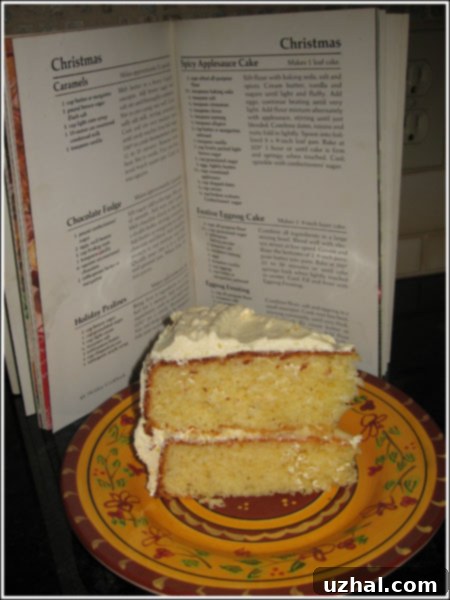
There’s something truly special about old cookbooks – they’re not just collections of recipes, but time capsules filled with stories and culinary traditions. My mother-in-law, who resides in picturesque Connecticut, possesses a fascinating collection of these historical culinary tomes. Though she no longer enjoys cooking, these books are cherished mementos from a time when she was actively engaged in the kitchen. Every so often, she’ll unearth a forgotten gem from her extensive collection and bestow it upon me, knowing my passion for bringing vintage recipes back to life. On a recent visit, she presented me with “Julia Waldbaum Has a Recipe for Holiday Cooking,” a book that proved to be a treasure trove, leading me directly to the delightful Festive Eggnog Cake recipe.
Unlike some legendary culinary figures shrouded in mystique, Julia Waldbaum was a very real, influential individual. She was an integral part of her family’s prominent grocery chain for many years, dedicating her life to serving the community. Her commitment to customer satisfaction was legendary; according to her obituary, she famously kept her personal telephone number published, inviting customers to call her directly with any complaints or feedback. This level of dedication truly speaks volumes about her character and the era she lived in. Julia Waldbaum lived a long and impactful life, passing away in 1996 at the remarkable age of 99, leaving behind a legacy not just in business, but in community connection and, as I discovered, delightful recipes.
The discovery of this Festive Eggnog Cake recipe felt like unearthing a piece of culinary history. This particular recipe from Julia’s book strikes a perfect balance between convenience and traditional baking. It seems designed for home bakers with fundamental kitchen skills, offering a straightforward approach that yields impressive results. The initial impression of “dump everything in a bowl, blend, and bake” is quite accurate, making it accessible even for those who might be new to holiday baking. However, I’ve added a few more detailed notes and insights to ensure your baking experience is as smooth and enjoyable as possible, guiding you to achieve a truly spectacular cake.
The Enchantment of Eggnog for Holiday Baking
Eggnog, with its rich, creamy texture and comforting spices like nutmeg, is undeniably synonymous with the holiday season. It evokes warmth, festivity, and a sense of nostalgic indulgence. Transforming this beloved beverage into a cake is a stroke of genius, offering all the classic flavors of eggnog in a wonderfully tender, moist cake format. This Festive Eggnog Cake is more than just a dessert; it’s a celebration in itself, perfect for holiday gatherings, family dinners, or simply a cozy evening treat. The cake’s subtle sweetness and fragrant spice profile make it an instant crowd-pleaser, destined to become a cherished part of your own holiday traditions.


Julia Waldbaum’s Festive Eggnog Cake: The Recipe
This recipe creates a beautifully moist and flavorful cake, infused with the delightful essence of eggnog. The combination of simple ingredients and straightforward steps makes it a joy to bake, even for those with limited time during the busy holiday season.
Ingredients for the Cake
- All-Purpose Flour: 2 cups, or for precision, 9 ounces (250 grams) by weight. While any good quality all-purpose flour like Gold Medal works, if you can find White Lily flour, it’s known for yielding a particularly tender crumb. Weighing your flour is always recommended for accuracy in baking.
- Granulated Sugar: 1 ½ cups (300 grams). Provides sweetness and helps create a tender texture.
- Baking Powder: 1 tablespoon. This leavening agent ensures your cake rises beautifully and achieves a light, airy structure.
- Salt: 1 teaspoon. A crucial ingredient that enhances all the other flavors and balances the sweetness.
- Fresh Nutmeg: ¼ teaspoon, freshly grated. This is non-negotiable! The aroma and flavor of freshly grated nutmeg are far superior to pre-ground varieties and truly elevate the eggnog flavor in the cake. It’s absolutely worth the extra step.
- Unsalted Butter: 4 ounces (114 grams), softened. Ensure your butter is truly softened to room temperature, which allows it to cream properly and incorporate evenly into the dry ingredients.
- Large Eggs: 3. Also at room temperature, these bind the ingredients and contribute to the cake’s richness and structure.
- Vanilla Extract: 1 teaspoon. A classic flavor enhancer that complements the eggnog beautifully.
- Full-Fat Eggnog: 1 cup. It is essential to use real, full-fat eggnog for the best flavor and moisture. Skim or reduced-fat versions will not yield the same rich results.
Instructions for the Cake
- Prepare Your Oven and Pans: Preheat your oven to 350 degrees F (175 degrees C). Prepare two 8 or 9-inch round metal cake pans by spraying them generously with a flour-added cooking spray. If you don’t have flour-added spray, grease and flour them the traditional way. I personally find 8-inch pans yield a slightly taller cake.
- Combine Dry Ingredients: In a large mixing bowl, combine the flour, granulated sugar, baking powder, salt, and freshly grated nutmeg. Whisk them together thoroughly to ensure all ingredients are evenly distributed.
- Incorporate Butter: Add the softened unsalted butter to the dry mixture. Using a spoon or your fingertips, work the butter into the dry ingredients. Continue mashing and stirring until the mixture resembles coarse crumbs and is moist with butter, ensuring the dry particles are coated. This method helps tenderize the flour before liquid is added.
- Add Wet Ingredients: Once the butter is fully incorporated, add the eggs, vanilla extract, and the full-fat eggnog to the mixture.
- Mix the Batter: With a spoon or an electric mixer set to its lowest speed, beat the mixture just until it is combined and no dry streaks remain. Then, increase the mixer speed to medium-high and beat for about one minute. This brief beating period helps to develop the cake’s structure without overmixing, which can lead to a tough cake.
- Divide and Bake: Pour the cake batter into your prepared cake pans, dividing it evenly between the two. Gently tap the pans on the counter a couple of times to release any large air bubbles.
- Bake to Perfection: Bake for 28 to 30 minutes, or until a wooden skewer or toothpick inserted into the center of the cakes comes out clean, and the cake springs back lightly when touched in the center. Avoid opening the oven door too frequently during baking.
- Cool the Cake: Let the cake layers cool in their pans on a wire rack for 10 minutes. This allows the cakes to firm up slightly before handling. After 10 minutes, carefully invert the cakes onto the wire rack to cool completely. Ensure they are fully cooled before frosting, as warm cake will melt the frosting.
Crafting the Perfect Eggnog Frosting
The frosting for this cake is truly exceptional, akin to the creamy, spiced filling of nostalgic treats like Ho Hos or Ding Dongs, but with a distinct eggnog flavor. It employs a somewhat old-fashioned technique that results in an incredibly smooth, stable, and utterly delicious frosting. While the method may seem a bit unconventional at first, the resulting texture and flavor are well worth the effort. Do not be intimidated; with a few careful steps, you will master this delightful creation.
Ingredients for the Frosting
- All-Purpose Flour: ¼ cup. This acts as a thickener, similar to making a roux for a gravy.
- Salt: ¼ teaspoon. Essential for balancing the sweetness and enhancing the flavors.
- Eggnog: 1 cup. Again, use real, full-fat eggnog for the best flavor and consistency.
- Unsalted Butter: ⅔ cup, very soft. Crucial for achieving the creamy texture. Ensure it’s at true room temperature.
- Granulated Sugar: 1 cup. Provides sweetness and structure to the frosting.
- Vanilla Extract: 1 teaspoon. A final touch that enhances the overall flavor profile.
Instructions for the Frosting
- Prepare the Flour Mixture: In a heavy-bottomed saucepan, whisk together the ¼ cup of flour and ¼ teaspoon of salt. Gradually add about ¼ cup of the eggnog, whisking constantly to create a smooth paste without lumps.
- Cook the Eggnog Mixture: Place the saucepan over low heat. Continue whisking constantly, slowly adding the remaining eggnog. Cook, still whisking continuously, until the mixture thickens to a gravy-like consistency. This step requires patience and vigilance to prevent lumps. The key is low heat and continuous stirring.
- Cool the Mixture: Once thickened, remove the saucepan from the heat and set it aside to cool completely. This is a critical step; the mixture must be at room temperature or even slightly cooler than the butter when you combine them later. If you notice any lumps despite your best efforts, strain the mixture through a fine-mesh sieve before it cools to achieve a perfectly smooth base.
- Cream Butter and Sugar: In a large mixing bowl (or the bowl of a stand mixer), beat the very soft butter and granulated sugar together until the mixture is light, fluffy, and creamy. This usually takes about 3-5 minutes on medium-high speed.
- Combine Mixtures and Beat: Once the cooked eggnog mixture is completely cool, gradually add it to the creamed butter and sugar. Begin beating on low speed until just combined, then increase the speed to high. Beat vigorously with an electric mixer for at least 8 minutes. This long beating time is essential for dissolving the sugar crystals and transforming what might initially look curdled into an incredibly smooth, silky, and voluminous frosting.
- Add Vanilla: Finally, beat in the vanilla extract until just incorporated.
- Frost the Cake: Use an offset spatula to generously frost your completely cooled eggnog cake layers.
Expert Tips for Your Eggnog Frosting (and Cake)
Achieving the perfect eggnog cake and its signature frosting involves a few key considerations that can elevate your results from good to absolutely outstanding. Pay close attention to these notes, particularly regarding the frosting, as its unique technique benefits from careful execution.
Mastering the “Gravy-Like” Frosting Technique
The distinctiveness of this frosting lies in its initial “gravy-like” mixture. This technique involves cooking flour and eggnog to create a thick, starchy base, which is then incorporated into creamed butter and sugar. While incredibly delicious, it does have a common pitfall: lumps. To avoid this, remember to:
- Maintain Low Heat: When cooking the flour and eggnog mixture, always keep the heat low. High heat can cause the mixture to seize and clump quickly, making it difficult to achieve a smooth consistency. Patience here is key.
- Whisk Constantly: From the moment you start adding the eggnog to the flour, whisk continuously. This prevents the flour from settling and burning at the bottom of the pan and helps break up any small lumps as they form.
- Strain if Necessary: Even with careful whisking, small lumps can sometimes appear. Don’t despair! If you notice lumps, simply press the cooled “gravy” mixture through a fine-mesh sieve or strainer before adding it to the butter and sugar. This simple step ensures a perfectly smooth frosting. Even with a few small lumps, rest assured, the frosting will still be incredibly flavorful and enjoyable – it’s “hella good,” as they say!
- Cool Completely: The cooked eggnog mixture MUST be completely cooled to room temperature, or even slightly chilled, before you add it to the butter and sugar. If it’s warm, it will melt the butter, leading to a greasy, runny frosting that won’t set properly.
The Importance of Beating Time
Another crucial aspect of this frosting is the extended beating time required after combining all ingredients. Expect to beat the mixture on high speed for approximately 7-10 minutes, possibly even longer, depending on your mixer. This process might seem unusually long, and the mixture may initially appear “curdled” or broken. Do not stop! Continue beating, and you will witness a magical transformation:
- Dissolving Sugar: The prolonged beating helps to fully dissolve the granulated sugar crystals, preventing a grainy texture.
- Emulsification and Aeration: It also emulsifies the butter and the cooked eggnog mixture, incorporating air to create a light, fluffy, and incredibly smooth consistency. What started as a seemingly curdled mixture will become beautifully smooth, almost like a whipped cream but with more stability and richness.
- Mixer Type Matters: If you have a stand mixer, this is its moment to shine – you can simply turn it on high and let it work its magic while you attend to other tasks. If you’re using a hand mixer, be prepared to stand there for a while, giving your arm a good workout, but the reward of a perfectly smooth frosting is well worth the effort.
General Baking Tips for the Cake
- Room Temperature Ingredients: Ensure your butter, eggs, and eggnog are at room temperature for the cake batter. This allows them to emulsify better, creating a smoother batter and a more uniform texture in the final cake.
- Weigh Your Flour: While cup measurements are provided, weighing your flour (250 grams) is far more accurate. Different brands and environmental factors can affect how much flour fits into a cup, impacting the cake’s consistency.
- Don’t Overmix: After adding the wet ingredients to the butter-coated dry ingredients, mix only until just combined, then beat for the specified one minute. Overmixing can develop the gluten in the flour too much, leading to a tough, dry cake.
- Cooling Completely: Just like with the frosting base, make sure your cake layers are completely cool before you attempt to frost them. Frosting a warm cake will cause the frosting to melt, slide off, and create a messy result.
Serving and Storage Suggestions
Once frosted, this Festive Eggnog Cake is a stunning centerpiece. Garnish with a light dusting of freshly grated nutmeg, a sprinkle of cinnamon, or even some festive edible glitter for an extra touch of holiday sparkle. A few sugared cranberries or a sprig of fresh rosemary can also add visual appeal. Serve it alongside a hot cup of coffee, tea, or, for the ultimate holiday indulgence, a small glass of chilled eggnog. The cake stores beautifully at room temperature in an airtight container for up to 3 days, or in the refrigerator for up to 5 days. For longer storage, individual slices can be wrapped and frozen for up to a month, allowing you to enjoy this holiday treat long after the season ends.
Julia Waldbaum’s Festive Eggnog Cake is more than just a recipe; it’s an invitation to create lasting holiday memories. Its rich flavors and tender texture are sure to delight everyone who tries it. So, gather your ingredients, put on some festive music, and embark on this delicious baking adventure. You’ll be glad you did, as this timeless cake is poised to become a cherished part of your own holiday baking traditions for years to come.
