The Ultimate Guide to Moist & Flavorful Sour Cream Banana Bread
There’s nothing quite like the comforting aroma of freshly baked banana bread filling your home. It’s a timeless classic, a go-to for using up those forgotten, over-ripe bananas on your counter. But what if you could elevate this humble quick bread to an even more tender, moist, and utterly irresistible level? Enter our Sour Cream Banana Bread recipe, a true game-changer that promises an unparalleled baking experience.

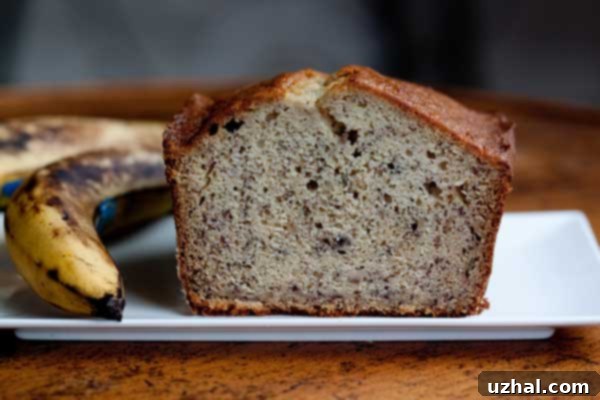
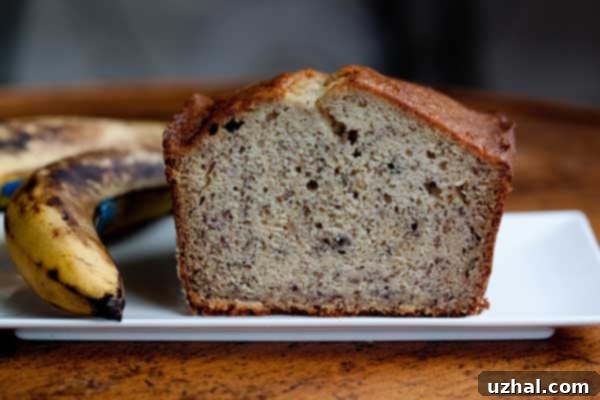
While often associated with comfort and simplicity, this particular recipe takes a few strategic turns to ensure maximum deliciousness. It champions the inclusion of sour cream, not just for a hint of tang, but primarily for its incredible ability to impart moisture and tenderness. Additionally, we advocate for bread flour to provide a sturdy yet perfectly soft structure, resulting in a less crumbly loaf that slices beautifully and holds its shape.
Why Sour Cream is Your Banana Bread’s Best Friend
Many banana bread recipes rely solely on mashed bananas for moisture, but the addition of sour cream brings a new dimension of tenderness and richness. Sour cream, with its higher fat content, contributes a velvety texture to the crumb, making each bite incredibly soft and moist. Beyond its fat, the mild acidity of sour cream also plays a crucial role. It reacts with baking soda, helping to create more air pockets and a higher rise, while also breaking down gluten strands just enough to prevent a tough texture. This combination of fat and acid ensures your banana bread isn’t just moist, but also wonderfully light and airy, avoiding the dreaded dense or gummy loaf.
The Bread Flour Advantage for Perfect Texture
Traditionally, banana bread recipes call for all-purpose flour, and there’s absolutely nothing wrong with that. However, if you’re seeking a distinct improvement in texture, we highly recommend experimenting with bread flour. As hinted in the original recipe, bread flour has a higher protein content, typically around 12-14%, compared to all-purpose flour’s 10-12%. This higher protein content means more gluten development, which can sound counter-intuitive for a tender quick bread. But in the case of banana bread, it provides just the right amount of structure to prevent the loaf from becoming too crumbly. The result? Cleaner, neater slices that don’t fall apart, a slightly chewier yet still tender crumb, and a loaf that holds its shape beautifully. It’s a subtle but noticeable upgrade for a superior homemade banana bread experience.
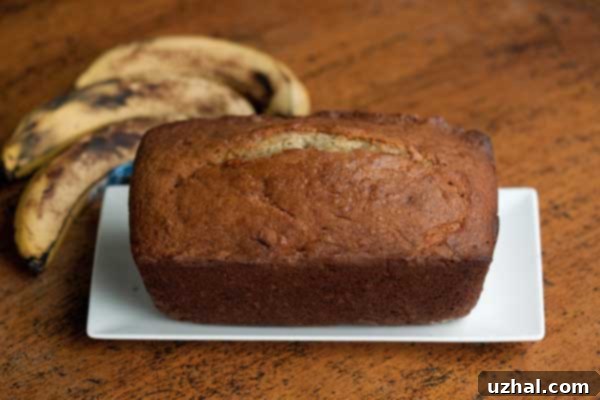
This recipe is designed to yield a moist, high-rising loaf with a tight crumb, perfectly suited for an 8 ½ by 4 ½ or 9×5 inch loaf pan. We personally favor the 8 ½ by 4 ½ inch pans because they produce a taller, more elegant loaf compared to the shorter, wider appearance of a 9×5 inch pan. It’s a small detail, but one that contributes to the overall appeal of your delicious creation.
Mastering Banana Ripeness: The Key Ingredient
The secret to truly flavorful banana bread lies in the ripeness of your bananas. Don’t be shy about using those bananas that are past their prime for eating raw – the ones with plenty of brown spots and even some black areas. These super-ripe bananas are naturally sweeter and softer, making them easier to mash and ensuring that their intense banana flavor permeates every bite of your bread. The natural sugars also contribute to a beautifully caramelized crust during baking. If your bananas aren’t quite ripe enough, you can speed up the process by baking them in their peels on a baking sheet at 300°F (150°C) for 15-30 minutes until they’re black and soft, or by placing them in a paper bag with an apple for a day or two.
Essential Tips for Baking the Perfect Sour Cream Banana Bread
- Room Temperature Ingredients: Ensure your butter, eggs, and sour cream are at room temperature. This allows them to emulsify properly, creating a smooth, uniform batter that traps air efficiently, leading to a lighter texture.
- Don’t Overmix: Once you add the dry ingredients to the wet, mix only until just combined. Overmixing develops the gluten too much, which can result in a tough, dry loaf. A few lumps are perfectly fine!
- Proper Pan Preparation: Always grease and flour your loaf pan thoroughly to prevent sticking. For easy release, you can also line the pan with parchment paper, leaving an overhang on the sides.
- Check for Doneness: Baking times can vary. Use a meat thermometer inserted into the center of the loaf; it should register between 205-210°F (96-99°C). Alternatively, a toothpick inserted into the center should come out with moist crumbs, not wet batter.
- Cooling is Crucial: Allow the banana bread to cool in the pan for 10-15 minutes before transferring it to a wire rack to cool completely. This prevents the loaf from steaming and becoming soggy, and allows it to set properly.
Delicious Variations and Add-Ins
While this sour cream banana bread is phenomenal on its own, it also serves as a fantastic base for customization. Feel free to get creative with these delicious additions:
- Chocolate Chips: A classic pairing! Stir in ½ to 1 cup of semi-sweet, dark, or milk chocolate chips for a sweet treat.
- Nuts: Beyond the walnuts mentioned in the recipe, pecans, almonds, or even macadamia nuts can add a delightful crunch and nutty flavor. Toasting them beforehand enhances their aroma and taste.
- Spices: A pinch of cinnamon, nutmeg, or allspice can add warmth and depth to the banana flavor.
- Dried Fruit: Raisins, cranberries, or chopped dates can introduce a chewy texture and additional sweetness.
- Brown Sugar Swirl: For an extra touch of decadence, sprinkle a mixture of brown sugar and cinnamon over the top of the batter before baking.
And one last photo! You can absolutely make these loaves in “normal” sizes for sharing or use mini loaf pans for individual portions or gifting.

Serving and Enjoying Your Homemade Banana Bread
This Sour Cream Banana Bread is versatile and delicious for any occasion. Serve it warm with a pat of butter that melts right into the tender crumb, or with a dollop of cream cheese for a richer experience. It’s perfect for breakfast, brunch, or an afternoon snack with your favorite coffee or tea. Leftovers (if there are any!) are fantastic for a quick grab-and-go breakfast on busy mornings.
Storage and Freezing Instructions
To keep your banana bread fresh and delicious, store it properly:
- Countertop: Once completely cooled, wrap the loaf tightly in plastic wrap or aluminum foil, or store it in an airtight container at room temperature for up to 3-4 days.
- Refrigerator: For extended freshness, store the wrapped loaf in the refrigerator for up to a week.
- Freezing: Banana bread freezes exceptionally well! Once completely cool, wrap the entire loaf or individual slices tightly in plastic wrap, then an additional layer of aluminum foil, and place in a freezer-safe bag. It can be frozen for up to 3 months. Thaw at room temperature or gently warm slices in the microwave or oven.
More Recipes to Explore
- Banana Bread with Sour Cream and Oil
- Banana Bread
- Sour Cream Chocolate Cookies
- Banana Fudge Brownies
- Peanut Butter Banana Bread with Chocolate Chips
Whether you’re a seasoned baker or just starting out, this Sour Cream Banana Bread recipe is a delightful journey. With its perfect balance of moisture, tenderness, and rich banana flavor, it’s destined to become a staple in your kitchen. Enjoy the process and the incredibly delicious results!
Recipe

Sour Cream Banana Bread
Anna
Pin Recipe
Ingredients
- 1 stick unsalted butter, softened 4 ounces/114 grams
- 1 cup granulated sugar or use ½ cup brown and ½ cup white
- 2 large eggs room temperature
- 1 teaspoon vanilla extract
- 1 ½ cups bread flour or all-purpose (weigh if possible) (210 grams)
- 1 teaspoon baking soda
- ¾ teaspoon salt reduce to half if using salted butter
- 1 cup mashed ripe bananas about 3 (sometimes 4 or up to 11 oz weight)
- ½ cup sour cream
- ½ cup toasted and chopped walnuts optional
Instructions
-
Preheat the oven to 350 degrees F (175°C). Grease and flour a 9×5 inch loaf pan or use an 8 ½ by 4 ½ inch loaf pan for a slightly taller loaf.
-
In a large mixing bowl, beat the softened butter and granulated sugar until creamy and light.
-
With the mixer on low speed, beat in the room temperature eggs one at a time, ensuring each is fully incorporated before adding the next. Increase speed to high and beat for 30 seconds to incorporate air. Beat in the vanilla extract.
-
In a separate, second bowl, thoroughly whisk together the flour (bread flour or all-purpose), baking soda, and salt. Add these dry ingredients to the wet batter and stir by hand with a spoon or spatula until just mixed; avoid overmixing. Gently fold in the mashed bananas, then stir in the sour cream and optional toasted nuts until uniformly distributed.
-
Pour the batter into the prepared loaf pan, ensuring not to overfill (leave at least an inch from the top for rising). Bake for 55 minutes to an hour, or until a meat thermometer inserted in the center registers between 205 and 210 degrees F (96-99°C). A toothpick inserted should also come out with moist crumbs.
Notes
You can also halve this recipe to make a petite but delicious 8×4 inch loaf. If you opt for a smaller loaf, begin checking for doneness around 40 minutes into the baking process. A Bundt pan can also be used for a more decorative shape, but be sure to grease and flour it very thoroughly to prevent sticking. And finally, for a simpler preparation, this bread is also excellent when made with melted butter. If you use melted butter, you can skip the electric mixer entirely and simply beat everything together by hand with a spoon. This method is great for a rustic, denser loaf.
