Authentic Homemade Cannoli Recipe: Crispy Shells & Creamy Ricotta Filling
The journey to crafting the perfect homemade cannoli from scratch can be incredibly rewarding. Years ago, my initial attempts were marked by uncertainty and a lack of access to high-quality ingredients. However, much has changed since then. With more experience under my belt and a steady supply of excellent ricotta cheese readily available here in Chicago, preparing this classic Italian dessert has become a delightful culinary adventure. While I occasionally embark on the full process of making cannoli shells from scratch, I more often opt for the convenience of store-bought shells (like the reliable Alessi brand) paired with my perfected homemade cannoli filling. This guide will walk you through both paths, ensuring you can enjoy a truly exquisite cannoli experience tailored to your time and preference.

The Irresistible Charm of Homemade Cannoli
There’s something uniquely satisfying about biting into a freshly made cannoli. The crisp, slightly bubbly shell gives way to a decadent, smooth, and sweet ricotta filling, often studded with chocolate chips or candied fruit. Originating in Sicily, cannoli are a quintessential Italian pastry, traditionally prepared during Carnival season, though now enjoyed year-round. While readily available in Italian bakeries, making them at home allows for unparalleled freshness and customization, ensuring every bite is exactly to your liking. This recipe aims to demystify the process, making it accessible for home bakers of all skill levels.
Crafting the Perfect Cannoli Filling: The Heart of the Dessert
The filling is arguably the most crucial component of a cannoli. A truly great cannoli filling is rich, subtly sweet, and incredibly smooth, with a delicate balance of flavors. Our homemade cannoli filling recipe consistently relies on a luxurious trio: ricotta cheese, cream cheese, and whipped cream. This combination yields a filling that is both traditional in its ricotta base and wonderfully creamy due to the addition of cream cheese and whipped cream.
The Ricotta Factor: Quality and Preparation
The foundation of an outstanding cannoli filling is high-quality ricotta cheese. Opt for whole milk ricotta, as its richer fat content contributes to a creamier, more flavorful filling. Brands like BelGioso are excellent choices if available in your area. Regardless of the brand, an essential step for achieving an extra-smooth filling is to press out any excess liquid from the ricotta. Ricotta naturally holds a lot of moisture, which, if not removed, can lead to a watery filling that quickly makes your shells soggy. To do this, place the ricotta cheese on a stack of paper towels or in a cheesecloth-lined sieve set over a bowl. Blot or drain it for at least 30 minutes, or even overnight in the refrigerator for the best results. You might be surprised by how much liquid comes out, especially if you’re using a wetter ricotta.
Achieving Silky Smoothness: The Food Processor’s Role
Once the ricotta is adequately drained, transfer it to a food processor along with softened cream cheese (or mascarpone for an even richer taste). Process these ingredients until the mixture is completely smooth and creamy, without any grainy texture. Don’t hesitate to scrape down the sides of the bowl periodically to ensure everything is thoroughly combined. Even with high-quality ricotta, this processing step is highly recommended as it guarantees that signature silky texture. Since you’ll likely have the food processor out anyway if you’re making homemade shells, this step adds minimal effort for maximum reward.
Flavor Harmony: Sweetness, Vanilla, and a Hint of Lemon
After achieving the desired smoothness, it’s time to introduce the flavorings. Add confectioners’ sugar (also known as powdered sugar) for sweetness. Confectioners’ sugar is preferred over granulated sugar because its fine texture dissolves easily, contributing to the smooth consistency. You can adjust the amount to your preference; some prefer a less sweet filling, while others enjoy a more pronounced sweetness. Vanilla extract is crucial for classic cannoli flavor, adding warmth and depth. For a bright, authentic touch, a teaspoon of lemon juice is an optional but highly recommended addition. It cuts through the richness of the cheese, providing a subtle tang that elevates the entire filling.
The Whipped Cream Difference: Lightness and Texture
Finally, to achieve that light, airy texture that distinguishes a truly exceptional cannoli, gently fold in whipped heavy cream. Whip the cream separately until soft peaks form, then carefully incorporate it into the cheese mixture. This step introduces air and volume, making the filling wonderfully fluffy. As a convenient shortcut, especially if you’re short on time or prefer a slightly different flavor profile, you can sometimes substitute whipped topping for homemade whipped cream. While store-bought whipped topping is often pre-sweetened, it typically doesn’t make the cannoli filling overly sweet, offering a pleasant and time-saving alternative.
Adding Character: Chocolate Morsels and Other Mix-ins
To complete the filling, stir in semi-sweet mini chocolate morsels. The small size of the mini morsels ensures a good chocolate-to-filling ratio in every bite without overwhelming the delicate flavor of the ricotta. For those looking to customize, consider other mix-ins like finely chopped candied orange peel, chopped pistachios, or a touch of orange zest. These additions can provide extra texture and flavor dimensions, allowing you to personalize your cannoli to your taste.

The Art of the Cannoli Shell: Crispy Perfection
The shell is the crispy, golden vessel that holds the creamy filling, and its texture is paramount to a great cannoli. You have two main options: making them from scratch or using store-bought shells. Each has its merits, and your choice will likely depend on how much time you have and your comfort level with deep-frying.
Homemade Shells: A Rewarding Endeavor
Making cannoli shells from scratch is a rewarding process, resulting in exceptionally fresh and flavorful shells that are often lighter and crispier than their store-bought counterparts. The method for making the dough is surprisingly similar to creating pie dough, but instead of one large crust, you’ll be forming about 10 small, thin rounds. The dough typically consists of flour, sugar, salt, butter, egg yolk, vanilla, and a crucial ingredient: dry white wine (though brewed coffee can also be used as an alternative). The wine helps create a tender yet crisp texture and adds a subtle depth of flavor to the shell. Weighing your flour (230 grams for this recipe) is highly recommended for the most consistent results.
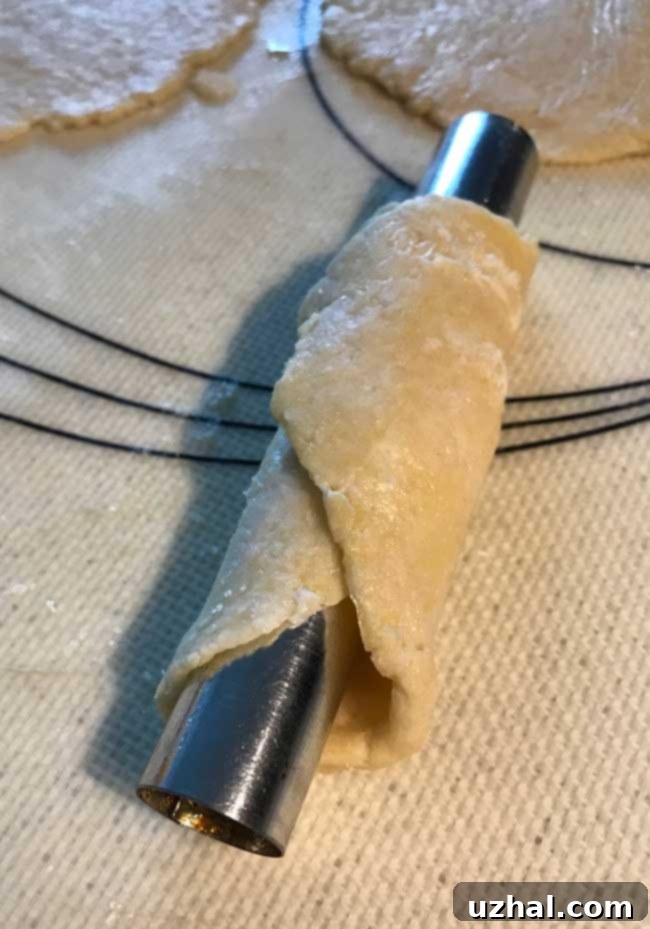
Once the dough comes together in the food processor (or by hand), it should be smooth but firm. After a short resting period (at least 30 minutes), divide the dough into equal pieces and roll each one out into a very thin circle, approximately 5 inches in diameter. The thinner you roll the dough, the crispier your shells will be. Each circle is then wrapped around a metal cannoli form, overlapping the ends and pressing firmly to seal. Be careful not to press the dough too tightly onto the form, as this can make it difficult to remove the fried shell later.

Frying Pastry Shells: The Golden Crunch
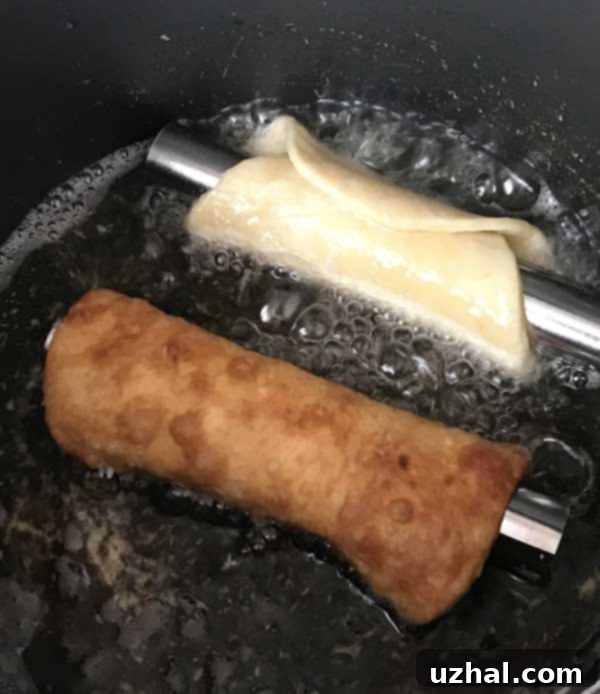
Deep frying is the step that some home cooks find daunting, but with proper precautions, it’s quite manageable and results in beautifully golden, bubbly shells. Peanut oil is an excellent choice for frying due to its high smoke point and neutral flavor, which won’t interfere with the delicate taste of the cannoli. Heat about 1 inch of oil in a heavy-bottomed pot or deep fryer to approximately 350-375°F (175-190°C). Using a thermometer is highly recommended for consistent results and safety.
Carefully lower two dough-wrapped cannoli forms into the hot oil at a time, ensuring you don’t overcrowd the pot, which can lower the oil temperature. Fry for about 1-3 minutes, turning them occasionally with tongs to ensure even browning on all sides. The shells will puff up and turn a rich golden brown. Once fried, remove the shells from the oil and place them on a rack lined with paper towels to drain any excess oil. Allow them to cool for a few minutes until they are cool enough to handle, then carefully slide the crispy shells from the metal tubes. Repeat with the remaining dough.

Opting for Convenience: Store-Bought Shells
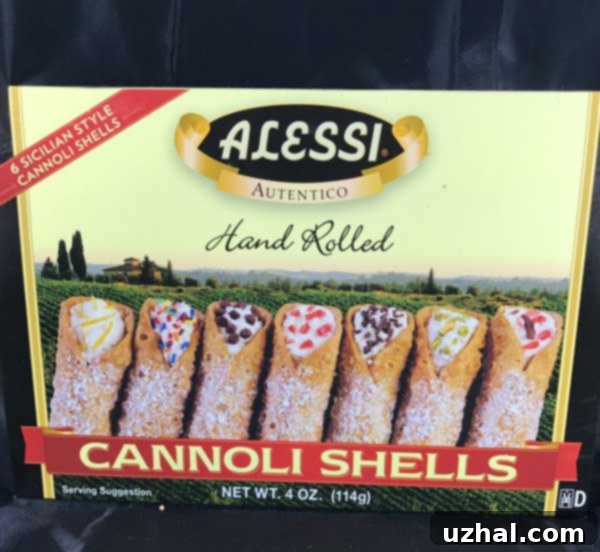
If you prefer to skip the deep-frying step or simply want to save time, store-bought cannoli shells are a fantastic option. They offer convenience without compromising on the quality of your homemade filling. You can often find reputable brands like Alessi in the international or baking aisles of larger grocery stores. These pre-made shells are typically ready to fill and will still deliver that satisfying crunch when paired with your fresh, creamy ricotta filling. This allows you to focus all your energy on perfecting the star of the show – the filling!

Assembling and Serving Your Masterpiece
The key to serving perfect cannoli is to fill them just before serving. If you fill them too far in advance, the moisture from the ricotta filling will soften the crispy shells, leading to a less enjoyable texture. Prepare your filling ahead of time and store it in an airtight container in the refrigerator. When you’re ready to serve, transfer the chilled filling to a piping bag fitted with a wide, plain tip (or simply use a spoon if you don’t have a piping bag). Gently pipe the filling into each cannoli shell from both ends until it meets in the middle. For a classic finish, dust the filled cannoli with a sprinkle of confectioners’ sugar. You can also dip the ends in mini chocolate chips, chopped pistachios, or candied orange peel for added visual appeal and flavor. Serve immediately and watch them disappear!
Recipe

Cannoli
Cookie Madness
Pin Recipe
Ingredients
Filling:
- 1 cup whole milk ricotta cheese — I like a brand called BelGioso
- 2 oz cream cheese softened (or mascaprone)
- ⅓ cup confectioners’ sugar use more if desired
- 1 ½ teaspoon vanilla extract
- 1 teaspoon lemon juice optional
- ¼ cup heavy whipping cream or ½ cup whipped topping**
- ⅓ cup semi-sweet chocolate mini morsels
Cannoli Shells — Use Store Bought or This Recipe
- 2 cups minus 2 T flour 230 grams (weigh the flour for best results)
- 1 tablespoon plus 1 teaspoon granulated sugar
- ¼ teaspoon salt
- 1 ½ tablespoons unsalted butter softened
- 1 egg yolk
- ½ cup dry white wine plus water if needed can also use brewed coffee
- ¼ teaspoon vanilla
- Oil for frying
Instructions
-
Place ricotta cheese on a stack of paper towels and blot out any excess moisture. If you use good ricotta, you probably won’t get much drainage. Transfer to food processor. Add cream cheese and process until smooth and creamy. Scrape sides of bowl. Process a little more, then add confectioners’ sugar, vanilla and lemon juice; process for another 30 seconds.
-
Whip the cream with a handheld mixer and fold into the cheese.
-
To make shells, mix flour, sugar and salt in bowl of food processor. Add butter and pulse until mixture is coarse. Combine egg yolk, wine and vanilla and add to processor. Pulse until mixer comes together. If mixture still seems too dry, add water 1 tablespoon at a time until it comes together when pinched. Empty onto a sheet of waxed paper and shape into a ball. Let stand for at least 30 minutes or until ready to use.
-
Divide dough into 10 equal pieces and shape each into a ball. Press and then roll each ball into a very thin circle.
-
Roll each circle of dough around a metal cannoli tube, overlapping the ends and press to seal. Try not to press the dough on too tight or the cannoli shell will be more difficult to remove.
-
Fry two at a time in about a 1 inch of peanut oil for approximately 1-3 minutes, turning to brown all side. Remove from oil and set on paper towels to drain. Let cool for a few minutes, then carefully slide from tubes.
Notes
Tips for Cannoli Success
- **Drain Ricotta Thoroughly:** This is arguably the most important step for a non-soggy, perfectly textured filling.
- **Roll Dough Thin:** For truly crispy homemade shells, aim for paper-thin dough. This prevents them from being too bready.
- **Monitor Oil Temperature:** Use a deep-fry thermometer when frying shells. Too cool, and the shells will be greasy; too hot, and they’ll burn before cooking through.
- **Fill Just Before Serving:** This cannot be stressed enough to maintain the crunch of the shells.
- **Don’t Overfill Forms:** When making shells, avoid pressing the dough too tightly on the cannoli tubes. A slight looseness helps them slide off easily after frying.
- **Store Components Separately:** Keep unfried shells (unwrapped or on forms) and filling refrigerated separately until ready to assemble.
Variations to Explore
While the classic cannoli is a masterpiece on its own, feel free to experiment with these variations:
- **Citrus Zing:** Add more orange or lemon zest to the filling for a brighter, more aromatic flavor.
- **Nutty Crunch:** Dip the ends of the filled cannoli in chopped pistachios, almonds, or hazelnuts.
- **Chocolate Lover’s Dream:** Melt some chocolate and dip the cooled cannoli shells in it before filling. Let the chocolate set, then fill for an extra layer of decadence.
- **Liqueur Infusion:** A small splash of Marsala wine, rum, or orange liqueur can be added to the filling for an adult twist.
- **Mini Cannoli:** Use smaller cannoli forms and roll out smaller dough circles for bite-sized treats perfect for parties.
Final Thoughts on Your Homemade Cannoli Journey
Whether you choose to embrace the full homemade experience, from dough to deep-fry, or opt for the convenience of store-bought shells, the journey of making cannoli at home is incredibly rewarding. The aroma of frying shells, the satisfaction of creating a silky-smooth filling, and the joy of sharing these delightful Italian pastries with loved ones are unparalleled. This recipe provides a solid foundation, offering both traditional techniques and practical shortcuts to ensure your homemade cannoli are nothing short of spectacular. So go ahead, don your apron, and bring a taste of Sicily into your kitchen!
- Cannoli Poke Cake
- Ricotta Muffins
- Ricotta Rum Chocolate Chip Muffins
- Ricotta Cheese Chocolate Muffins
- Chocolate Ricotta Muffins
