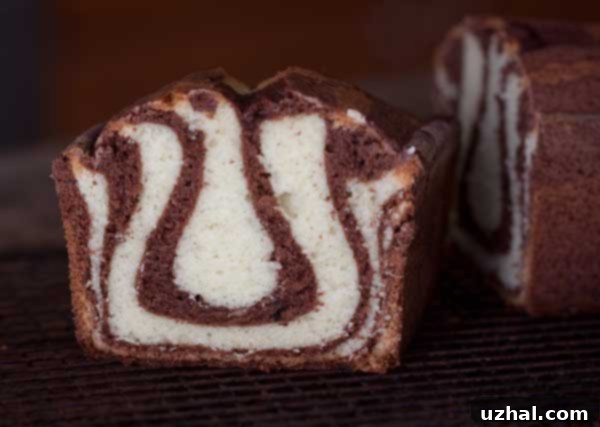
Discover the Unique Marbled Olive Oil Cake: Alice Medrich’s Elegant Tiger Cake Recipe
Embark on a culinary journey with a truly exceptional dessert: the Marbled Olive Oil Cake, affectionately known as “Tiger Cake” or “Zebra Cake.” This stunning creation hails from the brilliant mind of Alice Medrich, often hailed as the “Queen of Chocolate” for her innovative and precise approach to baking. I first encountered the original version of this extraordinary cake in her seminal work, Bittersweet – a book that I wholeheartedly believe belongs on the shelf of every true chocolate lover. It’s a treasure trove of recipes that challenge conventional baking with delightful results.
For the longest time, I confess, I hesitated to try this particular recipe. Perhaps it was the intrigue of the “unusual” flavor combination – the prominent use of extra virgin olive oil paired with a dash of white pepper – that initially made me pause. Yet, the curiosity of such a unique cake, promising a blend of robust and delicate notes, eventually won me over. And what a discovery it was! This Marbled Olive Oil Cake isn’t just a dessert; it’s an experience, offering a beautiful appearance, an intriguing flavor profile, and an unparalleled texture that will captivate your senses. It’s a testament to how simple, quality ingredients can transform into something truly extraordinary.
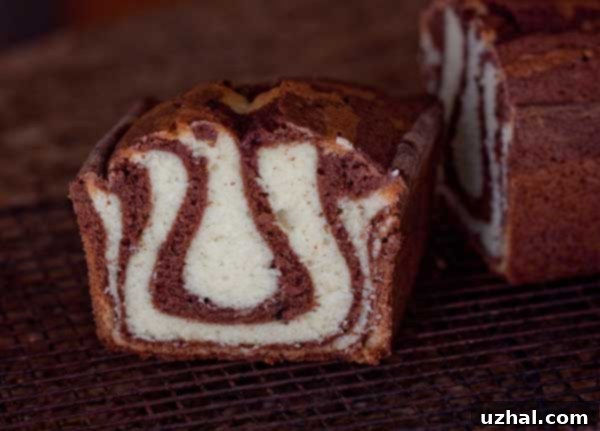
Marbled Olive Oil Cake: A Symphony of Delicate Flavor and Unforgettable Texture
One of the most defining characteristics of this Marbled Olive Oil Cake, much like many traditional Italian cakes, is its wonderfully delicate yet complex flavor. Unlike heavily sweetened or overly rich desserts, this cake offers a more refined palate experience. It’s neither excessively salty nor cloyingly sweet, finding a perfect balance that allows the quality of its core ingredients to shine through. The secret to its profound flavor lies in two key components: a high-quality, flavorful extra virgin olive oil and the subtle warmth of white (or black) pepper. Neglecting either of these will undoubtedly diminish the magic of this cake, so choose your olive oil wisely – a robust, fruity variety is highly recommended to achieve the best results.
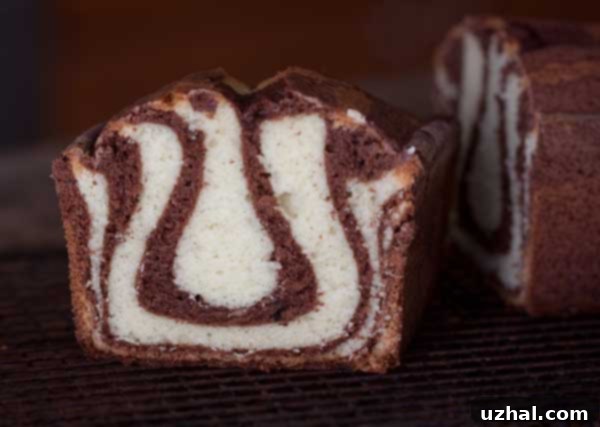
The visual impact of the cake, with its bold, striking marbled pattern, cleverly contrasts with its understated and delicate taste. This unexpected duality is part of its charm. Beyond the flavor, the texture of this Marbled Olive Oil Cake is truly “out of this world.” It’s incredibly moist, wonderfully tender, and possesses a fine, almost silky crumb that melts in your mouth. To preserve this ethereal texture, paying close attention to your flour measurement is paramount. Over-measuring flour is a common pitfall that can lead to a dry, dense cake. For consistently perfect results, I strongly recommend weighing your flour using a kitchen scale. If a scale isn’t available, make sure to fluff the flour thoroughly in its container before gently spooning it into your measuring cup and leveling it off, rather than scooping directly from the bag, which compacts the flour and leads to over-measurement.
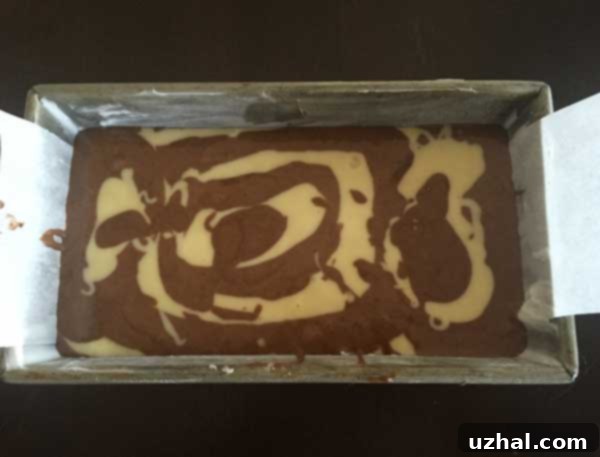
Achieving the signature marbled effect is an exciting part of the baking process. The photo above provides a glimpse into what my batter looked like just before it went into the oven. I initiated the marbling by carefully dropping alternating colors of batter into the center of the loaf pan, aiming for a bullseye pattern. Interestingly, while my initial drops didn’t perfectly form a bullseye, the baking process itself worked its magic. As the cake baked, the batters subtly shifted and swirled, transforming into an absolutely captivating and unique pattern. This organic transformation is what makes each slice of Marbled Olive Oil Cake a delightful surprise, showcasing intricate designs reminiscent of tiger stripes or zebra patterns, hence its playful nicknames.
Crafting the Iconic Marbled Pattern: A Visual Delight
The visual appeal of the Marbled Olive Oil Cake is undoubtedly one of its most striking features. The contrast between the rich cocoa batter and the lighter, olive oil-infused vanilla batter creates a dynamic and artistic swirl that is beautiful to behold. The “bullseye” method, as described, is a classic approach to achieve this. You start with a dollop of one batter in the center of your prepared pan, allowing it to spread slightly. Then, you place a dollop of the second color directly into the center of the first, letting it too expand. Continuing this alternating process builds concentric rings of color. While you might not see perfect circles with each pour, the gentle nature of the batter and the heat of the oven will encourage a natural, flowing marble effect. Don’t be afraid to experiment; you can also simply drop alternating spoonfuls of batter randomly into the pan and gently swirl with a knife for a different, equally beautiful, chaotic marble. The beauty of the Tiger Cake lies in its imperfect perfection – no two slices are exactly alike.
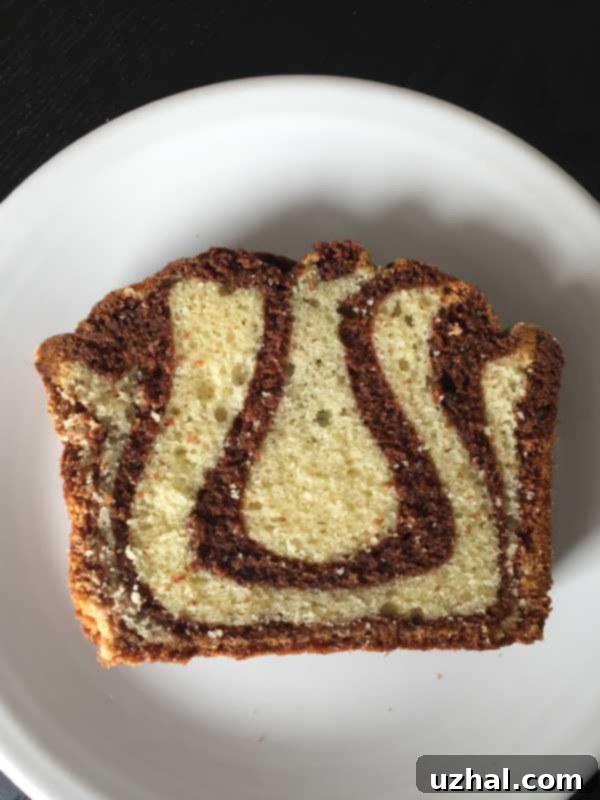
This cake is not just a treat for the taste buds but also a feast for the eyes, making it an ideal choice for special occasions or simply to elevate an everyday moment. The distinct layers and swirls of chocolate and vanilla batter, achieved with the unique inclusion of olive oil, create a sophisticated yet approachable dessert. The slight peppery kick adds another layer of complexity that keeps you coming back for another slice. It’s a truly memorable baking project that yields delicious, impressive results, reinforcing why Alice Medrich’s recipes are so beloved.
The Art of Baking with Olive Oil: Expert Tips for a Perfect Cake
Mastering this Marbled Olive Oil Cake involves a few key baking insights, especially concerning the star ingredient: extra virgin olive oil. For starters, the type of olive oil you choose significantly impacts the final flavor. Opt for a high-quality, robust extra virgin olive oil. While it might seem counterintuitive to use a strong-flavored oil in a cake, it’s precisely those peppery, fruity, or grassy notes that will lend a wonderful depth and unique character to your cake, distinguishing it from traditional butter-based recipes. A bland olive oil will result in a bland cake, so don’t be shy about investing in a good bottle.
Another crucial tip, as mentioned earlier, is the accurate measurement of flour. Baking is a science, and precision pays off. Using a digital kitchen scale to measure your flour by weight (190 grams for 1 ½ cups) will prevent the cake from becoming dry and heavy. Volume measurements can be inconsistent, as flour compacts differently depending on how it’s stored and scooped. If you absolutely must use measuring cups, aerate your flour by whisking it first, then spoon it lightly into the cup and level it off without compacting.
When preparing your pan, don’t cut corners. A well-greased and parchment-lined 6-cup loaf pan ensures easy release and maintains the cake’s beautiful shape. Grease, line with parchment allowing an overhang for easy lifting, then grease the parchment again and lightly dust with flour, tapping out any excess. This multi-step process guarantees a perfect cake release every time.
The mixing process is equally important. When beating the sugar, olive oil, vanilla, salt, and pepper (white pepper is incorporated earlier for its subtle heat, black pepper can be added with cocoa), aim for a thick, pale, and well-blended mixture. This aeration provides structure. When adding the flour and milk alternately, mix on low speed or by hand only until *just* blended. Overmixing develops the gluten in the flour, leading to a tough cake, which is the opposite of the delicate texture we’re aiming for.
Finally, trust the toothpick test. Insert a toothpick into the center of the cake; it should come out clean, perhaps with a few moist crumbs, but no wet batter. Baking times can vary slightly depending on your oven, so this visual and tactile cue is your best indicator. Allowing the cake to cool in the pan for about 20 minutes before transferring it to a rack to cool completely is also vital. This allows the cake to set and prevents it from breaking when removed from the pan.
Why This Marbled Olive Oil Cake Stands Out from the Rest
In a world full of classic cakes, Alice Medrich’s Marbled Olive Oil Cake truly carves out its own niche. It’s more than just a dessert; it’s a conversation starter, a unique blend of familiar comfort and unexpected sophistication. What makes it stand out? Firstly, the bold use of extra virgin olive oil. This isn’t just a fat substitute; it’s a flavor enhancer, imparting a rich, nuanced base that’s both earthy and subtly fruity, a departure from the one-note richness of butter. This not only contributes to its exquisite flavor but also its remarkable moisture and tenderness, ensuring the cake remains fresh and delightful for days.
Secondly, the intriguing inclusion of a dash of white (or black) pepper. This might sound unconventional, but the pepper doesn’t add heat; rather, it amplifies the subtle notes of the chocolate and olive oil, creating an aromatic depth that is surprisingly harmonious and utterly addictive. It’s a testament to Medrich’s genius in balancing flavors.
Visually, the “Tiger Cake” lives up to its name. The dramatic marble pattern is naturally captivating, making it a beautiful centerpiece for any gathering, from a casual brunch to an elegant dinner party. Each slice reveals a unique, artistic swirl, promising a delightful surprise every time. This cake effortlessly marries visual appeal with an extraordinary taste and texture, offering a dessert experience that is both memorable and refreshingly different. It’s a celebration of simple, quality ingredients brought together in an innovative way, making it a truly special addition to any baker’s repertoire.
Serving and Storage Suggestions for Your Marbled Olive Oil Cake
Once your Marbled Olive Oil Cake has cooled completely, it’s ready to be savored. This cake is exceptionally versatile and delicious served either at room temperature or slightly warmed. A light dusting of powdered sugar is often all it needs to highlight its intricate marbled top, but you could also serve it alongside fresh berries, a dollop of crème fraîche, or a scoop of vanilla bean ice cream for an extra touch of indulgence. Its robust yet delicate flavor profile makes it an ideal companion for a strong cup of coffee or espresso, or a comforting mug of tea. It’s equally at home as a sophisticated dessert or a delightful mid-afternoon treat.
Proper storage ensures that you can enjoy the exquisite flavors and moist texture of your Tiger Cake for several days. At room temperature, the cake keeps beautifully under a cake dome or tightly wrapped in plastic wrap. The olive oil helps maintain its moisture, extending its freshness. If you’ve baked a larger loaf and want to preserve some for later, this cake freezes exceptionally well. I often cut mine in half (after enjoying a few slices with my family, of course!) and wrap each half securely in plastic wrap, then place it in a freezer-safe bag or container. When you’re ready to enjoy it, simply thaw it at room temperature, and it will be as moist and flavorful as the day it was baked.
- Extra Virgin Oatmeal Cookies
- Olive Oil Brownies
- Marble Rye Bread
- Marbled White Chocolate Cheesecake
- Marbled Layer Cake
Marbled Olive Oil Cake Recipe

Marbled Olive Oil Cake
Anna
Pin Recipe
Ingredients
- ¼ cup unsweetened cocoa powder, natural (20 grams) – for the dark batter swirl
- ¼ cup sugar (50 grams) – for the cocoa mixture
- 2 tablespoons plus 2 teaspoons water – to create the cocoa paste
- 1 ½ cups all-purpose unbleached flour (190 grams) – vital for cake structure, weigh for accuracy
- 1 teaspoon baking powder – for leavening
- 1 cup sugar (200 grams) – for the main batter
- ½ cup extra virgin olive oil – choose a robust, flavorful variety
- ½ teaspoon pure vanilla extract – for aromatic depth
- ¼ teaspoon salt – to balance flavors
- ¼ teaspoon finely ground white pepper or use black pepper – for a unique flavor enhancement
- 2 large cold eggs plus 2 tablespoons lightly beaten egg – for richness and structure
- ½ cup whole milk, cold – for moisture
Instructions
-
Preheat your oven to 350 degrees F (175°C). Prepare a 6-cup capacity loaf pan by greasing it thoroughly, then lining it with parchment paper, leaving an overhang on the longer sides for easy removal. Grease the parchment paper again and lightly dust with flour, tapping out any excess to prevent sticking.
-
In a small bowl or a 2-cup measuring cup, whisk together the cocoa powder, ¼ cup sugar, and 2 tablespoons plus 2 teaspoons of water until the mixture is completely smooth and free of lumps. This creates your rich cocoa paste for the darker batter.
-
In a separate large bowl, thoroughly whisk together the all-purpose flour and baking powder. For best results and a lighter cake, sift this dry mixture onto a piece of wax paper, ensuring it’s well combined and aerated.
-
In the bowl of a stand mixer fitted with the whisk attachment (or using a hand mixer), combine the remaining 1 cup of sugar, ½ cup extra virgin olive oil, vanilla extract, salt, and white pepper (if using white pepper, add it now; if opting for black pepper, reserve it for the cocoa batter). Beat on medium-high speed until all ingredients are well blended and the mixture is light. Add the 2 large cold eggs one at a time, beating well after each addition to ensure full incorporation. Continue to beat the mixture for an additional 3 to 5 minutes until it becomes notably thick and pale, indicating proper aeration.
-
Reduce the mixer speed to low (or mix gently by hand). Add the sifted flour mixture and the cold whole milk to the batter alternately, beginning and ending with the flour. Mix only until just blended – be careful not to overmix, as this can lead to a tough cake.
-
Transfer approximately 1 ½ cups of the plain (white) batter into the prepared cocoa mixture from step 2. Stir gently until the cocoa is fully blended into the batter, creating your dark, marbled component. If you opted to use black pepper instead of white, this is the time to add it to the cocoa batter and mix it in.
-
To create the distinctive marble pattern, pour a portion of the plain batter into the center of your prepared loaf pan, allowing it to spread out slightly. Next, pour some of the cocoa batter directly into the center of the plain batter, letting it naturally expand to form a bullseye-like pattern. Continue layering the batters alternately in this fashion, pouring into the center each time, without stirring them together with a utensil. Alternatively, for a more rustic swirl, you can simply pour alternating spoonfuls or dollops of each batter into the pan in any desired pattern.
-
Bake the cake for 1 hour to 1 hour and 10 minutes, or until a wooden skewer or toothpick inserted into the very center of the cake comes out clean (a few moist crumbs are fine, but no wet batter). Baking times can vary, so monitor your cake closely as it nears the 1-hour mark.
-
Once baked, remove the pan from the oven and place it on a wire rack to cool for approximately 20 minutes. This crucial resting period allows the cake to set fully, making it easier to handle. After 20 minutes, carefully lift the cake out of the pan using the parchment paper overhangs and transfer it directly to the wire rack to cool completely. The Marbled Olive Oil Cake can be stored for several days at room temperature, ideally under a cake dome or wrapped tightly in plastic to maintain its moisture. For longer storage, I recommend cutting the cooled cake in half and freezing the two halves, securely wrapped, for a future treat.
