Homemade Gluten-Free Graham Crackers: Your Ultimate Guide to Crispy, Flavorful Treats
The journey to discovering truly delicious gluten-free alternatives can often be a costly one, especially when it comes to specialty items like graham crackers. I vividly recall the moment a few weeks ago when I needed some for a gluten-free pie crust and was taken aback by their price tag. While buying a box for a quick taste test might have been the easiest route, my adventurous spirit (and budget-conscious mind) led me down a different path: a quest for the perfect homemade gluten-free graham cracker recipe. After much experimentation, I am thrilled to share my absolute favorite version with you. This recipe delivers a delightful crunch and a deeply satisfying flavor that will make you forget all about the store-bought varieties, and perhaps even save you a pretty penny!

Unveiling the Unique Flavor and Texture of These Gluten-Free Graham Crackers
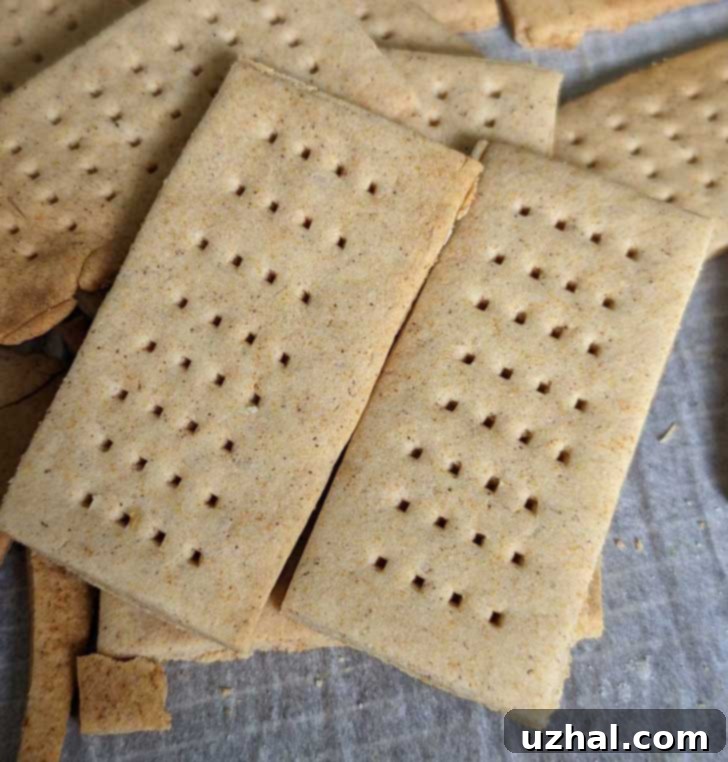
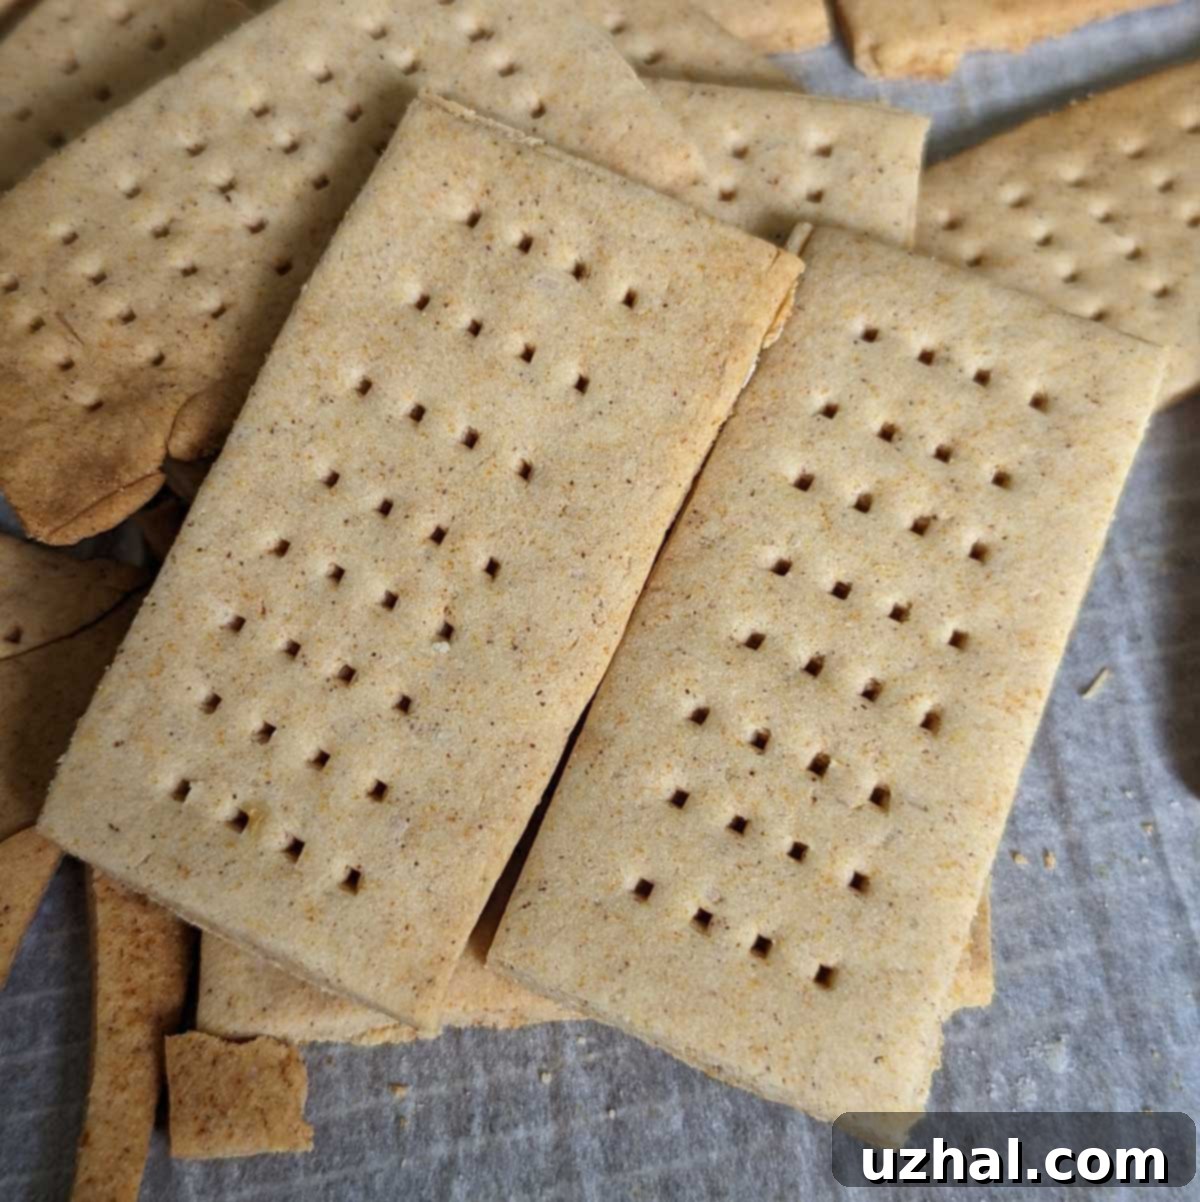
Let’s be upfront: these homemade gluten-free graham crackers do not mimic the exact taste and texture of conventional Honey Maid crackers. And that’s perfectly okay! Instead, they offer a wonderfully distinct experience that stands on its own. You’ll find them less overtly sweet than their traditional counterparts, allowing a more nuanced flavor profile to shine through. The secret lies in the harmonious blend of cinnamon, the rich sweetness of honey, the warm notes of vanilla, and the optional but highly recommended hint of maple syrup. Each ingredient plays a crucial role in creating a depth of flavor that is truly satisfying.
When it comes to texture, these crackers are delightfully crispy, providing that satisfying snap you expect from a graham cracker. However, they possess a slightly denser, richer quality compared to the typically airy texture of conventional graham crackers. This isn’t to say they are “shortbread-like” – they maintain a distinct cracker crispness – but they offer a more substantial bite. This richer texture makes them incredibly versatile, perfect for enjoying on their own as a wholesome snack, crumbling into a pie crust, or stacking high with marshmallows and chocolate for an unforgettable gluten-free s’mores experience. Their robust structure holds up beautifully to various toppings and uses, ensuring they won’t crumble prematurely.
Choosing Your Gluten-Free Flour: 1:1 Blends or a Custom Mix
The foundation of any successful gluten-free bake lies in the flour, and graham crackers are no exception. Many traditional gluten-free graham cracker recipes, particularly older ones, often feature a specific mix of flours, with sorghum flour frequently making an appearance. Sorghum is an excellent choice for gluten-free baking because it imparts a subtle, earthy flavor that surprisingly echoes the taste of wheat, making it ideal for recreating classic baked goods.
This natural affinity for a wheat-like flavor is precisely why King Arthur’s Measure for Measure gluten-free flour blend performs so exceptionally well in this recipe. Sorghum is the third ingredient listed in their blend, and its characteristic flavor subtly yet noticeably enhances the graham crackers, contributing to their authentic taste. Therefore, I highly recommend using King Arthur’s Measure for Measure as your go-to all-purpose gluten-free flour substitute for this recipe. It’s a reliable, widely available blend that consistently yields fantastic results.
Beyond King Arthur, I’ve also had success with other 1:1 blends. Notably, the brand “Measure for Measure” (different from King Arthur’s product, despite the similar name) also works well. This particular brand is intriguing for its unique selling point of pre-measured flour packets, which can be a convenient option for some bakers. I’ve primarily encountered this brand at Publix stores. Another fantastic update: I’ve recently tested this recipe using Cup4Cup gluten-free flour, and it works wonderfully too! When substituting, the most critical factor is to ensure you use the same weight of flour as specified in the recipe. Gluten-free flours can vary significantly in density, so weighing is key to consistent results. For those who enjoy crafting their own blends, the “Notes” section of the recipe provides an alternative blend suggestion, allowing you to tailor the recipe to your existing gluten-free flour collection.
Understanding the Importance of Weighing Gluten-Free Flour
When it comes to gluten-free baking, precision is paramount, and nowhere is this more critical than with flour measurement. The weight of 1 cup of gluten-free flour can astonishingly vary between different brands, due to differences in composition and how finely the flours are milled. Moreover, even within the same brand, the volume of a “cup” can differ depending on how you scoop it – whether you lightly spoon it into the measuring cup or tightly pack it in. These seemingly minor discrepancies can significantly impact the dough’s consistency and, ultimately, the final texture of your graham crackers.
For example, 1 cup of King Arthur Measure for Measure typically weighs around 135 grams in my kitchen. Following a volumetric measurement for the recipe, this would suggest a total amount of a scant 1 ¾ cups. However, to eliminate any guesswork and ensure optimal results every time, I strongly recommend weighing out precisely 230 grams of your chosen gluten-free flour blend. Investing in a simple kitchen scale is one of the best steps you can take to elevate your gluten-free baking game, ensuring consistency, reducing frustration, and producing consistently delicious results. Trust me, it makes a world of difference!
The Role of Shortening in Achieving That Perfect Graham Cracker Snap
Choosing the right fat is crucial for the texture of these gluten-free graham crackers. I primarily opt for shortening in this recipe for two key reasons. First, shortening is instrumental in developing that desirable snappy, crisp texture that is characteristic of a great graham cracker. Its unique fat structure helps create a delicate crumb that crisps up beautifully during baking. Second, and equally important for many, shortening does not contain dairy, making these crackers suitable for those with dairy sensitivities or allergies, or for anyone following a vegan diet (provided all other ingredients are also vegan-friendly).
I’ve successfully tested this recipe with two different brands of shortening: Star Fine Foods Agreena and Spectrum, the latter being more widely available in many grocery stores. Both delivered excellent results in terms of texture. For those looking for alternatives or desiring a slightly different flavor profile, coconut oil is a viable substitute. I’ve found it works well in my other graham cracker recipes, and subsequent tests confirmed its efficacy here too. A recent update involved successfully making a batch using ¼ cup (56 grams) of coconut oil. Another successful test was conducted with Nutiva shortening. When using coconut oil, ensure it’s in its solid, unrefined state for the best results, as this will contribute to the desired texture and a subtle, pleasant coconut aroma. The choice between shortening and coconut oil ultimately comes down to personal preference for flavor and dietary needs, but both will yield a wonderfully crisp cracker.
Sweeteners and Spices: Crafting the Signature Graham Cracker Flavor
The distinct, comforting flavor of graham crackers comes alive through a thoughtful combination of sweeteners and spices. Honey is a foundational ingredient, lending its unique floral and sweet notes that are indispensable to the classic graham cracker taste. If you’re particularly fond of a pronounced honey flavor, feel free to use 100% honey as your sole liquid sweetener in this recipe.
However, I often opt for a combination of honey and maple syrup. This blend not only offers a slightly different, more complex flavor profile but also helps to lower the FODMAP content a bit, which can be beneficial for those with sensitive digestive systems. The rich, earthy sweetness of maple syrup complements the honey beautifully, adding another layer of depth to the crackers.
Cinnamon is another non-negotiable component, providing that warm, spiced essence. You’ll definitely taste the cinnamon infused directly into the crackers, making an additional cinnamon sugar sprinkle entirely optional. If you’re a true cinnamon enthusiast and appreciate an extra touch of sweetness, then by all means, generously sprinkle that cinnamon sugar mixture over the crackers before baking. It creates a lovely caramelized crust and intensifies the spice. Finally, vanilla extract is crucial for rounding out the flavors, adding a fragrant warmth that enhances both the honey and cinnamon. Don’t skimp on good quality vanilla, as it truly makes a difference in the overall aroma and taste of your homemade treats.

Mastering the Art of Rolling and Shaping Your Graham Crackers
While rolling and cutting dough might seem daunting to some, I genuinely find this stage of the recipe quite enjoyable – even if my initial attempts at perfection were, shall we say, “rustic.” The key to making the process manageable and stress-free, especially with gluten-free dough which can sometimes be a bit more delicate, is to work in smaller batches. Instead of attempting to roll out one massive rectangle of dough, I recommend dividing the dough in half and working with one portion at a time. This approach gives you greater control and minimizes the risk of the dough tearing or becoming difficult to handle.
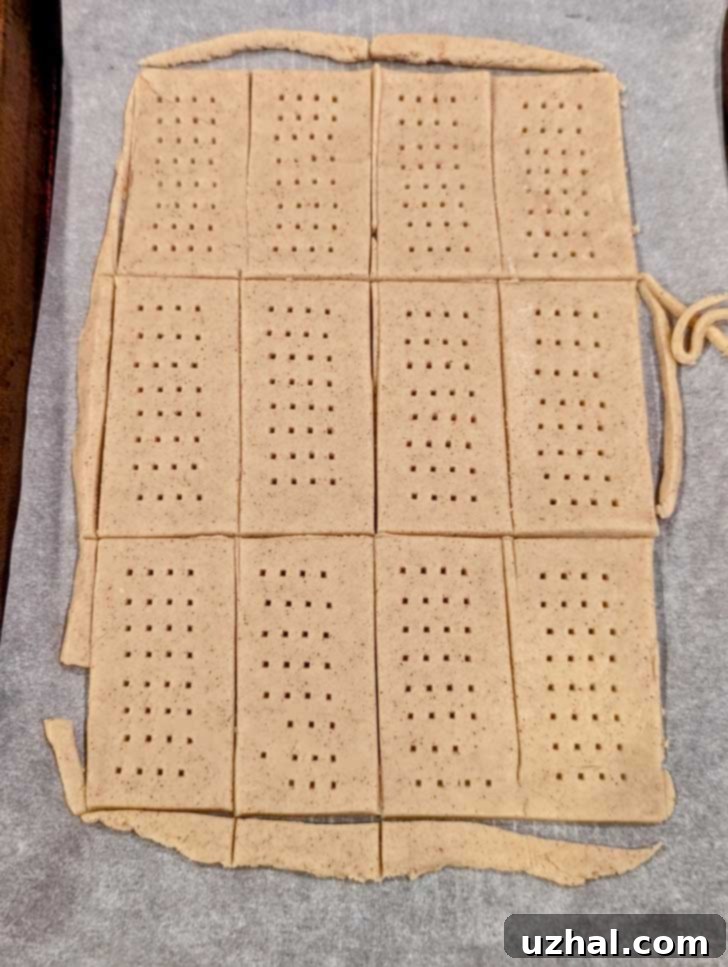
To ensure uniform thickness and prevent sticking, use two sheets of parchment paper. Place one half of the dough between two sheets of parchment paper (or a sheet of plastic wrap on top), and then roll it out to approximately 1/16th of an inch thick. Aim for a rectangular shape such as 8×8 inches, 7×10 inches, or 7×9 inches. This size is ideal because it allows you to neatly trim the edges to create a 7 ½ by 7 ½ inch square, which can then be perfectly scored into nine 2 ½ inch squares. Once you have your larger squares, score each of them in half to yield a total of 18 smaller rectangles. Remember, at this stage, you are only scoring – do not separate the crackers. The dough will remain as one sheet during baking, and you’ll separate them once they are warm. Finally, use a fork to gently poke holes across each cracker square. This not only gives them the classic graham cracker appearance but also helps prevent bubbling during baking, ensuring an even crispness.
One of my absolute favorite aspects of this recipe is that the inevitable uneven edges and trimmings don’t go to waste! These scraps get baked right alongside the main crackers, transforming into delicious, long, skinny “tester” pieces. They’re perfect for immediate sampling straight from the oven, providing an instant reward for your baking efforts. After the crackers and trimmings have baked, carefully separate them along the scored lines while they are still warm. This makes for cleaner breaks and reduces breakage. Enjoy those delicious warm scraps while you wait for the rest to cool!
- Cup4Cup Gluten Free Flour Review
- All Brown Sugar Chocolate Chip Cookies
- Gluten-Free White Chocolate Cherry Cookies
Recipe

Gluten-Free Graham Crackers
Anna
Pin Recipe
Ingredients
- 1 ½ cups plus 3 tablespoons King Arthur Measure for Measure or Cup4Cup gluten-free flour blend (230 grams) — Weigh if possible for best accuracy.
- 1 teaspoon baking powder
- 1 teaspoon ground cinnamon
- ½ teaspoon salt
- 1 large egg
- 4 tablespoons honey ( or 2 T. honey and 2 T. maple syrup for a balanced flavor and lower FODMAPs) (85 grams)
- ¼ cup solid shortening or coconut oil (56 grams)
- ¾ teaspoon vanilla extract
- 1-2 tablespoons Optional: almond milk or oat milk or dairy milk (use if dough is too dry)
Optional Cinnamon Sugar Sprinkle
- 2 tablespoons granulated sugar
- 1 teaspoon ground cinnamon
Instructions
-
Preheat your oven to 300 degrees F (150 C). Prepare two large baking sheets by lining them with parchment paper. Ensure you have two separate large sheets of parchment paper ready for rolling the dough.
-
In the bowl of a stand mixer (or a large mixing bowl if mixing by hand), combine the gluten-free flour, baking powder, ground cinnamon, and salt. Whisk or stir these dry ingredients thoroughly to ensure they are well combined.
-
Weigh the solid shortening or coconut oil (56 grams) and add it to the dry mixture in small chunks. Using the paddle attachment of your stand mixer, mix on low speed until the fat is evenly distributed and coats the dry mixture, resembling coarse crumbs.
-
Add the egg, honey (or honey/maple syrup blend), and vanilla extract to the mixture. Continue mixing with the paddle attachment until a smooth, cohesive dough forms. The dough should come together easily. If, for any reason, the dough appears dry or crumbly (this can sometimes happen due to differences in flour absorption or humidity), add 1 tablespoon of almond milk, oat milk, or regular dairy milk. Mix again and if it’s still too dry, add another tablespoon. The exact amount of liquid may vary based on your specific gluten-free flour blend and how it was measured.
-
Carefully divide the dough into two equal halves.
-
Take one half of the dough. Place it on one of the prepared sheets of parchment paper. Cover the dough with a second sheet of parchment paper (or plastic wrap). Using a rolling pin, flatten the dough evenly to approximately 1/16th of an inch thick. Aim for a rectangular shape, roughly 8×8 inches, 7×10 inches, or 7×9 inches. This will allow you to trim it into a perfect 7 ½ by 7 ½ inch square later.
-
Using a pizza cutter or a sharp knife, gently score the rolled-out dough to create nine even 2 ½ inch squares. Then, score each of these 9 squares in half to form 18 smaller rectangles. Straighten any uneven edges by scoring. Do not cut all the way through; simply score the lines. If using the optional cinnamon sugar sprinkle, mix the 2 tablespoons of sugar with 1 teaspoon of cinnamon and sprinkle evenly over the scored dough now. Finally, use a fork to poke several holes down the center of each cracker square, giving them their classic appearance and helping with even baking.
-
Carefully transfer the parchment paper with the scored dough onto one of your prepared baking sheets.
-
Repeat steps 5-7 with the second half of the dough, placing it on the second baking sheet.
-
Bake the crackers in the preheated oven at 300 degrees F (150 C) for approximately 20 minutes. Once the baking time is complete, turn off the oven, but leave the crackers inside with the door closed for an additional 10 minutes. This “off-oven” technique helps to draw out moisture and ensures maximum crispness.
-
Remove the baking sheets from the oven. While the crackers are still warm, use a sharp knife or pizza cutter to cut along the scored lines, separating them into individual crackers. Trim any edge scraps if desired – these make delicious “baker’s treats” for immediate tasting! Allow the crackers to cool completely on a wire rack for them to firm up and reach their ultimate crispy texture.
Notes
Alternative to Gluten-Free Blend: For seasoned gluten-free bakers who maintain a pantry of individual flours, you can create your own blend instead of using a 1:1 all-purpose mix. A successful alternative blend for this recipe consists of 75 grams of sorghum flour, 80 grams of brown rice flour, 80 grams of arrowroot starch, and 1 teaspoon of xanthan gum. This combination effectively mimics the properties of a commercial 1:1 blend, offering a similar flavor and texture profile.
Storage: Once completely cooled, store your homemade gluten-free graham crackers in an airtight container at room temperature for up to one week. If they lose a bit of their crispness, you can briefly reheat them in a low oven (around 250 F / 120 C) for 5-10 minutes to restore their crunch.
Versatile Uses: These crackers are incredibly versatile! Enjoy them as a standalone snack, pair them with cheese, or use them as a base for delicious gluten-free s’mores. They also make an outstanding gluten-free pie crust when crushed and mixed with a little melted butter or coconut oil. Their robust flavor and texture hold up perfectly in various dessert applications.
