Recreating Pillsbury’s Discontinued Cornbread Twists: Homemade Cornbread Breadsticks Recipe
Do you ever find yourself yearning for a long-lost favorite from your childhood? For many, the Pillsbury Cornbread Twists, once a staple in the refrigerated dough aisle, evoke a powerful sense of nostalgia. These delightful treats were a unique fusion of the comforting sweetness of cornbread and the satisfying chew of a breadstick, offering a tender interior encased in a perfectly golden-brown crust. Their slightly sweet flavor profile made them incredibly versatile, perfect alongside a hearty meal or simply enjoyed on their own. Sadly, like many beloved products, they were discontinued years ago, leaving a void in our culinary memories.
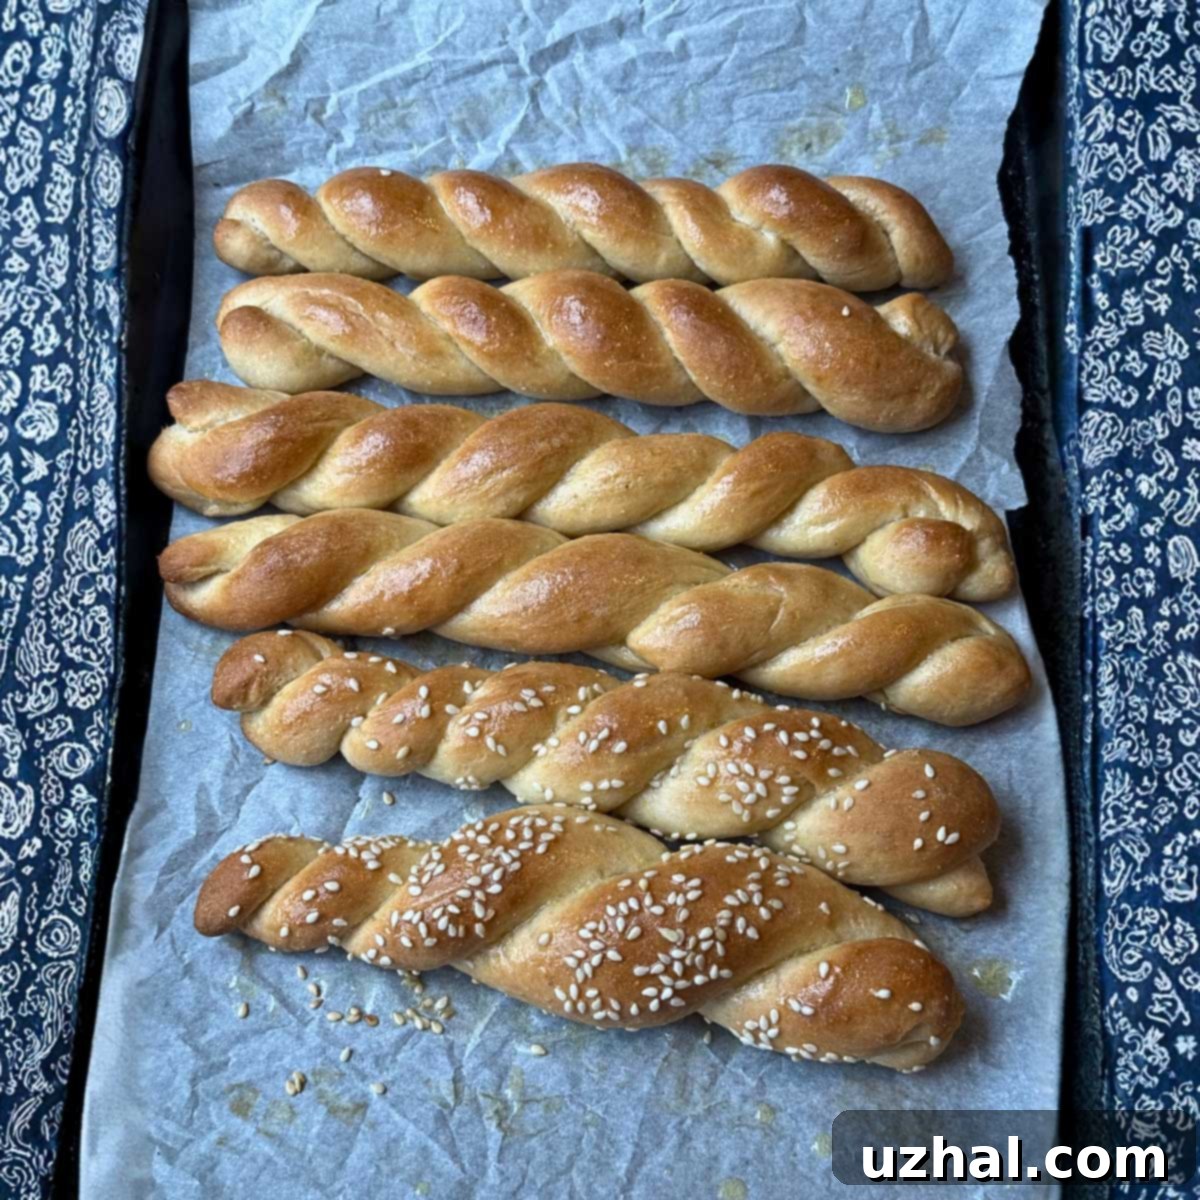
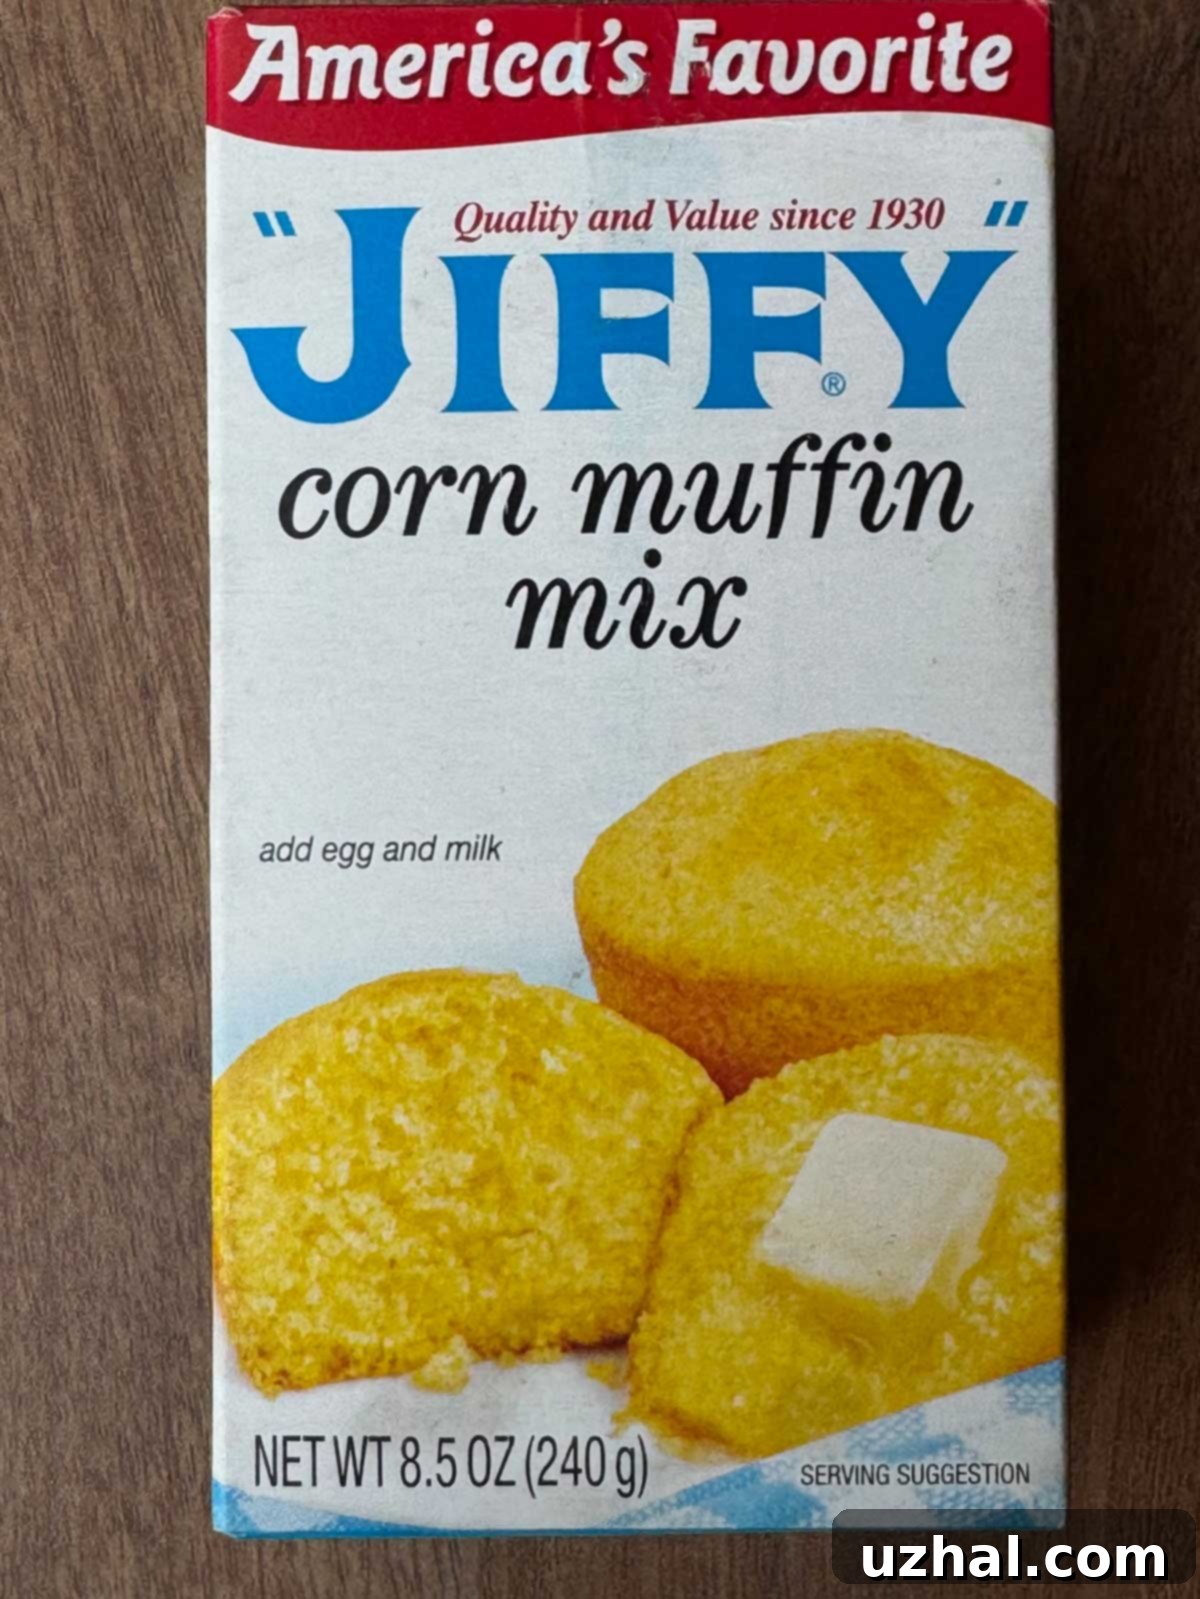
But what if you could bring that cherished memory back to life, right in your own kitchen? This meticulously crafted recipe offers a triumphant return for those very Cornbread Twists, now reimagined as homemade Cornbread Breadsticks. Forget the sadness of discontinuation; this guide empowers you to recreate that iconic taste and texture from scratch, with the flexibility to choose between classic yellow cornmeal for a more rustic flavor or the convenient Jiffy Corn Muffin Mix for a touch of that familiar, slightly sweeter profile, reminiscent of the original Pillsbury product.

The Quest for the Perfect Cornbread Breadstick: Jiffy Mix vs. Plain Cornmeal
The journey to recreate these cornbread breadsticks led to a fascinating discovery regarding ingredient choices. The recipe offers two distinct paths, each yielding a slightly different, yet equally delicious, result. Understanding these differences will help you decide which version best suits your taste and pantry.
The Convenience and Flavor of Jiffy Mix
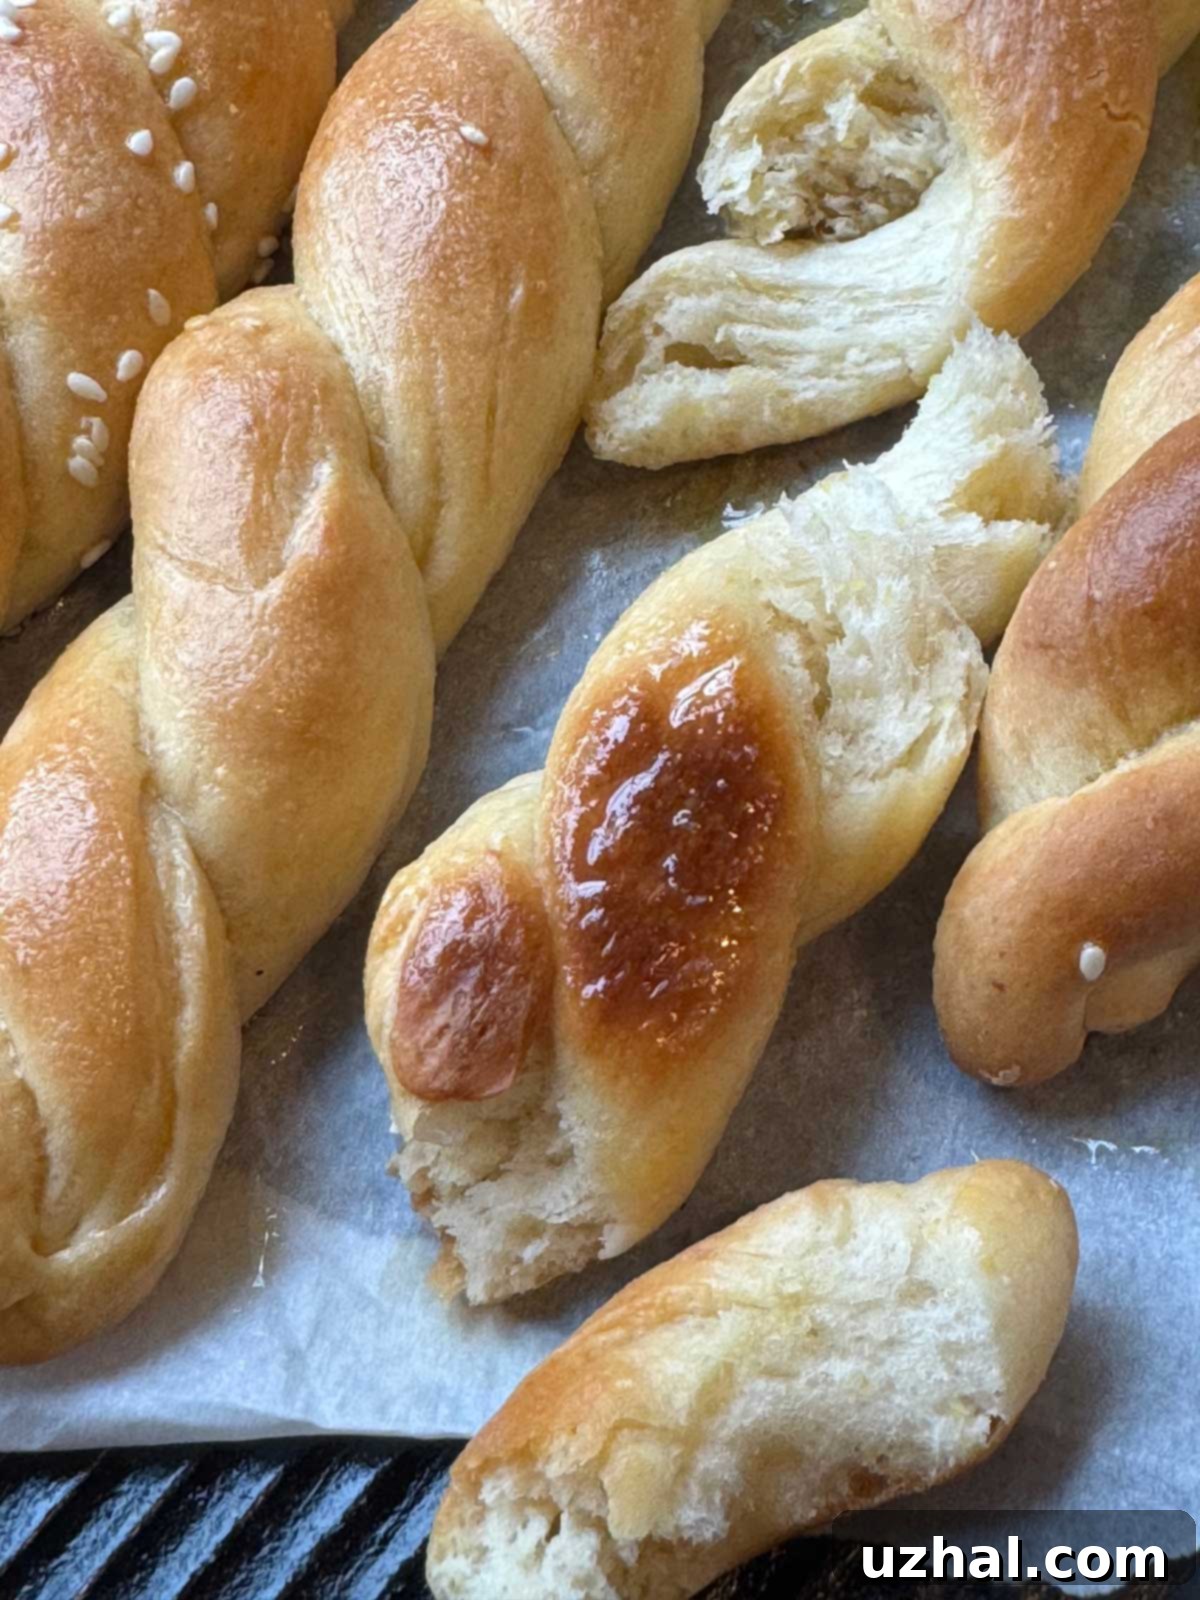
My initial foray into recreating these breadsticks began with an experiment involving Jiffy Corn Muffin Mix. I had a partial box on hand and a curious thought: what if I leveraged its pre-blended ingredients? By swapping a portion of the bread flour for Jiffy mix, I aimed to harness the leavenings, emulsifiers, and distinct flavorings already present in the mix. The outcome was nothing short of delightful. The resulting Cornbread Breadsticks were wonderfully puffy, remarkably light, and possessed that quintessential touch of sweetness, very closely mirroring the texture and taste of the nostalgic Pillsbury Cornbread Twists. The emulsifiers in the Jiffy mix contribute to a softer crumb, while its built-in leavening agents give an extra boost to the rise, resulting in a breadstick that feels airy and tender.
The Authentic Charm of Plain Cornmeal
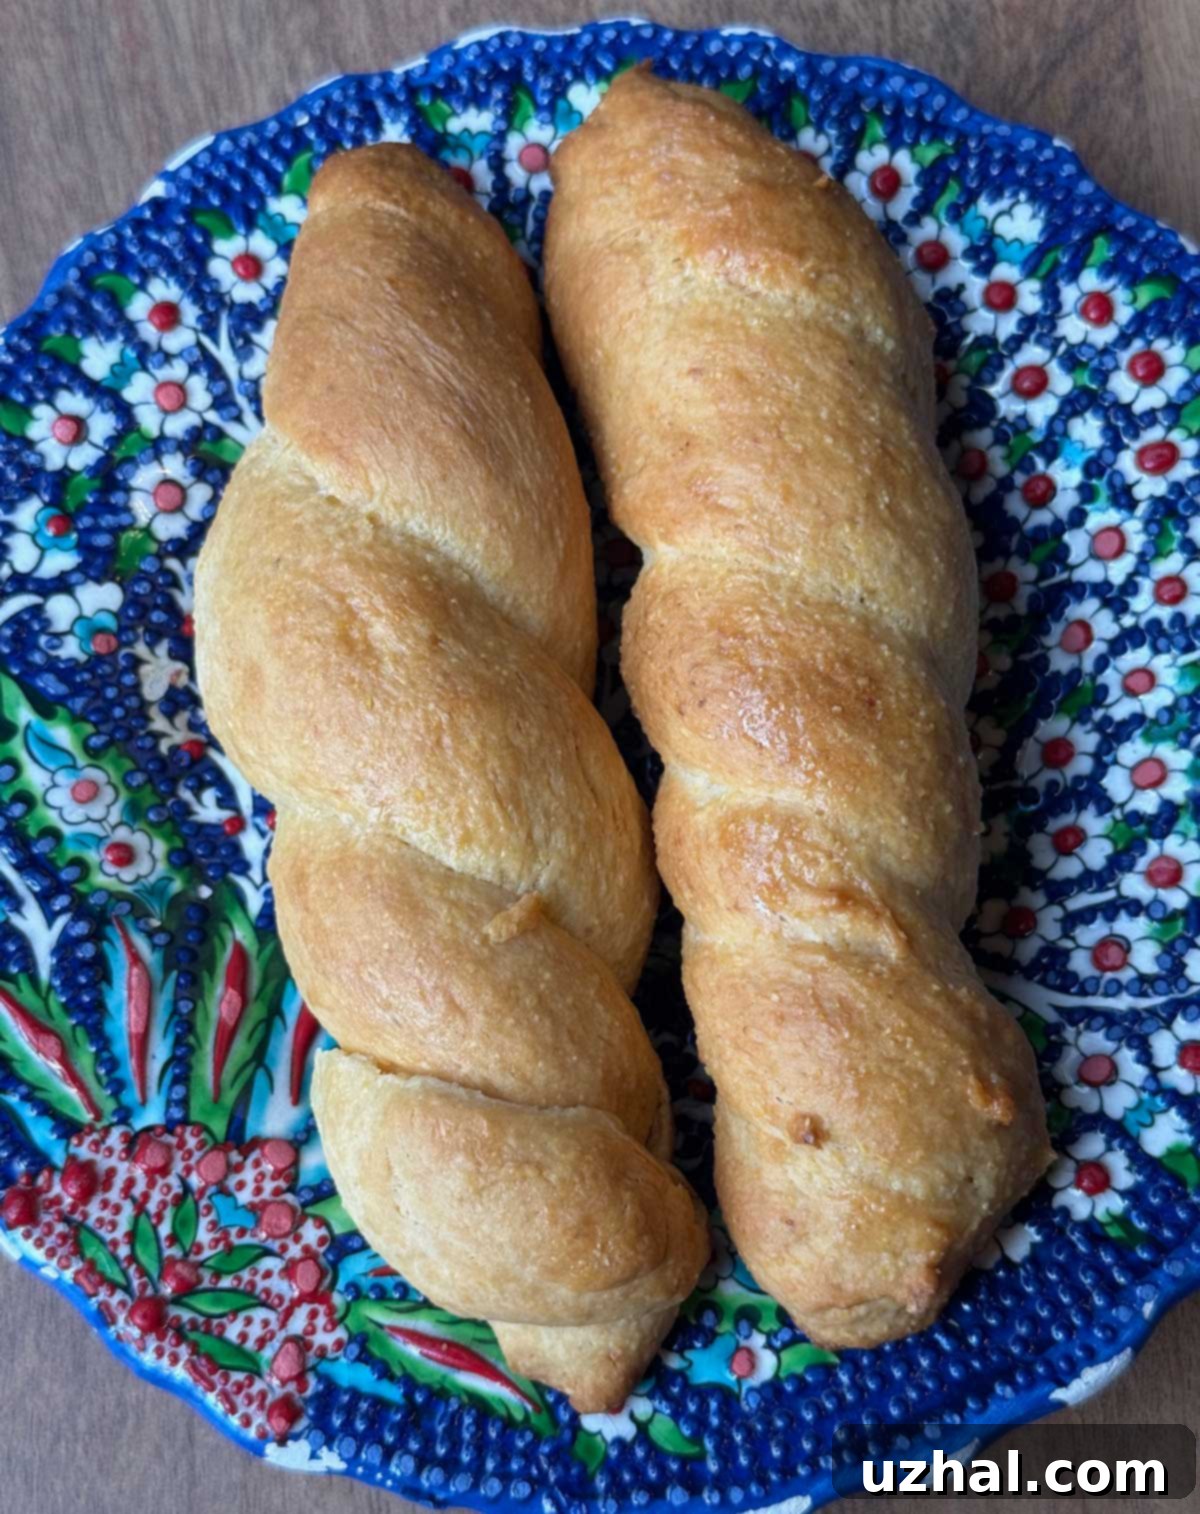
For those who prefer a more traditional approach or simply don’t keep Jiffy mix in their pantry, the recipe also offers a version using plain yellow cornmeal. This method results in a breadstick with a slightly different character. The texture tends to be a bit denser, offering a more substantial chew, and the sticks often come out a little longer and thinner. This version highlights the earthy, robust flavor of the cornmeal, providing a more “from scratch” cornbread experience. Both variations are undeniably delicious, so your choice ultimately depends on what you have readily available and your preference for texture and sweetness. If you appreciate the convenience and specific flavor profile of Jiffy, it’s a fantastic option. If you lean towards a more unadulterated cornbread taste, plain cornmeal will serve you beautifully.
Essential Ingredients for Your Cornbread Twists
Beyond your choice of cornmeal or Jiffy mix, a few key ingredients ensure these cornbread breadsticks turn out perfectly. Each component plays a vital role in achieving the desired texture, flavor, and structure.
Bread Flour: The Foundation of Structure
A significant portion of this recipe relies on bread flour. This isn’t just any flour; bread flour boasts a higher protein content compared to all-purpose flour, typically around 12-14%. This higher protein translates directly to more gluten development, which is absolutely crucial for giving the dough its necessary structure and elasticity. It’s the gluten network that allows the breadsticks to hold their twisted shape and contributes to that satisfying chewiness we love. While I haven’t thoroughly tested this recipe with all-purpose flour, it might work in a pinch. However, be prepared for a potentially stickier dough and a slightly less structured, perhaps softer, final product due to the lower gluten content. For the best results and the most authentic texture, bread flour is highly recommended.
Quick-Rising Yeast: The Engine of Fluffiness
To ensure a speedy and efficient rise, this recipe calls for quick-rising yeast, also known as instant yeast or rapid-rise yeast. This type of yeast is specifically formulated to be mixed directly into the dry ingredients without prior proofing, saving you a step and some time. To activate it effectively, very warm water (around 120-125°F or 49-52°C) is essential. Water that’s too hot can kill the yeast, while water that’s too cold won’t activate it properly, leading to a dense dough. I personally use SAF gold label instant yeast for its reliability, but any good quality quick-rising yeast will suffice. If active dry yeast is all you have, you’ll need to proof it separately in 110-115°F (43-46°C) water with a pinch of sugar for about 5-10 minutes until foamy, before incorporating it into your dry ingredients.
Sweetness and Salt: Balancing the Flavors
Brown sugar plays a dual role in this recipe. Firstly, it provides nourishment for the yeast, helping it activate and produce gases for leavening. Secondly, and perhaps most importantly for these cornbread twists, it contributes to their signature subtle sweetness and helps with browning during baking, creating that beautiful golden crust. The recipe specifies 3-4 tablespoons, with a slight reduction if you’re using Jiffy mix which already contains some sugar. Salt, though used in a small amount (1 teaspoon), is indispensable. It not only enhances the overall flavor of the breadsticks but also helps to control the yeast’s activity and strengthens the gluten structure in the dough, preventing it from becoming overly elastic or tough.
Butter and Water: Enhancing Texture and Hydration
Softened butter is incorporated into the dough to add richness and tenderness. Fat inhibits gluten formation slightly, which results in a softer, more palatable breadstick. It also contributes to the golden color and a subtle buttery aroma. If using Jiffy mix, the amount of butter is slightly reduced because Jiffy often contains fats of its own. Warm water is the primary hydrating agent for the dough. Its temperature is critical for yeast activation, as discussed earlier. The precise amount of water can vary slightly depending on factors like humidity and the specific type of flour and cornmeal used, so it’s important to observe your dough’s consistency as you mix.
Mastering the Dough: Kneading and Rising
The secret to tender, airy breadsticks lies in proper kneading and proofing. This dough is designed to be soft and pliable, making it a joy to work with, especially with the assistance of a stand mixer.
Achieving the Ideal Dough Consistency
While hand kneading is certainly an option for the experienced baker, a stand mixer fitted with a dough hook makes the process considerably easier and more consistent. The mixer efficiently develops the gluten network without the need to incorporate excessive extra flour. Adding too much flour during kneading is a common mistake that can lead to dense, heavy breadsticks instead of the desired light and fluffy texture. The goal is a dough that feels smooth and elastic to the touch, with only a slight tackiness. When you press it, it should spring back slowly. If your dough feels too soft or sticky to handle, add flour one spoonful at a time until the desired consistency is reached. Conversely, if it appears too dry or stiff, drizzle in a tiny bit more warm water. Learning to “feel” the dough is a skill that comes with practice, but aiming for smooth and elastic is key.
The Magic of Proofing: First Rise
Once kneaded, the dough undergoes its first rise, also known as bulk fermentation. This crucial step allows the yeast to work its magic, consuming sugars and producing carbon dioxide, which creates air pockets and gives the bread its characteristic texture. After forming the dough into a ball and placing it in a lightly oiled bowl, cover it tightly with plastic wrap to prevent a dry skin from forming. Set it in a warm, draft-free place – an oven with just the light on can be ideal – and let it rise for 30 to 45 minutes, or until it has roughly doubled in size. The duration can vary based on the ambient temperature and the activity of your yeast. A successful first rise lays the groundwork for light and airy breadsticks.
Shaping Your Homemade Cornbread Twists
The twisted shape is what sets these breadsticks apart and gives them their nostalgic charm. While it might seem intricate, it’s quite straightforward with a little practice.
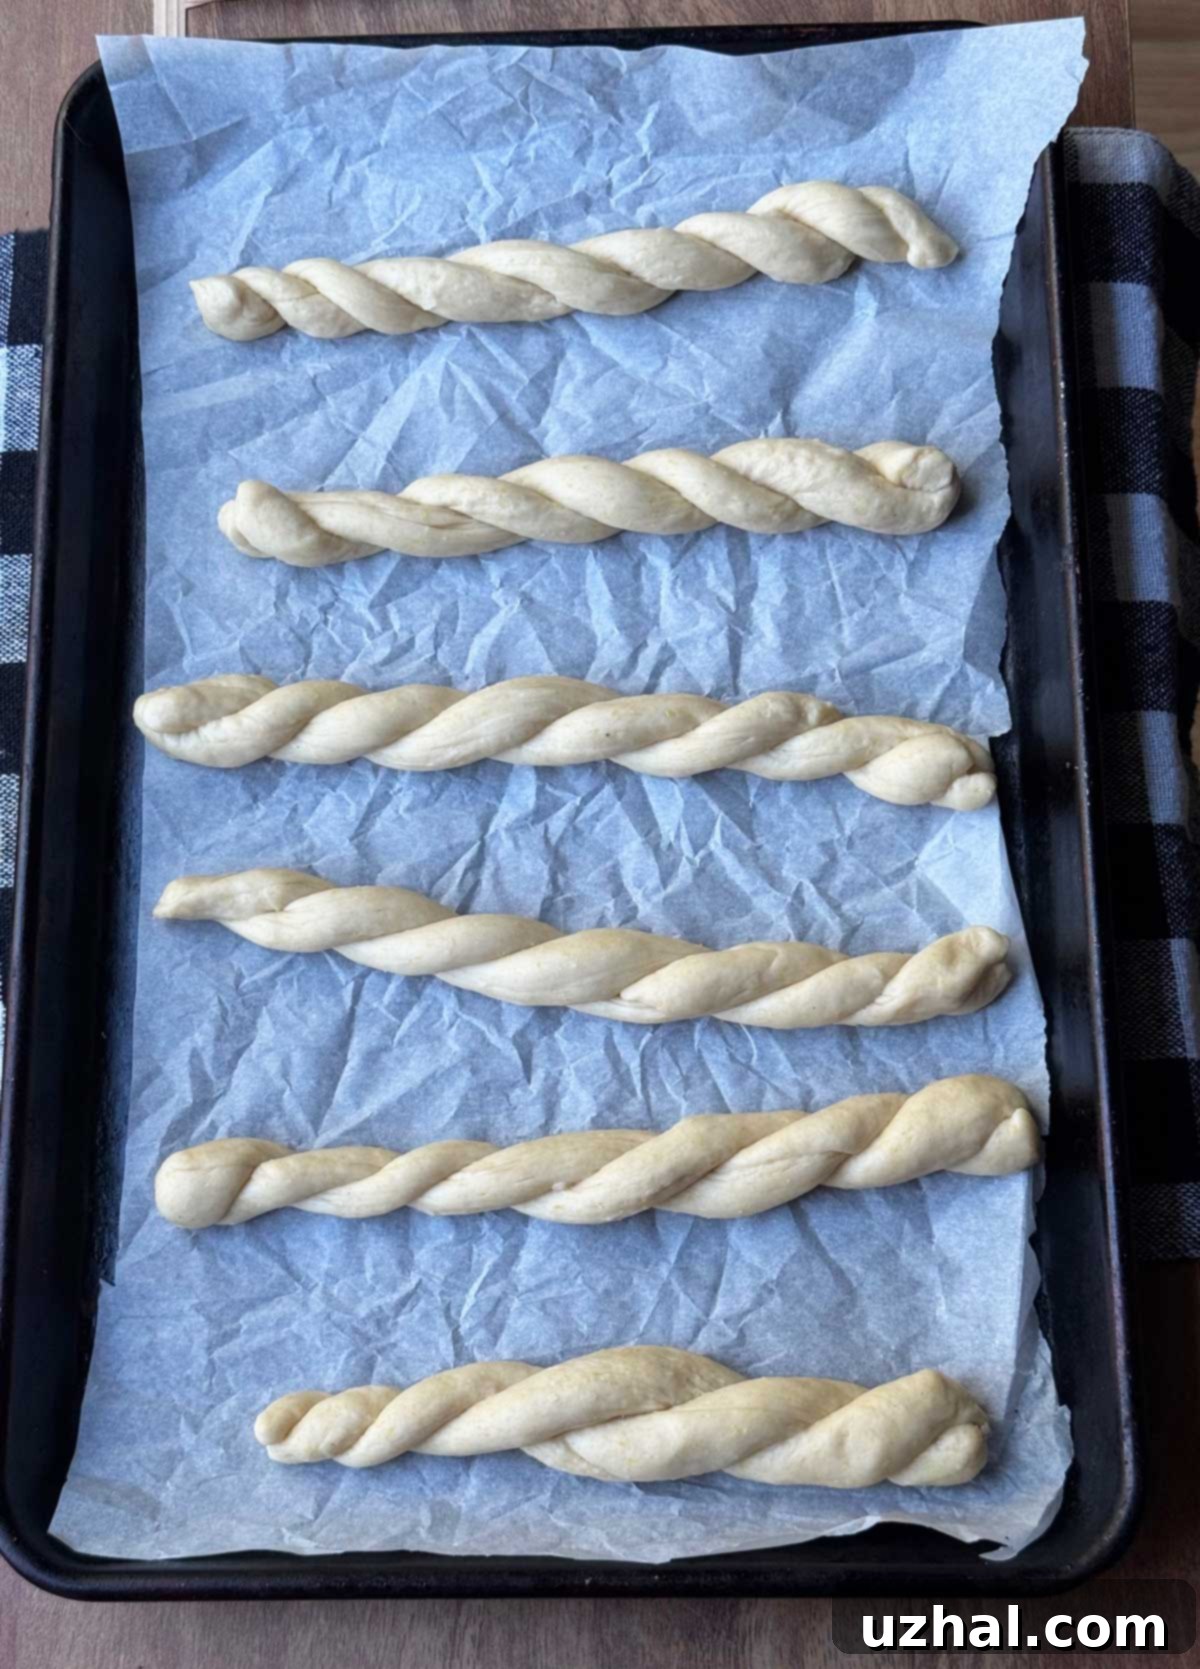
Once your dough has completed its first rise, gently punch it down to release the accumulated gases. Transfer it to a lightly floured mat and press and shape it into a rectangular slab, approximately 10×10 inches. Precision isn’t paramount here, but aim for an even thickness. Next, using a sharp knife or a bench scraper, slice the slab into 12 individual 10-inch strands. These will be the foundation of your twists. Working with one strand at a time, carefully cut it lengthwise into two thinner, 10-inch pieces. Take these two thin pieces and cross them over each other, forming an ‘X’ in the middle. Then, starting from the center ‘X’, twist the strands together, working your way up to one end, and then repeating the twisting motion from the center down to the other end. This technique creates beautiful, uniform twists. Place the shaped breadsticks onto baking sheets lined with parchment paper, ensuring enough space between each to allow for their final rise without sticking together. Cover the shaped twists loosely with a greased sheet of plastic wrap and allow them to rise for another 20-30 minutes. This second, shorter rise is known as proofing, and it helps the breadsticks achieve their final light and airy texture before baking.
Baking to Golden Perfection
The final step in bringing these delicious cornbread breadsticks to life is baking them until they are perfectly golden and fragrant.
While your shaped breadsticks are undergoing their final rise, preheat your oven to 375°F (190°C). This ensures the oven is at the correct temperature when the breadsticks go in, promoting an even rise and bake. Bake the breadsticks for approximately 18-20 minutes, or until they achieve a beautiful golden-brown color. The exact baking time may vary slightly depending on your oven, so keep an eye on them towards the end. Once baked, remove them from the oven, and for an extra touch of flavor and a soft, glistening crust, immediately brush them with more melted salted butter. This step adds moisture and enhances the overall deliciousness, making them irresistible straight from the oven.
Batch Size and Customization: Making it Your Own
This recipe yields a generous batch of 12 cornbread twists, perfect for a family meal or for sharing. However, it’s incredibly versatile and can be easily halved if you only need a smaller quantity. Simply weigh out half of each ingredient and follow the same instructions. This flexibility makes it a great recipe for both small households and larger gatherings.
If you’re particularly intrigued by the Jiffy Mix version, you’ll find that just ½ cup (or 80 grams), which is approximately one-third of a standard box, is all you need. Since Jiffy mix includes some sugar and fat, you’ll adjust the recipe by using only 3 tablespoons of brown sugar and 2 tablespoons of butter as listed in the ingredient section. This careful adjustment ensures the perfect balance of flavors and textures.
For those who love to experiment, I’ve also successfully played with different proportions of Jiffy Mix. Using up to half a box (about 120 grams or ¾ cup) and reducing the bread flour by 40 grams creates an even puffier breadstick. The higher ratio of Jiffy mix tends to make the twists noticeably lighter and more airy, as demonstrated in some of the images. Feel free to adjust and find your preferred balance!
For the plain cornmeal enthusiasts, selecting the right type of cornmeal can make a difference. Here in North Carolina, we are fortunate to have a wonderful variety of local cornmeals. My current favorite is a local brand called Moss Plain Yellow Water Ground by Buffaloe Milling Company. “Water ground” refers to a traditional milling process where the corn is slowly ground on a water-powered stone mill. This cooler grinding method helps to protect the natural oils in the corn, thereby preserving and enhancing its rich, authentic flavor. The consistency of this particular cornmeal is neither overly fine nor excessively coarse, striking a perfect balance that works beautifully in these breadsticks, contributing to their delightful texture.
Serving Suggestions and Storage Tips
These Homemade Cornbread Twists are utterly delicious on their own, especially when fresh from the oven, their aroma filling your kitchen with warmth. However, their versatility truly shines when paired with other dishes. They are an absolute dream served warm alongside a steaming bowl of chili, a plate of smoky barbecue, or a comforting soup. For an extra layer of flavor, consider brushing them with a sweet honey butter or a savory garlic butter immediately after baking. If you prefer a more rustic, savory bite, a sprinkle of coarse sea salt before baking adds a wonderful textural contrast and flavor boost. These breadsticks are perfect for dipping into stews or as a side with almost any hearty meal.
Another fantastic feature of this recipe is how well these cornbread breadsticks freeze and reheat. This makes them an ideal make-ahead option for busy weeks or unexpected guests. To freeze, allow them to cool completely after baking. Then, arrange them in a single layer on a baking sheet and freeze until solid. Once frozen, transfer them to a freezer-safe bag or airtight container, removing as much air as possible to prevent freezer burn. They can be stored in the freezer for up to 3 months. When you’re ready to enjoy them, simply thaw at room temperature or reheat directly from frozen in a preheated oven (around 350°F or 175°C) for 10-15 minutes, or until warmed through and slightly crispy again. This means you can whip up a big batch and enjoy a taste of those nostalgic, from-scratch Pillsbury Cornbread Twists anytime you desire, without the fuss!
A Taste of Nostalgia: Remembering Pillsbury’s Cornbread Twists
For many, the Pillsbury Cornbread Twists weren’t just a simple baked good; they were a part of family dinners, holiday meals, and comforting weeknights. They represented convenience married with a uniquely delicious flavor that was hard to replicate. The disappointment of their discontinuation left a genuine gap for fans. This recipe is more than just instructions for breadsticks; it’s an homage, a culinary bridge back to those cherished memories. It offers a chance to not only taste that familiar flavor profile but also to experience the joy of creating something truly special from your own kitchen. Whether you opt for the Jiffy version to get closer to the original’s processed charm or the cornmeal version for a wholesome, homemade touch, each twist you pull apart will be a bite of delicious remembrance.
- Skillet Small Batch Cornbread
- Boston Cream Cheesecake
- Easy No-Yeast Bread
- Pumpkin Yeast Bread
Recipe

Cornbread Breadsticks
Anna
Pin Recipe
Ingredients
- 2 cups bread flour (280 grams)
- ½ cup yellow cornmeal or Jiffy Corn Muffin Mix (80 grams)
- 2 ¼ teaspoons fast rising yeast (one packet)
- 3-4 tablespoons brown sugar or (3 if using the Jiffy)
- 1 teaspoon salt
- ¾ cup warm water (120 to 125 degrees F)
- 3 tablespoons butter, softened plus extra for brushing. If using Jiffy mix, only use 2.
Instructions
-
Mix the bread flour, cornmeal or Jiffy, yeast, brown sugar and salt together in the bowl of a stand mixer. Add the water and stir until almost blended, then add the butter and stir well. At this point the mixture will feel very thick and dry.
-
Using the dough hook, knead until smooth and elastic. If the dough feels dry or breaks apart, add a splash more water. It should be a very smooth and not at all sticky or tacky.
-
Scrape dough into the center of the bowl and form a ball. Cover with plastic wrap, set in a warm place and let rise for 30 to 45 minutes or until about doubled.
-
Preheat the oven and have ready one or two parchment lined baking sheets. I usually make half a batch and use one, but unless your baking sheet is very large you’ll probably need two for the full batch.
-
Punch down dough on a mat and press and shape into a rectangular slab somewhere around 10×10 inches (doesn’t have to be precise), then slice into 12 10 inch strands.
-
Working one strand at a time, cut the strand lengthwise into two thin 10 inch pieces. Cross them like an X, then twist strands together from the middle up and middle down. Set on the baking sheet(s)
-
Cover with a greased sheet of plastic wrap and let rise for another 20-30 minutes.
-
Meanwhile, preheat the oven to 375 degrees F. Bake the breadsticks for about 20 minutes or until golden. Brush with more melted salted butter.
