Indulge in Gluten-Free Bliss: The Ultimate Flourless Amaretto Chocolate Swiss Roll Cake Recipe
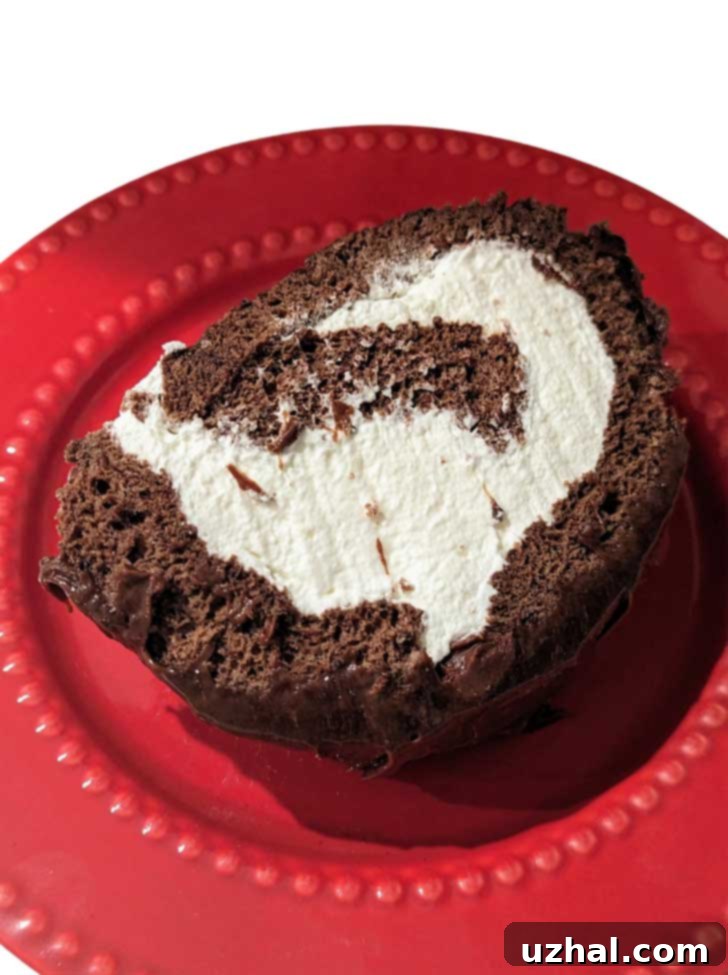
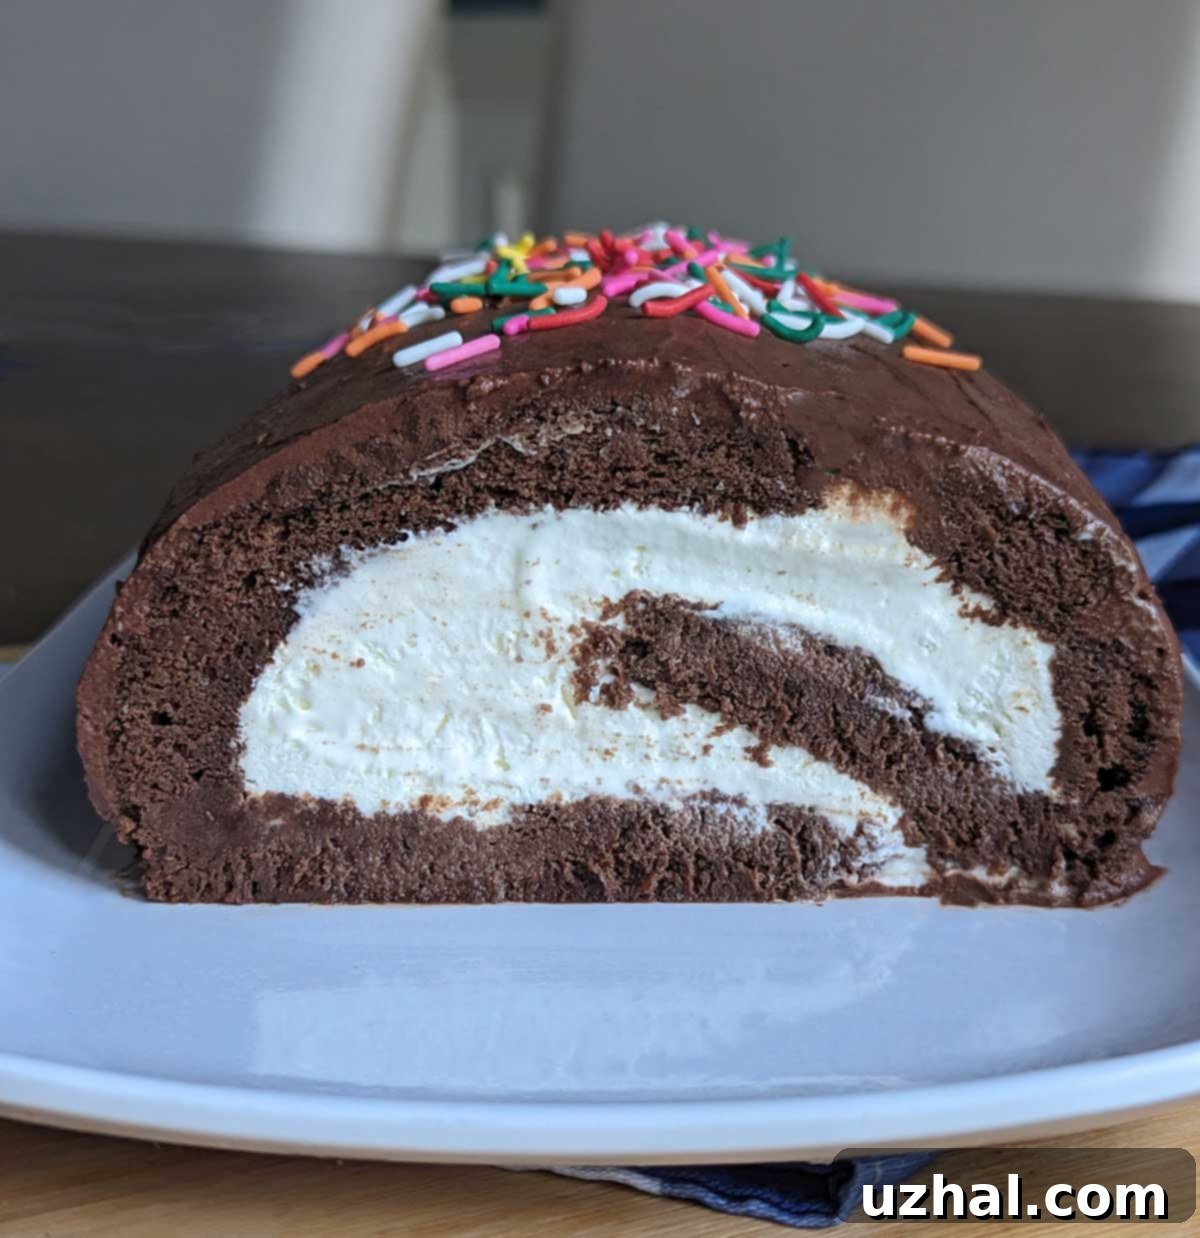
Prepare to delight your senses with this exquisite Flourless Amaretto Chocolate Swiss Roll Cake! Unlike any store-bought equivalent, this homemade creation offers a truly luxurious experience. It’s not just gluten-free and flourless; it’s a symphony of rich cocoa, light-as-air whipped cream, and a distinctive Amaretto-spiked frosting that elevates it beyond the ordinary. This recipe has quickly become a cherished favorite in our home, prompting me to bake it twice in as many weeks – not only for its irresistible flavor but also as a delightful opportunity to perfect my roll cake technique. What once seemed like an intimidating baking endeavor now consistently results in a show-stopping dessert. This particular recipe offers the added bonus of being budget-friendly (if you already have the Amaretto on hand!), making it a fantastic choice for practice. Crafted primarily from cocoa powder, it delivers an intensely chocolatey experience that’s both elegant and comforting.

The Allure of Amaretto in Whipped Cream and Frosting
This remarkable recipe finds its roots in a fantastic gluten-free cookbook titled Against the Grain. While I started with their foundation, I’ve made several adjustments in my kitchen to perfect it, tailoring it to achieve the ideal texture and flavor profile we adore. One element that immediately captured my heart from the original concept was the brilliant inclusion of Amaretto – not just in the chocolate frosting, but also infused into the delicate whipped cream filling. This isn’t about creating an overtly boozy dessert; rather, the Amaretto contributes a subtle, sophisticated almond note that brings an indescribable “something extra” to the cake. It’s a whisper of nutty warmth that beautifully complements the deep cocoa, transforming each bite into a more complex and memorable experience. If you prefer to omit alcohol, don’t worry! The cake remains wonderfully delicious with pure vanilla extract, or you could substitute almond extract for a similar nutty essence without the Amaretto. However, for those who appreciate a touch of refined flavor, the Amaretto is truly the secret ingredient that makes this Swiss cake roll exceptional.
Mastering the Art of Freezing Flourless Swiss Cake Rolls
Working with roll cakes, especially delicate flourless varieties like this Swiss cake roll, becomes significantly easier and less stressful with a bit of foresight and some extra freezer space. I’ll admit, frosting and decorating can be a messy affair, and precision isn’t always my strong suit. This is where the freezer becomes your best friend! Freezing the filled cake roll *before* applying the final frosting is a game-changer. It firms up the delicate structure, making it much more stable and preventing the dreaded “curtail the mess” scenario (and the accompanying expletives!).
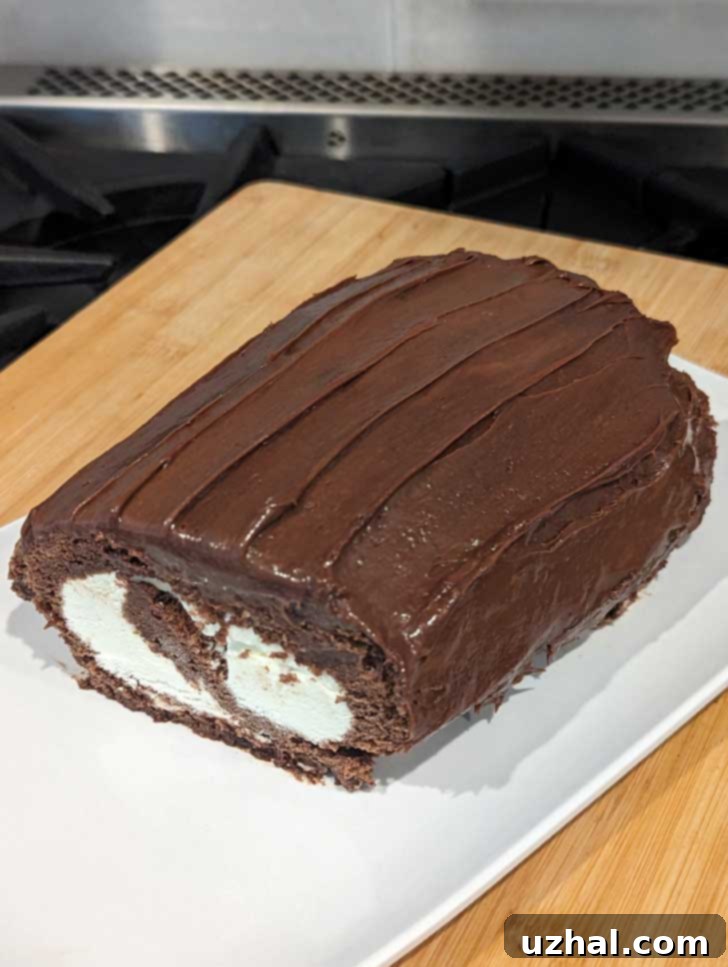
Once your cake is rolled and thoroughly chilled, don’t despair if it’s not a perfectly symmetrical cylinder. The beauty of a cold, firm cake is that it’s surprisingly forgiving. You can gently press and reshape it into a more uniform log. Any small tears or imperfections that occur during rolling can be easily patched up later with a dab of frosting or even a tiny piece of cake scrap. For an even more professional finish, I take an additional step: after applying a thin initial layer of frosting, I return the cake to the freezer. This second freeze creates a stable base, allowing for a smoother, more even final layer of frosting and making any subsequent decorating (if you choose to add it) a breeze. In this particular instance, my plan was to freeze the entire frosted log and simply slice off individual portions as needed, which is an excellent strategy for portion control and ensuring fresh-tasting dessert whenever a craving strikes.

Essential Tips for a Perfect Gluten-Free Flourless Swiss Cake Roll
- Choose the Right Pan: A jelly roll pan is absolutely crucial for this recipe. Its specific dimensions (typically 10×15 inches or 12×18 inches with a shallow rim) ensure the cake bakes to the perfect thinness needed for rolling without cracking excessively. I personally swear by my USA Pan jelly roll pan; it’s incredibly versatile and doubles as an excellent cookie sheet, making it a valuable addition to any baker’s kitchen.
- Parchment vs. Wax Paper Debate: You’ll find many roll cake recipes advocating for either parchment paper or wax paper. For this flourless cake, I’ve consistently achieved great results with wax paper. The key is generous greasing – and I mean *plenty* of softened butter or another suitable fat. Wax paper excels at rolling smoothly without fighting you. If you’re new to baking with wax paper, remember this vital rule: it must be completely covered by batter. If exposed to direct oven heat, it will smoke. So, it’s perfect for cakes where the batter fully encases it, but definitely not for items like cookies where parts of the paper might be bare. Always ensure thorough greasing!
- Mixing for Success: Achieving the perfect light and airy texture in a flourless cake relies heavily on properly beaten eggs. I recently invested in a stand mixer with two bowls, and it’s been a game-changer for cakes. This setup allows me to efficiently beat the egg yolks in one bowl and then transfer the whisk attachment directly to a clean, separate bowl for whipping the egg whites to stiff peaks, eliminating the need for washing in between. However, if a two-bowl mixer isn’t an option, a good quality handheld mixer works perfectly fine; just ensure your bowls and whisks are impeccably clean and dry when beating egg whites.
- The Dusting Secret: Before the crucial inversion step, lightly dust the top of your cooled cake with a mixture of powdered sugar and cocoa. This simple trick serves a dual purpose: it acts as a non-stick barrier, preventing the delicate cake from adhering to the fresh layer of greased wax paper or parchment you’ll invert it onto, and it adds a subtle layer of flavor.
- Rolling While Warm (or Not): Many traditional sponge roll cake recipes instruct you to cool the cake wrapped in a clean tea towel, rolling it up while still warm to “train” it into a rolled shape and prevent cracks. However, through my extensive practice with *this particular flourless* chocolate roll cake, I’ve found that this step doesn’t significantly impact its tendency to crack. Due to the unique structure of a flourless cake (relying on egg proteins rather than gluten for elasticity), it will likely develop some minor cracks regardless of whether it’s rolled warm or cool. The good news? These minor imperfections are easily camouflaged by the luscious filling and frosting, so don’t let them deter you!
- Embrace the Make-Ahead Method: For the smoothest possible baking and decorating experience, I highly recommend baking, filling, and rolling your cake a day ahead of frosting. Freezing the filled, rolled cake log allows it to firm up beautifully, making it much easier to handle, frost, and slice cleanly. This also spreads out the workload, reducing stress on the day you plan to serve it.
While this flourless recipe requires a touch more care during the rolling process compared to its flour-based counterparts, the resulting delicate texture and rich flavor are absolutely worth it. Remember, slight cracks are part of its charm and easily remedied, so don’t get discouraged! If you’re looking for an alternative roll cake recipe that might be a bit more forgiving for beginners, I also highly recommend my Hot Cocoa Cake Roll. It’s a wonderful option, though I do need to update some of its photos soon!
- Gluten-Free Chocolate Layer Cake
- Crustless Spinach Quiche
- Banana Cupcakes with Amaretto Cream Cheese Frosting
- Flourless Chocolate Pecan Cookies
- Amaretto Cheesecake Bars
Recipe: Flourless Amaretto Chocolate Swiss Roll Cake

Flourless Chocolate Roll Cake
Anna
Pin Recipe
Ingredients
For the Flourless Chocolate Cake
- Softened unsalted butter (for greasing the pan, or another suitable fat like vegetable shortening)
- 6 large eggs, separated (Bringing them to room temperature isn’t strictly necessary, I’ve had success with cold eggs)
- 6 tablespoons granulated sugar, divided (4 tablespoons for yolks, 2 tablespoons for whites)
- ¼ cup unsweetened cocoa powder (Dutch-processed or natural, both work well)
- ½ cup powdered sugar (also known as confectioners’ sugar)
- 3 tablespoons vegetable oil (canola, sunflower, or any other neutral-flavored oil)
- ⅛ teaspoon salt
- 1 teaspoon vanilla extract
- ¼ teaspoon balsamic vinegar (this helps stabilize the egg whites, optional but recommended)
For the Amaretto Whipped Cream Filling
- 1 ½ cups well-chilled heavy whipping cream (ensure it’s very cold for best results)
- 1 ½ tablespoons granulated sugar
- 2 teaspoons Amaretto liqueur or 1 ½ teaspoons vanilla extract (for an alcohol-free alternative)
For the Cake Dusting Mixture
- 1 tablespoon unsweetened cocoa powder
- 1 tablespoon confectioners’ sugar
For the Rich Chocolate Amaretto Icing
- 4 tablespoons salted butter, softened (if using unsalted, add a pinch of salt)
- ⅓ cup unsweetened cocoa powder
- 2 cups sifted confectioners’ sugar
- 4 tablespoons whole milk (adjust as needed for desired consistency)
- 2 tablespoons Amaretto liqueur (or 1 ½ teaspoons vanilla/almond extract for non-alcoholic)
Instructions
-
Preheat your oven to 325 degrees F (160 degrees C). This lower temperature helps ensure an evenly baked and less brittle cake.
-
Generously grease a standard jelly-roll pan (approx. 10×15 inches) with plenty of softened butter or your chosen fat. Line the pan with wax paper or parchment paper, ensuring it extends slightly over the edges. Grease the paper again to prevent any sticking.
-
In the bowl of a stand mixer fitted with the whisk attachment (or using a hand mixer), beat the egg yolks with 4 tablespoons (¼ cup) of the granulated sugar until the mixture is thick, pale yellow, and forms ribbons when the whisk is lifted. Gradually beat in the cocoa powder, powdered sugar, vegetable oil, salt, and vanilla extract. Make sure to scrape down the sides of the bowl as you mix to ensure everything is thoroughly combined. Remove this bowl from the stand.
-
Clean and dry the mixing bowl and whisk attachment meticulously. Return the bowl to the mixer stand. Add the egg whites and beat on medium speed until they become frothy. Increase the speed to medium-high and continue beating until soft peaks begin to form. Gradually add the remaining 2 tablespoons of granulated sugar. As the egg whites stiffen, beat in the balsamic vinegar (this helps stabilize them). Continue beating just until stiff, glossy peaks form. Be careful not to overbeat, as this can make the whites dry and crumbly.
-
With a large, sturdy spatula or heavy scraper, gently fold a third of the beaten egg whites into the chocolate egg yolk mixture to lighten it. Then, carefully fold in the remaining egg whites in two additions, taking care not to deflate the mixture. Mix just until no white streaks remain.
-
Pour the delicate batter into the prepared jelly-roll pan. Gently spread it evenly across the pan (I find tilting the pan helps achieve an even layer). Bake on the center rack for approximately 10-15 minutes, or until the cake is puffed, springs back lightly when touched, and is just set. Do not overbake, as this can make the cake dry and prone to cracking.
-
Remove the cake from the oven and let it cool completely in the pan on a wire rack. While cooling, run the tip of a thin knife carefully along the edges of the wax paper to gently loosen the cake. Once fully cool, you can lightly cover it with another sheet of wax paper if desired to prevent it from drying out.
-
Prepare the Filling: Once the cake is completely cool, begin preparing the filling. In a well-chilled mixing bowl (you can chill the bowl and whisk in the freezer for 10-15 minutes), beat the very cold heavy whipping cream until soft peaks just start to form. Gradually sprinkle in the granulated sugar and continue beating until medium-stiff peaks are achieved. Finally, gently beat in the Amaretto (or vanilla extract).
-
Invert and Fill the Cake: While the cake is cooling, mix together the 1 tablespoon of cocoa powder and 1 tablespoon of confectioners’ sugar for dusting. Sift this mixture evenly over the cooled cake. Lay a fresh sheet of lightly greased wax paper or parchment paper over the dusted cake. Then, place a large, flat surface like a cutting board or another baking sheet over the wax paper. Carefully and confidently invert the cake so it rests on the new greased paper. Gently peel off the wax paper that was originally used to line the pan. Spread the Amaretto whipped cream filling evenly over the entire cake, leaving about a 1-inch border on all sides. This border allows room for the filling to spread slightly as the cake is rolled.
-
Roll and Chill: Starting from one of the short sides, carefully roll up the cake jelly-roll style. Use the waxed paper underneath to help guide and lift the cake as you roll it tightly. Don’t worry if it cracks slightly – this is common with flourless cakes and will be covered by the frosting. Once rolled, wrap the entire log securely in the waxed paper or parchment, then wrap again in plastic wrap. Place the wrapped roll cake in the freezer until it is very firm, which will make it much easier to handle and frost. This typically takes at least 1-2 hours. While it’s chilling, prepare your rich chocolate icing.
-
Prepare the Icing: In a clean mixing bowl, beat the softened salted butter until it’s light and creamy. Add the unsweetened cocoa powder and mix on low speed until well blended. Gradually beat in the sifted confectioners’ sugar. Add the whole milk one tablespoon at a time, beating until the icing is smooth and reaches a spreadable consistency. Finally, beat in the Amaretto until fully incorporated. Adjust milk quantity slightly if you desire a thinner or thicker icing.
-
Frost, Decorate, and Serve: Once the cake is firm from the freezer, unwrap it and spread the chocolate Amaretto icing evenly over the entire surface. At this stage, you have a few options: you can transfer it to a beautiful serving plate and immediately decorate with sprinkles, chocolate shavings, or fresh berries, or you can wrap the iced cake tightly in plastic wrap and return it to the freezer for future enjoyment. When ready to serve from frozen, allow it to thaw partially in the refrigerator for about 30-60 minutes before slicing. If decorating a frozen cake, you can add sprinkles while it’s still cold for easy adhesion. Store any leftovers in an airtight container in the refrigerator for up to 3-4 days, or keep it frozen for longer storage (up to 2-3 weeks).
