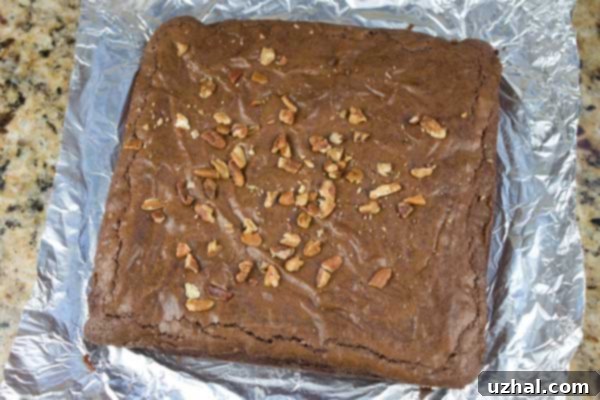
The Secret to Perfectly Shiny Top Fudge Brownies: A Comprehensive Recipe Guide
There’s something undeniably captivating about a batch of brownies boasting that signature shiny, crinkly top. While all brownies offer a delightful chocolatey escape, those with a gorgeous sheen often signal a superior, fudgy texture within. This isn’t just a matter of aesthetics; the glossy crust is a hallmark of a well-executed brownie, promising a rich, dense, and chewy bite. If you’ve ever wondered how to achieve this coveted bakery-perfect finish in your own kitchen, look no further. This recipe is meticulously crafted to deliver not just incredible flavor, but also that beautiful, elusive shiny top that makes homemade brownies truly special.
Unlocking the Mystery of Shiny Top Brownies
The quest for the perfect shiny brownie top has long intrigued bakers. For years, it seemed like a happy accident, but culinary science has shed light on the process. The secret to this coveted sheen often lies in the precise interaction of ingredients and baking techniques. This particular recipe draws inspiration from valuable insights shared in a classic issue of Cook’s Illustrated (June 2000), a publication renowned for its meticulous testing and scientific approach to cooking. At the time, even CI wasn’t entirely sure what caused the shiny top, so they turned to the experts to unravel the mystery.
The Delicious Chemistry Behind a Glossy Crust
A leading scientist from Nestlé provided a fascinating explanation for the phenomenon of shiny-topped brownies. Understanding this culinary chemistry is key to consistently achieving that desirable crust:
- Sugar’s Ascent: During the initial minutes of baking, the intense heat causes the fats in the brownie batter to melt and the sugar to dissolve. As the batter becomes more fluid, the lighter sugar molecules begin to migrate upwards, floating towards the surface. Once they reach the top, these sugar molecules align themselves neatly, forming a delicate, sugary crust.
- The Maillard Reaction: As baking continues, this surface layer of sugar undergoes caramelization and a form of the Maillard reaction, contributing to both the shine and a subtle depth of flavor. This quick formation of a sugary barrier on the surface prevents excessive moisture loss and locks in the fudgy texture below.
- Inhibitors to the Shine: However, this elegant “rising and lining up” of sugar molecules isn’t always a guaranteed process. Certain ingredients can inadvertently inhibit the formation of this shiny crust, leading to a more matte finish.
- Unsweetened Chocolate: A high proportion of unsweetened chocolate in a recipe can sometimes absorb too many of the rising sugar molecules, preventing them from reaching the surface to form the shiny layer. This is because unsweetened chocolate, being mostly cocoa solids, has a greater affinity for moisture and can interfere with the sugar’s ability to create that distinct surface film.
- Hygroscopic Ingredients (e.g., Corn Syrup): Ingredients like corn syrup are hygroscopic, meaning they readily absorb moisture. While corn syrup can contribute to a chewy texture, its moisture-absorbing properties can also inhibit the sugar molecules from aligning on the surface. By pulling moisture away, it disrupts the conditions necessary for the sugar’s upward migration and crystallization, resulting in a duller crust.
- The Role of Emulsification and Beating: Another critical factor is the emulsification of the butter, sugar, and eggs. Vigorously whisking these ingredients together, especially when the butter and sugar are slightly warm, helps create a stable emulsion. This traps air, forming tiny bubbles that carry the dissolved sugar to the surface, where it sets into a firm, glossy layer. The more thoroughly incorporated and airy these ingredients are, the better the chances of achieving that coveted shine.
So, armed with this knowledge, you are now well-equipped to achieve your own beautifully shiny-topped brownies! It’s worth noting that these particular fudge brownies are designed to be thin and incredibly rich. If you prefer an extra-thick brownie, you might consider adjusting the pan size (though untested with this specific recipe) or seeking out a different formula. However, if you’re looking for a firm-yet-chewy brownie that holds its shape perfectly for cutting into fun shapes – think footballs for game day or charming animal heads for a themed party – then this recipe is an absolute winner.
Lindt Chocolate: A Secret Ingredient for Extra Shine
Update and Pro Tip: Through my extensive brownie-baking experiments, I’ve observed a consistent trend: using Lindt chocolate often results in a spectacularly shiny top. This makes perfect sense from a chemical perspective. Lindt chocolate, particularly their higher cocoa content varieties, tends to have a richer proportion of cocoa butter. Cocoa butter is a fat that melts at a relatively low temperature, and when incorporated into the batter, it “loosens up” the mixture more effectively than some other fats. This increased fluidity allows the dissolved sugar molecules an easier path to float to the surface during the initial baking phase, where they can then align and form that glossy crust. The extra fat also contributes to an incredibly rich and luxurious fudgy texture, enhancing the overall brownie experience.
More Delicious Chocolate Recipes
- Shiny Top Brownies (Original Post)
- Shiny Happy Chocolate Cookies
- Shiny Chocolate Glaze with Dove Chocolates
- Six Inch Chocolate Cake
- Giant Peanut Butter Chocolate Chunk Cookies
Recipe: The Ultimate Shiny Top Fudge Brownies

Shiny Top Fudge Brownies
Anna
Pin Recipe
Ingredients
- 3 ounces unsweetened chocolate chopped into small pieces for even melting. Using high-quality chocolate will significantly impact flavor.
- 18 tablespoons unsalted room temp. butter, cut into chunks (9 oz, which is two sticks plus 2 tablespoons). Room temperature butter helps achieve a smooth, emulsified batter.
- ¼ teaspoon instant coffee crystals feel free to use more, up to ½ teaspoon, to enhance the chocolate flavor without making the brownies taste like coffee.
- ½ cup plus 1 tablespoon cocoa powder I recommend using a Dutch-processed cocoa like Rodelle Dutch for a darker color and richer, less acidic flavor.
- 2 ½ cups granulated sugar (approximately 485 grams). This high sugar content is crucial for the shiny top.
- 3 large eggs at room temperature. This helps them incorporate smoothly into the batter.
- 2 teaspoons vanilla extract use pure vanilla extract for the best flavor.
- ½ teaspoon kosher salt Morton kosher salt measures like table salt, balancing the sweetness perfectly.
- 1 ½ cups all-purpose flour (approximately 190 to 200 grams). Measure accurately for proper texture.
- ⅓ cup chopped toasted pecans (optional, but adds a lovely crunch and nutty flavor). You can substitute with walnuts or omit entirely.
Instructions
-
Prepare Your Pan: Preheat your oven to a precise 350° F (175° C). For easy removal and clean cuts, line a 9×13 inch metal baking pan with nonstick foil, ensuring an overhang on the sides. Alternatively, grease the pan thoroughly and line it with parchment paper, again leaving an overhang. This step is crucial for preventing sticking and simplifying the cutting process later.
-
Melt Chocolate and Butter: In a 3-quart saucepan, combine the chopped unsweetened chocolate and the chunks of room temperature unsalted butter. Melt these two ingredients together over very gentle heat. Stir continuously with a wooden spoon or a heat-proof silicone scraper until the mixture is almost fully melted and smooth. The key here is low heat to prevent the chocolate from scorching. Once nearly melted, stir in the instant coffee crystals and cocoa powder until the mixture is completely smooth and homogeneous. Remove the saucepan from the heat immediately after.
-
Incorporate Sugar and Eggs: While the chocolate mixture is still warm (but not scalding hot, as this could scramble the eggs), stir in the granulated sugar vigorously. Let the mixture cool slightly for a minute or two – it should be warm to the touch, not hot. Then, add the large eggs one at a time, beating well after each addition until fully incorporated. This thorough beating during this stage is essential for creating the emulsion that contributes to the shiny top. Finally, stir in the vanilla extract and kosher salt until the mixture is smooth and glossy.
-
Add Flour: Gradually add the all-purpose flour to the chocolate mixture. Stir just until the flour is blended and no dry streaks remain. Be careful not to overmix, as overmixing can develop the gluten in the flour, leading to tough or cakey brownies instead of the desired fudgy texture. The batter will be noticeably thick at this point.
-
Bake: Scrape the thick brownie batter evenly into your prepared 9×13 inch pan, spreading it all the way to the edges with an offset spatula or the back of a spoon. If using, sprinkle the toasted pecans evenly over the top of the batter. Place the pan in the preheated oven.
-
Check for Doneness: Bake for 25 to 30 minutes. Brownies are done when they are aromatic (filling your kitchen with a delicious chocolate scent), appear set around the edges, and the edges begin to pull slightly away from the sides of the pan. A toothpick inserted into the center should come out with moist crumbs, not wet batter. Avoid overbaking, as this will result in dry brownies.
-
Cool and Serve: Once baked, remove the pan from the oven and immediately place it on a wire rack to cool completely. This full cooling process is vital for the brownies to set properly, ensuring a truly fudgy texture and clean cuts. Once cooled, use the foil or parchment overhang to lift the entire slab of brownies from the pan. Cut into small squares (24 servings are typical for a 9×13 pan of thin brownies) and enjoy!
Notes
For an 8-inch Square Pan Version: If you wish to bake a smaller batch, you can follow the same procedure, but you’ll need to halve all of the ingredients. Bake this smaller batch for approximately 25 minutes in an 8-inch metal pan. Please note, attempting to use a 9-inch square pan with this halved recipe is not recommended, as these brownies are already quite thin, and spreading the batter even thinner would significantly alter their texture and baking time.
How to Halve an Egg: When a recipe calls for half an egg, simply crack one large egg into a small bowl and beat it thoroughly with a fork until the yolk and white are fully combined. Then, measure out 2 tablespoons of this beaten egg mixture. Using just the right amount of egg is crucial for maintaining the precise ratios of the recipe and ensuring the desired fudgy texture and shiny top. Do not simply estimate or try to use more egg than specified, as this will disrupt the delicate balance of the batter.
Storage: Store brownies in an airtight container at room temperature for up to 3-4 days. For longer storage, wrap individual brownies tightly in plastic wrap and then foil, and freeze for up to 3 months. Thaw at room temperature before serving.
Serving Suggestions: These rich, fudgy brownies are wonderful on their own, but they also pair beautifully with a scoop of vanilla bean ice cream, a drizzle of caramel sauce, or a dusting of powdered sugar.
