Easy Instant Yeast Doughnuts: Your Quick Guide to Homemade Glazed Perfection
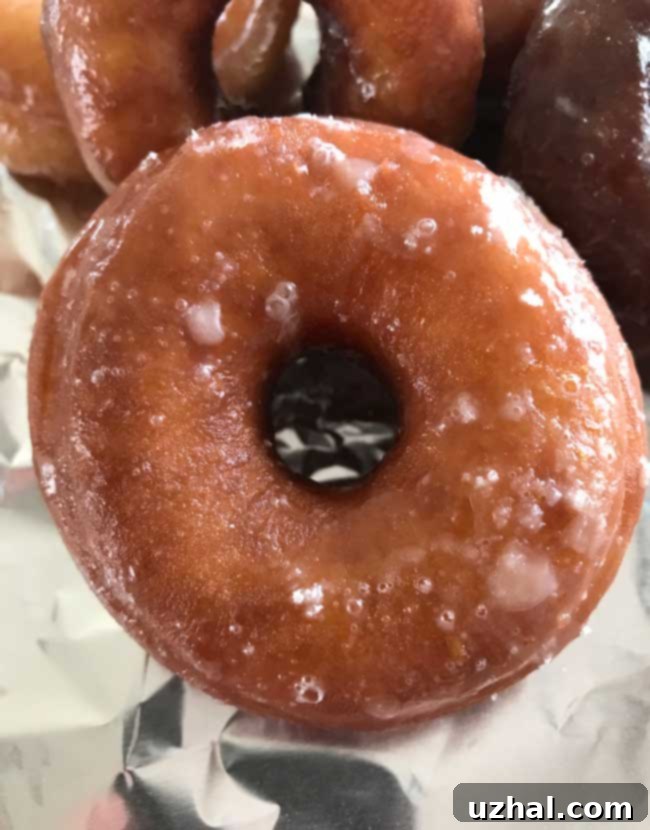
Craving warm, fluffy doughnuts but short on time? This easy instant yeast doughnut recipe is your answer! Based on a beloved classic, it has been fine-tuned for modern bakers using fast-rising yeast, making delicious homemade glazed doughnuts more accessible than ever before. Forget long proofing times; with instant yeast, you’re just a couple of hours away from a sweet, satisfying treat that rivals any bakery.

The Magic of Instant Yeast for Doughnuts
While many traditional doughnut recipes call for active dry yeast, which requires an initial proofing step in warm liquid, this recipe leverages the convenience of instant yeast. Instant yeast, also known as “rapid rise” or “quick rise” yeast, can be mixed directly into your dry ingredients without prior activation. This shaves significant time off the overall preparation, allowing for a quicker rise and getting those delightful doughnuts into your hands much faster. Originally developed with Red Star Platinum, which is a fantastic choice, I now primarily use SAF instant yeast, but Red Star Platinum remains an excellent alternative if SAF isn’t readily available.
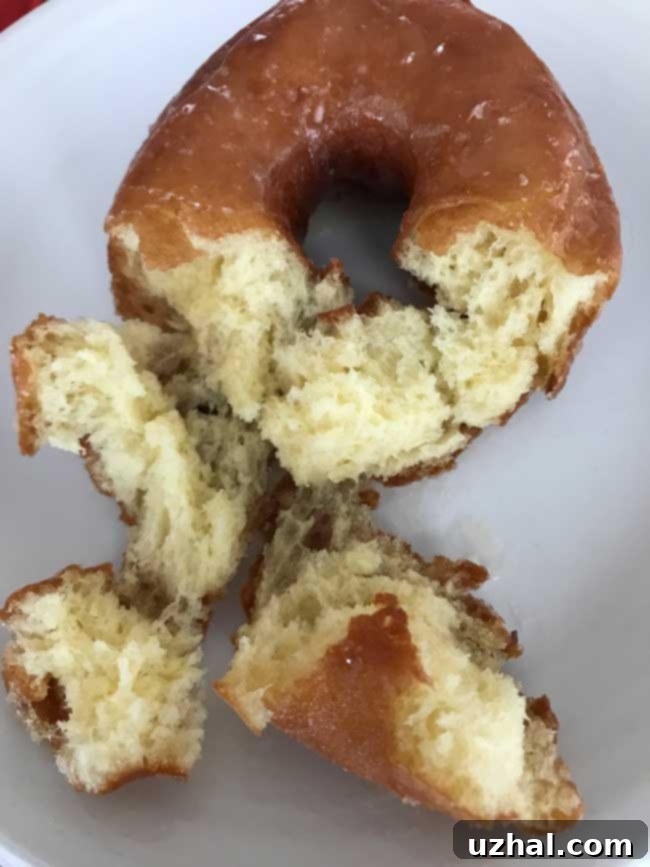
Using instant yeast doesn’t just speed things up; it also tends to be more reliable, offering consistent results for busy bakers. The smaller granules dissolve easily, ensuring an even distribution throughout your dough, leading to a uniform rise and a perfectly airy texture in your finished doughnuts. This recipe capitalizes on these benefits, making it an ideal choice for a weekend breakfast or a spontaneous sweet craving.
Perfectly Sized, Small Batch Instant Yeast Doughnuts
Just like my other favorite doughnut recipes, this one is designed for a relatively small batch. This is intentional, as it ensures freshness and makes the frying process more manageable for home cooks. Using a standard 3-inch doughnut cutter, you can expect to yield about 12 delicious doughnuts along with a handful of irresistible doughnut holes. This quantity is perfect for a family breakfast, a small gathering, or simply to enjoy throughout a day or two without worrying about leftovers going stale.

This particular dough opts for butter instead of shortening, lending a richer, more nuanced flavor profile to the doughnuts. While both fats yield delicious results, butter contributes a certain depth that shortening can’t quite replicate. Furthermore, this recipe calls for slightly less yeast than my traditional Make Ahead Doughnuts, which still makes for a quick rise without an overpowering yeasty taste. The accompanying glaze is intentionally lighter – a simple blend of milk, powdered sugar, and a hint of vanilla – designed to complement the rich doughnut without being overly sweet. While I love both recipes, these Instant Yeast Doughnuts are undeniably faster, making them a go-to for immediate gratification.
Related Doughnut Delights
If you’re a true doughnut enthusiast, you might also enjoy exploring some of these other fantastic recipes:
- Baked Double Chocolate Cake Doughnuts
- Baked Cake Doughnuts
- Make Ahead Doughnuts with Glaze
- Chocolate Pumpkin Doughnuts
- Raised Potato Doughnuts

Instant Yeast Doughnuts
Glazed doughnuts made quickly and easily with fast-rising instant yeast.
Pin Recipe
2 hrs
2 mins
2 hrs 2 mins
Breakfast, Dessert
American
12 doughnuts
Doughnuts, Instant Yeast, Glazed
Ingredients
- 2 cups plus 2 tablespoons all-purpose flour (plus more for rolling out the dough)
- 1 ⅛ teaspoon instant yeast (e.g., ½ pack of Red Star Platinum or SAF)
- 2 tablespoons sugar
- ½ teaspoon salt
- 4 tablespoons unsalted butter, melted and cooled
- 1 large egg, room temperature
- ½ cup plus 2 tablespoons whole milk, scalded and cooled to about 125°F (50-52°C)
- Peanut oil for frying (or other neutral high-smoke point oil like vegetable or canola)
For the Glaze
- ¼ cup milk
- 1 teaspoon vanilla extract
- 2 cups powdered sugar
Instructions
-
Prepare the Dough: In the bowl of a stand mixer (or a large mixing bowl if kneading by hand), combine 2 cups of the all-purpose flour, the instant yeast, granulated sugar, and salt. Stir these dry ingredients thoroughly to ensure even distribution of the yeast.
-
Add the melted and cooled butter to the dry mixture and stir until the mixture resembles coarse crumbs. Then, incorporate the room temperature large egg. Next, add the warm milk (scalded and cooled to 125°F is crucial for yeast activation without killing it). Stir everything together to form a very soft, shaggy dough. Gradually add the remaining 2 tablespoons of flour, one at a time, until the dough just barely clings to the sides of the bowl when stirred.
-
Knead the Dough: If using a stand mixer, attach the dough hook and knead the dough on medium-low speed for about 5-7 minutes until it becomes smooth, elastic, and pulls away cleanly from the sides of the bowl. If the dough is too sticky, add a tiny bit more flour, a teaspoon at a time, until it reaches the desired consistency. If kneading by hand, turn the dough out onto a lightly floured surface and knead for 8-10 minutes.
-
First Rise: Cover the bowl tightly with plastic wrap or a clean kitchen towel. Allow the dough to rise in a warm, draft-free place for about 45 minutes, or until it has doubled in bulk. Instant yeast works quickly, so keep an eye on it!
-
Shape the Doughnuts: Once risen, gently turn the dough out onto a well-floured surface. Using a rolling pin, roll the dough evenly to a thickness of approximately ½-inch. Use a 3-inch round doughnut cutter to cut out the doughnut shapes. For the doughnut holes, use a smaller round cutter (or the center of your doughnut cutter). Carefully transfer the cut doughnuts and holes to a lightly floured baking sheet.
-
Second Rise: Loosely cover the doughnuts on the baking sheet with a piece of lightly greased plastic wrap (this prevents sticking). Let them rise for another 25 minutes, or until they are visibly puffed up and feel delicate to the touch. This second rise is crucial for a light, airy texture.
Prepare the Glaze and Frying Station
-
Glaze Prep: While your dough is undergoing its second rise, prepare your glazing station. In a medium saucepan, add ¼ cup of milk. Have your 1 teaspoon of vanilla extract and 2 cups of powdered sugar measured and ready. You’ll finish the glaze as the doughnuts fry.
Frying the Doughnuts
-
Heat the Oil: Approximately 15 minutes before the doughnuts finish their second rise, pour enough peanut oil (or other high-smoke point oil like vegetable or canola) into a heavy-bottomed pot or Dutch oven to reach a depth of about 2-3 inches. Heat the oil over medium heat until it reaches 375°F (190°C). If you are using a cast iron pot, you might want to aim for a slightly lower temperature of 350°F (175°C) as cast iron retains heat very well. Meanwhile, line a cooling rack with several layers of paper towels, or prepare a baking sheet lined with paper towels, to drain the fried doughnuts.
-
Fry the Doughnuts: Carefully lower a few doughnuts into the hot oil at a time, making sure not to overcrowd the pot. Overcrowding will lower the oil temperature and result in greasy doughnuts. Fry for about 45 seconds to 1 minute per side. Once the first side is golden brown, use tongs or a slotted spoon to flip the doughnuts. Continue frying until the second side is also golden brown. Adjust the heat as necessary to maintain a consistent oil temperature. Remove the fried doughnuts and place them on the prepared paper towel-lined cooling rack to drain excess oil.
-
Fry Doughnut Holes: Cook the doughnut holes in the same manner, but be sure to keep a close eye on them as they cook much faster due to their smaller size. They will brown quickly and should be turned frequently to ensure even cooking on all sides.
-
Make the Glaze: While the doughnuts are frying and cooling slightly, gently heat the ¼ cup of milk in the saucepan until it just begins to simmer. Remove from heat, then stir in the vanilla extract and gradually whisk in the 2 cups of powdered sugar until the glaze is completely smooth and free of lumps. The consistency should be pourable but thick enough to coat the doughnuts.
-
Glaze and Serve: Dip each warm, fried doughnut into the prepared glaze, ensuring both sides are fully coated. Let any excess glaze drip off, then place the glazed doughnuts on a wire rack set over parchment paper or foil. This will catch any drips and allow the glaze to set. Serve immediately for the best experience!
Tips for Doughnut Success
- Yeast Freshness: Always check the expiration date on your yeast. Old yeast is the number one cause of dough not rising. Store instant yeast in the freezer for extended freshness.
- Milk Temperature: Scalding the milk and then cooling it to 125°F (50-52°C) is important. Scalding denatures proteins that can interfere with yeast activity, and the specific temperature range ensures the yeast is active but not killed. Use a kitchen thermometer for accuracy.
- Dough Consistency: The dough should be soft and slightly sticky, but still manageable. Too much flour will result in dense, dry doughnuts, while too little will make them difficult to handle and potentially greasy.
- Oil Temperature is Key: Invest in a good deep-fry thermometer. Maintaining a consistent oil temperature of 350-375°F (175-190°C) is crucial. Too cool, and your doughnuts will absorb too much oil and be greasy. Too hot, and they’ll brown too quickly on the outside, remaining raw in the middle.
- Don’t Overcrowd the Pot: Fry doughnuts in small batches to prevent the oil temperature from dropping significantly. This ensures even cooking and perfect golden brown results.
- Drain Properly: Draining on paper towels is important to remove excess oil, ensuring your doughnuts are light and not greasy.
- Glaze While Warm: Glazing the doughnuts while they are still warm (but not piping hot) allows the glaze to adhere beautifully and absorb slightly, creating that classic soft, sweet coating.
Variations to Try
- Chocolate Glaze: Substitute 1/4 cup of milk with 1/4 cup of unsweetened cocoa powder in the glaze, and add a splash more milk if needed to reach desired consistency.
- Maple Glaze: Replace the vanilla extract with 1 teaspoon of maple extract and use a bit of maple syrup in the glaze for an authentic maple flavor.
- Cinnamon Sugar: Instead of glazing, toss warm doughnuts in a mixture of granulated sugar and cinnamon.
- Sprinkles: Add colorful sprinkles to your glazed doughnuts while the glaze is still wet for a fun, festive touch.
Storage Suggestions
These instant yeast doughnuts are best enjoyed fresh, ideally within a few hours of making them. If you have leftovers, store them in an airtight container at room temperature for up to 1-2 days. Reheat briefly in the microwave for a few seconds to restore some of their soft texture, though they won’t be quite as fresh as the first batch.
Tried this recipe?
Let us know how it was!
