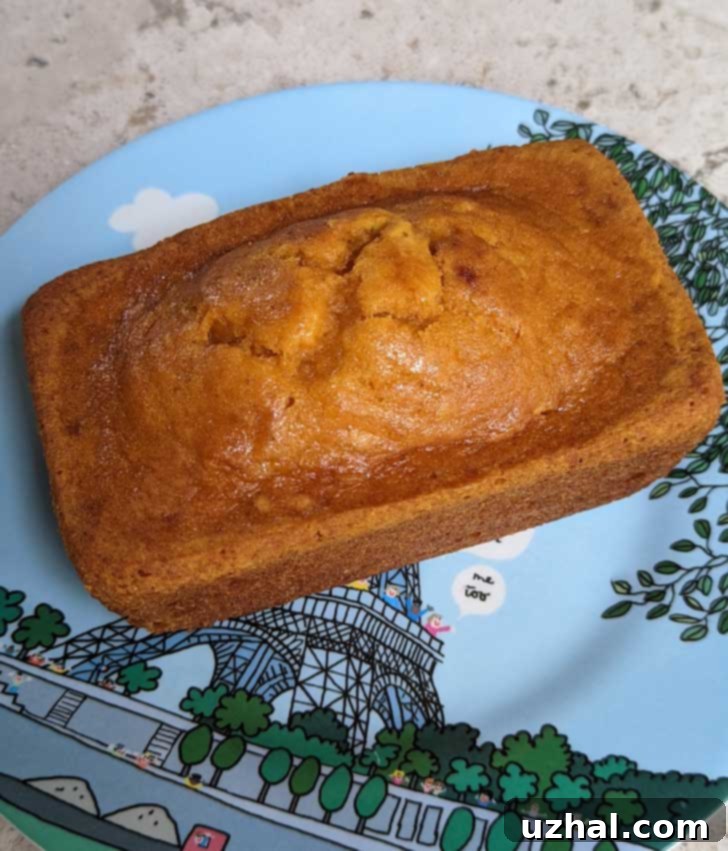
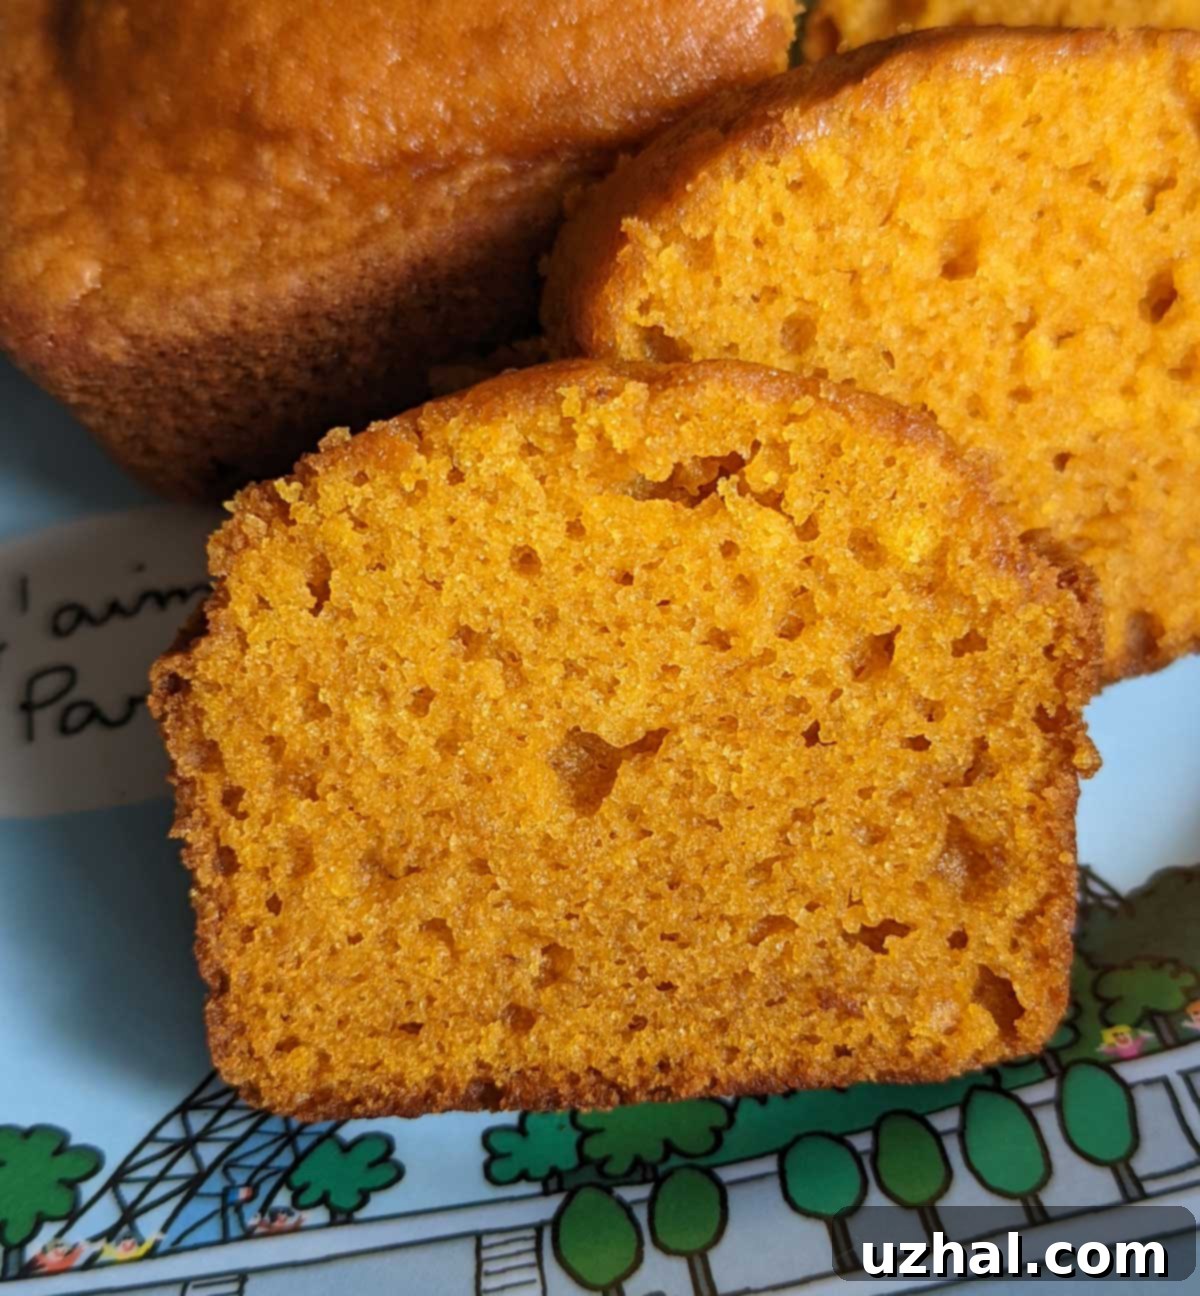
Deliciously Moist Mini Pumpkin Bread Loaves: Your Perfect One-Bowl Fall Recipe
There’s something uniquely comforting about the aroma of pumpkin bread wafting through your home, especially during the crisp days of autumn. These Mini Pumpkin Bread Loaves are an absolute lifesaver when you find yourself with an open can of pumpkin puree, eager to transform it into something truly special. This incredibly simple, one-bowl recipe yields two exquisitely moist and flavorful loaves of pumpkin quick bread. Whether you decide to keep both for yourself to savor over several days or share one with a dear friend, these delightful treats are sure to bring a smile. Their compact size makes them ideal for portion control, gifting, or simply enjoying a fresh, warm slice anytime. Get ready to embrace the cozy flavors of fall with this foolproof baking project!

Choosing the Perfect Loaf Pans for Your Mini Pumpkin Bread
My journey with these mini pumpkin bread loaves began years ago with a simple resolution: to finally make good use of my collection of small loaf pans. These aren’t just any pans; they are often referred to as “mini” but are actually a bit larger than what you might consider a true miniature loaf. The exact size I frequently use is 5.74 x 3 x 2.12 inches, from the reliable brand Wilton. This size strikes a wonderful balance, offering a substantial single serving or a perfect sliceable portion, without being as tiny as a typical muffin. The beauty of these slightly larger “mini” pans is that they bake a loaf that feels more like traditional bread, just in a more manageable format.
Beyond metal pans, I also cherish two ceramic loaf pans that I acquired years ago from a store called Garden Ridge (now At Home). While those specific ones might be harder to find, you can discover similar small ceramic loaf pans at retailers like Wal*Mart, often under the popular Pioneer Woman brand. These ceramic options are usually just a little larger, around 6.1″ x 3.1″ x 2.2″, providing a rustic charm and even baking. Generally, ceramic loaf pans can be a bit pricier compared to their metal counterparts, but they often offer superior heat distribution and a lovely aesthetic. For reference, when I refer to “mini” here, I’m thinking of these versatile small loaf pans. True mini loaves, like these ultra-small versions, tend to be much smaller and, in my opinion, lean more towards a rectangular muffin in texture and size rather than a proper bread loaf.
Regardless of whether you choose metal or ceramic, proper pan preparation is key to ensuring your mini pumpkin bread loaves release easily and beautifully. I always recommend generously greasing and flouring your pans. For an extra layer of non-stick assurance, especially if you’re worried about sticking, you can cut small strips of parchment paper to line the bottom and a bit up the sides of each pan before greasing and flouring the parchment itself. This simple step can save you from frustration and ensure your perfectly baked pumpkin bread slides out effortlessly. The use of small loaf pans not only speeds up baking time but also creates adorable, individually sized breads that are fantastic for gifting, school lunches, or simply enjoying fresh portions without committing to a giant loaf.
Crafting the Perfect Small-Batch Pumpkin Bread Recipe
This recipe for mini pumpkin bread loaves is a testament to the power of scaling down a beloved classic. The original family recipe, a robust one, called for 4 eggs, 1 cup of oil, 3 cups of flour, and typically yielded three generously sized one-pound loaves. For these more manageable “mini” versions, I carefully scaled down the ingredients to a precise quarter batch, ensuring the perfect balance of flavors and textures in a smaller format. This reduction makes it incredibly convenient for using up leftover pumpkin puree without committing to a massive baking project.
Over the years, this recipe has been a fantastic canvas for experimentation. In earlier iterations, I delved into alternative sweeteners, and while they performed well, for simplicity and consistent results, I now wholeheartedly recommend sticking to granulated sugar. It provides that classic, comforting sweetness we all expect from a good pumpkin bread. Another successful adaptation involved incorporating part whole wheat flour, which added a delightful depth and subtle nutty flavor without compromising the bread’s tender crumb. I also swapped out the traditional vegetable oil for coconut oil, which imparted an incredibly dense, moist, and utterly delicious texture. Whether this was solely due to the specific properties of coconut oil or simply the ample amount of fat in the recipe, the outcome was undeniably superb. The wonderful aspect of baking in small batches like this is the freedom it offers to test different ingredients and techniques without feeling overwhelmed or wasting a large quantity of ingredients if an experiment doesn’t quite hit the mark. It’s an excellent way to personalize your baking and discover new favorites.
Gluten-Free Mini Pumpkin Loaves: A Successful Experiment
For those with dietary restrictions or a preference for gluten-free baking, I have exciting news! My most recent venture with this pumpkin bread recipe involved making it entirely gluten-free, and I’m thrilled to report that it worked beautifully. I achieved excellent results using 100 grams of Cup4Cup 1:1 gluten-free flour blend. This particular blend is fantastic because it already contains xanthan gum, which is a crucial ingredient in many gluten-free baking projects. Xanthan gum acts as a binder, mimicking the elasticity that gluten provides, and helps to prevent baked goods from becoming crumbly or dry. While I used Cup4Cup, I’m confident that any high-quality 1:1 gluten-free flour blend that includes xanthan gum would yield similar successful results. When baking gluten-free, it’s often best to avoid overmixing the batter and sometimes allowing it to rest for a few minutes before baking can help the flours hydrate more fully, leading to an even better texture. This adaptation truly opens up the joy of these moist pumpkin loaves to everyone!
If you’re looking for more inspiration or similar delightful recipes, consider exploring these:
- Another Great Pumpkin Bread Recipe
- Mini Loaf Pan or Bar Cookies
- Mini Banana Muffins
- Mini Pumpkin Muffins
- Mini Chocolate Chip Cream Cake
Recipe

Mini Pumpkin Loaves
Anna
Pin Recipe
Ingredients
- ¼ cup melted and cooled coconut oil or vegetable oil
- 3 tablespoons water
- 1 large egg
- ½ teaspoon vanilla extract
- ½ cup canned pumpkin puree
- ½ teaspoon baking soda
- ¼ teaspoon salt
- ¾ cup granulated sugar (150 grams)
- ¼ cup plus 2 tablespoons whole wheat flour (50 grams)
- ¼ cup plus 2 tablespoons all-purpose flour (50 grams)
Instructions
-
Preheat your oven to 350 degrees F (175°C). Carefully grease and flour two mini (approximately 3×5 inch) loaf pans. For an extra measure of non-stick baking, you can line each pan with a small strip of parchment paper, extending over the sides for easy lifting, and then grease and flour the parchment as well. This ensures a flawless release of your delicious pumpkin bread.
-
In a large mixing bowl, combine the cooled melted coconut oil (or vegetable oil), water, large egg, vanilla extract, and canned pumpkin puree. Whisk these wet ingredients together until they are smooth and well combined. Next, whisk in the baking soda, salt, and granulated sugar, ensuring no lumps remain and the sugar is starting to dissolve. Finally, add both the whole wheat flour and all-purpose flour to the mixture. Stir gently until the flour is just incorporated, being careful not to overmix, as this can lead to a tougher bread. Divide the batter evenly between your two prepared mini loaf pans. Bake for approximately 45 minutes, or until a wooden toothpick inserted into the center of a loaf comes out clean, indicating it’s perfectly cooked through.
Once your mini pumpkin bread loaves are baked to golden perfection, allow them to cool in their pans for a few minutes before transferring them to a wire rack to cool completely. This cooling period is crucial for the bread to set and firm up, ensuring it slices beautifully. These loaves are incredibly versatile; they make a fantastic breakfast treat alongside your morning coffee, a satisfying afternoon snack, or a delightful dessert served warm with a dollop of whipped cream or a scoop of vanilla ice cream. For an added touch of seasonal spice, consider sprinkling a pinch of cinnamon or nutmeg into the batter. You can also fold in chopped nuts like pecans or walnuts, or even chocolate chips for a sweeter twist. The possibilities are endless!
When it comes to storage, these mini pumpkin bread loaves keep wonderfully. Wrap them tightly in plastic wrap or aluminum foil, or store them in an airtight container at room temperature for up to 3-4 days. For longer storage, they freeze exceptionally well. Simply wrap each cooled loaf individually in plastic wrap, then place them in a freezer-safe bag or container. Thaw them at room temperature or gently warm them in the oven for a freshly baked taste. Their small size makes them incredibly convenient for freezing and pulling out just one loaf at a time whenever a craving strikes. These mini loaves also make thoughtful, homemade gifts during the holidays or for housewarming parties – just tie a festive ribbon around them, and you have a charming, delicious present. Enjoy the comforting flavors and ease of baking these beautiful mini pumpkin bread loaves throughout the fall season and beyond!
