Delicious Canned Cherry Berry Pie: Your Easy, Flavorful Fall Dessert Solution
As the leaves turn golden and a crisp chill fills the air, thoughts often drift to the comforting aroma of freshly baked pies. While November might not be the peak of cherry season, that doesn’t mean you have to forgo the joy of a homemade cherry pie. The secret lies in a clever recipe that masterfully utilizes canned or frozen fruits, bringing the vibrant taste of summer into your autumn kitchen. This particular recipe combines the tartness of canned pitted sour cherries with the sweet-tart punch of frozen raspberries to create an utterly delightful and incredibly simple dessert: the Canned Cherry Berry Pie.

Why Canned & Frozen Fruits are Your Pie-Making Superheroes
One of the biggest advantages of this Canned Cherry Berry Pie recipe is its accessibility. By leaning on canned sour cherries and frozen raspberries, you bypass the seasonal limitations and often the higher costs associated with fresh produce. Canned cherries come already pitted, saving you considerable prep time and sticky fingers. Frozen raspberries, while sometimes a bit elusive, offer that fresh-picked flavor without the worry of them going bad before you’re ready to bake. This strategic use of pantry and freezer staples means you can enjoy a fantastic fruit pie any time of year, from a cozy weeknight treat to a grand holiday feast.
While fresh, in-season cherries offer a firm texture that is truly unique, the combination of canned cherries and frozen raspberries in this pie delivers an incredibly rich and satisfying flavor profile. The fruit juices blend beautifully with the sugars and thickener, creating a luscious, saucy filling that perfectly complements a flaky, buttery crust. For many pie enthusiasts, including those in my own home, the robust taste of this pie is more than enough to win them over. It’s a testament to how quality ingredients, even if they aren’t fresh, can come together to create something truly special. Plus, the sheer simplicity of preparing the filling is a huge bonus for busy bakers.
Sourcing Your Berries & Embracing Delicious Alternatives
Finding canned pitted sour cherries is usually straightforward; they’re a common item in most grocery store baking aisles. Frozen raspberries, however, can sometimes be a bit trickier to locate. You’ll typically find them in the freezer section alongside other frozen fruits. I’ve had experiences where I’ve had to visit a couple of different stores to track them down, but they’re generally available. Don’t be discouraged if your first stop doesn’t have them!
If frozen raspberries prove impossible to find, or if you simply want to try a different berry blend, there’s a fantastic alternative: a Frozen Cherry and Mixed Berry Pie. This version substitutes frozen mixed berries for the raspberries, offering a similar yet distinct flavor profile. It’s just as delicious and happens to be one of my daughter’s absolute favorites, proving that flexibility in your fruit choices can lead to equally delightful results. Feel free to experiment with other frozen berries like blueberries or blackberries if you’re feeling adventurous – pie making is all about personalizing your creation!
Tips for a Perfect Pie Every Time
Achieving pie perfection isn’t as daunting as it might seem. Here are some key tips to ensure your Canned Cherry Berry Pie turns out beautifully:
- The Crust is Key: Whether you opt for a homemade pastry or a convenient store-bought option like Pillsbury, a good crust is fundamental. If making your own, ensure your butter is very cold and avoid overworking the dough to achieve that desirable flakiness. For store-bought crusts, handle them gently to prevent tearing.
- Thickeners are Your Friend: Cornstarch is crucial here for thickening the fruit juices into a lovely, stable filling. Don’t skip the step of whisking it thoroughly into the sugar and fruit juice mixture before cooking. This prevents lumps and ensures a smooth, bubbly consistency. Continue to cook and stir for the recommended two minutes after it thickens to fully activate the cornstarch and prevent a gummy texture.
- Flavor Boosters: Almond and vanilla extracts add wonderful depth to the pie’s flavor. The hint of almond pairs exceptionally well with cherries. The softened butter at the end of the filling preparation melts into the hot fruit, adding richness and a silky mouthfeel.
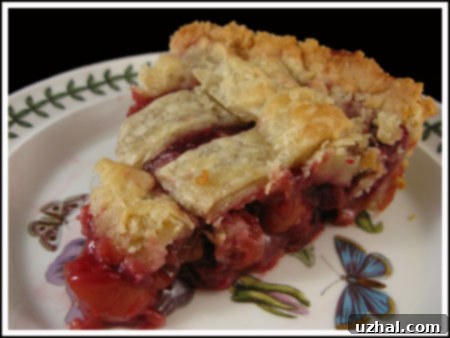
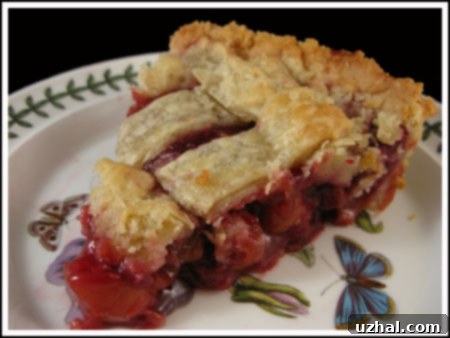
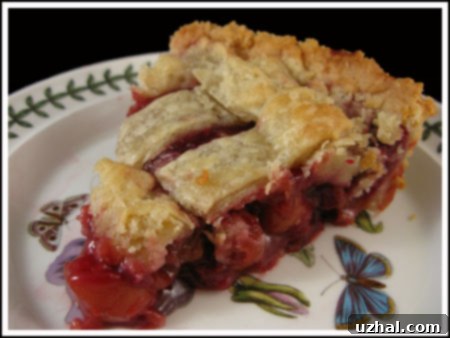
- Mastering the Lattice Top: A lattice top isn’t just pretty; it allows steam to escape, preventing a soggy bottom crust. If you’re new to lattice work, take your time. You can also opt for a full top crust with a few slits cut into it. Remember to trim the strips evenly and crimp the edges firmly to seal in the delicious filling.
- Preventing Over-Browning: Pie crusts can brown quickly, especially the edges. Shielding the edges with aluminum foil during the initial baking time is a smart move. You can remove it for the last 15 minutes to allow the entire crust to turn a beautiful golden brown. Every oven bakes differently, so keep an eye on it!
- The Importance of Cooling: This is perhaps the most crucial step for any fruit pie with a thickened filling. Allowing the pie to cool completely for at least 2-3 hours (or even longer) ensures the filling fully sets. Cutting into a hot pie will result in a runny, messy slice, however tempting it may be! Patience is a virtue when it comes to pie.
Serving Suggestions & The Joy of Sharing
This Canned Cherry Berry Pie is a versatile dessert that shines in many settings. Serve it warm with a scoop of vanilla bean ice cream for a classic “à la mode” experience, allowing the cold creaminess to perfectly balance the warm, tart-sweet fruit. A dollop of freshly whipped cream or a simple dusting of powdered sugar also makes for an elegant presentation. It’s equally delicious served at room temperature, making it an ideal make-ahead dessert for potlucks, family gatherings, or holiday tables like Thanksgiving. Its vibrant color and comforting flavors make it a crowd-pleaser that evokes warmth and nostalgia.
Whether you’re celebrating a special occasion or simply craving a homemade treat, this pie is sure to bring smiles. It’s a reminder that even when fresh ingredients aren’t in season, creativity in the kitchen can lead to truly memorable dishes. My family absolutely adores this pie, and I’m confident yours will too. The ease of the filling preparation means you can enjoy the satisfaction of baking without the fuss, leaving more time to savor the moments with loved ones.
- Cherry Cheesecake Pie
- White Chip Cherry Oatmeal Cookies
- White Chocolate Cherry Almond Cookies
- Four Layer Meringue Berry Dessert (Red, White & Blue)
Recipe: Canned Cherry Berry Pie

Canned Cherry-Berry Pie
Anna
Pin Recipe
Ingredients
- 1 9-inch unbaked pie crust, double crust (can use Pillsbury)
- 1 can 14 to 16 ounce can pitted tart cherries, drained, liquid reserved
- 12 oz package frozen raspberries, thawed, drained, juice reserved
- ⅔ cup granulated sugar
- ⅓ cup brown sugar lightly packed
- ¼ cup cornstarch
- ½ teaspoon almond extract
- ½ teaspoon vanilla extract
- 4 tablespoon softened regular butter
Instructions
-
Preheat oven to 375 degrees F. Line a shallow 9-inch pie dish with one of the refrigerated pie dough circles.
-
Combine half cup of cherry liquid and half cup of the raspberry juice to make one cup combined. Set the juice and fruit aside.
-
Combine sugars and cornstarch in a small saucepan. Whisk in the 1 cup of fruit juice and cook over medium heat until thickened and bubbly. Cook and stir 2 minutes more. Remove from heat. Stir in almond extract, vanilla and soft butter. Stir in drained cherries and raspberries.
-
Fill pie shell with cherry-berry mixture. Roll out second portion of dough into a 12 inch circle and cut into 1 inch strips. Arrange in a lattice pattern over cherry filling, weaving strips crosswise over and under lengthwise strips. Trim pastry strips even with edge of bottom crust. Fold bottom pastry over lattice strips and seal. Flute edge.
-
Shield edges of pie with foil to prevent excess browning if you feel you need to. (I often find this step unnecessary, but it’s a good precaution.) Set pie on a baking sheet and bake for 45 to 50 minutes until crust is golden brown. Remove foil strip during final 15 minutes of baking time if used.
-
Let cool completely before serving.
