Easy & Delicious Small Batch Cheesecake Bars: A Timeless Family Recipe
There’s something truly special about a recipe passed down through generations, holding stories and memories within its measurements and instructions. This particular recipe for Small Batch Cheesecake Bars is one such treasure, originating from my grandmother’s involvement with The Houston Junior Forum. While the exact timeline of her membership remains a fond mystery, likely dating back many years, her dedication to collecting cookbooks certainly didn’t wane. This delightful recipe is proudly featured in one of her prized finds, a cookbook aptly titled “Scrumptious.” And yes, while ‘scrumptious’ might not be a word I use daily, it perfectly captures the essence of these irresistible bars!

Why These Small Batch Cheesecake Bars Are a Must-Try
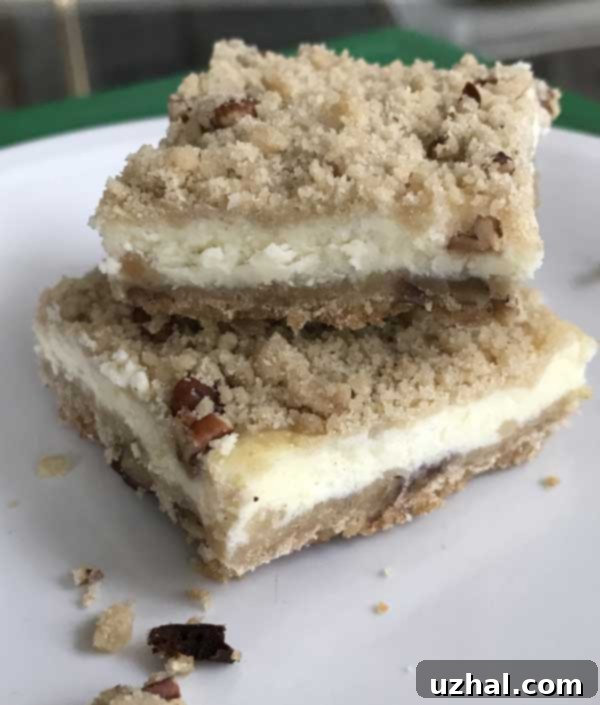
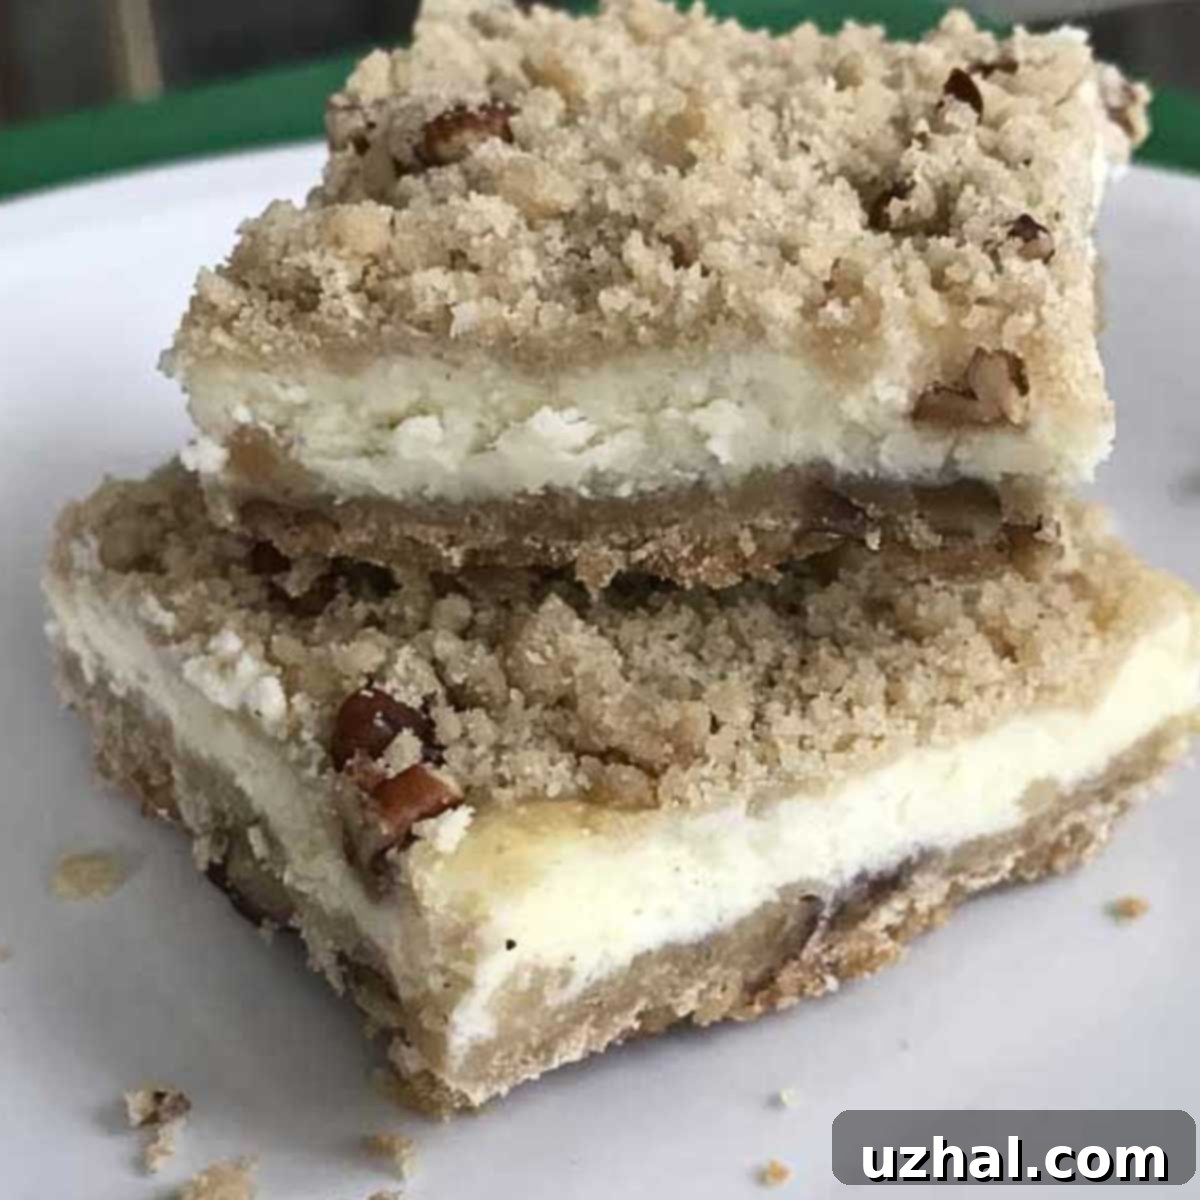
In a world of overly complicated desserts, these cheesecake bars stand out for their delightful simplicity and incredible flavor. They strike the perfect balance between a rich, creamy cheesecake and a sturdy, buttery shortbread crust. Whether you’re baking for a small gathering, a weeknight treat, or simply want to satisfy a cheesecake craving without a full-sized cake, this small batch recipe is your ideal solution. I’ve made these bars numerous times since first discovering the recipe, and they consistently deliver, proving to be incredibly reliable and utterly delicious. In fact, they’re so good, you might even find yourself wanting to double the recipe – and I wholeheartedly encourage it!

The Secret to a Perfect Crust: Don’t Be Alarmed by Dry Dough!
One crucial detail you should know about this recipe concerns the crust. When you first mix the butter, brown sugar, salt, and flour, the dough will feel, and look, quite dry and crumbly. This is completely normal and exactly what you want! It might make you question if you’ve done something wrong, but rest assured, you haven’t. This dry, crumbly texture is characteristic of a good shortbread crust. After the initial bake, the crust will still appear dry, but here’s where the magic happens: once the luscious cream cheese filling is poured over it and the bars bake and set, the crust naturally absorbs moisture from the filling. This transformation results in a wonderfully tender, slightly chewy, and perfectly balanced crust that complements the creamy topping beautifully. So, embrace the dryness during the mixing stage – it’s a promise of deliciousness to come!
Essential Ingredients for Your Cheesecake Bars
The beauty of this recipe lies in its use of simple, accessible ingredients that combine to create something truly extraordinary. You’ll need:
- Unsalted Butter (76 grams): The foundation of our rich shortbread crust. If using salted butter, remember to omit the additional salt from the crust recipe.
- Brown Sugar (70 grams): Adds depth and a lovely caramel note to the crust, enhancing its shortbread character.
- Salt (¼ teaspoon): Balances the sweetness in the crust. (Omit if using salted butter).
- All-Purpose Flour (126 grams): Provides structure to the crust.
- Chopped, Toasted Nuts (½ cup, pecans or almonds): These are optional but highly recommended for an extra layer of flavor and delightful crunch. Toasting them beforehand truly brings out their aroma.
- Cream Cheese (8 oz / 230 grams): The star of the show! Ensure it’s softened to room temperature for a smooth, lump-free filling. Full-fat cream cheese works best for that classic rich texture.
- Granulated Sugar (¼ cup / 50 grams): Sweetens the cream cheese filling.
- Lemon Juice (2 teaspoons): A touch of lemon juice brightens the flavor of the cheesecake, cutting through the richness and adding a lovely tang. Don’t skip it!
- Vanilla Extract (1 teaspoon): Enhances the overall flavor profile of the filling.
- Large Egg (1): Acts as a binder, giving the cheesecake its structure and helping it set.
- Milk (2 tablespoons): Helps to achieve the perfect creamy consistency for the filling.
Having your ingredients at the right temperature, especially the cream cheese, is key to a silky-smooth filling.
Step-by-Step Guide to Baking Perfection
Creating these cheesecake bars is straightforward, making them a joy to bake. Here’s a detailed breakdown of the process for making approximately 12 bars:
- Prepare Your Pan: Start by preheating your oven to 350°F (180°C). Then, lightly grease an 8-inch square metal pan. For easier removal, you can also line it with non-stick foil, leaving an overhang on the sides.
- Craft the Shortbread Crust: In a mixing bowl, combine the softened butter, brown sugar, and salt. Beat them together until the mixture is light and creamy. Gradually add the all-purpose flour, stirring until just blended. The mixture will be thick and crumbly – perfectly normal! Fold in your chosen chopped, toasted nuts.
- Form the Crust and Topping: Measure out approximately 1 cup of this delicious crumb mixture and set it aside. This will be your topping later. Press the remaining crust mixture evenly into the bottom of your prepared pan.
- Partial Bake the Crust: Bake the crust for 15 minutes. This initial bake helps to set the crust and gives it a head start before the filling is added.
- Prepare the Creamy Filling: While the crust is baking, start on your filling. In another bowl, beat the softened cream cheese and granulated sugar together until smooth and creamy. Next, beat in the lemon juice and vanilla extract. Finally, add the large egg and milk, mixing gently until the filling is just smooth. Be careful not to overmix, as this can introduce too much air, leading to cracks in the cheesecake.
- Assemble and Bake: Once the crust is partially baked, pour the cream cheese mixture evenly over it. Take the reserved crumb topping and sprinkle it generously over the top of the cheesecake filling. Return the pan to the oven and bake for another 25 minutes, or until the edges are set and the center has a slight jiggle.
- Cool and Chill: This is a crucial step! Allow the cheesecake bars to cool completely on a wire rack at room temperature. Once cool, transfer the pan to the refrigerator and chill for at least 2 hours. Chilling allows the cheesecake to firm up properly, making it much easier to cut into clean, delicious bars. For best results, overnight chilling is even better.
- Serve and Enjoy: Once thoroughly chilled, lift the bars out of the pan (if using foil handles) and cut them into 12 even squares. Serve them cold and savor every bite!
Recipe Card

Cheesecake Bars
Anna
Pin Recipe
Ingredients
- ⅓ cup unsalted butter 76 grams
- ⅓ cup brown sugar 70 grams
- ¼ teaspoon salt omit if using salted butter
- 1 cup all purpose flour 126 grams)
- ½ cup chopped toasted nuts (pecans or almonds)
- 8 oz cream cheese softened (230 grams)
- ¼ cup granulated sugar 50 grams
- 2 teaspoons lemon juice
- 1 teaspoon vanilla extract
- 1 large egg
- 2 tablespoons milk
Instructions
-
Preheat oven to 350 degrees F (180 C). Grease an 8 inch square metal pan or line with non-stick foil.
-
Beat butter, brown sugar and salt together until creamy. Add flour and stir until it is fully blended – batter will be thick and crumbly. Stir in the nuts. Measure out about 1 cup and set aside. Press remainder into bottom of pan. Bake crust for 15 minutes.
-
Beat cream cheese and granulated sugar until creamy. Beat in lemon juice and vanilla, then add egg and milk and beat just until smooth.
-
Pour cheese mixture over baked crust. Sprinkle reserved crumb topping over top. Return to oven and bake for 25 minutes. Let cool on a wire rack, then transfer to refrigerator and chill for at least 2 hours or until ready to serve.
-
Makes 12 bars
Tips for Making the Best Cheesecake Bars
- Room Temperature Ingredients: For the smoothest possible filling, ensure your cream cheese, egg, and butter are at room temperature. Cold cream cheese will result in lumps, no matter how much you beat it.
- Don’t Overmix the Filling: Once you add the egg and milk, beat only until just combined and smooth. Overmixing incorporates too much air, which can cause the cheesecake to puff up too much and then crack as it cools.
- Use Good Quality Cream Cheese: Opt for full-fat block cream cheese, not cream cheese spread from a tub. The higher fat content provides a richer flavor and better texture.
- Toasting Nuts: If using nuts, always toast them first! This simple step significantly enhances their flavor and aroma, adding another dimension to your bars. Spread them on a baking sheet and toast in a 350°F (180°C) oven for 5-7 minutes, watching closely to prevent burning.
- Proper Cooling is Key: Resist the urge to cut into the bars too early. Allowing them to cool completely at room temperature, then chilling for at least 2 hours (preferably longer), is essential for the cheesecake to fully set and achieve its ideal firm yet creamy texture.
- Lining the Pan: Using parchment paper or non-stick foil with an overhang makes lifting the cooled bars out of the pan incredibly easy, ensuring clean cuts.
Customization & Variations: Make Them Your Own!
While the classic version of these small batch cheesecake bars is phenomenal as is, there’s always room for a little personalization. Here are some ideas to inspire your creativity:
- Different Nuts: If pecans or almonds aren’t your preference, try walnuts, hazelnuts, or even a mix of several types. Ensure they are toasted for maximum flavor.
- Citrus Zest: For an extra bright flavor, add a teaspoon of fresh lemon or orange zest to the cream cheese filling.
- Chocolate Swirl: Melt a few tablespoons of dark or milk chocolate and swirl it into the top of the cream cheese filling before baking for a decadent twist.
- Fruit Toppings: After the bars are chilled, top them with fresh berries (strawberries, raspberries, blueberries), a fruit compote, or a drizzle of caramel or chocolate sauce just before serving.
- Spiced Crust: Add a pinch of cinnamon or nutmeg to the brown sugar shortbread crust for a warmer, spicier flavor profile.
- Coconut Delight: Stir some shredded coconut into the crust mixture and sprinkle some on top with the reserved crumbs.
Storage and Making Ahead
These cheesecake bars are a fantastic make-ahead dessert, as they require chilling time and actually taste even better the next day once the flavors have had a chance to meld. Here’s how to store them:
- Refrigeration: Store the cheesecake bars in an airtight container in the refrigerator for up to 3-4 days.
- Freezing: For longer storage, you can freeze the bars. Once completely chilled and cut, place them in a single layer on a baking sheet and freeze until firm. Then, transfer the frozen bars to an airtight freezer-safe container or bag, separating layers with parchment paper. They will keep in the freezer for up to 1 month. Thaw in the refrigerator before serving.
Frequently Asked Questions About Cheesecake Bars
Q: Can I use low-fat cream cheese?
A: While technically possible, I highly recommend using full-fat cream cheese for the best flavor and texture. Low-fat versions can result in a thinner, less creamy filling that may not set as well.
Q: How do I know when the cheesecake bars are done baking?
A: The edges of the cheesecake filling should appear set, but the very center might still have a slight jiggle when gently shaken. It will continue to set as it cools and chills.
Q: Can I use a different size pan?
A: This recipe is designed for an 8-inch square pan. If you use a different size, you may need to adjust baking times and potentially double the recipe for a larger pan (e.g., a 9×13 inch pan would require doubling the recipe and a longer bake time). Be mindful of the thickness of the crust and filling.
Q: Do I really need to chill them for so long?
A: Yes, chilling is crucial! It allows the cheesecake to firm up, making it easier to cut and ensuring a delightful, dense, and creamy texture. Rushing this step will result in a softer, messier bar.
Q: What if I don’t have lemon juice?
A: The lemon juice adds a vital bright, tangy note that balances the richness of the cream cheese. If you absolutely can’t use fresh lemon juice, a tiny splash of white vinegar or even a very small amount of citric acid powder diluted in water could offer a similar acidic balance, but fresh lemon juice is always best.
Conclusion: A Taste of Nostalgia in Every Bite
These Small Batch Cheesecake Bars are more than just a dessert; they’re a delightful journey back to simpler times, inspired by a beloved family cookbook. Their ease of preparation, combined with their irresistible flavor and satisfying texture, makes them a perfect addition to any baking repertoire. Whether you’re an experienced baker or just starting out, you’ll find joy in bringing this reliable and delicious recipe to life. So go ahead, whip up a batch, and let these cheesecake bars become a new favorite in your home – perhaps even a future family classic!
